2.COMICIARE A CUCIRE/STARTING TO SEW
INFILARE LA MACCHINA
Una scorretta infilatura può causare il salto
dei punti, la rottura del filo o altri problemi.
Cercare di effettuare la corretta infilatura
prima di iniziare il test di cucitura. L'infilatura
deve essere completata nella sequenza di
gancio inferiore gancio superiore ago.
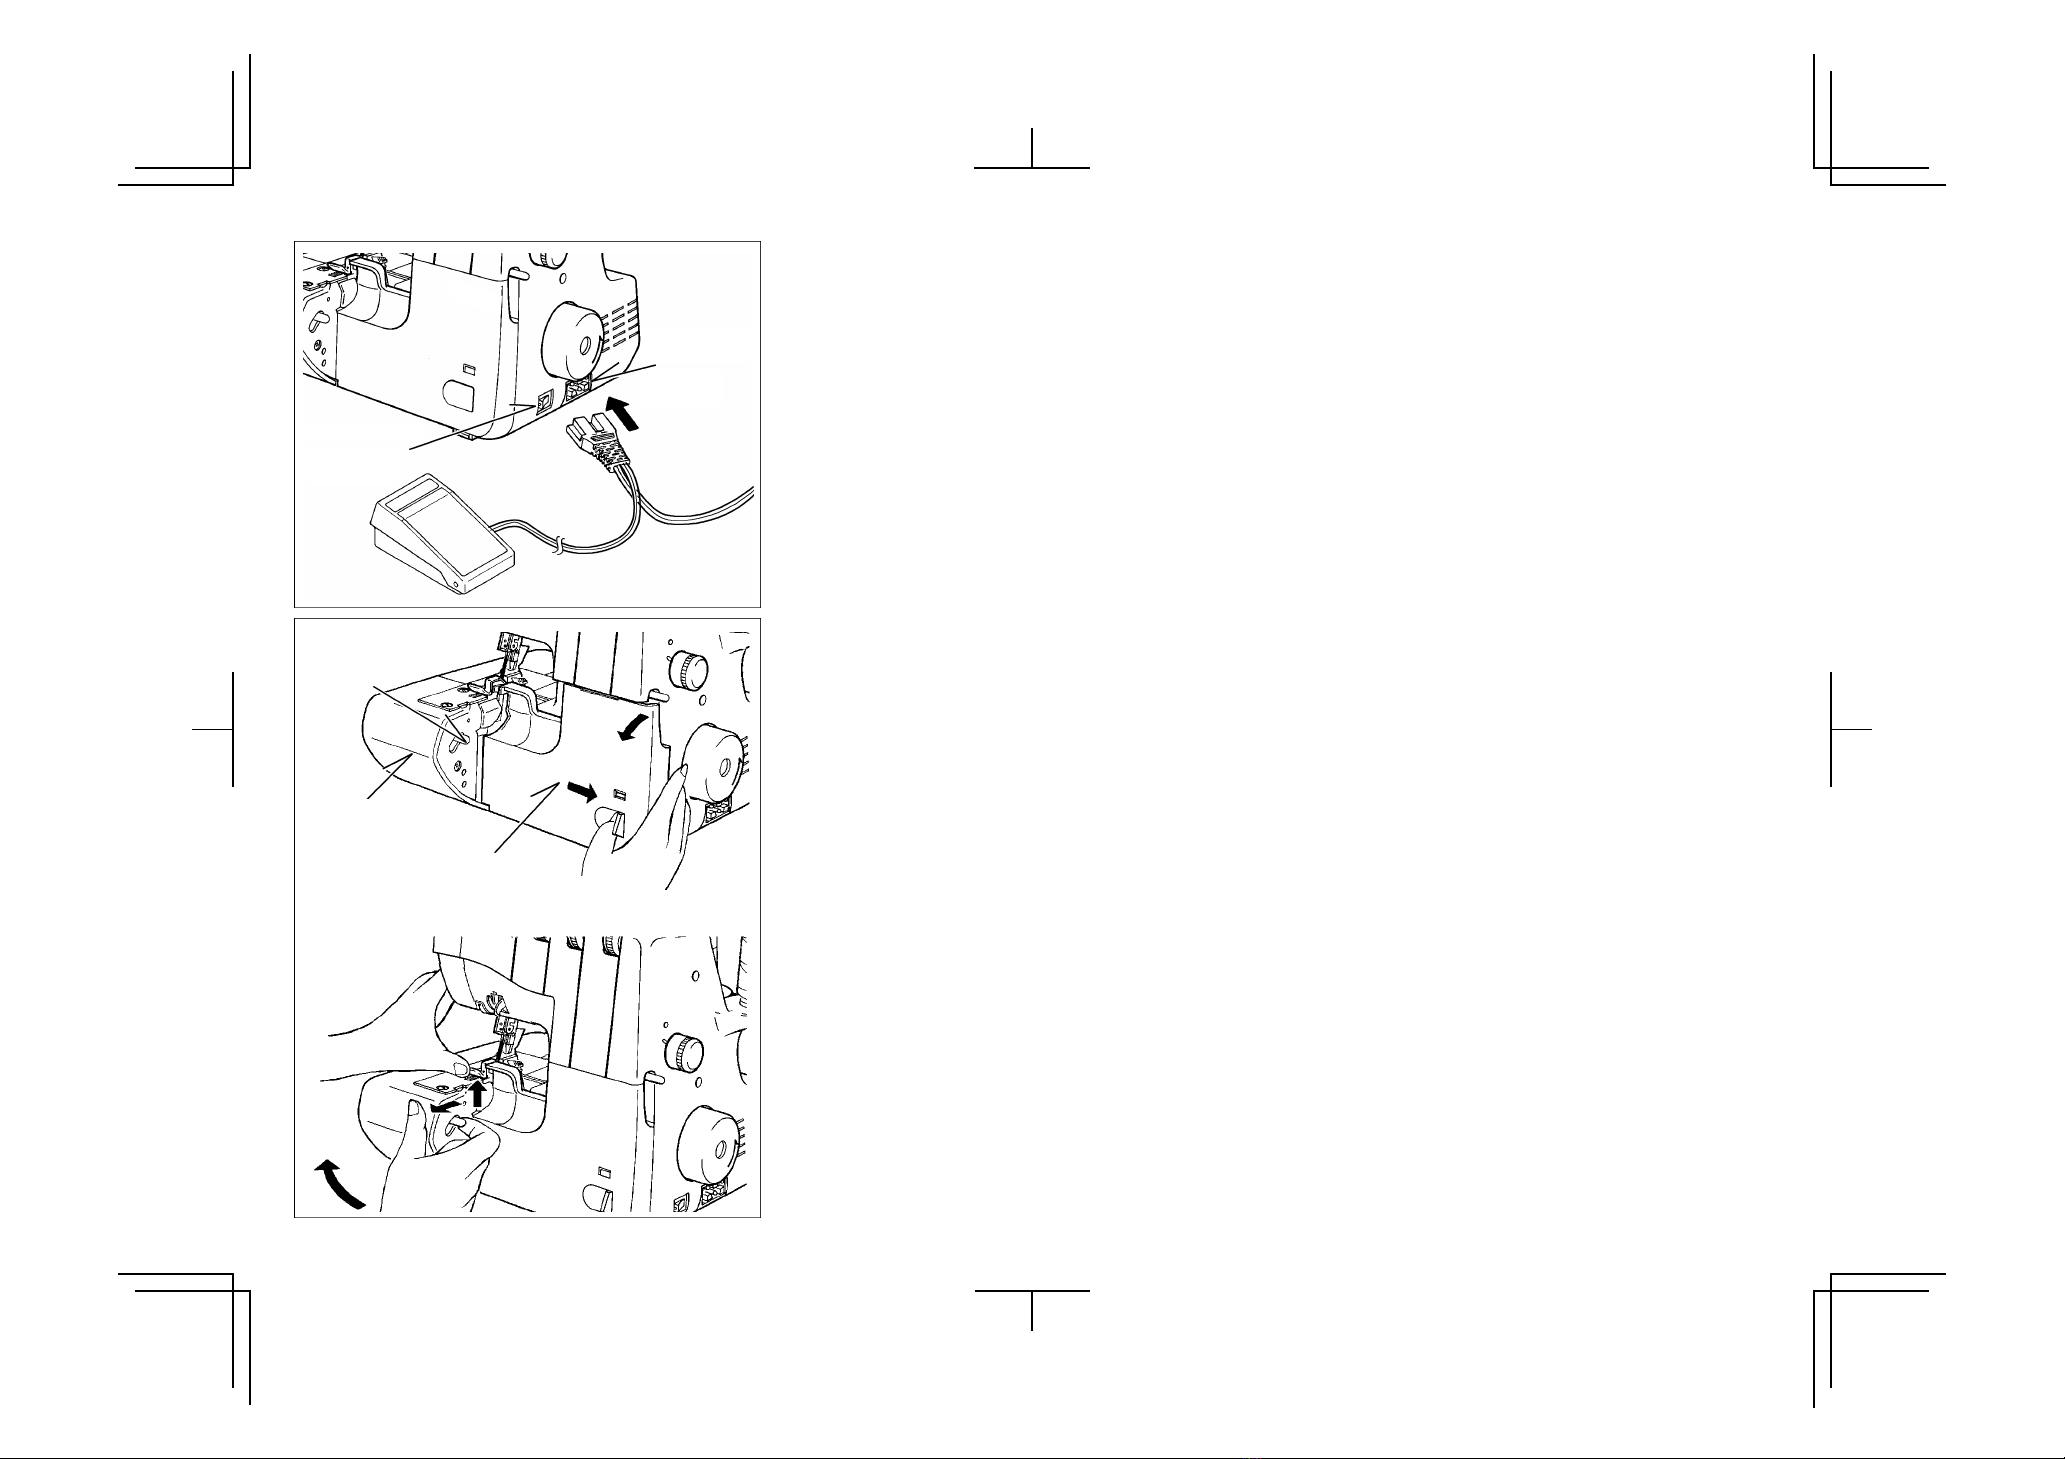
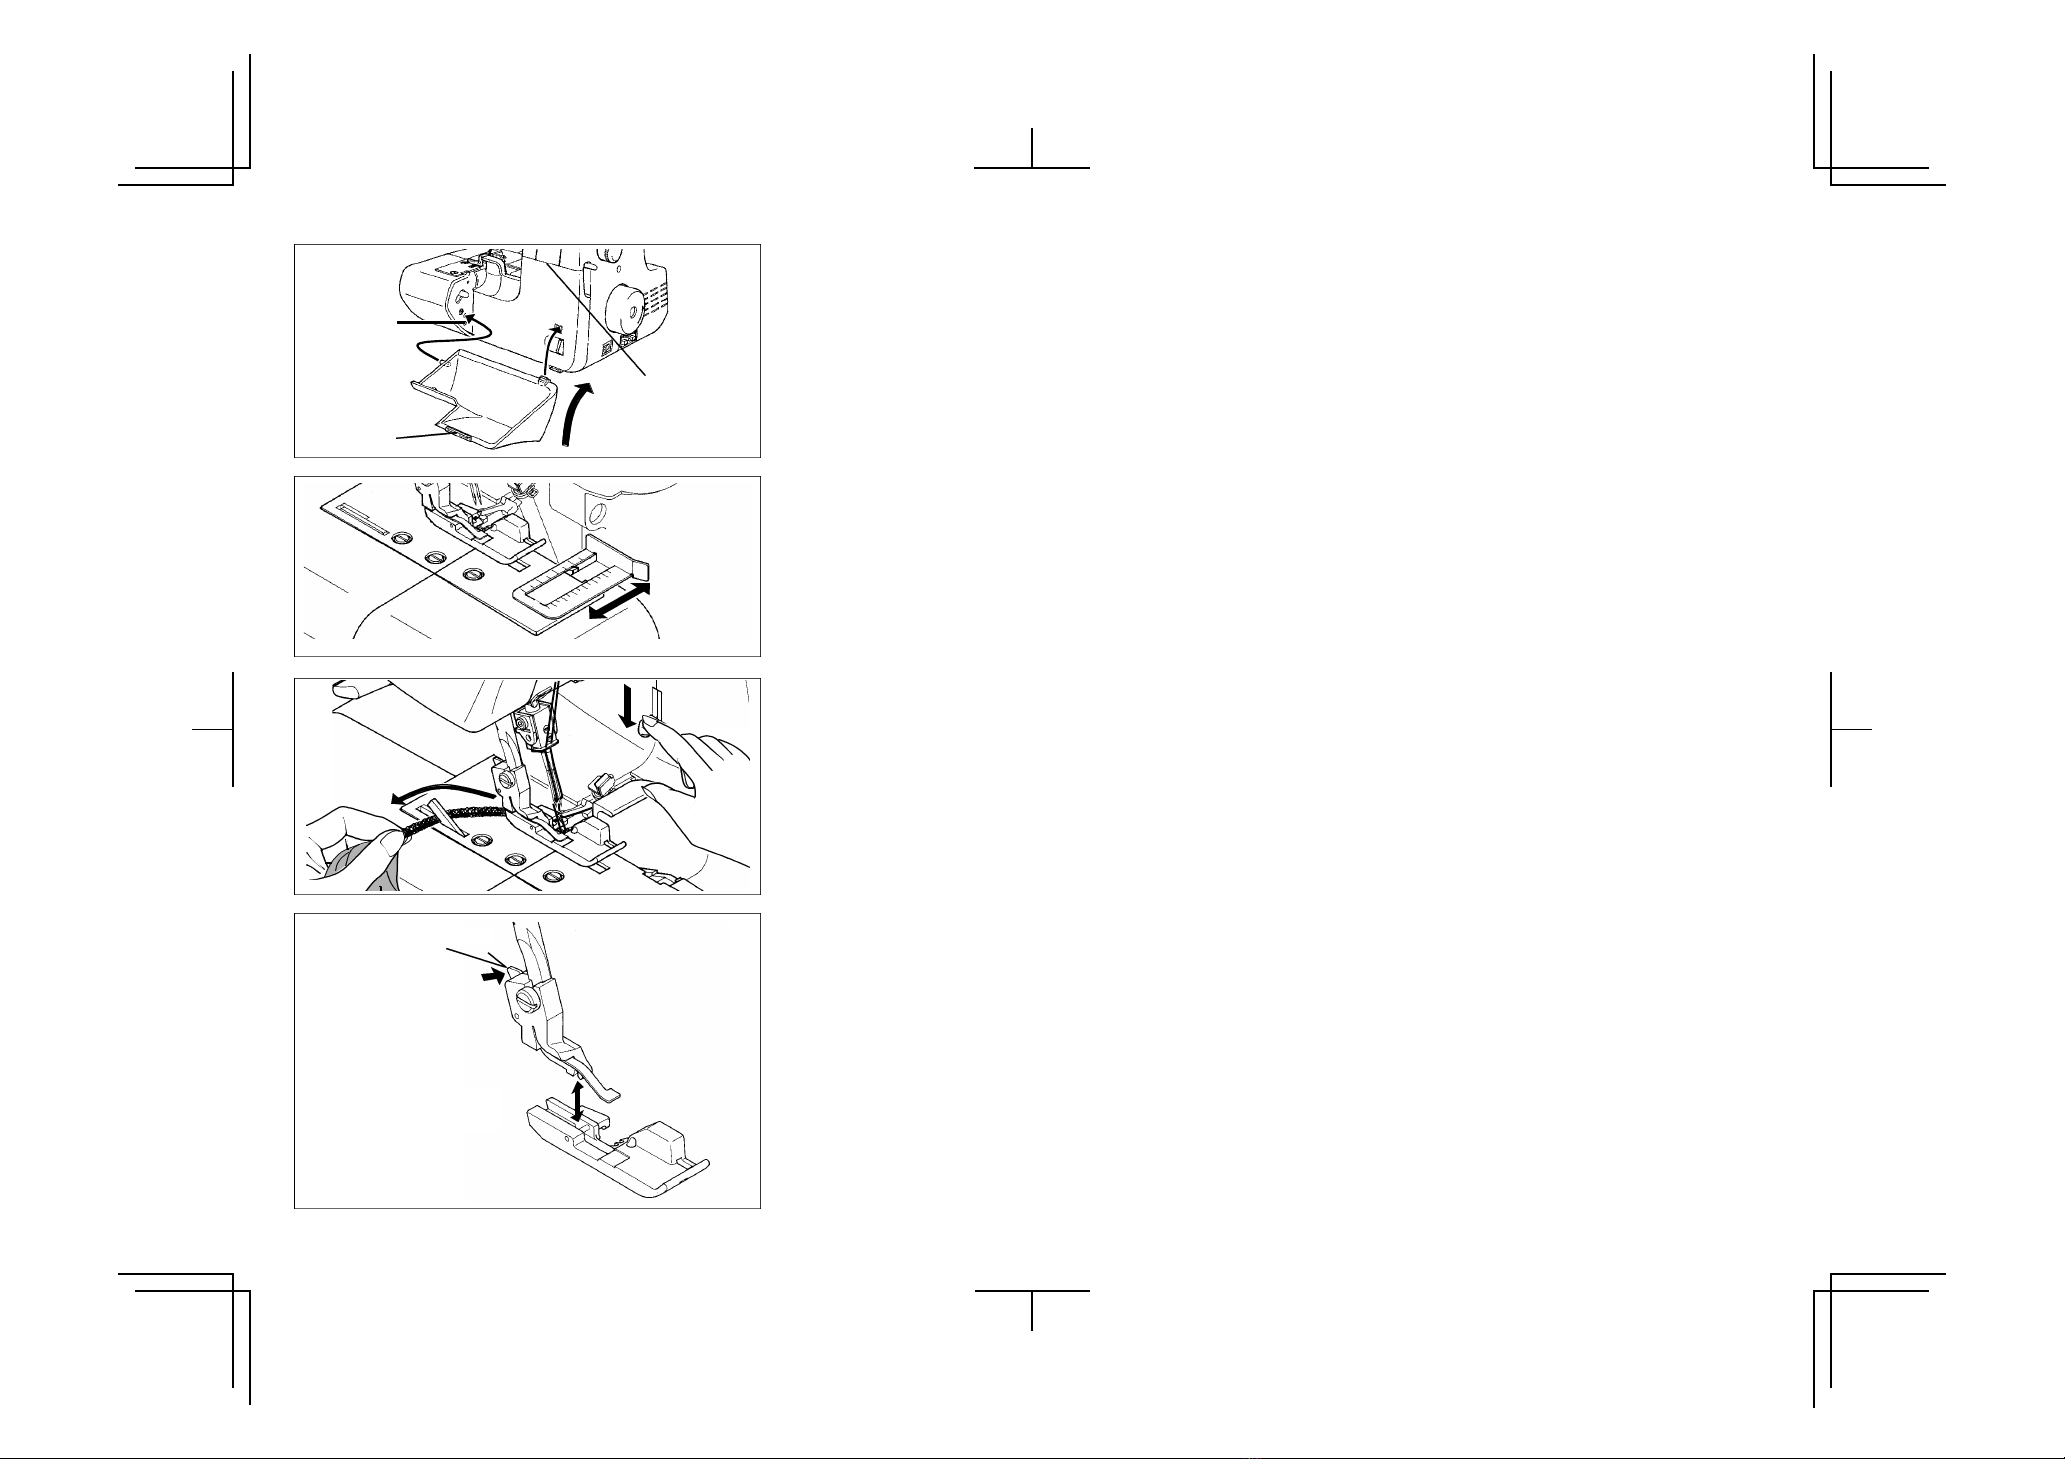
Aprire il coperchio frontale ed il piano di
lavoro alzare l'ago nel suo punto più alto
girando il volantino verso di voi ed alzare il
piedino pressore. Prima di reinfilare il
gancio inferiore, rimuovere il filo della cruna
dell'ago, questo eviterà grovigli di fili.
Nota:La tensione del filo è rilasciata
quando il piedino pressore è alzato.
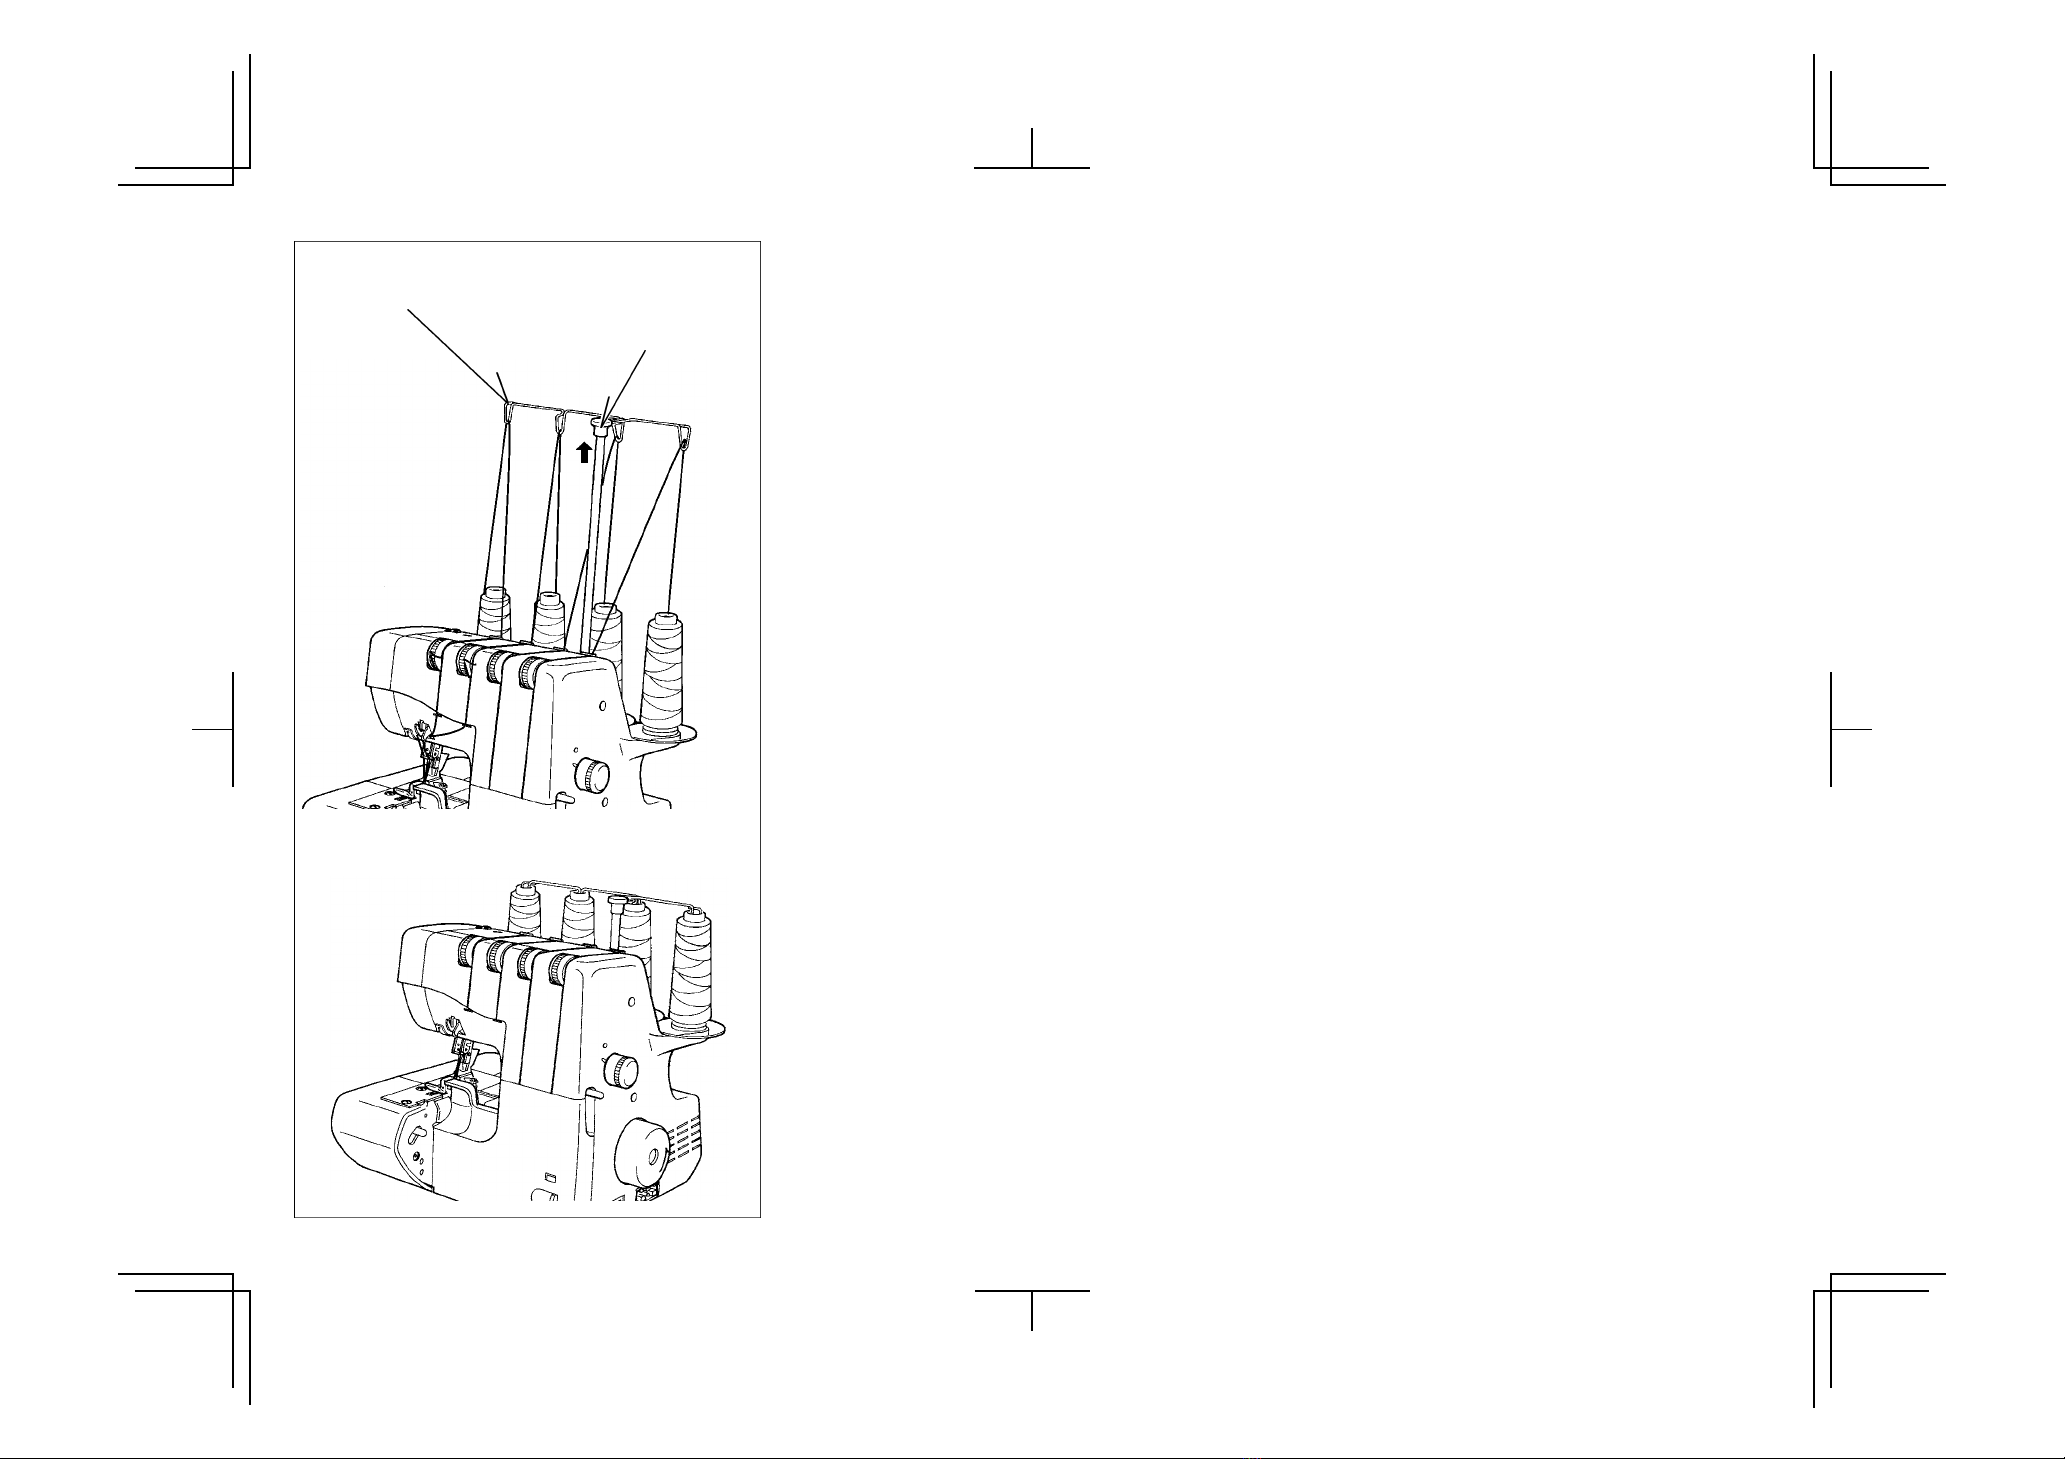
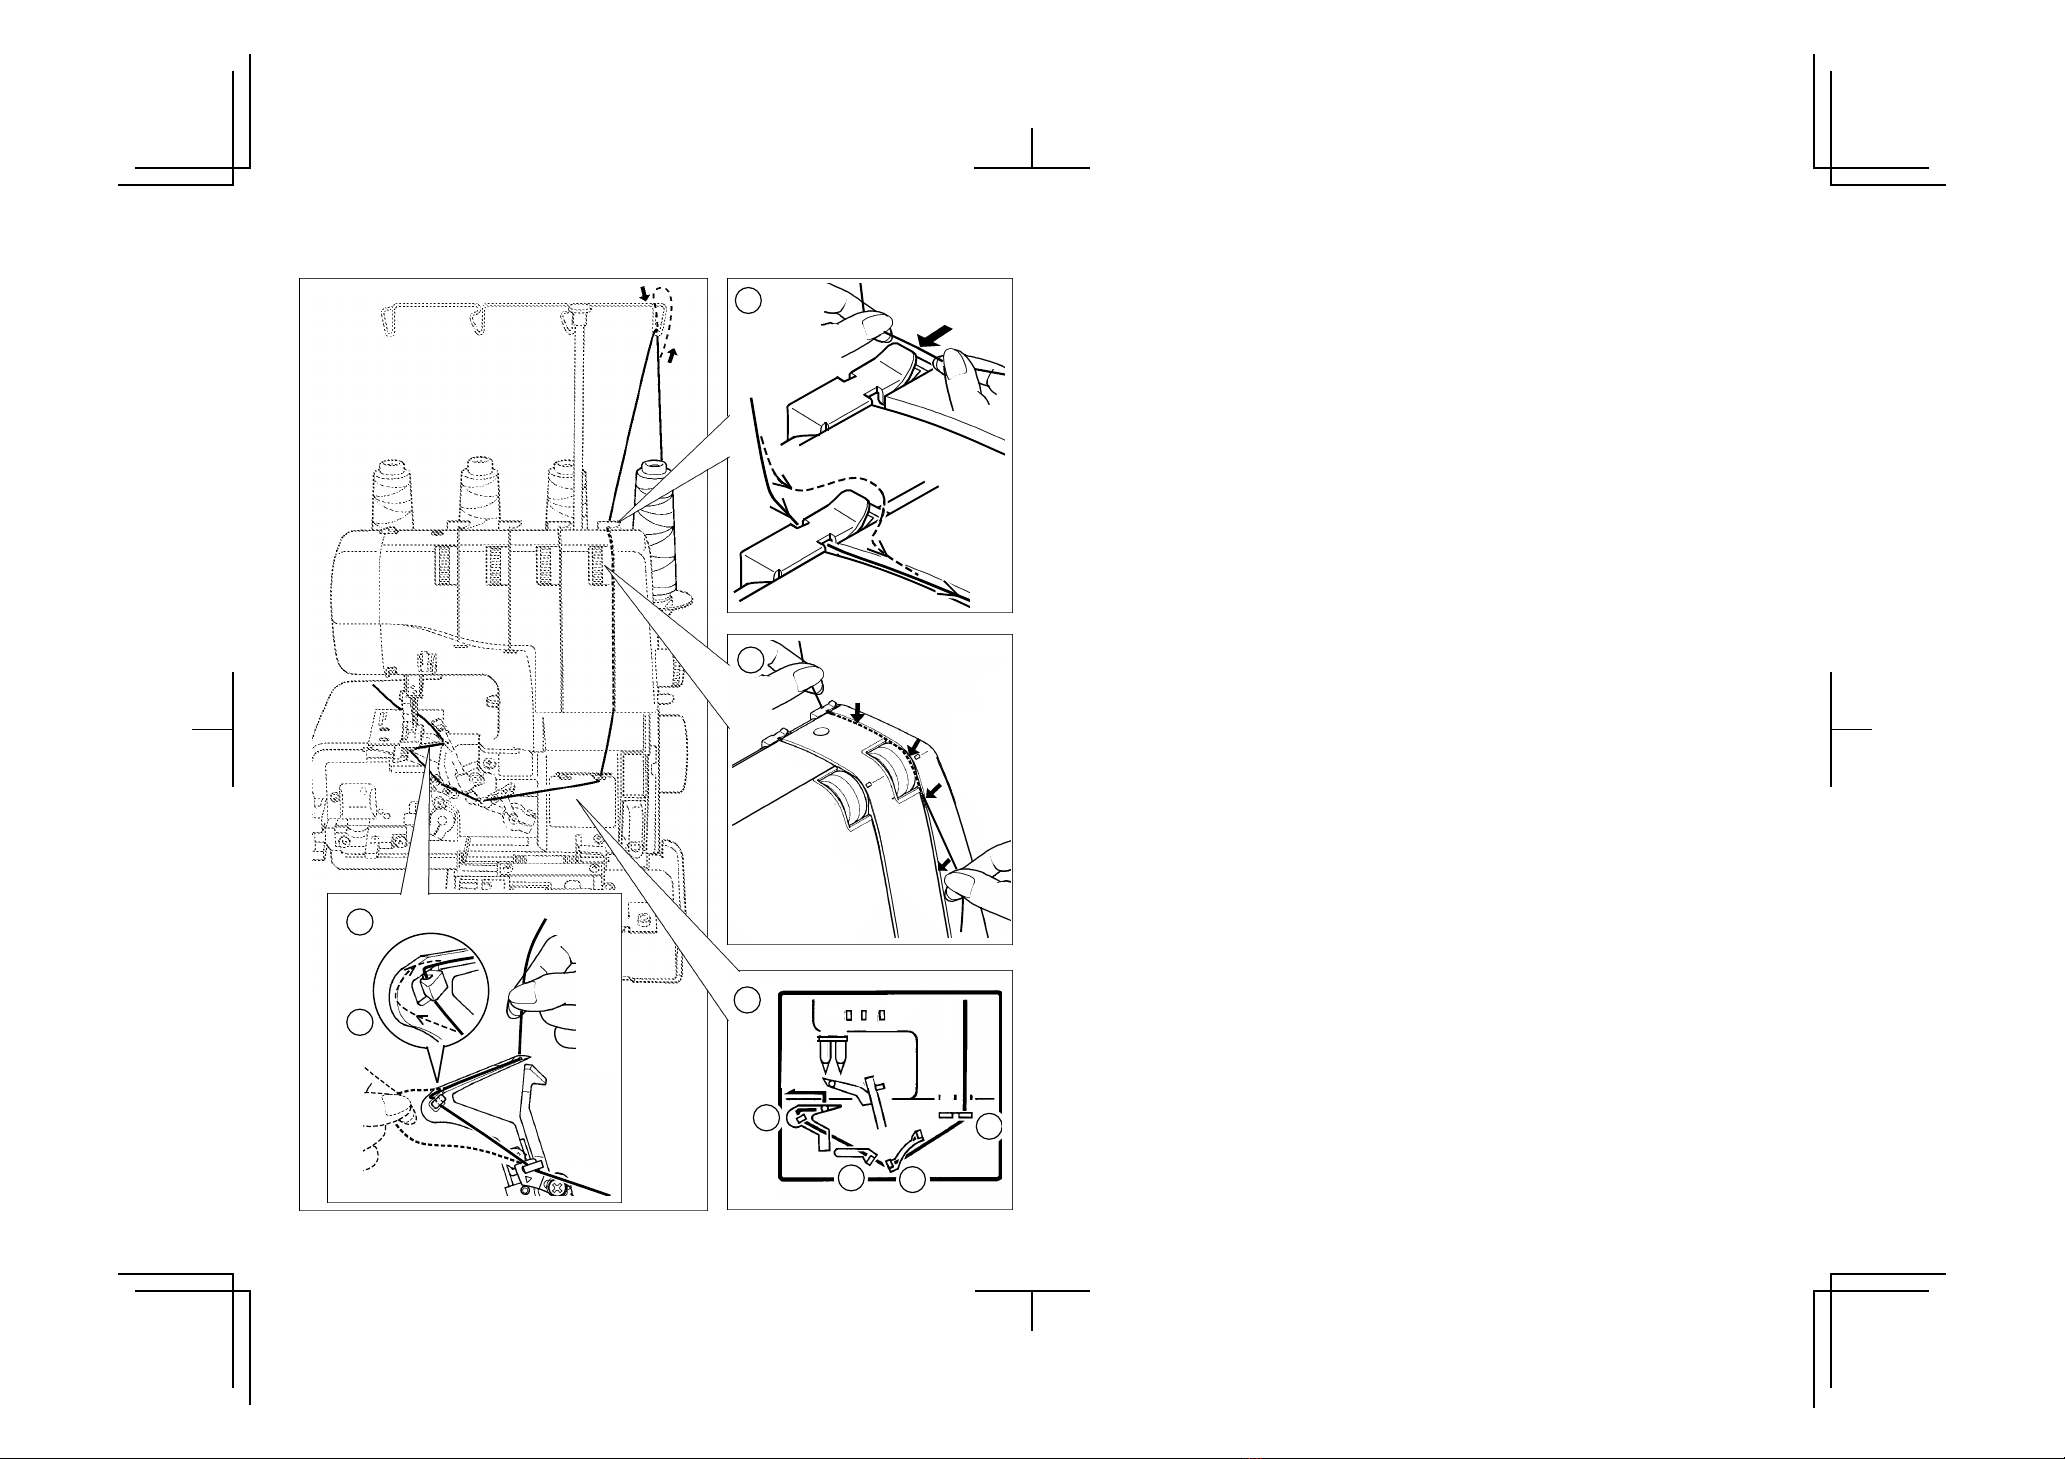
INFILARE IL GANCIO
INFERIORE
1.Alimentare il filo attraverso il guidafilo
come illustrato.
2.Tirare il filo inferiore attraverso la fessura
tensione destra, tenendo il filo con la
mano sinistra.
3.Tirare il filo attraverso il guidafilo come
illustrato.
4.Passare il filo attraverso la cruna del
gancio inferiore ed agganciarlo intorno
alla parte A come indicato dalla freccia.
Lasciare circa 10 cm di filo.
THREADING YOUR MACHINE
Wrong threading may cause skipped
stitches, breaking threads, or other
problems.
Try to master the correct threading before
moving on to test sewing.
Threading must be carried out in the
sequence of Lower Looper –Upper Looper
–Needle.
Open the front cover and the working table.
Raise needle to its highest point by turning
hand wheel towards you, and raise the
presser foot.
Before re-threading lower looper, remove
thread from needle eye first, then re-thread
the lower looper. This will prevent tangling.
NOTE:Thread tension is released when
the presser foot is lifted up.
THREADING LOWER LOOPER
1.Feed the thread through the thread
guide as illustrated.
2.Pull the lower thread through right hand
tension slot, holding the thread with your
left hand.
3.Draw the thread through thread guide as
illustrated.
4.Pass the thread through lower looper
eye, and hook it around part A as indi-
cated by the arrow. Leave about 4" (10
cm) extra thread.
10