Necchi HD22 User manual

INSTRUCTION BOOK

IMPORTANT SAFETY INSTRUCTIONS
This appliance is not intended for use by persons (including children) with reduced physical, sensory or mental capabilities, or lack of experience and
knowledge, unless they have been given supervision or instruction concerning use of the appliance by a person responsible for their safety.
Children should be supervised to ensure that they do not play with this sewing machine.
When using an electrical appliance, basic safety precautions should always be followed, including the
following:
This sewing machine is designed and manufactured for household use only.
Read all instructions before using this sewing machine.
DANGER— To reduce the risk of electric shock:
1. An appliance should never be left unattended when plugged in. Always unplug this sewing machine from the electric outlet immediately after
using and before cleaning.
2. Always unplug before replacing a sewing machine bulb. Replace bulb with same type rated 15 Watts.
WARNING—To reduce the risk of burns, fire, electric shock, or injury to persons:
1. Do not allow to be used as a toy. Close attention is necessary when this sewing machine is used by or near children.
2. Use this appliance only for its intended use as described in this owner’s manual.
Use only attachments recommended by the manufacturer as contained in this owner’s manual.
3. Never operate this sewing machine if it has a damaged cord or plug, if it is not working properly, if it has been dropped or damaged, or dropped
into water.
Return this sewing machine to the nearest authorized dealer or service center for examination, repair, electrical or mechanical adjustment.
4. Never operate the appliance with any air opening blocked. Keep ventilation openings of this sewing machine and foot controller free from
accumulation of lint, dust and loose cloth.
5. Never drop or insert any object into any opening.
6. Do not use outdoors.
7. Do not operate where aerosol (spray) products are being used or where oxygen is being administered.
8. To disconnect, turn all controls to the off (“O”) position, then remove plug from outlet.
9. Do not unplug by pulling on cord. To unplug, grasp the plug, not the cord.
10. Keep fingers away from all moving parts. Special care is required around the sewing machine needle and/or cutting blade.
11. Always use the proper needle plate. The wrong plate can cause the needle to break.
12. Do not use bent needles.
13. Do not pull or push fabric while stitching. It may deflect the needle causing it to break.
14. Switch this sewing machine off (“O”) when making any adjustment in the needle area, such as threading the needle, changing the needle,
threading the bobbin or changing the presser foot, and the like.
15. Always unplug this sewing machine from the electrical outlet when removing covers, lubricating, or when making any other adjustments
mentioned in this owner’s manual.
SAVE THESE INSTRUCTIONS

1
TABLE OF CONTENTS
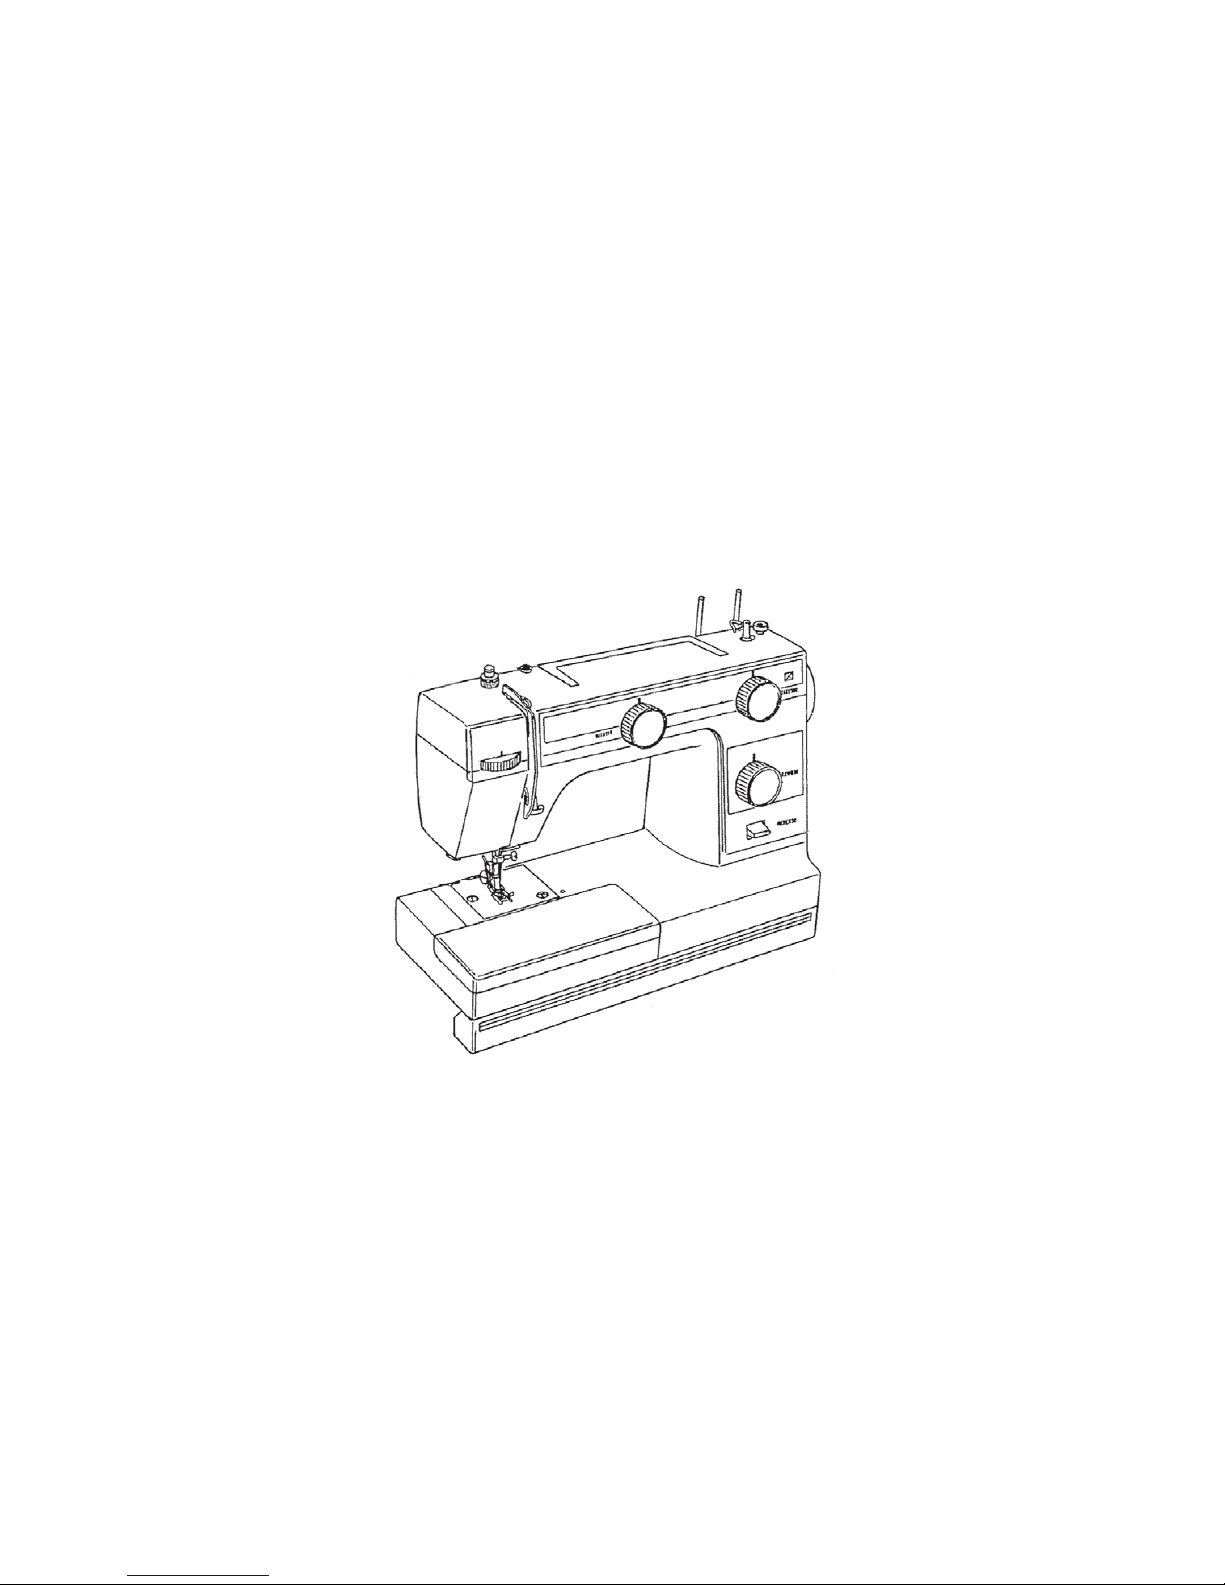
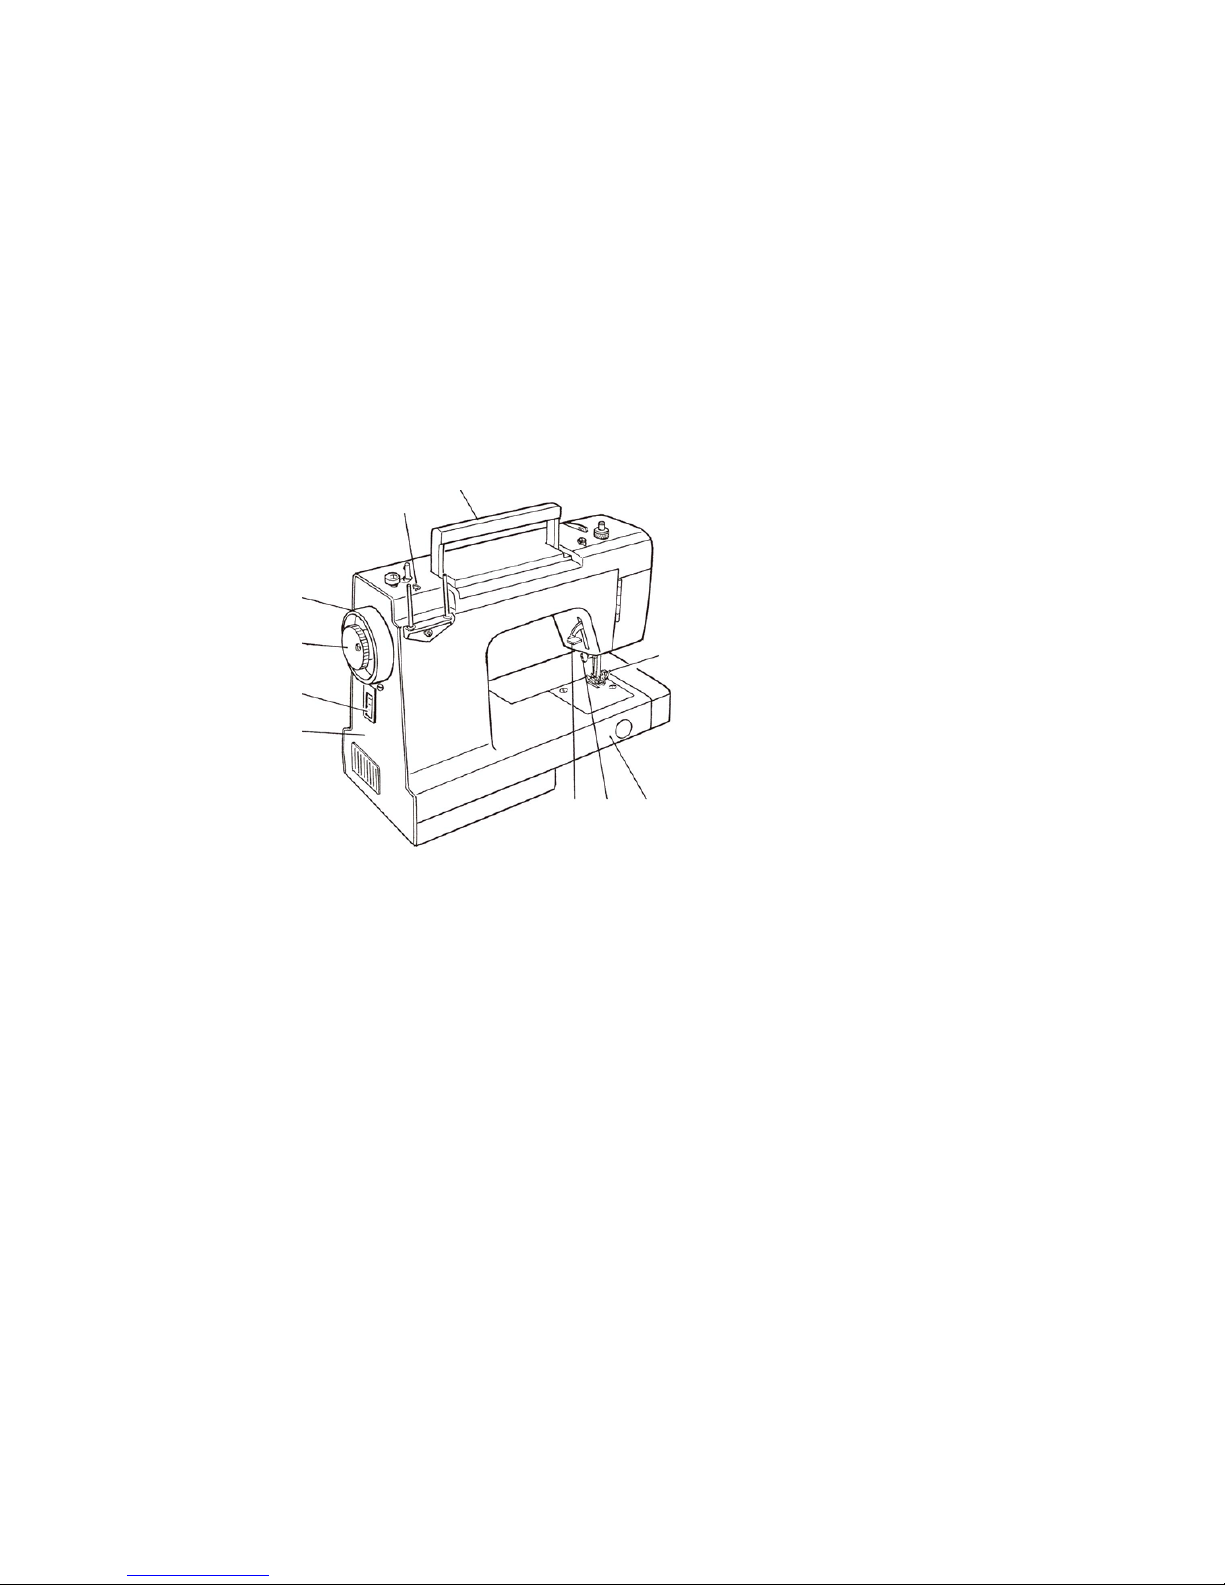
SECTION I ESSENTIAL PARTS
Names of Parts ............................................................................................ 2~3
SECTION II GETTING READY TO SEW
Connecting the Machine to the Power Supply ................................................ 6
Foot Control ..................................................................................................... 7
Sewing Light .................................................................................................... 7
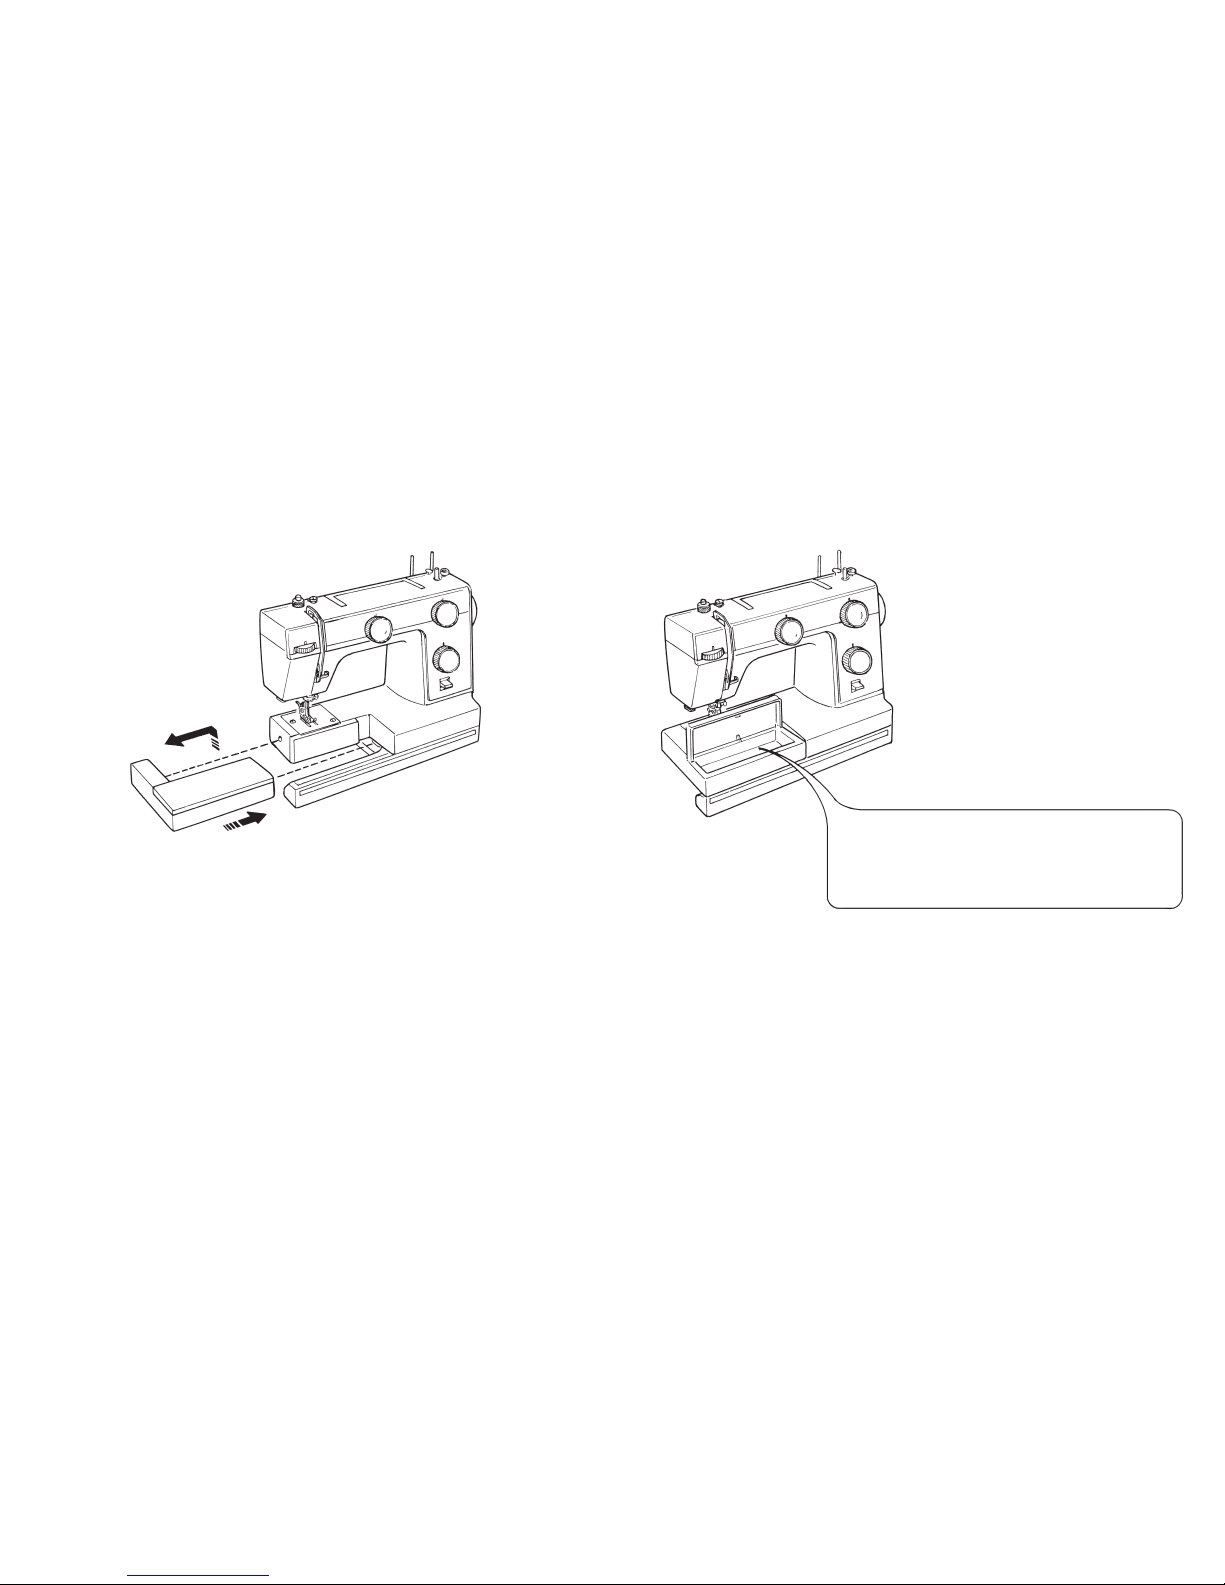
Extension Table (Accessory Box) .................................................................... 8
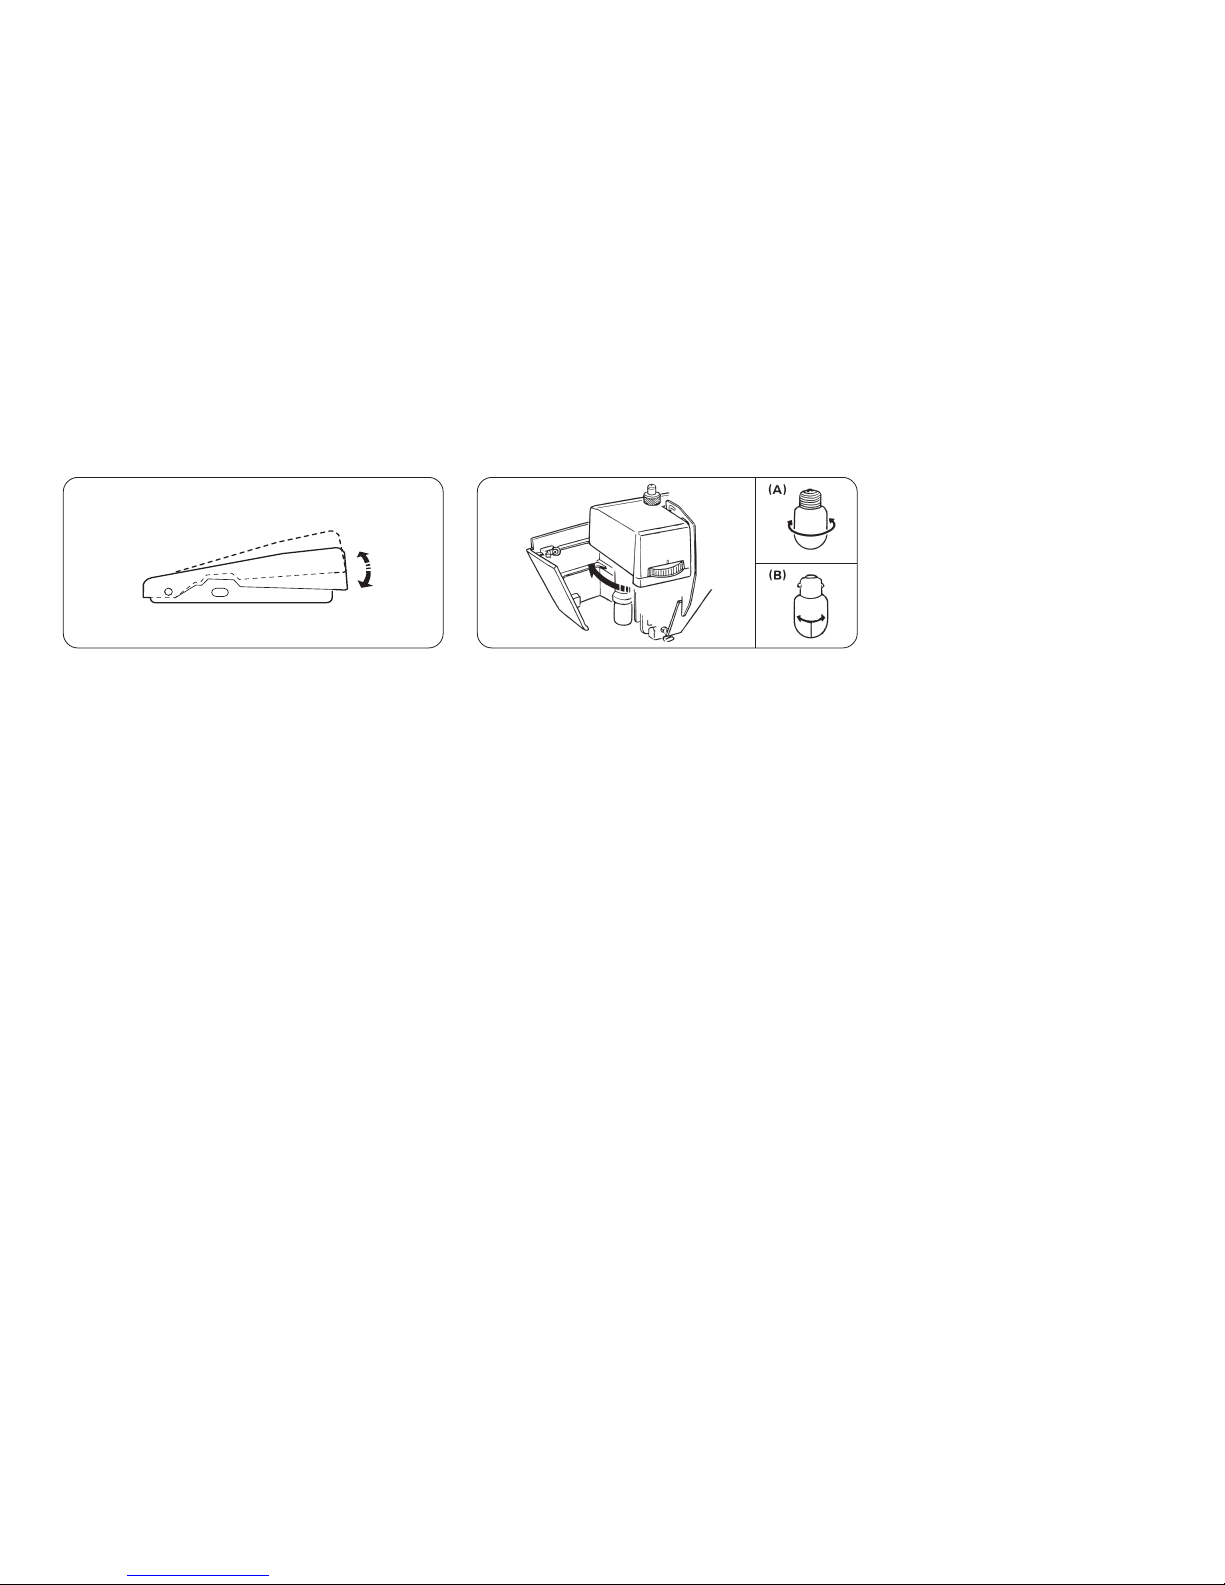
Pressure Regulator .......................................................................................... 9
Dropping the Feed Dogs ............................................................................... 10
To Snap On and Snap Off the Presser Foot ................................................. 11
Changing Needles ......................................................................................... 12
Thread and Needle Chart .............................................................................. 13
Removing or Inserting the Bobbin Case ....................................................... 14
Winding the Bobbin ....................................................................................... 15
Threading Bobbin Case ................................................................................. 16
Threading the Machine .................................................................................. 17
Drawing Up Bobbin Thread ........................................................................... 18
Balancing Needle Thread Tension ................................................................ 19
Zigzag Width Dial .......................................................................................... 20
Pattern Selector Dial...................................................................................... 20
Stitch Length Dial .......................................................................................... 20
SECTION III BASIC SEWING
Straight Stitch Sewing ................................................................................... 21
Changing the Sewing Directions ................................................................... 22
Zigzag Stitching ............................................................................................. 22
SECTION IV UTILITY STITCHING
Overcasting .................................................................................................... 23
Overedge Stitch ............................................................................................. 23
Tricot Stitch .................................................................................................... 24
Triple Strength Stitch ..................................................................................... 24
Buttonhole Stitching................................................................................. 25~26
Sewing Buttons .............................................................................................. 27
Zipper Application .......................................................................................... 28
Blind Stitch Hemming .................................................................................... 29
Rolled Hem .................................................................................................... 31
Fagoting Stitch ............................................................................................... 31
Box Stitching .................................................................................................. 31
Elastic Stretch Stitch ..................................................................................... 32
SECTION V DECORATIVE STITCHING
Shell Tuck ...................................................................................................... 32
Feather Stitch ................................................................................................ 33
Decorative Satin Stitch Patterns ................................................................... 34
Stretch Stitch Patterns ................................................................................... 34
SECTION VI CARE OF YOUR MACHINE
Dismantling and Assembling Hook Race ...................................................... 35
Cleaning the Feed Dogs ................................................................................ 36
Oiling the Machine ......................................................................................... 37
Trouble Shooting ..................................................................................... 38~39

2
ESSENTIAL PARTS
q
w
e
r
t
y
u
i
o
!0
!1
!2
!3
!4
!5
!6
!7
!8
!9
Names of Parts
Reverse stitch lever
Stitch length dial
Pattern selector dial
Bobbin winder stopper
Bobbin winder spindle
Spool pins
Zigzag width dial
Top cover
Bobbin winder thread guide
Thread take-up lever
Pressure regulator
Thread guide
Thread tension dial
Face plate
Check spring holder
Thread cutter
Needle plate
Extension table
(Accessory storage box)
Slide plate
t
e
r
q
y
u
w
i
o
!0!1
!2
!3
!4
!5
!6
!7
!8
The design and specifications are subject to change without a prior notice.
Please note that on disposal, this product must be safely recycled in
accordance with relevant National legislation relating to electrical/electronic
products. If in doubt please contact your retailer for guidance. (European
Union only)

3
@0
@1
@2
@3
@4
@5
@6
@7
@8
@9
Carrying handle
Thread guide
Handwheel
Stop motion knob
Machine socket
Belt cover
Presser foot lifter
Needle clamp screw
Free arm
Presser foot
@0
@4
@1
@3
@5
@2
@7 @8
@6
@9

4
How to set the spool pins
Spool pins are separately packed to
prevent any damage in transit.
Therefore, fix the holder of spool pins
in place with a screwdriver, as shown
in the figure.
GETTING READY TO SEW
Connecting the Machine to the Power Supply
Before connecting the power, make sure the voltage and number of cycles
of the machine conform to your electrical power.
Turn the power switch off.
Fit the nonreversible plug into the machine socket and plug the
machine into the power supply.
Turn the power switch on.
Operting instructions:
The symbol “O” of a switch indicates the “off” position of the switch.
To reduce the risk of electrical shock, this plug is intended to fit in a
polalized outlet only one way.
If it does not fit fully in the outlet, reverse the plug. If it does not fit, contact
a qualified electritian to install the proper outlet. Do not modify the plug in
any way.
The foot controller Model YC-482J-EC or TJC-150 is used with this sewing
machines.

5
Sewing speed can be varied by the foot control.
The harder you press on the control, the faster the
machine runs.
Foot Control Sewing Light
Turn the power switch off before relamping.
The sewing light is located behind the face plate.
(A) • To remove... Unscrew
• To replace... Screw
(B) • To remove... Push and twist counter-clockwise
• To replace... Push and twist clockwise

6
Accessory Storage BoxExtension Table
The extension table provides added sewing surface and can be easily
removed for free arm sewing.
Extension Table (Accessory Box)
For free arm sewing
Pull the end of the extension
table away from the machine,
as illustrated.
•Sewing accessories are conveniently
located under the extension table.
For attaching the table
Push the extension table until
its lugs fit into the machine.

7
To increase pressure, push down
the pressure regulator button
until suitable pressure is obtained.
Pressure Regulator
To release pressure, push down
the ring, then the button will spring
up to its highest position.
Setting Position
The top of button should normally be pushed down to about 3/4 position
from its highest position, except for the following:
• Set the top of button at 1/4 position from its highest position for
sewing delicate synthetic fabrics and knitted fabrics which tend to
stretch out of shape.
• Set the top of button at the depressed position to the bottom for
thick and heavier fabrics.

8
To raise the feed dogs, press down
the lever and move it to the direction
of arrow as illustrated.
For dropping the feed dogs, press
down the lever and move it to the
direction of arrow as illustrated.
The drop feed lever is located in the hook area.
Dropping the Feed Dogs

9
To snap off
To Snap On and Snap Off the Presser Foot
Turn the power switch off.
Turn the handwheel toward you to
raise the needle to its highest
position. Raise the presser foot.
To snap on
When attaching the presser foot, set
the pressure regulator button at the
depressed position to the bottom.
Place the presser foot so the pin on
the foot lies just under the groove of
the foot holder. Lower the foot holder
to lock the foot in place.
Press the lever on the back of the
foot holder.
The presser foot will drop off.

10
Changing Needles
Turn the power switch off.
Raise the needle by turning the
handwheel toward you and lower the
presser foot.
Loosen the needle clamp screw by turning it toward you.
Remove the needle from the clamp.
Insert the new needle into the needle clamp with the flat side away from
you.
When inserting the needle into the clamp, push it up as far as it will go and
tighten the clamp screw firmly with the screwdriver.
* Check your needles frequently for barbed or blunted points. Snags and
run in knits, fine silk and silk-like fabrics are permanent and almost
always caused by a damaged needle.

11
* In general, fine thread and needles are used for sewing thin fabrics, and thicker
threads and needles are used for sewing heavy fabrics. Always test thread and
needle size on a small piece of fabric which will be used for actual sewing.
* Use the same thread for needle and bobbin.
* When sewing stretch, very fine fabrics and synthetics, use a BLUE TIPPED
needle. The blue tipped needle effectively prevents skipped stitches.
* When sewing very fine fabrics, sew over a piece of paper to prevent yarn
distortion.
Thread and Needle Chart
Fabrics Threads Needle Size
Crepe de Chine, Vile
Lawn, Organdy, Georgette,
Tricot
Linens, Cotton, Pique,
Serge, Double Knits,
Percale
Denim, Tweed, Gabardine,
Coating, Drapery and
Upholstery Fabric
Fine silk
Fine Cotton
Fine Synthetic
Fine Cotton Covered
Polyester
50 silk
50 to 80 Cotton
50 to 60 Synthetic
Cotton Covered
Polyester
50 silk
40 to 50 Cotton
40 to 50 Synthetic
Cotton Covered
Polyester
9
or
11
11
or
14
14
or
16
Light weight
Medium
weight
Heavy
weight

12
Removing or Inserting the Bobbin Case
Turn the power switch off.
Open the hook cover or the slide plate.
Raise the needle by turning the
handwheel toward you.
Take out the bobbin case by holding
the latch.
When inserting the bobbin case,
place the horn into the recess of the
hook race.
Horn

13
Winding the Bobbin
Draw thread from spool. Pass the thread through the top cover thread
guide. Guide the thread around the bobbin winder thread guide. Insert
the thread through the hole in the bobbin, threading from the inside to the
outside. Put the bobbin on the bobbin winder spindle, and push it to the
right.
While holding the handwheel with your left hand, turn the stop motion
knob toward you with the right hand.
With the free end of the thread held in your hand, depress the foot control.
Stop the machine when it has made a few turns, and cut the thread close
to the hole in the bobbin. Depress the foot control again. When the bobbin
is fully wound, it will stop automatically.
Return the bobbin winder to its original position by moving the spindle to
the left, and cut the thread. Tighten the stop motion knob to engage clutch.

14
Threading Bobbin Case
qPlace bobbin into the bobbin
case. Make sure the thread
unwinds in the direction of arrow.
wPull thread into bobbin case slot. eDraw the thread under the
thread tension spring and into
the delivery eye.
* Leave about 10 cm (4 inches) of
free thread.

15
Threading the Machine
Turn the power switch off.
Raise the thread take-up lever to the highest point by turning the handwheel
towards you.
Raise the presser foot with presser foot lifter and pass the thread in the order
from q to i.
qPass the thread through the top cover thread guide.
wDraw the thread around the thread guide and down into the tension.
eThen down around the check spring holder.
rFirmly draw the thread from left to right over the take-up lever and down
into the take-up lever eye.
ty Then down through the lower thread guide.
uSlide the thread behind the needle bar thread guide on the left.
iThread the needle from front to back.
q
wr
et
y
u
i

16
Drawing up Bobbin Thread
qRaise the presser foot and hold the needle
thread lightly with your hand.
wTurn the handwheel slowly towards you with
your right hand until the needle goes down
and continue turning the handwheel until the
take-up lever is at its highest position.
Lightly draw up the needle thread forming
a loop of the bobbin thread.
ePull 15 cm (6 inches) of both threads back
and under the presser foot.

17
Thread Tension for Zigzag Sewing
Balancing Needle Thread Tension
The needle thread and the bobbin
thread should interlock in the center
of two layers of fabric in straight
seams.
Set the desired
number of the
thread tension dial
at setting mark.
Loosen the needle thread
tension by moving the dial
to a lower number.
Tighten the needle thread
tension by moving the dial
to a higher number.
To obtain better zigzag stitches, the
upper tension should be slightly
weaker than in the case of straight
sewing. The upper thread should
appear slightly on the reverse side
of the fabric.

18
Zigzag Width Dial Stitch Length Dial
Pattern Selector Dial
Selecting Stretch stitch Patterns ( )
When sewing stretch stitch, set the stitch length dial at “S.S.”. When forward and reverse feeds become unbalanced
depending upon the type of fabric, correct the balance as follows:
When patterns are compressed, correct it by turning the dial toward “ + ”.
When patterns are drawn out, correct it by turning the dial toward “ - ”.
* Raise the needle above the fabrics and presser foot when you turn the pattern selector dial and zigzag width dial.
The higher the number, the longer
the stitch length. You can select the
suitable stitch length for most fab-
rics.
Select the desired pattern at the
setting mark by turning the pattern
selector dial.
The stitch width for the zigzag stitches
( and ), the two needle positions
(center and left) for the straight stitch and
the triple strength stitch ( and ) and
buttonhole stitching can be selected with
the zigzag width dial.
Table of contents
Other Necchi Sewing Machine manuals

Necchi
Necchi 270 User manual

Necchi
Necchi EX100 User manual

Necchi
Necchi L234A User manual

Necchi
Necchi K408A User manual

Necchi
Necchi 681C User manual

Necchi
Necchi Q132A User manual

Necchi
Necchi NC-204D User manual

Necchi
Necchi Lock 181 User manual

Necchi
Necchi K121A User manual

Necchi
Necchi FA16 User manual

Necchi
Necchi Automatic Supernova Ultra Mark 2 User manual

Necchi
Necchi NC-103D User manual

Necchi
Necchi Creator User manual

Necchi
Necchi EX30 User manual

Necchi
Necchi EX60 User manual

Necchi
Necchi Q421A User manual

Necchi
Necchi 534 FB User manual

Necchi
Necchi NC-59QD User manual

Necchi
Necchi 590 User manual

Necchi
Necchi NL11C User manual