NEX D/DX
3
1 Preface.............................................................................................................................................................................................................14
2 Hazard Notices ................................................................................................................................................................................14
3 Description ..............................................................................................................................................................................................14
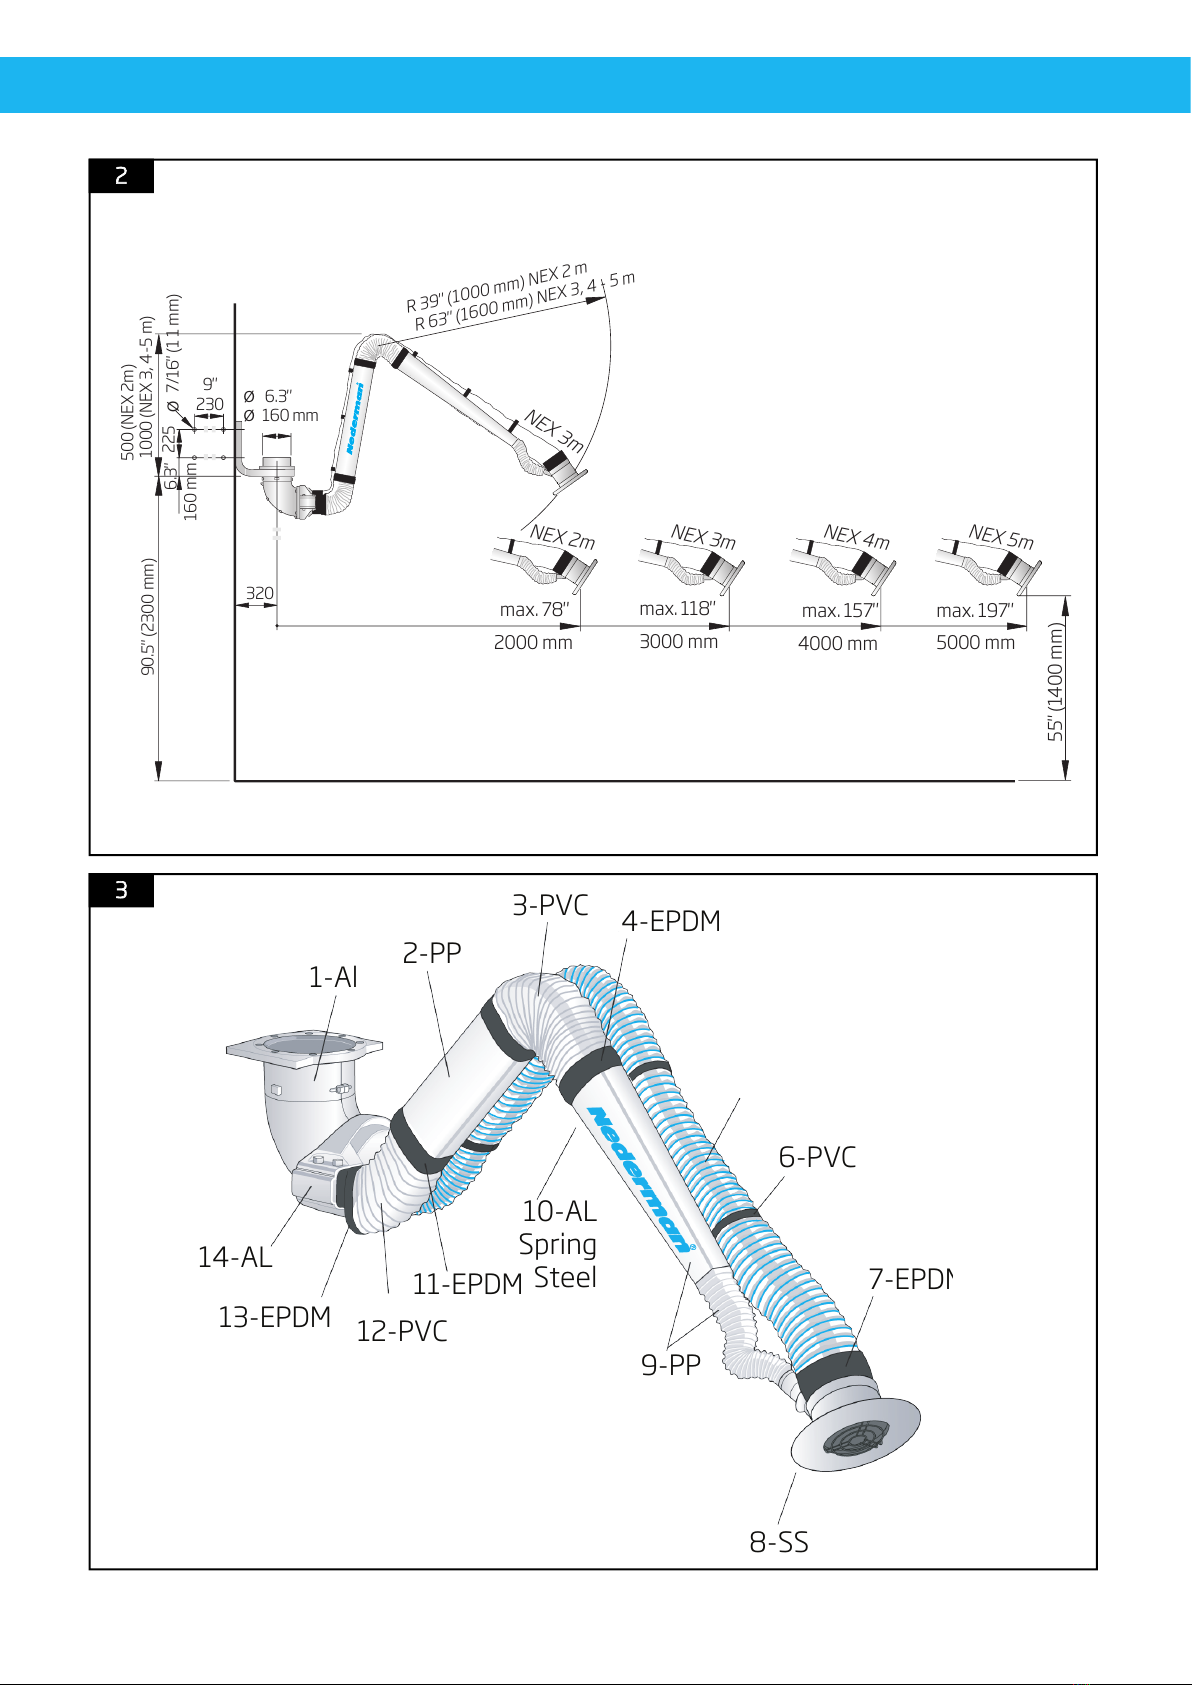
3.1 Technical data ...........................................................................................................................................................................15
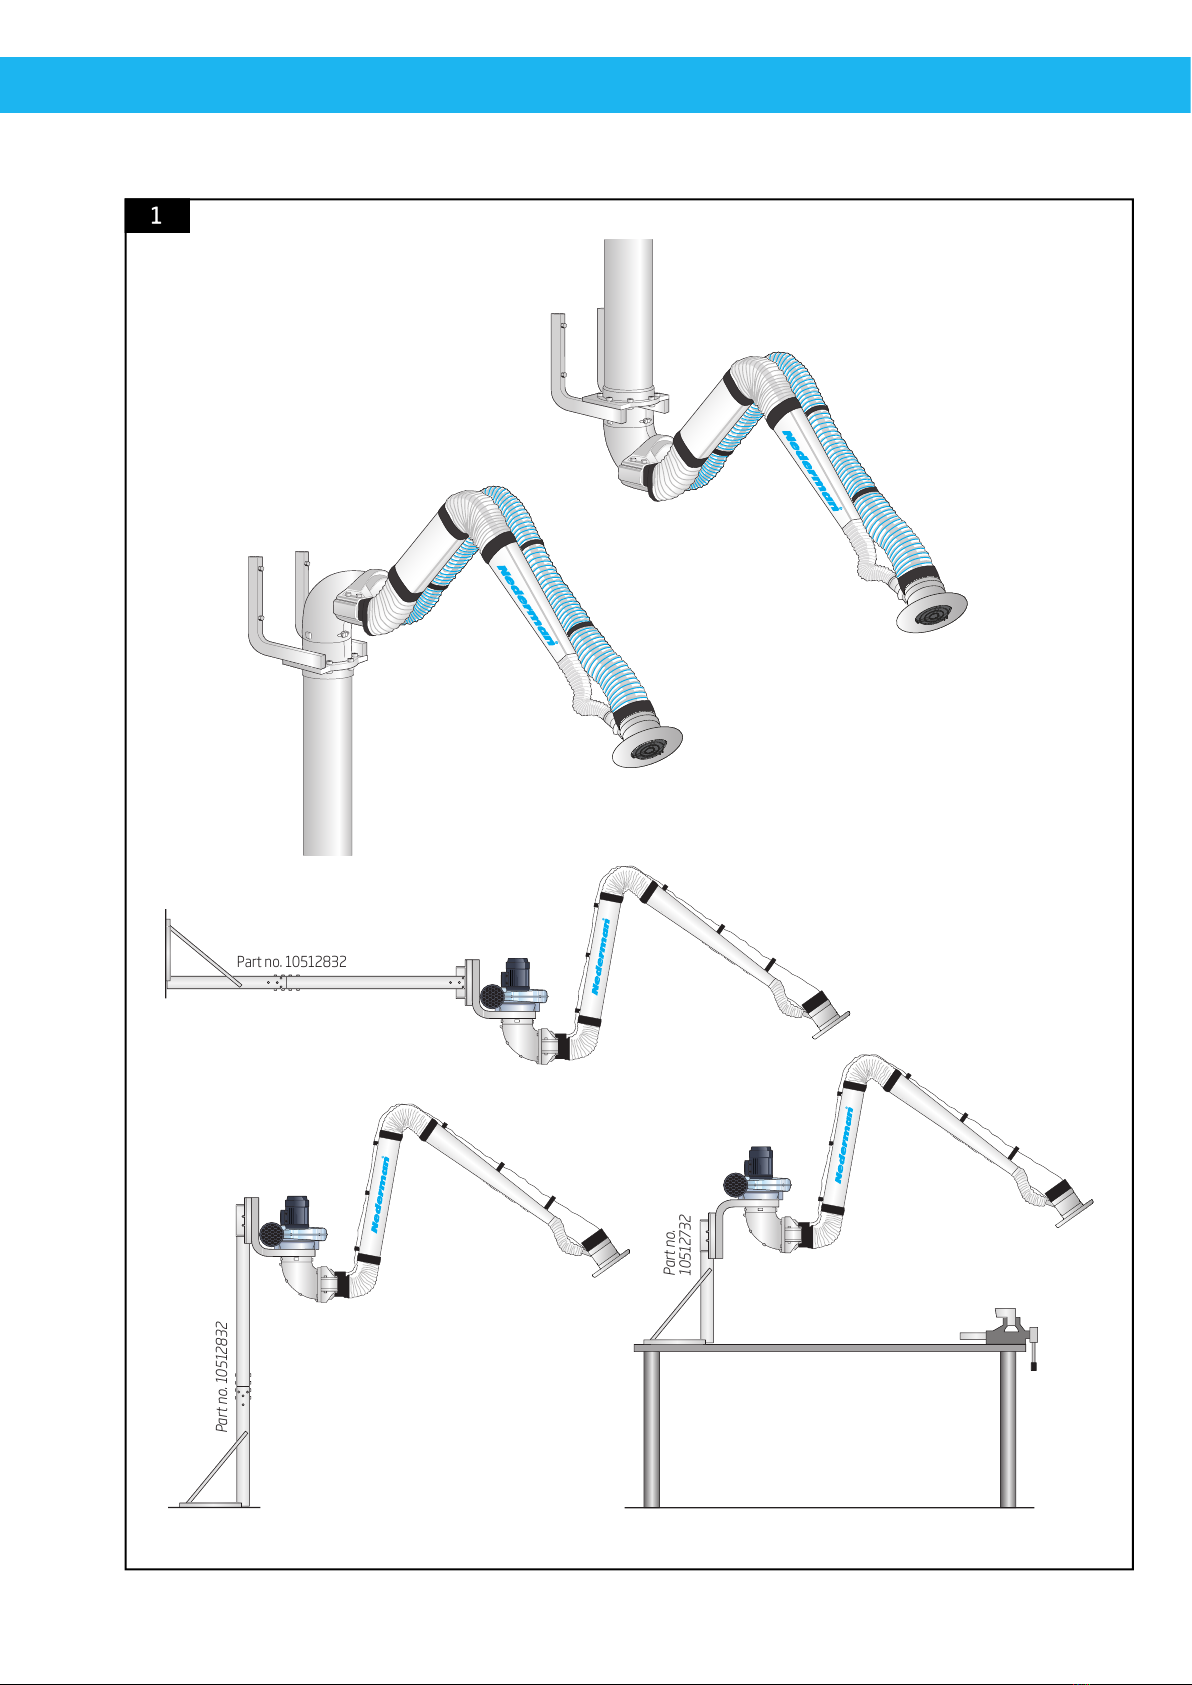
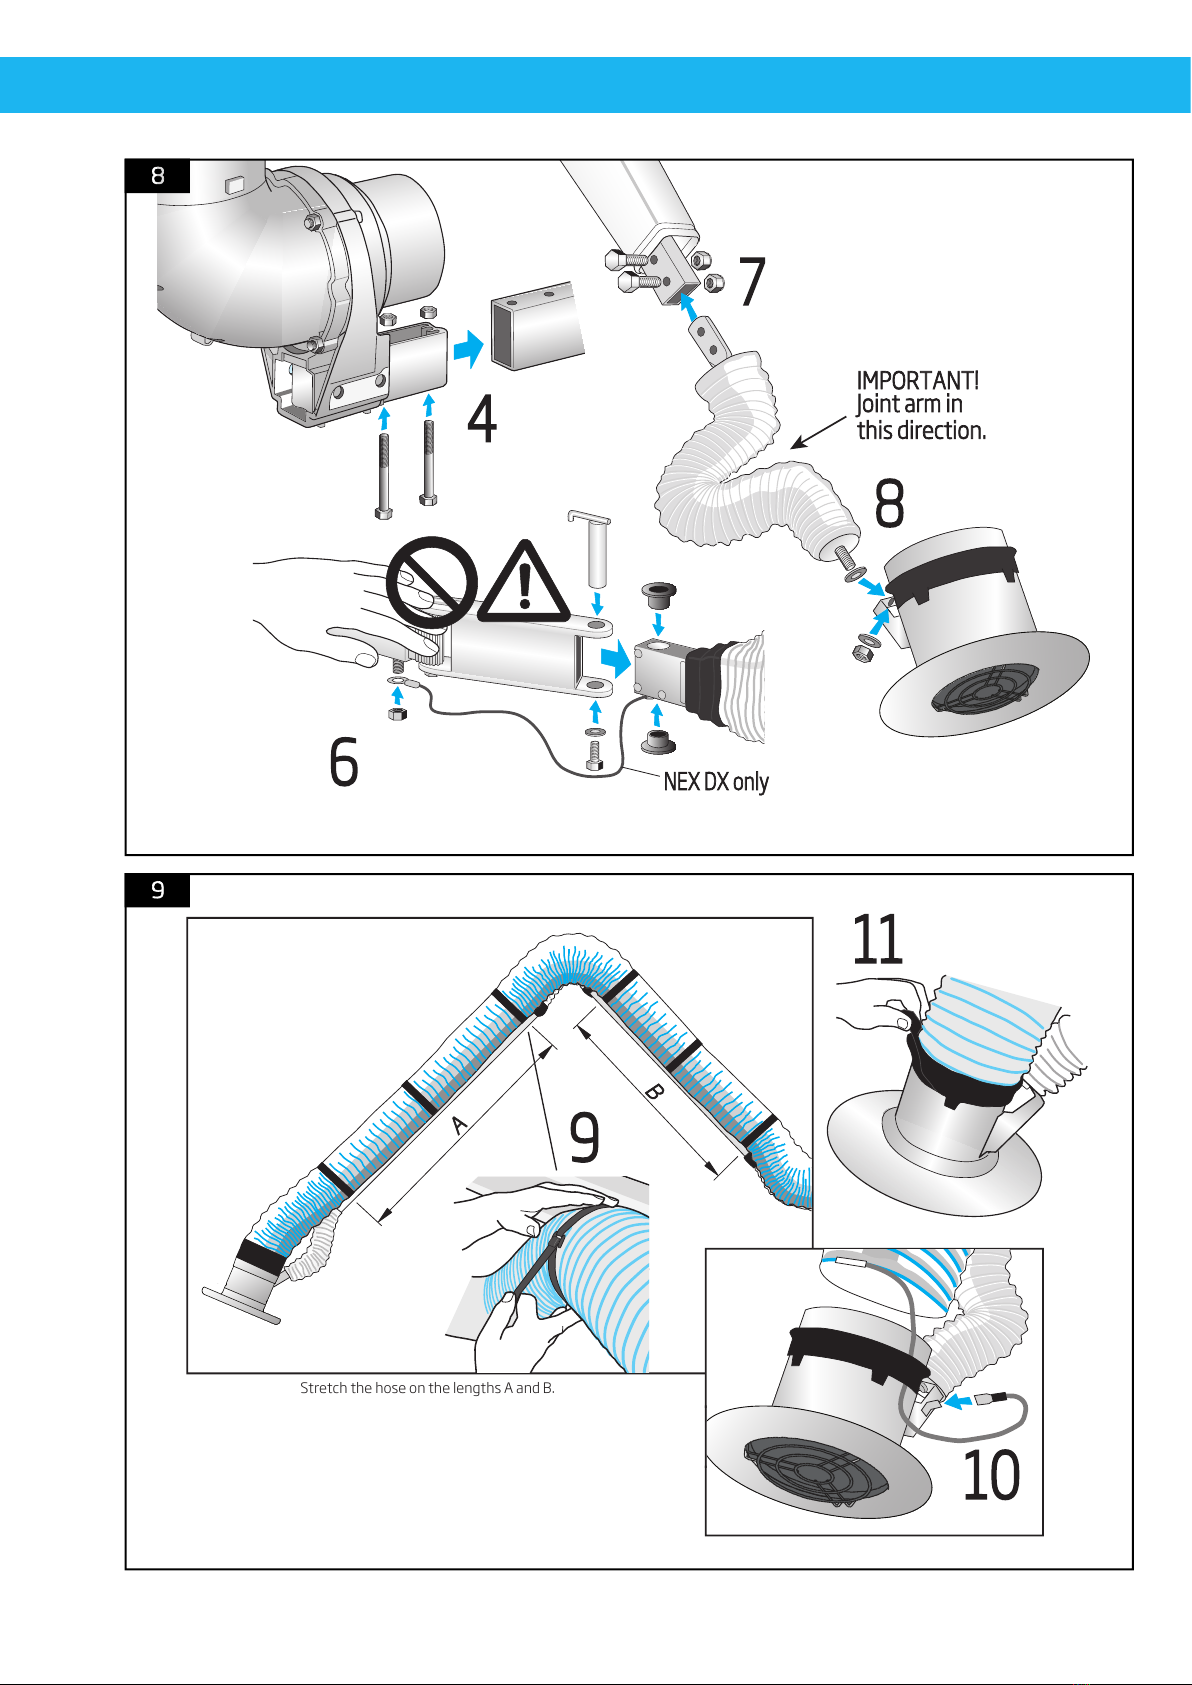
4 Installation ................................................................................................................................................................................................15
4.1 900 bend in hanging or standing position ........................................................................................15
4.2 Mounting ........................................................................................................................................................................................16
4.2.1 Rotary stop ............................................................................................................................................................................16
4.3 Grounding ......................................................................................................................................................................................16
5 Operation ....................................................................................................................................................................................................17
6 Service and Cleaning ..............................................................................................................................................................17
6.1 Internal cleaning of hood, hose and 900 bend ...........................................................................17
6.2 Internal cleaning, arm system ...........................................................................................................................18
6.3 Regular maintenance .....................................................................................................................................................18
6.4 Adjusting the links ..............................................................................................................................................................18
7 Spare Parts................................................................................................................................................................................................19
8 Recycling .......................................................................................................................................................................................................19
Installation Figures .......................................................................................................................................................................5
Table of Contents
Declaration of Conformity ............................................................................................................................................4