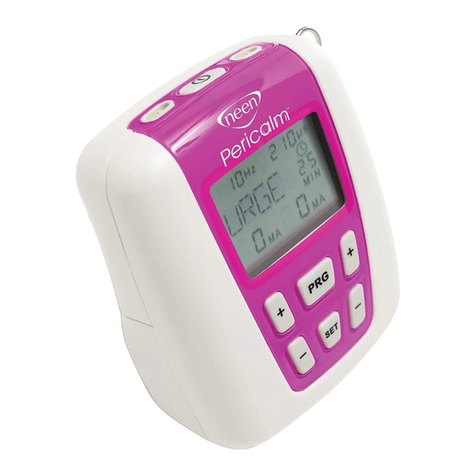
Neen Peritone User manual

Peritone
Instruction Manual – GB
Mode d’emploi – FR
Manual de Instrucciones – ES

PERITONE Instruction Manual - GB
2
This instruction manual is valid for the Neen PERITONE unit. It is
published by Patterson Medical. Patterson Medical does not guarantee
its contents and reserves the right to improve and amend it at any time
without prior notice.
Amendments will however be published in a new edition of this manual.
Revised Issue Date: October 2010 Document Number: VM-NEEN102-OM001-0
Language Contents
4 - 33 Instructions for use - GB
34 - 65 Conseils d’utilisation - FR
66 - 96 Instrucciones de uso - ES

PERITONE Instruction Manual - GB
3
Contents
4 - 5 Warnings
6 Introduction
7Contraindications & Precautions
8 - 9 Description of PERITONE Unit & Functions
10 - 11 Quick Start Instructions
12 - 13 Advanced Instructions
14 Recording Information
15 - 16 Statistics
17 - 18 Electrode Types & Tips
19 Care & Maintenance
20 Specifications
21 Interference
22 Troubleshooting
23 - 25 Software
26 Disposal & Applications
27 - 30 Information regarding Electromagnetic
compatibility and interference (EMC)
31 Warranty
32 Clinical References

PERITONE Instruction Manual - GB
4
Warnings
•This unit must be used with the guidance of a Physiotherapist,
Doctor or Continence Advisor.
•Type BF equipment, Continuous Operation.
•Do not insert lead wires into a mains power supply.
•Do not immerse the unit into water or any other substance.
•Do not use the PERITONE in the presence of a flammable
anaesthetic gas mixture and air or with oxygen or nitrous oxide.
•If using rechargeable 9 Volt PP3 Nickel Metal Hydride batteries,
be sure to use a CE approved battery charger. Never connect the
PERITONE directly to a battery charger or to any other
mains powered equipment.
We advise not to use Ni-Cad rechargeable batteries.
•Patient Electrodes including all skin surface electrodes, vaginal and
anal electrodes are for single patient use only.
•Use only CE approved vaginal or anal electrodes i.e. PERIFORM®+
or ANUFORM®.
•Keep out of reach of children.

PERITONE Instruction Manual - GB
5
Follow
instructions
for use
Type BF
Equipment
Do not dispose in normal
dustbin (see page 26 for the
disposal instructions)
•To avoid the effects of electromagnetic interference never use the
PERITONE device, within 4 meters of a cellular telephone or near
any other powerful radio interference producing equipment
that produces electrical sparks etc. In the electromyography
(EMG) mode, the PERITONE device may be susceptible to strong
interfering radio type emissions that may lead to temporarily
increased EMG microvolt readings. The reading will immediately
return to the correct value when the interference ceases.
(Remember that a relaxed muscle should read below 3.5 µvolts)
•No modification of this equipment is allowed!
Symbols on the rear cabinet of PERITONE explained:

PERITONE Instruction Manual - GB
6
Introduction
EMG (Electromyography) biofeedback is a method by which muscle
activity is recorded and displayed on a unit to assist in the retraining
of muscles. The PERITONE is a simple to operate, single channel
EMG unit. It has been designed for use in a variety of applications,
in particular for diagnosing continence problems and for
biofeedback of pelvic floor muscles. It can also be used very
effectively for Sports and General Physiotherapy applications.
The PERITONE is an accurate and sensitive single channel EMG
unit that measures muscle activity down to as low as to 0.2 µV
(microvolts) and up to 2000 µV. The diverse range enables the
unit to measure even very weak muscle activity. It displays the
biofeedback by way of bright LED lights on the front of the unit
and also gives audio feedback.
As well as measuring muscle activity, it is important to follow an
individual patient’s progress. By locking the unit, it records the
average work/rest, onset and muscle release parameters and time.
All session data will be added together to form the overall average
reading for the given period. This includes the number of trials
performed and average muscles activity, ideal for when patients
take PERITONE home and return to clinic.
Conditions known to respond to EMG:
•Incontinence •Pelvic pain •Patella femoral pain
•Neck and shoulder girdle pain •Lower Back pain
•Spinal conditions •Chronic tension headache
•Phantom limb pain •Asthma •Post-traumatic stress disorders
•Neuro feedback •Repetitive strain injury

PERITONE Instruction Manual - GB
Contraindications & Precautions
Read this operating manual before using the PERITONE
EMG should not be used:
•During menstrual period (when using a vaginal probe).
•If symptoms of bladder infection are present.
•During pregnancy (unless medically advised).
•With patients who have diminished mental capacity or physical
competence who cannot handle the unit properly.
•Do not place electrodes inside mouth.
•The patient should use the unit only as prescribed.
•Do not immerse the unit in water or any other liquid.
•If in doubt about the use of the PERITONE unit, call your Doctor,
Physiotherapist, Continence Advisor or your distributor for advice.
7

PERITONE Instruction Manual - GB
Description of PERITONE Unit & Functions
8
Front
Pressing the
START button
initiates a
program
SET sets
the EMG
program
+Increases EMG
threshold or alters
the parameters
when setting up
a program
–Decreases the
EMG threshold
or alters the
parameters when
setting up
a program
Pressing the ESC
(escape) button stops
a program

PERITONE Instruction Manual - GB
9
Top
Rear
The concealed
LOCK button locks
the program and
allows viewing
of recorded
information.
FIBRE OPTIC – Fibre
optic lead wire plugs
in here for use with
optional PC software
Battery
compartment
EMG REF – the EMG
reference lead wire
plugs in here
INPUT – EMG
biofeedback lead
wire plugs in here

PERITONE Instruction Manual - GB
Quick Start Instructions
1. Insert a 9 volt PP3 Alkaline battery into the battery compartment.
Can also use a rechargeable Nickel Hydride battery which has
a longer life than the Ni-Cad rechargeable batteries.
2. Insert the EMG reference and EMG lead wires into the labelled
sockets at the top of the unit as shown on page 9.
3. For pelvic floor muscle biofeedback - remove the surface
electrodes and/or PERIFORM®+ or ANUFORM®from their
outer packaging. For the time being, do not remove the surface
electrodes from the clear plastic film.
4. Connect one surface electrode to the pin connector at the end
of the EMG reference lead wire. The reference lead wire only
requires one surface electrode. Attach the PERIFORM®+ or
ANUFORM®cables to the pin connectors at the end of the EMG
lead wire.
5. For general muscle biofeedback – instead of attaching the
PERIFORM®+ or ANUFORM®electrode to the EMG cables attach
2 surface electrodes.
6. Make sure your skin around the treatment area is free from
grease or oil.
7. Carefully peel the electrodes from the clear plastic film -
Do not throw this plastic film away.
8. Attach the electrode(s) to the appropriate muscle and insert the
PERIFORM®+ or ANUFORM®if you are using it. The reference
electrode should be placed over a bony point i.e. for pelvic floor
retraining place on the hip area.
9. Turn the unit on by pressing ON/OFF button once.
10

PERITONE Instruction Manual - GB
10. Set up the Threshold level microvolt (µV). This is achieved by
contracting your muscles for 5 seconds and taking a reading
of the peak value. The values on the LCD screen will be moving
up and down. Take approximately 40% of the peak value.
E.g. if the reading moves from 25-30 µV, take 40% of 30 µV
which is 12 µV as the threshold level. This level will be different
for each individual.
11. Set the Threshold level by pressing the + or - button.
12. Set the desired parameters by pressing the SET button. This will
move you through the parameters for each mode (VOL, WRK,
RST, TRS, FAB, DOF, WDE – see page 12 for further details).
Press the + or - buttons to change each parameter.
13. Place the unit on a desk in its stand or hold the unit.
14. Relax so that the microvolts reading is as low as you can manage.
15. To start the program, press the START/ESC button. To end
the program before it is complete, press the START/ESC button
again or turn the unit off.
16. When you have finished, remove and replace the electrodes
onto the clear plastic film and reseal them in the plastic bag.
If you are using a PERIFORM®+ or ANUFORM®, clean the probe
and let it dry before sealing it in its plastic bag. See cleaning
information on page 19.
17. Store the surface electrodes in a cool place, such as a fridge
to extend their ‘in-use’ life.
NOTE: If the parameters of the unit cannot be changed when
pressing the SET button, the unit will need to be unlocked. Use the
pin from one of the lead wires and press it into the concealed LOCK
button at the back of the unit
11

PERITONE Instruction Manual - GB
Advanced Instructions
12
Firstly, the EMG Threshold level (THRS) requires setting up as accurately
as possible. The threshold level will vary from one patient to another.
The threshold level is a goal or target a patient strives to achieve when
contracting their muscles or when performing exercises.
To set up the threshold the patient should be asked to contract and/or
perform the exercise holding the position for approx. 5 seconds and then
relax for 5-10 seconds before repeating the contraction or movement.
Note the peak microvolt µV reading displayed on the LCD. The microvolt
readings will change due to muscle variation.
Calculate the average of the two peak readings and set the threshold
between 40-50% of this reading.
Example: Average Peak reading: 30µV take 40% of this value = 12µV
threshold setting.
To adjust the threshold setting (shown at the top of the LCD screen)
press the THRS + or – buttons.
Setting the EMG parameters
•
Pressing the SET button consecutively takes you through a looped menu
from which you can change the parameters for biofeedback including
volume, work/rest times, trials, feedback sound, serial data and band settings.
Press SET
to see:
VOL
Press the THRS + or THRS – button to adjust the sound volume between 0 – 10.
WRK
Press the THRS + or THRS – button to adjust the work time in seconds (2-99).
RST
Press the THRS + or THRS – button to adjust the rest time in seconds (2-99).
TRS
Press the THRS + or THRS – button to adjust the number of trials (repetitions).
FAB Press the THRS + or THRS – button to select either:
FBL FAB - to get audio feedback when the patient exceeds the threshold.
FOF FBL - to get audio feedback when patient goes below the threshold.
FOF - to turn off any audio biofeedback.
DON Press the THRS + or THRS
–
button to switch serial data on or off.
DOF Switch on if connected to PC (this will stop the device from turning off).
WDE Press the THRS + or THRS – button to select WDE wide filter band or
NRW NRW narrow filter band.

PERITONE Instruction Manual - GB
13
Electrodes placed on the legs, arms, face buttock or pelvic area use WIDE
BAND setting. All other areas i.e. abdomen, chest, shoulder, upper arms
and back use the NARROW BAND setting.
Narrow band setting is used due to the interference from the electrical
activity of the heart which needs to be eliminated from the EMG signal.
Pressing the ESC button will record and store the parameters that have
just been set until it is reprogramed. To start the program press the START
button, to escape press the ESC button.
At the end of each session for example Work 5 seconds, Rest 5 seconds
and 5 trials (Repetitions) the LCD display will highlight the statistics
(described on page 15 and 16). The results will differ from one patient
to another.
EMG Statistics.
Once a session has finished WAV will appear on the screen.
Press the SET button consecutively to read all the statistics.
When you have completed reading the statistics you can either continue to
press the SET button to read the statistics again or press the ESC button to
come out of the program. NOTE: Once you have pressed the ESC button you
will lose all the information.
If you are linked to a PC the statistics can be saved for future reference.
Press SET
to see:
WAV This is the work average for the session measured in (µV) microvolts.
Average readings will vary from one patient to another.
RAV This is the rest average for the session measured in µV - Below 4 µV
a muscle is beginning to rest.
OST This is the average onset of muscle contraction measured in seconds,
readings below 1 second can be considered normal.
RLS This is the average muscle release measured in seconds, readings
below 1 second can be considered normal.

PERITONE Instruction Manual - GB
Recording Information
To record and store the information for one patient over a number
of sessions using the LOCK function mode
•Remove the battery compartment cover.
•Using a thin rod (end of the lead wires) press the concealed
LOCK button once (see diagram on page 9) and you will hear two
beeps, this indicates the unit is locked. A padlock icon will appear
on screen.
•A series of sessions can then be undertaken. After each session
press the SET button consecutively to read the statistics for that
particular session. After reading all the statistics, press the ESC
button. The information at this point will be lost for good.
•To view the statistics over a number of sessions press the
concealed LOCK button once to unlock the unit. You will hear one
beep. All session data will have been added together to form the
overall average reading for the given period. This includes
the number of trials performed and average muscles activity.
•Press the SET button consecutively to view these statistics.
•After reading all the statistics, press the ESC button.
The information at this point will be lost for good.
•Don’t forget to LOCK the unit again if you wish to record the
average statistics of another series of sessions.
If you are linked to a PC read the software instructions for
downloading patient recorded details.
NOTE: Programs that are not completed will not be recorded.
NOTE: While the unit is in operation only the volume and threshold
can be changed. Recording only occurs by pressing the start button
and when the program is completed.
14

PERITONE Instruction Manual - GB
Statistics
15
EXAMPLE
The Work / Rest statistics automatically shown at the end of every
Work / Rest cycle are derived as follows:
1. TLS - Trials: Displays the number of work rest trials for the entire
period the unit was locked.
2. WAV - Work Average: The average value in microvolts of all the
Work segments excluding the first second of each segment.
3. RAV - Rest Average: The average value of the Rest segments
excluding the first second of each segment.
4. OST - Average Onset: The average time taken after each
respective “Work” prompt for the EMG to reach 75% of the
average value of the third second of that particular work segment.
In the case that only two seconds of work has been selected
then, Average Onset is the average of the time taken to reach
75% of the average value of the second second (after the “Work”
prompt). If any of the Onsets in any of the trials is more than 2
seconds then it (or they) will be rejected and indicated by a dash
before the number displayed. The display will indicate only the
average of those trials which were 2 seconds or less. If all the
Onsets were more than 2 seconds then the display will read AB2.
(continued)
MICROVOLTS
INITIAL
REST
1 WORK 1 REST 2 REST2 WORK
“WRK”
ONSET 1
RELEASE
1R
ELEASE 2
75%75%
37.5% 37.5%
ONSET 2
“RST” “RST”“WRK”
(2 TRIALS, 4 SEC WRK, 4 SEC RST)
PROMPTS
1 2 3 4 5 6 7 8 9 10 11 12 13 14 15 16 17 18 19 20
µV

PERITONE Instruction Manual - GB
16
5. RLS - Average Release: The average time taken, after the REST
prompt to reach 37.5% of the previous third second of work
or as in item 4 above, the second second if only 2 seconds of
work has been selected. As in the case of Onset, if any Release
of the trials is more than 2 seconds then it (or they) will be
rejected and the display will indicate the average of only those
which were 2 seconds or less but a dash (-) before the number
displayed will indicate this rejection.
6. If all the Releases were more than 2 seconds then the display
will read AB2.
AMPLITUDE
WIDE
FREQ
19-375 Hz
100-375 Hz
0db
18 50 100200 Hz
50 Hz NOTCH (Except Canada, 60 Hz NOTCH)
-3db 45-58 Hz (WIDE)
370 Hz
-3db
-33db
NARROW
WIDE AND NARROW FILTER SETTINGS
FREQUENCY RESPONSE

PERITONE Instruction Manual - GB
17
Electrode Types & Tips
Both internal and external electrodes can be used with this unit.
They are single patient use only.
Internal electrodes:
021972 PERIFORM
®
+ (vaginal electrode) 011503 ANUFORM
®
(anal electrode)
External self adhesive electrodes:
012571 50x50mm
012572 90x50mm
012574 30mm diameter
012575 50mm diameter

PERITONE Instruction Manual - GB
18
Tips
•If using an internal electrode, after use always wash it in warm soapy
water, rinse and dry thoroughly and carefully store it for your next
treatment session.
•Never let anyone else use your electrode.
•Follow all instructions provided with the electrode.
•If using self adhesive electrodes always cleanse the skin with soap
and water, then rinse and dry well in order to ensure good adhesion of
the electrodes.
•Clip away hairy skin using scissors. Do not shave the area.
•After using surface electrodes, place them back on the plastic film they
were packaged in and store them in a cool place i.e. the fridge.
•After repeated use, the sticky surface on the electrode will eventually
become dry. This surface is water based so by adding a few drops
of water will give you a few extra days of electrode life back!
•If you find the electrodes will not stick due to oily skin, cleanse the
skin with soap and water, then rinse and dry the area around the
electrode site. If this does not work, try cleansing the skin with a swab
impregnated with alcohol.
•The electrodes conductive material is water- based. If it becomes
saturated (e.g. from perspiration), it will lose its adhesive qualities. After
use leave the electrodes face up overnight to dry out (replace on plastic
film in the morning). At some point the electrodes will become dry.
Moisten the adhesive surface with a few drops of water, and apply onto
the plastic film overnight. This procedure will increase the electrode life
by few more days.

PERITONE Instruction Manual - GB
19
Care and Maintenance
Control Unit:
•Wipe the surface after use with a damp cloth or antiseptic wipe.
•Do not use cleaning sprays or alcohol based cleaning solutions.
Battery:
•To change the battery, open the battery door on the rear of the control
unit by pressing down on the raised rib pattern just below the belt clip.
Lift the battery out of the compartment. This is very easy and can be
done by the user.
•Check periodically for any discharge from the battery.
•Remove battery completely from unit if not in use for any extended
period of time (typically one week).
•Low battery indicator of 6.9 volts shown on LCD display.
When flashing change battery for a new one.
•Preferably use a PP3 alkaline battery.
Lead Wires:
•
The lead wires should be handled carefully and never stretched, as this can
cause the stimulation to function below normal standards or not at all.
•
Examine lead wires before each treatment for loose connections or damage.
•Avoid twisting the lead wires.
•Wipe lead wires after use with a damp cloth or antiseptic wipe.
•Store the lead wires carefully after each use.
Self-Adhesive Electrodes:
•
Check the short connectors have not become separated from the electrodes.
•Replace electrodes onto plastic film after use. If they drop onto the floor
debris will adhere to conductive gel rendering the electrodes ineffective.
Vaginal / Anal Electrodes:
•Check the connectors have not become separated from the probe.
•Before & after use always wash it in warm soapy water, rinse and dry
and carefully store.
•Never let anyone else use your electrode.
•Follow all instructions provided with the electrode.
Caution: Static electricity may damage this product.
NOTE: Only Patterson Medical or appointed distributors/importers are
approved to undertake servicing.

PERITONE Instruction Manual - GB
20
Specifications
1. Single Channel
2. EMG Range: 0.2 to 2000 µV RMS (continuous)
3. Sensitivity: 0.l µV RMS
4. Accuracy: 4% of µV reading +/- 0.3 µV at 200 Hz
5. Selectable Bandpass filter - 3db Bandwidth;
a. Wide: 18 Hz +/- 4 Hz to 370 Hz +/- 10% - Reading
below 235 microvolts. 10 Hz +/- 3 Hz to 370 Hz +/-
10% - Reading above 235 microvolts.
b. Narrow: 100 Hz +/- 5% to 370 Hz +/- 10%
6. Notch filter: 50 Hz (Canada 60Hz) - 33 dbs (0.1% accuracy)
7. Common Mode Rejection Ratio: 130 dbs Minimum @ 50 Hz
8. Battery: PP3 Alkaline
9. Work / Rest periods: 2-99 seconds
10. Number of Trials: 1-99
11. Low battery indication at 7.4 volts +/- 0.2 volts and
auto shut off 10 minutes after last key pressed
12. Environmental conditions for storage & transport:
-10 to +50ºC. 0-90% Humidity
13. Physical Dimensions: Length 128.5mm, Width 64mm,
Depth 28.3 mm
14. Weight: 0.15 Kg
Table of contents
Languages:
Other Neen Medical Equipment manuals
