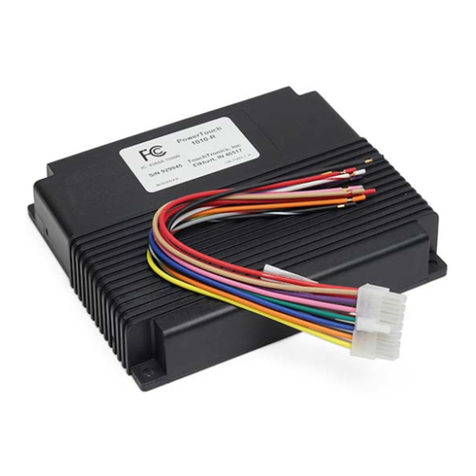
Neets Control Zulu User manual


Page 1 Doc. no#: 310-0050-001-002 R103 Manual
Foreword:
The purpose of this document is to describe how to install and configure the Neets Control - ZULU.
COPYRIGHT - All information contained in this manual is the intellectual property of and copyrighted material
of Neets. All rights are reserved. You may not allow any third party access to content, information or data in
this manual without Neets’ express written consent.
CHANGES - Neets reserve the right to change the specification and functions of this product without any
notice.
Questions, AFTER reading this manual, can be addressed to your local dealer or:
Neets
Langballe 4
8700 Horsens
Denmark
or you may use our contact form at www.neets.dk
Revision list:
Author: Date
Description
Pages
SDV 14/04-10
First release.
All
SVL 16/09-10
Added new case to fault finding section
11
DB 09/03-12
New company address
1

Doc. no#: 310-0050-001-002 R103 Manual Page 2
Table of content
Foreword: .............................................................................................................. 1
Revision list:........................................................................................................... 1
Table of content..................................................................................................... 2
Description: ........................................................................................................... 3
Connections on units ............................................................................................. 4
Technical description ............................................................................................. 5
USB ................................................................................................................................................................ 5
Power output ................................................................................................................................................ 5
Time Battery (RTC) ........................................................................................................................................ 5
RS-232 Port.................................................................................................................................................... 6
IR/RS-232 ports ............................................................................................................................................. 6
uSD-Card........................................................................................................................................................ 6
Switch and LED.............................................................................................................................................. 7
I/O Ports ........................................................................................................................................................ 7
LAN ................................................................................................................................................................ 7
Onboard relays.............................................................................................................................................. 8
Controlling an electric screen or lift ..............................................................................................................................................8
Cable in/out of the box .......................................................................................... 9
Fault finding......................................................................................................... 10
System log file .............................................................................................................................................................................11

Page 3 Doc. no#: 310-0050-001-002 R103 Manual
Description:
Neets Control - ZULU is the biggest system in the Neets product portfolio and the first control system in the
new generation of Neets control systems. The system can be controlled via web browser (IPhone, IPod Touch,
table PC etc.).The system has a LAN connection making this feature possible. All it requires is a wireless access
point.
Neets Control - ZULU is intelligence behind the scene. The box itself is mounted over the ceiling and controlling
the requested units through RS-232, IR, LAN and I/O.
Description
Part number#:
Neets Control - ZULU
310-0050
RS-232 (Rx/Tx)
1
RS-232 (Tx) / IR (controls up to 8 devices)
4
LAN device control (5 devices +programming)
1
I/O
24
Built in PSU
1
Built in relays
4
Micro SD card
1
Real time clock
1
Test buttons
4
LED
4
USB port
1
Controlled from web browser via wireless LAN
Yes
PIR sensor input
Yes
Light on/off
Yes
Room darkening
Yes
Screen up/down
Yes
Volume control
Yes
Alarm when RS-232 device is removed
Yes
Projector feedback
Yes

Doc. no#: 310-0050-001-002 R103 Manual Page 4
Connections on units
Number
Description
1:
Extern 12V DC out
2:
Fuse to enable screen mode on RELAY 1 and RELAY 2 (13)
3:
RS-232 port
4:
RS-232 or IR control out
5:
230 VAC power in
6:
Relay connectors
7:
LED and relay test button
8:
Input/Output
9:
Mini USB
10:
SD kort
11:
LAN
12:
Time battery
13:
Screen control connect
14:
Relay connectors
15:
Power indication

Page 5 Doc. no#: 310-0050-001-002 R103 Manual
Technical description
Technical details:
RS-232
Baud: 1200-115200
Data bit:7/8
Parity: none, even, odd
Stop bit: 1/1,5/2
IR
Transmit 381 Hz –500 KHz
LAN
10/100 MBit
Input
Sence low < 1 VDC
Sence high > 4 VDC
Output
Open drain
Max voltage: 24 VDC
Max current: 0,5 A
Power
110-230 V
Power out
12 VDC Max 0.35 Amp
Relay load max AC1
1150 Watt
Relay load max AC15 (230 VAC)
500 Watt
Relay single-phase motor rating (230 VAC)
370 Watt
Relay max voltage
230 VAC
Maximum screen size (recommended)
2,5 meters
USB
The USB port can only be used to program the Neets Control –ZULU from the Neets
Project designer software. It cannot be used to control any devices what so ever.
From the USB you can also power the system (except 12VDV/350mA out and the
onboard relays, those two things will not work). This is to be used in programming
situations, so you do not have to connect 110/230 volt to the unit to program it, BUT
for long periods of testing (testing your program) it is recommended to connect
110/230 to the unit, since the USB power is not made for long time powering of the
unit (more that 15-20 minutes at the time).
The USB connector needed to connect to the Neets Control –Zulu is of the type mini
USB B 5P. You can buy this cable on the web (buy a USB A to Mini USB B 5P).
The cable type is also widely used for MID device and compact cameras and so on.
Power output
The power output is used to power any external device that might need 12VDC (up to
350mA).
There is a small LED next to the connecter that indicate when there is power on the
connector
Time Battery (RTC)
The time keeping battery is of the type CR1216. The lifetime of the battery is
around 5-7 years.
To obtain a new battery, contact your distributor or search the web for CR1216.
Slide out the old battery (while power is disconnected) and slide in the new
battery. To reset the clock, you will need to upload the project for your system
again.

Doc. no#: 310-0050-001-002 R103 Manual Page 6
RS-232 Port
The onboard RS-232 port (TX-1 and RX-1) is used for two way
communication. This port is used for the device you want to use
reply on (e.g. your projector). It can also be used for uploading
settings to the unit (be aware that this is the most slow way to
do this).
To connect the Neets Control - ZULU you must wire the RS-232
cable as shown here to the right. This is a Female 9 pin SUB-D
connector that will fit into a standard computer RS-232 port, or
any USB to RS-232 converter.
IR/RS-232 ports
The Zulu has 4 ports (TX-2, TX-3, TX-4 and TX-5) that can be configured (in software) either as RS-232 or as IR
emitter.
PIN 5 <-> GND
PIN 2 <-> Tx
uSD-Card
The uSD-Card is used to storage firmware, homepage and the
settings. Under normal operation removal of the uSD-Card is not
needed. If needed, you can copy the settings and the firmware
directly onto the card.
To remove the SD Card from the unit by pushing the SD Card gently
into the holder about 1mm (by using your finger tips) and then let go
and it will slide out.
When used as RS-232
transmit port. Connect the
device to e.g. TX-2 and GND,
as shown here above.
When used as single IR port.
Connect the IR emitter to e.g.
TX-2 (white striped wire) and
GND, as shown here above.
When used as dual IR port. Connect
the IR-1 emitter to e.g. TX-2 (white
striped wire) and black wire on IR-1
emitter to IR-2 emitter (white striped
wire), and black wire from IR-2 emitter
to GND, as shown here above.
Junction
REMEMBER to remove power from
unit before removing Micro SD card!

Page 7 Doc. no#: 310-0050-001-002 R103 Manual
Switch and LED
The 4 switch’s (SW-1 to SW-4) is used to test the relay functions. The LED’s
are also used to indicate any fault modes that the software can end in (see
section: fault finding).
When powering the system by USB it is not possible to test the relays.
To get the unit into boot mode (used then using programming over RS-232),
the following needs to be done:
Press, and hold all 4 switch for 5 seconds (until all 4 LED flashes fast)
I/O Ports
The Neets Control –ZULU has 24 i/o’s onboard. They can be used for external
keyboard, PIR (movement) sensor, Keyboard lock, extra relays and so on.
The ports are not potential free, that means you will need external relays if
you need to prevent e.g. ground loops.
When used as output they are active low (when the software says activated
the pin are tired to GND thru a FET transistor also called open drain/collector
function). You can draw up to 24VDC/500mA
When used as input the voltage has to be below 1 Volt DC to be accepted as
LOW, and above 4 VDC (but below 24 VDC) to be accepted as high.
LAN
The network connector is for connecting the system to the local area network.
There are two LED’s on the connector.They have the following meaning:
Color:
Off
On
Blink
Yellow
No Link
Link
Activity
Green
10Mbit
100Mbit
Default IP settings is:
IP address:
192.168.254.253
Subnet:
255.255.255.0
10/100Mbit:
Auto
DHCP:
Disabled

Doc. no#: 310-0050-001-002 R103 Manual Page 8
Onboard relays
On each of the four relays you have
access to both the NO (Normal open
contacts) and the NC (Normal close
contacts). This gives you the
opportunity to use it according to
your needs.
When using the 4 relays you can select what type of voltage you want to use at installation time.
The flexibility of the Neets Control - ZULU offers you the possibility to control high voltage or low voltage
(Please note that high and low voltage cannot be used simultaneously).
Note that the relay box’s relay 1 and 2 from factory is
configured to control a 230 VAC screen or lift. Using the
“Screen” connector and therefore you must not use the
“RELAY 1” and “RELAY 2” connectors.
If you do not want to use the “Screen” connector, please
remove fuses F402 and F403 “SCREEN FUSES 2*5AT”.
Read the section “Controlling an electrical screen or lift”
for further details.
Controlling an electric screen or lift
The relays offer your easy connection of an electrical screen or lift.
By using the screen terminals, you get an easy connection of your screen, and even more high security mode
prevents you from accidentally making short circuit.
The relay 1 (RELAY 1) is now controlling the screen in one direction, and there is
ONLY power to the screen´s other direction (RELAY 2) when relay 1 (RELAY 1) is
“released”. Be sure to set up the software to fit this hardware configuration.
To enable the screen mode insert the fuses F402 and F403 (SCREEN FUSES 2*5AT)
Com
NCNO

Page 9 Doc. no#: 310-0050-001-002 R103 Manual
Number
Description
1:
Fuses for screen
2:
When using the screen connector, you must not use the RELAY
1 and RELAY 2 connector at the same time.
3:
Dry contacts free to be used
Cable in/out of the box
The Neets Control - ZULU box comes with rubber globs. This allows you to use any cable size you want, and the
taps inside the box gives you a good and flexible way of safely fixating the cable.
Use the include binders to tie the cables like below or what fits your installation.
Use included
binders to secure
the cables.

Doc. no#: 310-0050-001-002 R103 Manual Page 10
Fault finding
When errors occur the LED will indicate this. The following will give you a guide to find these errors.
In the Neets Control –ZULU the LED´s are placed here:
Fault
Solution
SD card missing
Control that the SD card is mounted correctly and that the
uSD card that you are using are formatted with FAT.
Unexpected Error
There are properly problems in the project you have
uploaded. Try e.g. to upload a empty project and see if this
works or contact Neets or you dealer
Error in serial number
Doing the production of the unit, something has gone
wrong. You need the return the unit to Neets or your
dealer for replacement/repair.
Unzipping config.zip
file after power on
If you manual have placed a project file on the uSD card
the system will extract the files needed to run the project.
After extraction, the system will start to run the project.
Unable to start the
project
This scenario often happens when the uSD card in the unit
are replaced with a blank uSD card. Alternative there can
be a problem in the project you have uploaded. Try e.g. to
upload a empty project and see if this works or contact
Neets or you dealer
System are in boot
mode
You have put the system in boot mode. This mode allows
you to communicate with the system using Rx1/Tx1. See
the section “Switch and LED” on page 7 for details on how
to get the system into boot mode.

Page 11 Doc. no#: 310-0050-001-002 R103 Manual
Fault
Solution
System are resuming
factory default
settings
When pressing Switch 1 and 4 during power on the system
will delete the current settings and resume factory default.
This method are only intended to be used if the control
system lock up and enter “Unexpected Error”
System log file
The Neets Control –ZULU has a log file, which contains information, warning and error that the system
encounters during run.
The log file looks like below.
To give you the best support possible we recommend that you have access to the log file when contacting
support.
There are two ways to get access to this file:
uSD card
If you put the uSD card into your computer you find the log file here: Drive\System\Log.txt
HTTP
Enter the following address into your browser: http://xxx.xxx.xxx.xxx//System/Log.txt.
xxx.xxx.xxx.xxx are the IP address of your Neets Control –ZULU.
Remember the two“//”.
Table of contents
