Neilsen CT5643 User manual

220L SAND BLASTING CABINET WITH BLASTING GUN
CT5643
ORIGINAI INSTRUCTION
Cannon Tools Limited
Address: 20 Station Road, Rowley Regis, West Midlands, B65 0JU.UNITED KINGDOM
SAVE THESE INSTRUCTIONS FOR REFERENCE


EC DECLARATION OF CONFORMITY
We CANNON TOOLS LTD
20 Station road, Rowley Regis, West Midlands,B65 0JU.U.K.
Declare that the following machine complies with the appropriate basic safety
and health requirements of the EC Directive based on its design and type, as
brought into circulation by us.
In case of alteration of the machine, not agreed upon by us, this declaration
will lose its validity.
Product description:
220L SAND BLASTING CABINET WITH BLASTING GUN
Model: CT5643
Applicable EC Directives:
EC Machinery Directive 2006/42/EC
EC EMC Directive 2014/30/EU
ROHS - 2011/65/EU amended by 2015/863/EU Restriction of the use of
certain hazardous substances (RoHS)
Harmonized standards
EN 1248:2001+A1:2009, EN 60204-1:2018,
EN 55015:2013/+A1:2015, EN 61547:2009,
EN 61000-3-2:2014, EN 61000-3-3:2013,
EN 62321-4:2014+A1:2017,EN 62321-5:2014,EN 62321-7-2:2017,
EN 62321-6:2015, EN 63000:2018
20 Station Road, Rowley Regis, West Midlands, B65 0JU.U.K.
Mr. Gurcharan Tony Singh Sanghera
Managing Director
CANNON TOOLS LTD
2020-05-06

1. SPECIFICATIONS
Air compressor delivery:
60-120PSI @ 15-25CFM
Maximum operation pressure:
110 PSI
Nozzle size:
4/5/6/7mm
Working space:
84 x 55 x 38cm
Overall Dimensions:
138 x 87 x 63cm
Noise pressure
70dB(A)
12V FLUORESCENT WORK LIGHT WITH 110 V/ 230VAC 50HZ input 12V
800mA output
2. IMPORTANT SAFETY INFORMATION
Any blast cabinet will produce a powerful flow of abrasive Particles. Please avoid
personal injury and property damage. Study this manual thoroughly before
assembling, operating or servicing this blast cabinet.
General Safety Information
1). WARNING! Ensure Health & Safety, government and local authority
regulations relating to the the use of shot blasting are adhered to when using this
equipment. Familiarise yourself with the applications, limitations and potential
hazards peculiar to the cabinet.
2). WARNING! Disconnect the cabinet from the mains power and the air supply
before attempting to change accessories or carry out any servicing or
maintenance.
3). Maintain the cabinet in good condition. Replace or repair damaged parts. Use
genuine parts only. Unauthorised parts may be dangerous and will invalidate the
warranty.
4). Locate cabinet in a suitable work area and keep area clean, tidy and free from
unrelated materials. Ensure there is adequate lighting.
5). Use only dry abrasives such as glass bead. Never use fluids or mix fluids with
another media in the unit.
6). WARNING! Always wear approved eye or face and ear protection when

operating the cabinet. Use mask when filling hopper. During operation, do not
expose the hands or skin directly in the line of the blast nozzle.
7). Keep the unit lid closed and secured when in use.
8). WARNING! Ensure correct air pressure is maintained and not exceeded.
9). Ensure all components seal properly after assembly.
10). Always keep the blast nozzle directed at the workpiece. Never use outside
the unit and always use with the lid closed.
11). Regularly check that the exhaust vent at the back of the cabinet is clear and
not blocked and that there is space between it and any wall. 1.Check hoses and
air lines for weak or worn condition before each use. Make sure all the
connections are secure before use.
12). Maintain correct balance and footing. Ensure the floor is clean and free from
blasting media spillage. Wear non-slip shoes.
13). Remove ill fitting clothing. Remove ties, watches, rings, and other loose
jewellery and contain and/or tie back long hair.
14). Keep children and non-essential persons away from the work area.
Specific Safety Instructions
1). DO NOT use the cabinet for a task it is not designed to perform.
2). DO NOT operate the cabinet if any parts are damaged or missing as this may
cause failure and/or personal injury.
3). DO NOT operate the cabinet with the lid open.
4). DO NOT stand on the cabinet.
5). DO NOT get the cabinet wet or use in damp or wet locations or areas where
there is condensation.
6). DO NOT operate the cabinet when you are tired or under the influence of
alcohol, drugs or intoxicating medication.
7). DO NOT leave the cabinet operating unattended.
8). When not in use disconnect from the electrical mains and the air supply.
Danger! Chemicals, including lead includes in this product or its
power cord. Wash hands after handling.

The dust can be created when you sweep, blast, cut, sand,
drill or grind materials such as wood, paint, metal, concrete,
cement, or other masonry. This dust often contains chemicals
known to cause cancer, birth defects, or other reproductive
harm. Wear protective gear.
Fire or Explosion Hazard! DO NOT USE a sand blaster around
combustible or flammable liquids, dusts, gases, oily rags, or
other materials that can explode or burn quickly. Some
abrasives crate sparks when they hit metal. Abrasives similar
to aluminum oxide may generate static electric sparks which
will cause fires or explosions in an unsafe environment.
Static electric shocks can be painful. Please wear leather or
rubber soled shoes or boots and stand on the ground to avoid
static electricity. A grounded wire attached to the sand blast
gun will safely remove the static electricity.

3. TECHNICAL DESCRIPTION
4. UNPACKING AND CHECKING
Carefully remove the product from the packaging and examine it for any sign of
damage that may have happened during shipping. Lay the contents out and
check them against the parts shown below. If any part is damaged or missing;
please contact the seller and do not attempt to use the product.

5. AIR SUPPLY
a). You will require an air pressure of 60-120psi, and an air volume of
at least 15cfm to operate the unit efficiently.
b). WARNING! Ensure air supply is clean, dry and does not exceed
125psi.Too high an air pressure and/or unclean or damp air will
shorten the product life due to excessive wear and may be dangerous,
causing possible damage and/or personal injury.
c). Drain the air supply tank daily. Clean compressor air inlet filter
weekly.
d). Line pressure should be increased to compensate for unusually
long air hoses (over 8 metres). The minimum hose and fittings bore
should be 10mm.
e). Keep hoses away from heat, oil and sharp edges.
f). Check airline hoses for wear and poor connections.
g). Cabinet input connection is 1/4”BSP.

6. ASSEMBLY & OPERATION
LEG INSTALLATION
1. Place cabinet on its back on a table or
Bench.
2. Remove M6 x 12 bolts nuts lock
washer & washers from bolt packet.
3. insert M6 x 12 bolt through leg & into
cabinet.
4. Place M6 washer and M6 lock washer
over bolt and M6 hex nut. Hand tighten.
5. Repeat above for remaining three legs.
FUNNEL, NET AND FRAME
FOUNDATION OF NET INSTALLATION
1. Stand cabinet upright.
2. Place net on funnel.
3. Remove four M6 x 20 bolts and
washers and four hex nuts from bolt
package.
4. Insert four M6 x 20 bolts and washers
through holes in funnel frame foundation
into cabinet. Place washers and nuts over
bolts and tighten.
SHELF INSTALLATION
1. Stand cabinet upright.
2. Remove eight M6 x 12 bolts, 16
washers and eight hex nuts from bolt
package.
3. Insert eight M6xl2 bolts and washers
through holes in leg and shelf, place
washers and M6 lock washers and nuts
over bolts and tighten.
4. Tighten leg bolts and level cabinet.

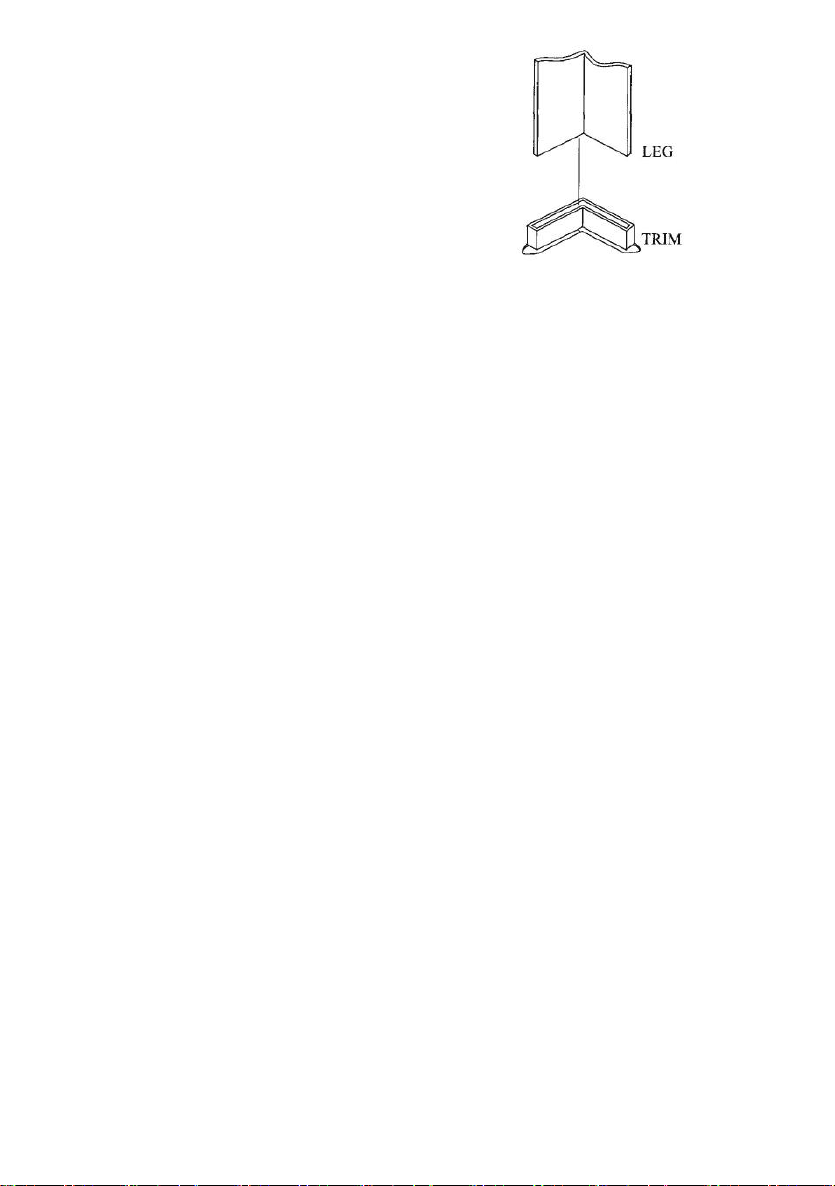
CABINET LEG TRIM MOULDING
Enclosed are four trim Mouldings for
bottom of cabinet legs. They may be
pushed in place, without tools.
AIR REQUIREMENTS:
For best results, we recommend a good 5
HP air compressor. A small nozzle/air jet
combo is use with a 3 HP air compressor.
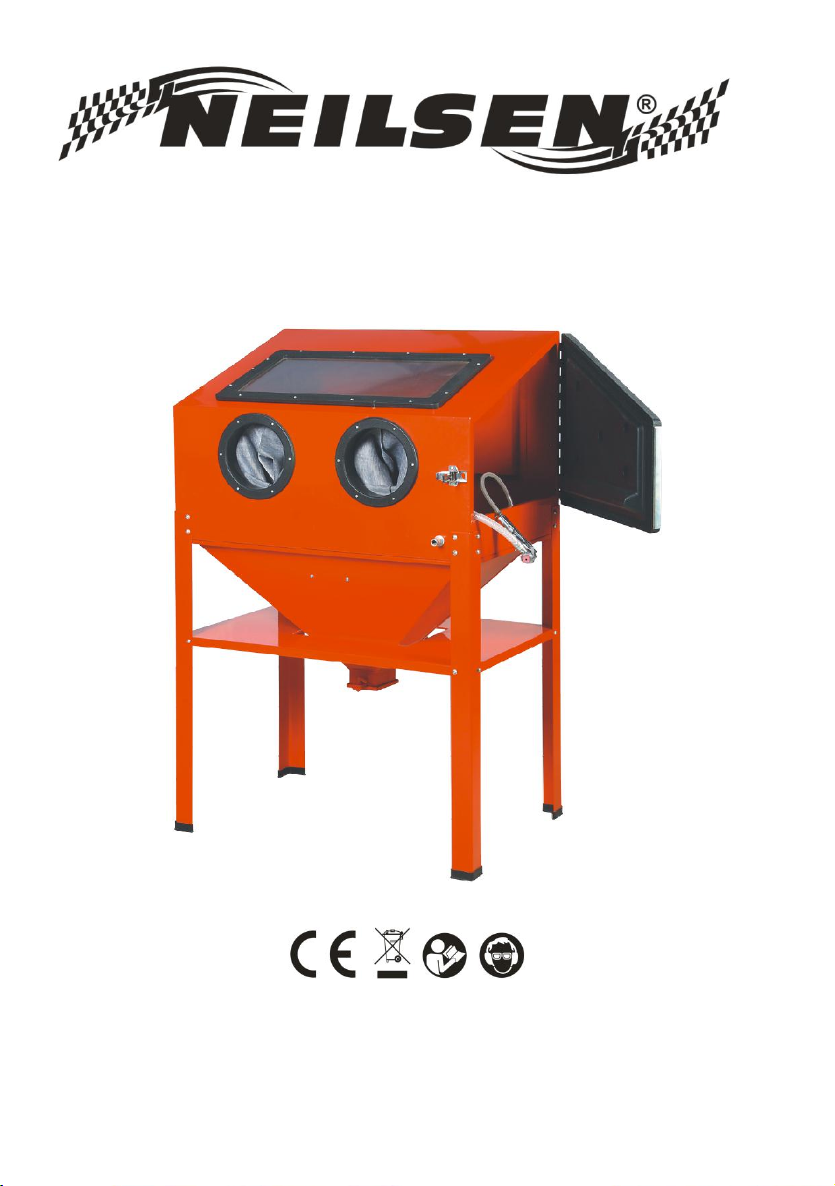
HOW IT WORKS
Your shop air hose enters front opening of cabinet and is connected to the air
inlet of power gun. Bottom handle of gun has 1/4" pipe threads which will fit most
air hose. Cabinet pickup tube leads to clear siphon hose which connects to gun
head assembly.
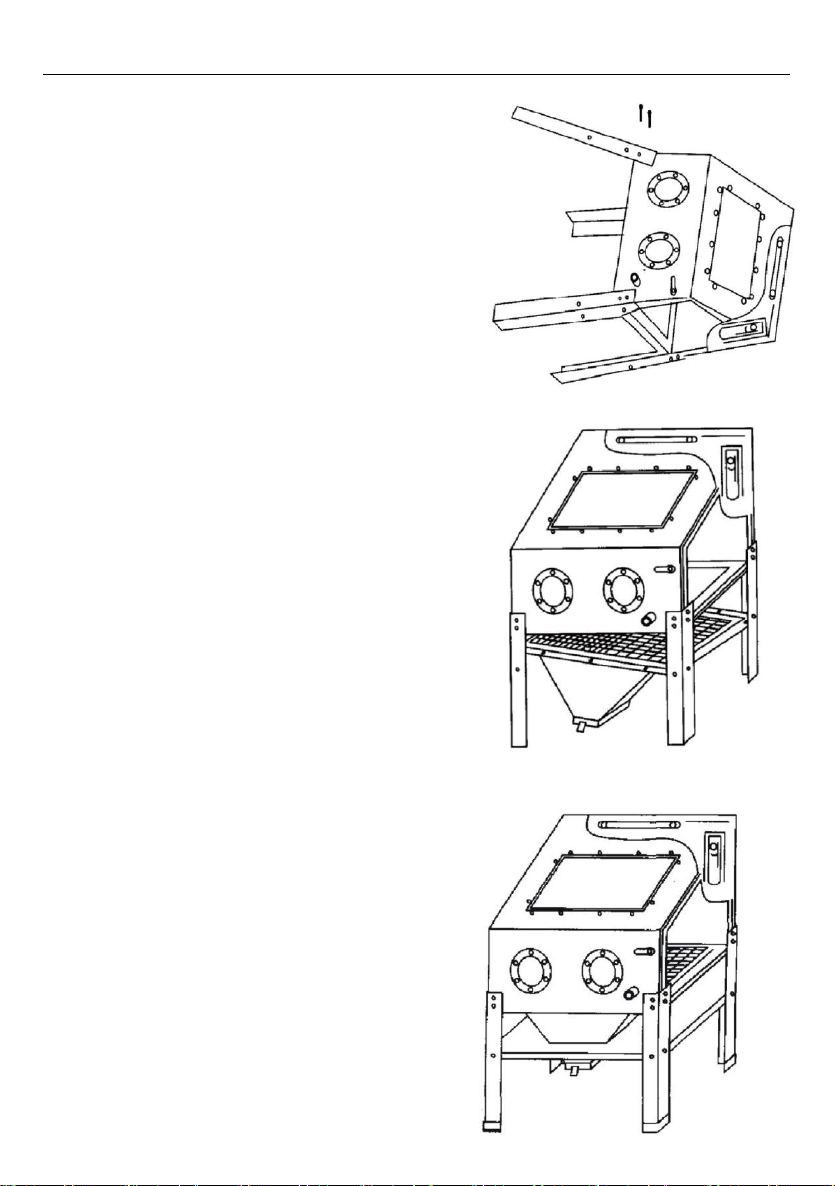
Pour glass beads or other abrasive into cabinet hopper through the side loading
door. Place parts to be blasted in cabinet and close door. With hands in cabinet
gloves aim power gun at object, pull trigger and let our unique siphon recycling
system do the rest. Rust, paint and scale are quickly removed, leaving the
original metal clean and intact. Abrasive drops to the bottom of cabinet for
continual recycling each time power gun is activated.
Abrasive can be re-used until it eventually breaks down or becomes dusty. To
discard worn abrasive simply place empty box under spring loaded trap door.
Add more abrasive and resume blasting.
Your shop vac connects to vacuum ferrule is necessary to remove the dust
created in blasting. When using a shop vacuum, be sure to install the paper filter
over the standard filter. Otherwise, abrasive could work its way into the vacuum
motor, causing bearing failure.
At right front of cabinet is an opening for your air hose from your compressor. An
ordinary 3/8” ID air hose should fit through this opening, connect your air hose
should fit through this opening. Connect your air hose to bottom handle of power
gun by screwing into place(use teflon tape or pipe compound-do not over tighten).
Close door and pull trigger a few times to test operation. You are now ready to
add abrasive.
Add suitsble abrasive by pouring through side door opening and allowing it to fill

funnel area. Do not over fill (1/2 full below work area screen is best).
NOTE: use a fine grade of abrasive to prevent clogging. We recommend
straining through a double layer of ordinary window screen. If it passes through
the screen, it will pass through the nozzle. YOU ARE READY TO START
BLASTING.
7. MAINTENANCE
NOTE: Disconnect power and air before the maintenance.
Cleaning: please clean the plastic door or parts with a soft cloth. DO NOT
use solvents to clean.
Avoiding Block: the moist media will cause the block of nozzle. Try
dislodging the media with a drill bit.
Blast Gun Connection: Please assemble them as picture shown, when
a blast gun need to be replaced.
WARNING: Ensure the cabinet is disconnected from the electrical and air
supplies before attempting any maintenance.
1. Keep the blast cabinet clean and dry. Do not use abrasives to clean the unit.
2. Ensure the blasting media does not become damp. Keep the air supply dry at
all times. Dispose of any damp media.
3. Replace media when it has becomes excessively dusty, loses its granular or
spherical appearance, or debris from workpieces mixes in with it. This is usually
noticed when media from the nozzle is accompanied by airborne dust which
lingers in the cabinet
4. To change media, place an appropriate container under funnel outlet and turn
the locking lever to open. Wear a dust mask to perform this task.
5. If used, regularly check that the exhaust vent at the back of the cabinet is clear
and not blocked.
6. If you use an extraction unit change the filters according to use.
7. Regularly check gun blast nozzle to ensure it does not become blocked with
media. Immediately replace worn or damaged nozzles.
8. If abrasive pick-up hose becomes blocked, re-power the unit and ensure the
door is correctly closed. Cover the gun tip and force air
back through the hose to clear any media.
9. The transparent screen has a replaceable covering on the underside of the lid.

If visibility is reduced, replace the protective cover.
10. Check that the gloves are in good condition. If damaged replace immediately.
8. TROUBLESHOOTING CHART
Symptom (s)
Possible Causes(s)
Corrective Action(s)
Excessive dust in the
cabinet
1.Exhaust vent or air flow block.
2. Abrasive is worn.
3. Too much abrasive in the
cabinet
4. Loose air line or fittings.
1. Clean vent and keep vent away
from any wall.Connect to a
suitable dust extraction system.
2. Replace.
3. Remove excess.
4. Check and tighten all air
fittings.
Uneven
blasting actions
1. Too much abrasive in cabinet.
2. Moisture inside cabinet.
1. Remove excess.
2. Check air line for moisture
Inadequate speed or
efficiency of blast
1.Abrasive media worn.
2.Pressure too low.
1. Replace.
2. Check that there are no supply
blockages or leaks. Increase
pressure.
Static electricity.
1. Dry weather conditions.
1. Leave the workpiece to stand
for a while
Blast pattern too
wide or ineffective.
1. Nozzle blocked or worn.
1. Unblock or replace nozzle
9. DISPOSAL
At the end of the machine's working life, or when it can no longer be repaired,
ensure that it is disposed of according to national regulations.
Contact your local authority for details of collection schemes in your area.
In all circumstances:
Do not dispose of this tool with domestic waste.
Do not incinerate.

10. SYMBOLS
The following symbols are used in this manual and/or on the machine:
Denotes risk of personal
injury or damage to the
tool
WARNING – To
reduce the risk of
injury, user must read
instruction manual”
In accordance with
essential safety
standards of applicable
European directives
Mandatory use of eye
protection
Wear noise protection

11. EXPLODED VIEW


CANNON TOOLS LTD
Add: 20 station road, Rowley Regis, west midlands,B65 0JU.U.K.
Made in China
Table of contents
Other Neilsen Construction Equipment manuals