manuals.online logo
Brands
  1. Home
  2. •
  3. Brands
  4. •
  5. Neilsen
  6. •
  7. Grinder
  8. •
  9. Neilsen CT0827 User manual

Neilsen CT0827 User manual






115MM ANGLE GRINDER
CT0827



















ORIGINAL INSTRUCTIONS





Cannon Tools Limited
Address:20 Station Road, Rowley Regis, West Midlands, B65 0JU.UNITED KINGDOM

SAVE THESE INSTRUCTIONS AND PRECAUTIONS.
READ ALL PRECAUTONS AND INSTRUCTIONS BEFORE USE.


EC DECLARATION OF CONFORMITY
WeCANNON TOOLS LTD
20 Station road, Rowley Regis, West Midlands,B65 0JU.U.K.
Declare that the following machine complies with the appropriate basic safety and
health requirements of the EC Directive based on its design and type, as brought
into circulation by us.
In case of alteration of the machine, not agreed upon by us, this declaration will
lose its validity.
Product description: ANGLE GRINDER
Model: CT0827
Applicable EC Directives:
EC Machinery Directive 2006/42/EC
EC Directive of Electromagnetic Compatibility 2014/30/EU
Harmonized standards:
EN 60745-1, EN 60745-2-3,
EN 55014-1, EN 61000-3-2, EN 61000-3-3, EN 55014-2
20 Station Road, Rowley Regis, West Midlands, B65 0JU.U.K.
Mr. Gurcharan Tony Singh Sanghera
Managing Director
CANNON TOOLS LTD
2016-08-18





1. DESCRIPTION OFTHE SYMBOLS
The use of symbols in this manual is intended to draw your attention to possible
risks. The safety symbols and the explanations that accompany them must be
perfectly understood. The warnings in themselves do not remove the risks and
cannot replace correct actions for preventing accidents.
This symbol, marking a point of safety, indicates a caution, warning or danger.
Ignoring this warning can result in an accident to yourself or others. To limit the
risks of injury, fire or electrocution, always follow the recommendations indicated.
WARNING – To reduce the risk of injury, user must read instruction manual.

Class II symbol: this machine is designed with double insulation. It is not
necessary to connect it to an earthed power socket.
This symbol indicates the requirement of wearing ear protection, eye protection,
when using the product.

2. GENERAL POWER TOOL SAFETY WARNINGS
WARNING Read all safety warnings and all instructions. Failure to follow
the warnings and instructions may result in electric shock, fire and/or
serious injury.
Save all warnings and instructions for future reference.
The term "power tool" in the warnings refers to your mains-operated (corded)
power tool or battery-operated (cordless) power tool.
1) Work area safety
a) Keep work area clean and well lit. Cluttered or dark areas invite accidents.
b) Do not operate power tools in explosive atmospheres, such as in the
presence of flammable liquids, gases or dust. Power tools create sparks
which may ignite the dust or fumes.
c) Keep children and bystanders away while operating a power tool.
Distractions can cause you to lose control.
2) Electrical safety
a) Power tool plugs must match the outlet. Never modify the plug in any
way. Do not use any adapter plugs with earthed (grounded) power tools.
Unmodified plugs and matching outlets will reduce risk of electric shock.
b) Avoid body contact with earthed or grounded surfaces, such as pipes,
radiators, ranges and refrigerators. There is an increased risk of electric
shock if your body is earthed or grounded.
c) Do not expose power tools to rain or wet conditions. Water entering a
power tool will increase the risk of electric shock.
d) Do not abuse the cord. Never use the cord for carrying, pulling or
unplugging the power tool. Keep cord away from heat, oil, sharp edges
or moving parts. Damaged or entangled cords increase the risk of electric
shock.
e) When operating a power tool outdoors, use an extension cord suitable
for outdoor use. Use of a cord suitable for outdoor use reduces the risk of
electric shock.
f) If operating a power tool in a damp location is unavoidable, use a
residual current device (RCD) protected supply. Use of an RCD reduces
the risk of electric shock.
3) Personal safety
a) Stay alert, watch what you are doing and use common sense when
operating a power tool. Do not use a power tool while you are tired or
under the influence of drugs, alcohol or medication. A moment of
inattention while operating power tools may result in serious personal injury.
b) Use personal protective equipment. Always wear eye protection.
Protective equipment such as dust mask, non-skid safety shoes, hard hat, or
hearing protection used for appropriate conditions will reduce personal
injuries.
c) Prevent unintentional starting. Ensure the switch is in the off-position
before connecting to power source and/or battery pack, picking up or
carrying the tool. Carrying power tools with your finger on the switch or
energising power tools that have the switch on invites accidents.
d) Remove any adjusting key or wrench before turning the power tool on.
A wrench or a key left attached to a rotating part of the power tool may result
in personal injury.
e) Do not overreach. Keep proper footing and balance at all times. This
enables better control of the power tool in unexpected situations.
f) Dress properly. Do not wear loose clothing or jewellery. Keep your hair,
clothing and gloves away from moving parts. Loose clothes, jewellery or
long hair can be caught in moving parts.
g) If devices are provided for the connection of dust extraction and
collection facilities, ensure these are connected and properly used. Use
of dust collection can reduce dust-related hazards.
4) Power tool use and care
a) Do not force the power tool. Use the correct power tool for your
application. The correct power tool will do the job better and safer at the rate
for which it was designed.
b) Do not use the power tool if the switch does not turn it on and off. Any
power tool that cannot be controlled with the switch is dangerous and must
be repaired.
c) Disconnect the plug from the power source and/or the battery pack
from the power tool before making any adjustments, changing
accessories, or storing power tools. Such preventive safety measures
reduce the risk of starting the power tool accidentally.
d) Store idle power tools out of the reach of children and do not allow
persons unfamiliar with the power tool or these instructions to operate
the power tool. Power tools are dangerous in the hands of untrained users.
e) Maintain power tools. Check for misalignment or binding of moving
parts, breakage of parts and any other condition that may affect the
power tool’s operation. If damaged, have the power tool repaired before
use. Many accidents are caused by poorly maintained power tools.
f) Keep cutting tools sharp and clean. Properly maintained cutting tools with
sharp cutting edges are less likely to bind and are easier to control.
g) Use the power tool, accessories and tool bits etc. in accordance with
these instructions, taking into account the working conditions and the
work to be performed. Use of the power tool for operations different from
those intended could result in a hazardous situation
5) Service
a) Have your power tool serviced by a qualified repair person using only
identical replacement parts. This will ensure that the safety of the power
tool is maintained.
b) Only have the replacement carbon brushes provided replaced by the
after-sales service at your store or by an approved specialist. This will
ensure the power tool remains reliable.
3. SAFETY WARNINGS COMMON FOR GRINDING OPERATIONS
a) This power tool is intended to function as a grinder. Read all safety
warnings, instructions, illustrations and specifications provided with this
power tool. Failure to follow all instructions listed below may result inelectric
shock, fire and/or serious injury.
b) Operations such as sanding, wire brushing, polishing or cutting-off are
not recommended to be performed with this power tool. Operations for which
thepower tool was not designed may create a hazard and cause personal injury.
c) Do not use accessories which are not specifically designed and
recommended by the tool manufacturer. Just because the accessory can be
attached to your power tool, itdoes not assure safe operation.
d) The rated speed of the accessory must be at least equal to the maximum
speed marked on the power tool. Accessories running faster than their rated
speed can break and fly apart.
e) The outside diameter and the thickness of your accessory must be within
the capacity rating of your power tool. Incorrectly sized accessories cannot be
adequatelyguarded or controlled.
f) Threaded mounting of accessories must match the grinder spindle thread.
For accessories mounted by flanges, the arbour hole of the accessory must
fit the locating diameter of the flange. Accessories that do not match the
mounting hardware of the power tool will run out of balance, vibrate excessively and
may cause loss of control.
g) Do not use a damaged accessory. Before each use inspect the accessory
such as abrasive wheels for chips and cracks, backing pad for cracks, tear
or excess wear. If power tool or accessory is dropped, inspect for damage
or install an undamaged accessory. After inspecting and installing an
accessory, position yourself and bystanders away from the plane of the
rotating accessory and run the power tool at maximum no-load speed for
one minute. Damaged accessories will normally break apart during this test time.
h) Wear personal protective equipment. Depending on application, use face
shield, safety goggles or safety glasses. As appropriate, wear dust mask,
hearing protectors, gloves and workshop apron capable of stopping small
abrasive or workpiece fragments. The eye protection must be capable of
stopping flying debrisgenerated by various operations. The dust mask or
respirator must be capable of filtrating particles generated by your operation.
Prolonged exposure to high intensity noise may cause hearing loss.
Page:7
i) Keep bystanders a safe distance away from work area. Anyone entering
the work area must wear personal protective equipment. Fragments of
workpiece or of a broken accessory may fly away and cause injury beyond
immediate area of operation.
j) Hold power tool by insulated gripping surfaces only, when performing an
operation where the cutting accessory may contact hidden wiring or its
own cord. Cutting accessory contacting a "live" wire may make exposed metal
parts of the power tool "live" and shock the operator.
k) Position the cord clear of the spinning accessory. If you lose control, the
cord may be cut or snagged and your hand or arm may be pulled into the
spinning accessory.
l) Never lay the power tool down until the accessory has come to a
complete stop. The spinning accessory may grab the surface and pull the power
tool out of your control.
m) Do not run the power tool while carrying it at your side. Accidental contact
with the spinning accessory could snag your clothing, pulling the accessory into
your body.
n) Regularly clean the power tool’s air vents. The motor’s fan will draw the
dust inside the housing and excessive accumulation of powdered metal may
cause electrical hazards.
o) Do not operate the power tool near flammable materials. Sparks could
ignite these materials.
p) Do not use accessories that require liquid coolants. Using water or other
liquid coolants may result in electrocution or shock.
4. KICKBACK AND RELATED WARNINGS
Kickback is a sudden reaction to a pinched or snagged rotating wheel, backing
pador any other accessory. Pinching or snagging causes rapid stalling of the
rotating accessory which in turn causes the uncontrolled power tool to be forced
in the direction opposite of the accessory’s rotation at the point of the binding.
For example, if an abrasive wheel is snagged or pinched by the workpiece, the
edge of the wheel that is entering into the pinch point can dig into the surface of
the material causing the wheel to climb out or kick out. The wheel may either
jump toward or away from the operator, depending on direction of the wheel’s
movement at the point of pinching. Abrasive wheels may also break under these
conditions.
Kickback is the result of power tool misuse and/or incorrect operating procedures
or conditions and can be avoided by taking proper precautions as given below.
a) Maintain a firm grip on the power tool and position your body and arm to
allow you to resist kickback forces. Always use auxiliary handle, if provided,
for maximum control over kickback or torque reaction during start-up. The
operator can control torque reactions or kickback forces, if proper precautions are
taken.
b) Never place your hand near the rotating accessory. Accessory may
kickback over your hand.
c) Do not position your body in the area where power tool will move if
kickback occurs. Kickback will propel the tool in direction opposite to the
wheel’s movement at the point of snagging.
d) Use special care when working corners, sharp edges etc. Avoid
bouncing and snagging the accessory. Corners, sharp edges or bouncing
have a tendency to snag the rotating accessory and cause loss of control or
kickback.
e) Do not attach a saw chain woodcarving blade or toothed saw blade. Such
blades create frequent kickback and loss of control.
SAFETY WARNINGS SPECIFIC FOR GRINDING OPERATIONS
a) Use only wheel types that are recommended for your power tool and the
specific guard designed for the selected wheel. Wheels for which the power
tool was not designed cannot be adequately guarded and are unsafe.
c) The guard must be securely attached to the power tool and positioned for
maximum safety, so the least amount of wheel is exposed towards the operator.
The guard helps to protect the operator from broken wheel fragments, accidental
contact with wheel and sparks that could ignite clothing.
d) Wheels must be used only for recommended applications. For example:
do not grind with the side of cut-off wheel. Abrasive cut-off wheels are
intended for peripheral grinding, side forces applied to these wheels may cause
them to shatter.
e) Always use undamaged wheel flanges that are of correct size and shape
for your selected wheel. Proper wheel flanges support the wheel thus reducing
the possibility ofwheel breakage. Flanges for cut-off wheels may be different from
grinding wheel flanges.
f) Do not use worn down wheels from larger power tools. Wheel intended for
larger power tool is not suitable for the higher speed of a smaller tool and may
burst.
WARNING
Some dust created by grinding activities contains chemicals known to cause
cancer, birth defects or other reproductive harm. Some examples of these
chemicals are:
- lead from lead-based paints,
- crystalline silica from bricks and cement and other masonry products, and
- arsenic and chromium from chemically-treated lumber.
Your risk from these exposures varies, depending on how often you do this type
of work. To reduce your exposure to these chemicals: work in a well ventilated
area, and work with approved safety equipment, such as those dust masks that
are specially designed to filter out microscopic particles.
5. INTENDED USE
The machine is intended for roughing and brushing metal and stone materials
without using water.
6. TECHNICAL SPECIFICATIONS

Model: CT0827
Voltage: 230 -240V~ 50 Hz
Power consumption: 850 W
Rated speed: 12000/min
Drive spindle diameter M14
Max disc diameter: 115 mm
Wheel size 115x22x6mm
Sound pressure level Lp
A
87.6dB(A) K=3dB(A)
Sound power level LwA 98.6dB(A) K=3dB(A)
Level of main handle vibration ah: 5.437 m/s² K=1.5 m/s²
Level of auxiliary handle vibration ah: 6.134 m/s² K=1.5 m/s²
NOISE/VIBRATION INFORMATION
Measured sound values determined according to EN 60745.
Wear hearing protection!
Vibration total values (triax vector sum) determined according to EN 60745:
The vibration emission level given in this information sheet has been measured in
accordance with a standardized test given in EN 60745 and may be used to
compare one tool with another.
It may be used for a preliminary assessment of exposure.
The declared vibration emission level represents the main applications of the tool.
However if the tool is used for different applications, with different accessories or
poorly maintained, the vibration emission may differ. This may significantly
increase the exposure level over the total working period.
An estimation of the level of exposure to vibration should also take into account
the times when the tool is switched off or when it is running but not actually doing
the job. This may significantly reduce the exposure level over the total working
period.
Identify additional safety measures to protect the operator from the effects of
vibration such as: maintain the tool and the accessories, keep the hands warm,
organization of work patterns.
7. LIST OF MAIN PARTS
1
2
3
4 6
5
7
1. Spindle-lock button 2. Disc guard
3. Off/on switch 4. Auxiliary handle
5. Carbon brushes 6. Flange spanner
7. Flanges
8. OPERATION
Before use
Before making assembly, changing and adjustment for any accessory,
disconnect the tool from the mains supply to avoid any unintentional starting.
Please always check the mains supply voltage before use! It must correspond
with the rating label on the appliance.
Remove any packing material and loose parts from unit.
Check the accessories before use. It should be fit with the machine and your
purpose.
Disc guard
CAUTION! For grinding, the machine should be used only with guard.
The position of the disc guard can be adjusted to suit the working conditions.
To do this, please follow below steps:
1. Loosen the hexagon bolt with the spanner.
2. Turn the guard to the desired position.
3. Retighten the hexagon bolt firmly.
WARNING
Before using the machine other than grinding, the guard should be removed
completely.
Auxiliary handle
CAUTION! The machine must be used with both handles.
Depending on the working method, the auxiliary handle can be mounted in three
different positions on the grinding head.
Do not continue to use the auxiliary handle if it is damaged.
On/Off switch
Use the On/Off switch to start the machine and keep holding for continuous
operation.
Release the On/Off switch to switch the machine off.
Locking function
The On/Off switch can hold the switch on position for continuous grinding.
Please follow below step:
Press On/Off switch push forward to lock position, then release the On/Off switch.
The angle grinder will continue to operate until the on/off switch is released.
To release the on/off switch, just press switch again. It will return to original
position
CAUTION! Always carry out a test run before starting work and after every tool
change! Always ensure that the tools are in good condition, correctly mounted
and able to turn freely. The trial run should be at last 30 sec.
WARNING
Vibrating discs must be replaced immediately.
Please always keep other persons and combustible material from work area.
Please always make sure work with guard and disc in position before start the
machine.
Mounting disc
The mounting hole of disc must fit with the mounting flange. Do not use reducers
or adapters.
The direction-of-rotation arrow on disc and machine (see direction-of-rotation
arrow on the machine head) should be same.
CAUTION!
Never use discs whose diameter is larger than that indicated.
The maximum rotation speed of disc must be greater than the idling speed of the
machine.
CAUTION! Never use the grinding disk for cutting
To assembly the disc, press the spindle-lock button in deep
and hold it in this position continuously. If necessary, turn the
spindle slightly with the free hand until it locks into position.
And then put the disc between two flanges and then tighten
the outer flange with the spanner provided.
Removing disc
To remove the disc, press the spindle-lock button in deep and hold it in this
position continuously. If necessary, turn the spindle slightly with the free hand until
it locks into position.
Loose the flange with the spanner provided and then removes the disc from
spindle.
CAUTION!
Check the diameter of disc regularly during use. If it is less than 80mm, replace it!
Working advice
After heavily straining the power tool, continue to run it at no-load for several
minutes to cool down the grinding tool.
Grinding discs become very hot while working; do not touch until they have
cooled.
Do not use the power tool with a cut-off stand.
For grinding:
Please always make sure grinding disk touch the workpieceatapproximately 15°
to 30º and move slowly.
WARNING
Don’t apply big pressure to the machine.
Best grinding results can be obtained by only a slight pressure on the tool;
Forcing and excessivepressure will damage the disk and cause serious
personalinjury.
Instruction for abrasive wheels and discs
Abrasive wheels should not be mounted on makeshift apparatus. They should be
mounted on the type of machine for which they are intended. These appear to be
obvious precautions, but accidents still occur because wheels are mounted on
home-made or improvised apparatus quite unsuitable for the work. Likewise,
accidents are caused by heavy wheels being fitted to spindles designed to take
only the lightest of wheels. As a result, vibration is excessive and breakages
occur. On no account should an abrasive wheel be screwed on to the tapered
spindle of a buffing machine. This dangerous method of mounting is likely to
result in the breaking of the wheel owing to the wedging action of the tapered
spindle.
The new wheels should be carefully unpacked, cleaned with a brush and
examined for possible damage in transit. In unpacking, the careless use of a tool
may cause damage to the wheel. The soundness of wheels can be further
checked by tapping them with a light, non-metallic implement. This is known as
the ‘ring’ test. Wheels must be dry and free from sawdust for the ring test
otherwise the sound will be deadened. It should also be noted that organic
bonded wheels do not emit the same clear metallic ring as inorganic bonded
wheels. Heavy wheels should be supported on a clean hard floor for the ring test
while light wheels should be suspended from their hole on a finger or small pin. If
the wheel sounds dead, for example due to cracking, it should not be used.
All abrasive wheels are relatively fragile. It should not be assumed that organic
bonded wheels (resin, shellac, rubber) will stand rough handling.
As the wheel wears down in use, the effective peripheral surface speed will
reduce if the rotational speed remains constant and may result in a reduced
grinding efficiency. To make sure the machine work smoothly, the wheel should
be replace with the maximum size less than 80 mm.
9. MAINTENANCE
Keep the ventilation openings clear and clean the product regularly.
If something unusual occurs during use, switch off the supply and disconnect the
plug. Inspect and repair the tool before using it again. The repairs must be carried
out by a qualified technician.
Repair of the tool must only be carried out by a qualified repair technician.
Repair or maintenance by unqualified personnel can lead to a risk of injury.
Use only identical spare parts for repairing a tool. Follow theinstructions
in the maintenance section of this user manual.
Caution!
If the tool’s power cord is damaged, it must be replaced with a specially
manufactured cable available from the after-sales service.
Care and cleaning
Clean the housing only with a damp cloth-do not uses any solvents! Dry
thoroughly afterwards.
10. STROING
Store the machine, operating instructions and where necessary the accessories
in the original packaging. In this way you will always have all the information and
parts ready to hand.
Pack the device well or use the original packaging in order to avoid transit
damage.
Always keep the machine in dry place.
Environment
Should your appliance need replacement after extended use, do
not discard it with the household rubbish but dispose of it in an
environmentally safe way.
Waste produced by electrical machine items should not be
handled like normal household rubbish. Please recycle where
recycle facilities exist. Check with your Local Authority or retailer
for recycling advice.
PARTS DIAGRAM
PARTS LIST

NO Component Quantity NO Component Quantity
1 upper plate 1 30 bearing plate 1
2 disc 1 31 screw M4 x 10 2
3 bottom plate 1 32 rotor 1
4 wheel guard 1 33 winding 1
5 screw M5 x 20 1 34 screw ST3.9 x 70 2
6 screw M5 1 35 stator 1
7 dust cover 1 36 bearing 1
8 head cover 1 37 bearing coat 1
9 screw M4 x 6 4 38 pushing button 1
10 spring washer 7 39 pulling bar 1
11 flat washer 4 40 housing 1
12 bearing 6000 1 41 spring 2
13 bearing plate 1 42 brush holder 2
14 screw M4 x 12 3 43 carbon brush 2
15 output spindle 1 44 brush cover 2
16 half key 2 45 wire plate 1
17 super gearing 1 46 screw ST3.9 x 14
lt
2
18 wave washer 1 47 locking nut 4
19 spring washer 1 48 capacitance 1
20 bearing 1 49 switch 1
21 side handle 4 50 rear handle 1
22 head 1 51 screw ST3.9x 12 1
23 open washer 1 52 wire coat 1
24 spring 1 53 locking nut 2
25 spindle lock 1 54 cable 1
26 screw ST3.9 x 18 4 55 wrench 1
27 spring washer 1 56 locking nut 2
28 pinion gearing 1 57 stator plate 1
29 bearing 608 1 58 dust cover 1
CANNON TOOLS LTD
Add: 20 station road, Rowley Regis, west midlands,B65 0JU.U.K.
Made in China

Other Neilsen Grinder manuals

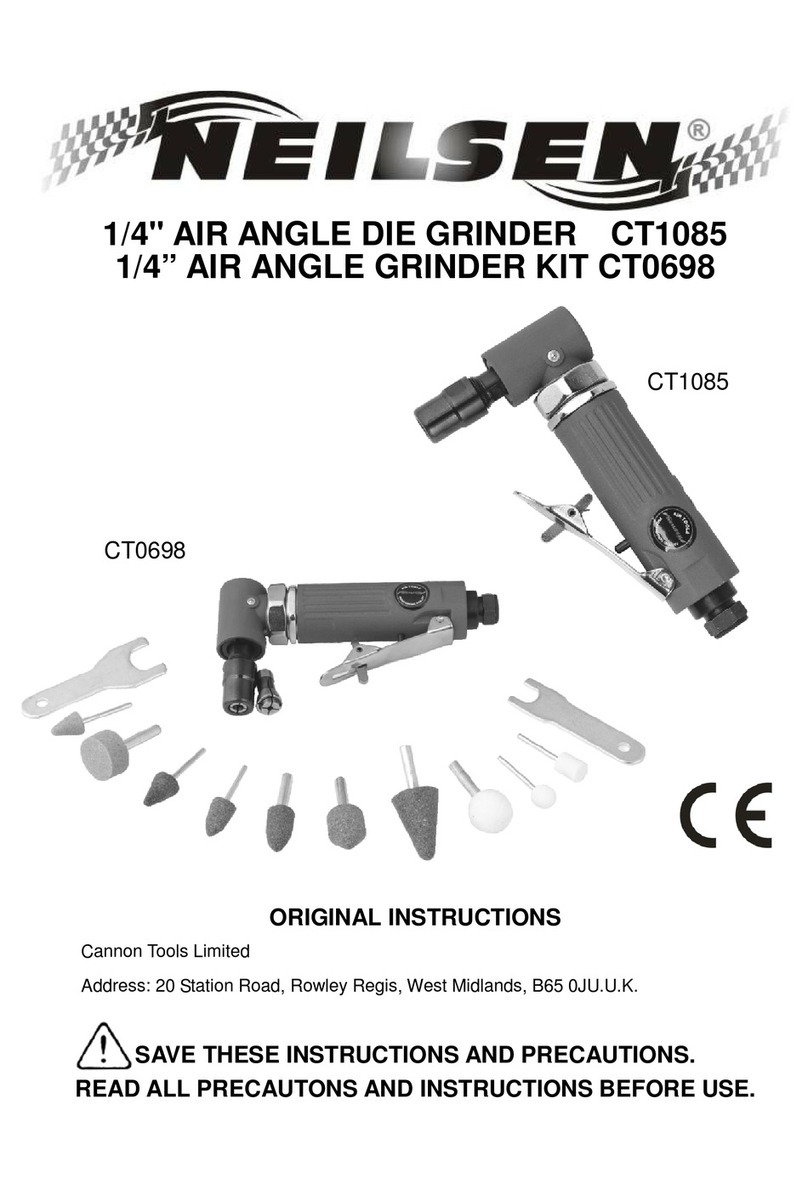
Neilsen CT1085 User manual

Neilsen

Neilsen CT1085 User manual

Neilsen CT3096 User manual

Neilsen

Neilsen CT3096 User manual

Neilsen CT1084 User manual

Neilsen

Neilsen CT1084 User manual

Neilsen CT1646 Operation instructions

Neilsen

Neilsen CT1646 Operation instructions

Neilsen CT2279 User manual

Neilsen

Neilsen CT2279 User manual

Neilsen CT1083 User manual

Neilsen

Neilsen CT1083 User manual

Neilsen CT0698 User manual

Neilsen

Neilsen CT0698 User manual

Popular Grinder manuals by other brands

DeWalt DW476 manual

DeWalt

DeWalt DW476 manual

Milwaukee 5192 Operator's manual

Milwaukee

Milwaukee 5192 Operator's manual

DeWalt DWE4157F Original instructions

DeWalt

DeWalt DWE4157F Original instructions

Prokit's Industries PT-5721 user manual

Prokit's Industries

Prokit's Industries PT-5721 user manual

EINHELL ERGO Tool E-WS 230/2350 operating instructions

EINHELL

EINHELL ERGO Tool E-WS 230/2350 operating instructions

Milwaukee M18 FUEL 2939-20 Operator's manual

Milwaukee

Milwaukee M18 FUEL 2939-20 Operator's manual

Black & Decker KG2023 manual

Black & Decker

Black & Decker KG2023 manual

Arc-Zone DGP-2 Operation manual

Arc-Zone

Arc-Zone DGP-2 Operation manual

DeWalt DWE4884 Original instructions

DeWalt

DeWalt DWE4884 Original instructions

Dynabrade 52224 Important operating, maintenance and safety instructions

Dynabrade

Dynabrade 52224 Important operating, maintenance and safety instructions

Central Machinery 45707 Set up and operating instructions

Central Machinery

Central Machinery 45707 Set up and operating instructions

MasterCraft 54-1243-8 owner's manual

MasterCraft

MasterCraft 54-1243-8 owner's manual

Makita M0920 instruction manual

Makita

Makita M0920 instruction manual

kincrome K13231 manual

kincrome

kincrome K13231 manual

OEM SBG-200T owner's manual

OEM

OEM SBG-200T owner's manual

Parkside PWSAP 20-Li B2 Operation and safety notes

Parkside

Parkside PWSAP 20-Li B2 Operation and safety notes

Bosch PWS 2000-230 JE Professional Original instructions

Bosch

Bosch PWS 2000-230 JE Professional Original instructions

VONROC AG503AC Original instructions

VONROC

VONROC AG503AC Original instructions

manuals.online logo
manuals.online logoBrands
  • About & Mission
  • Contact us
  • Privacy Policy
  • Terms and Conditions

Copyright 2025 Manuals.Online. All Rights Reserved.