Neo Legend ARKADOR 680 User manual
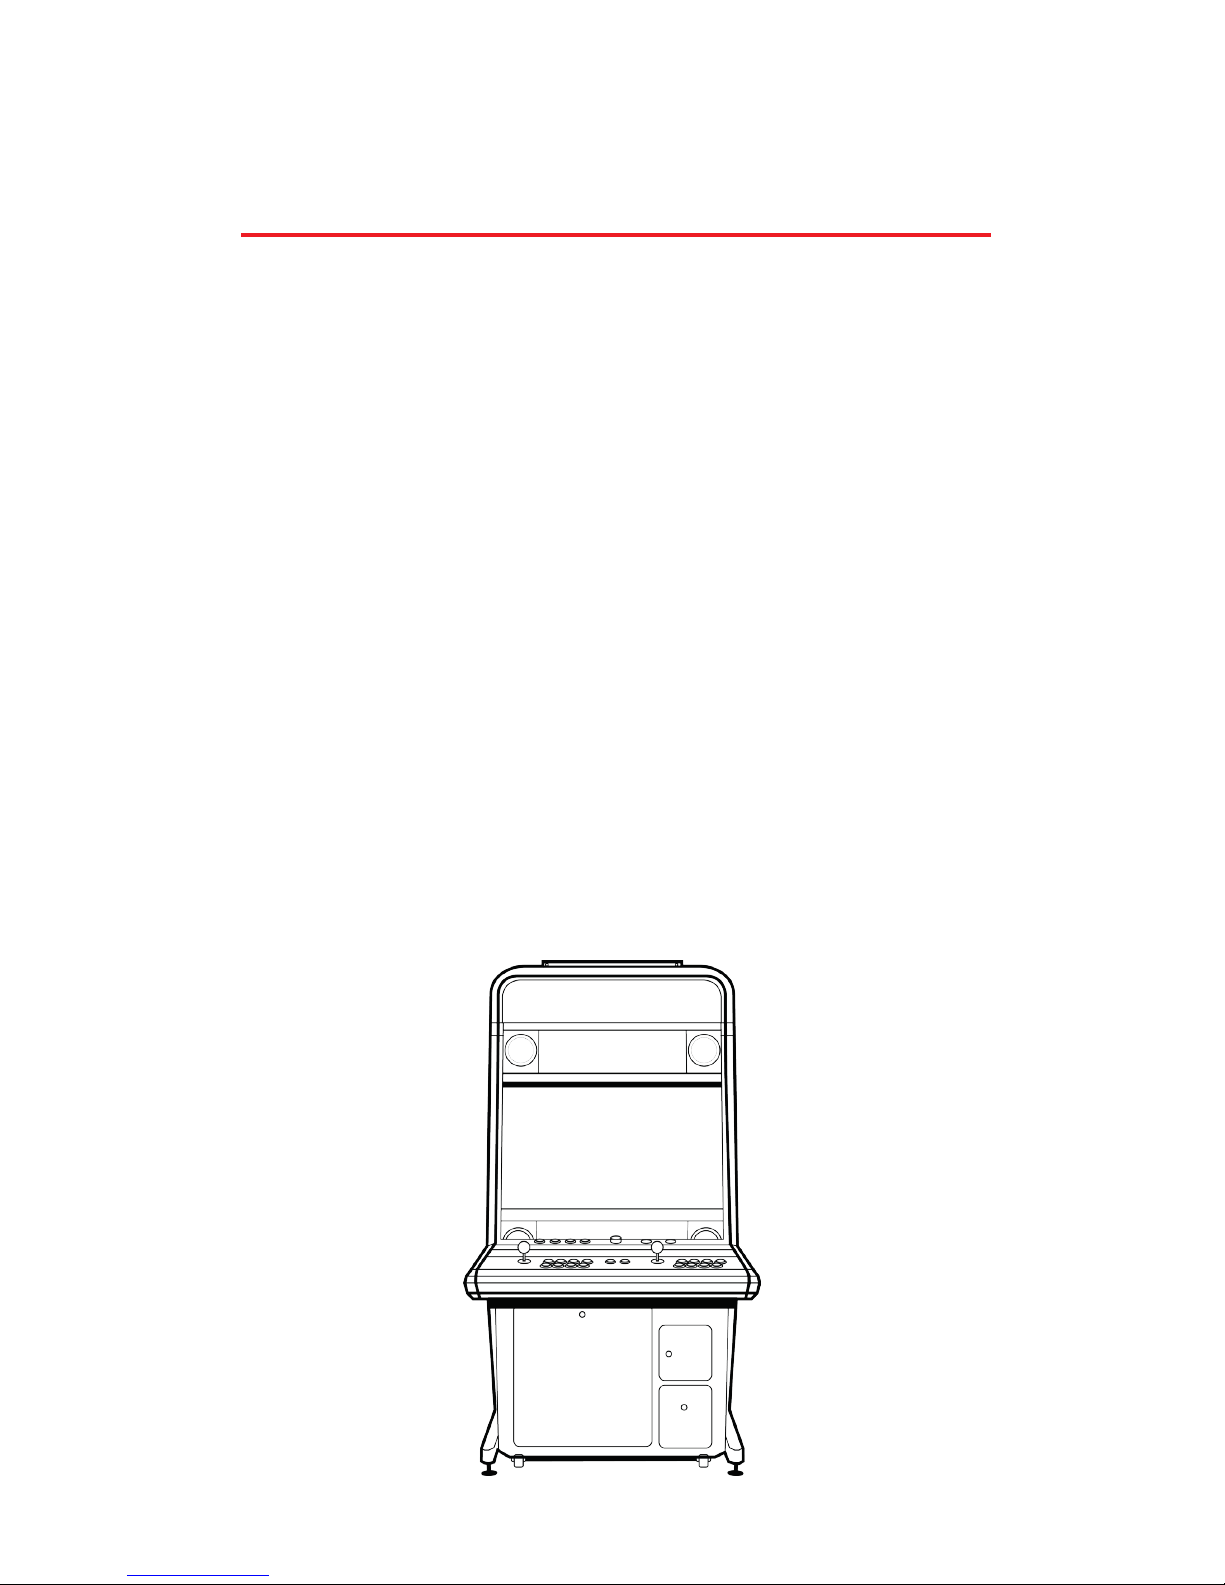
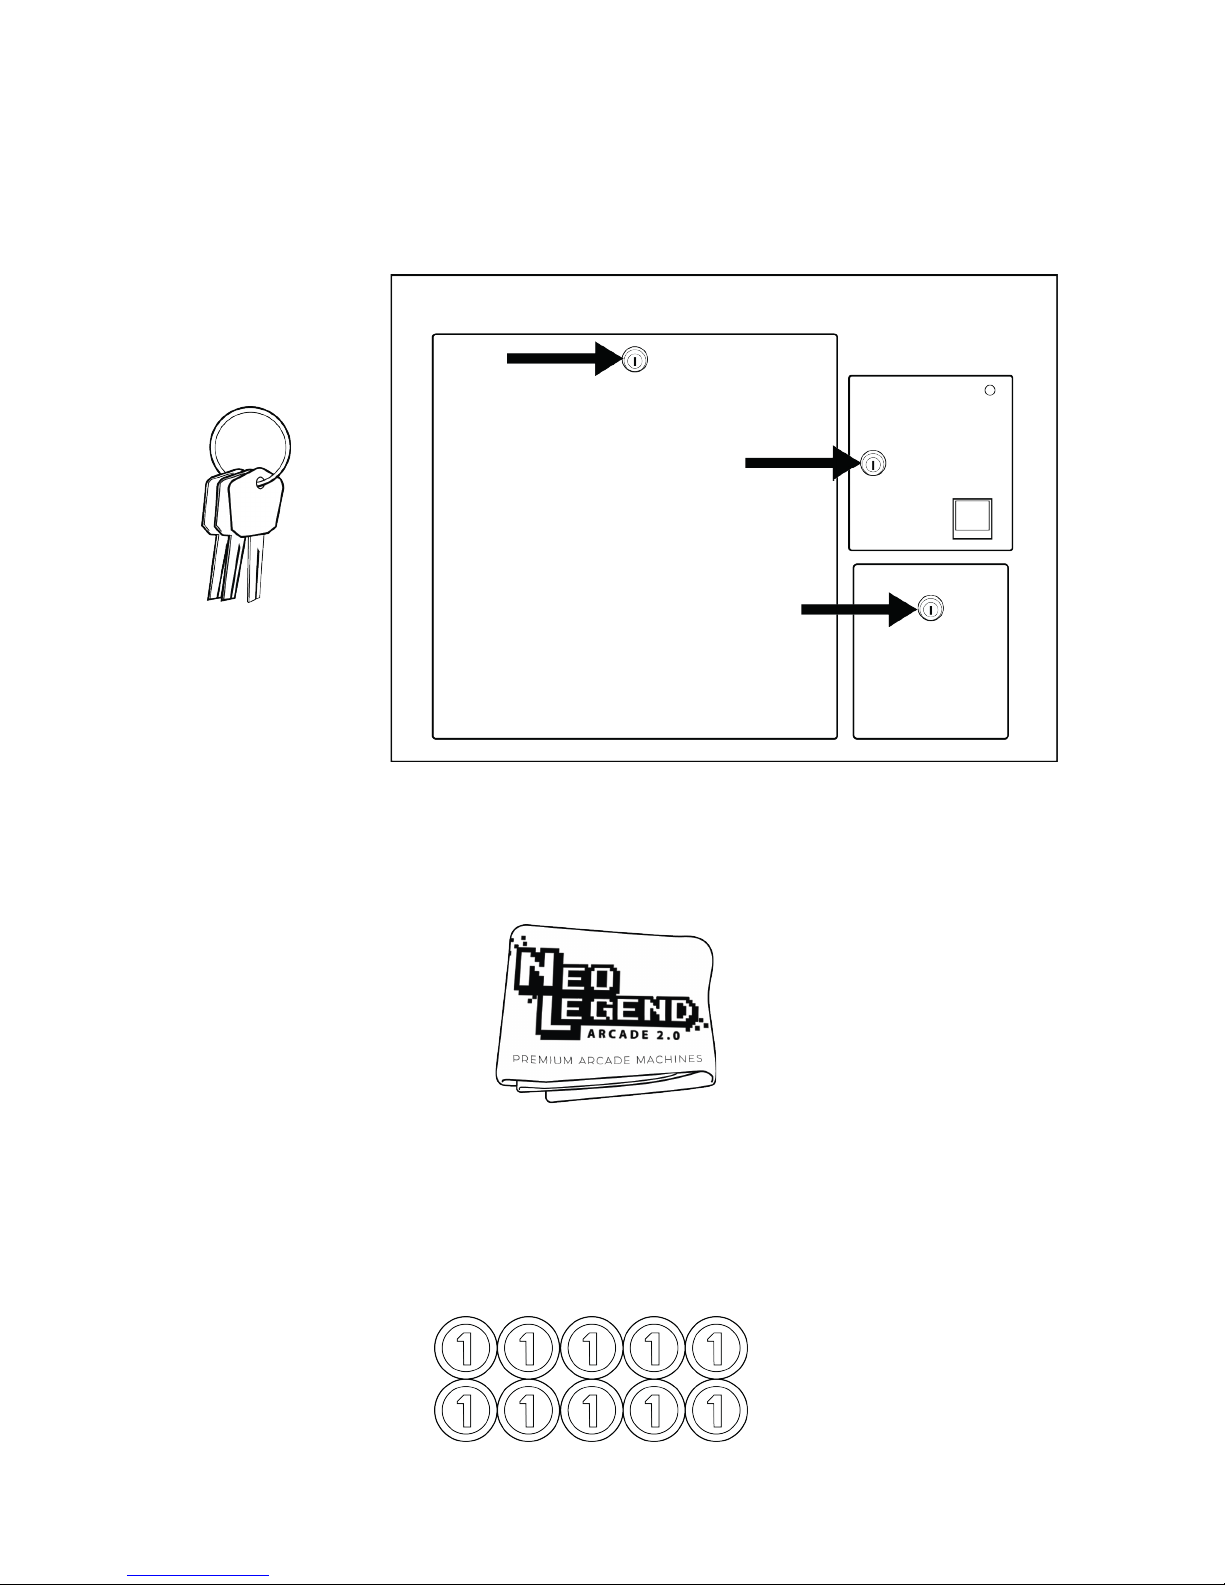
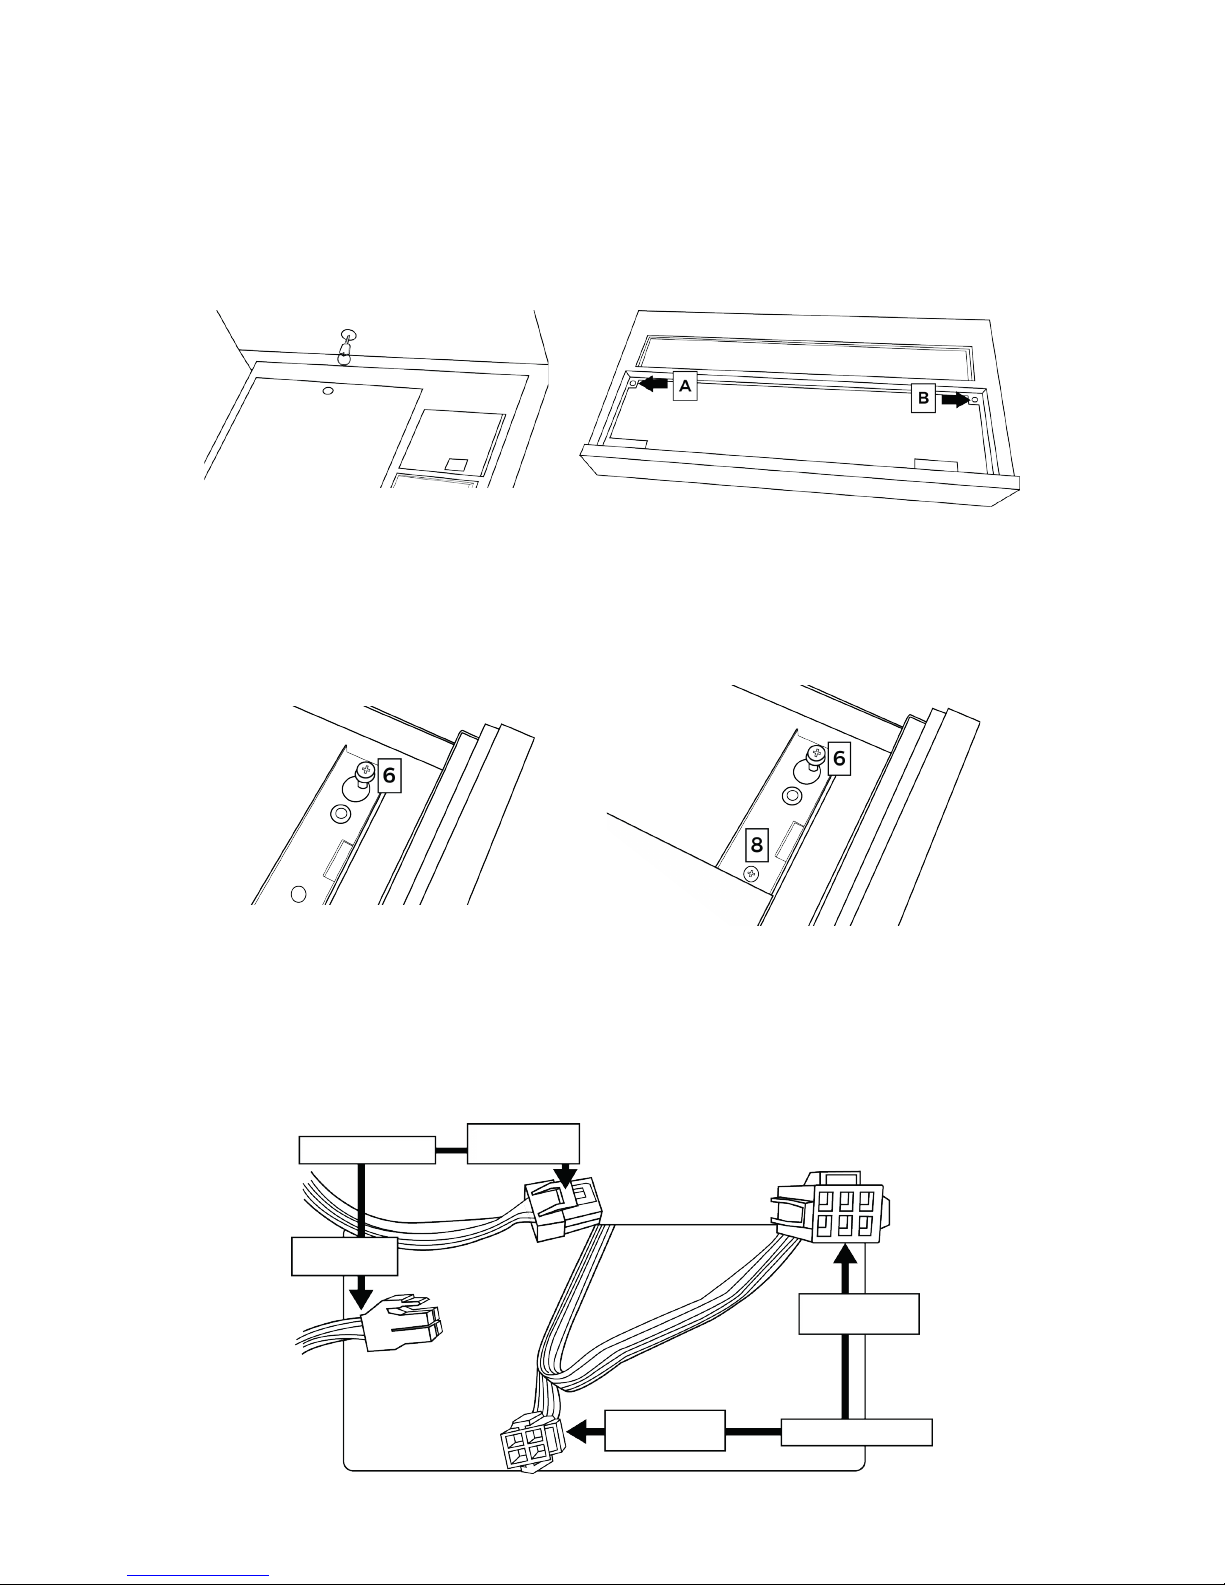
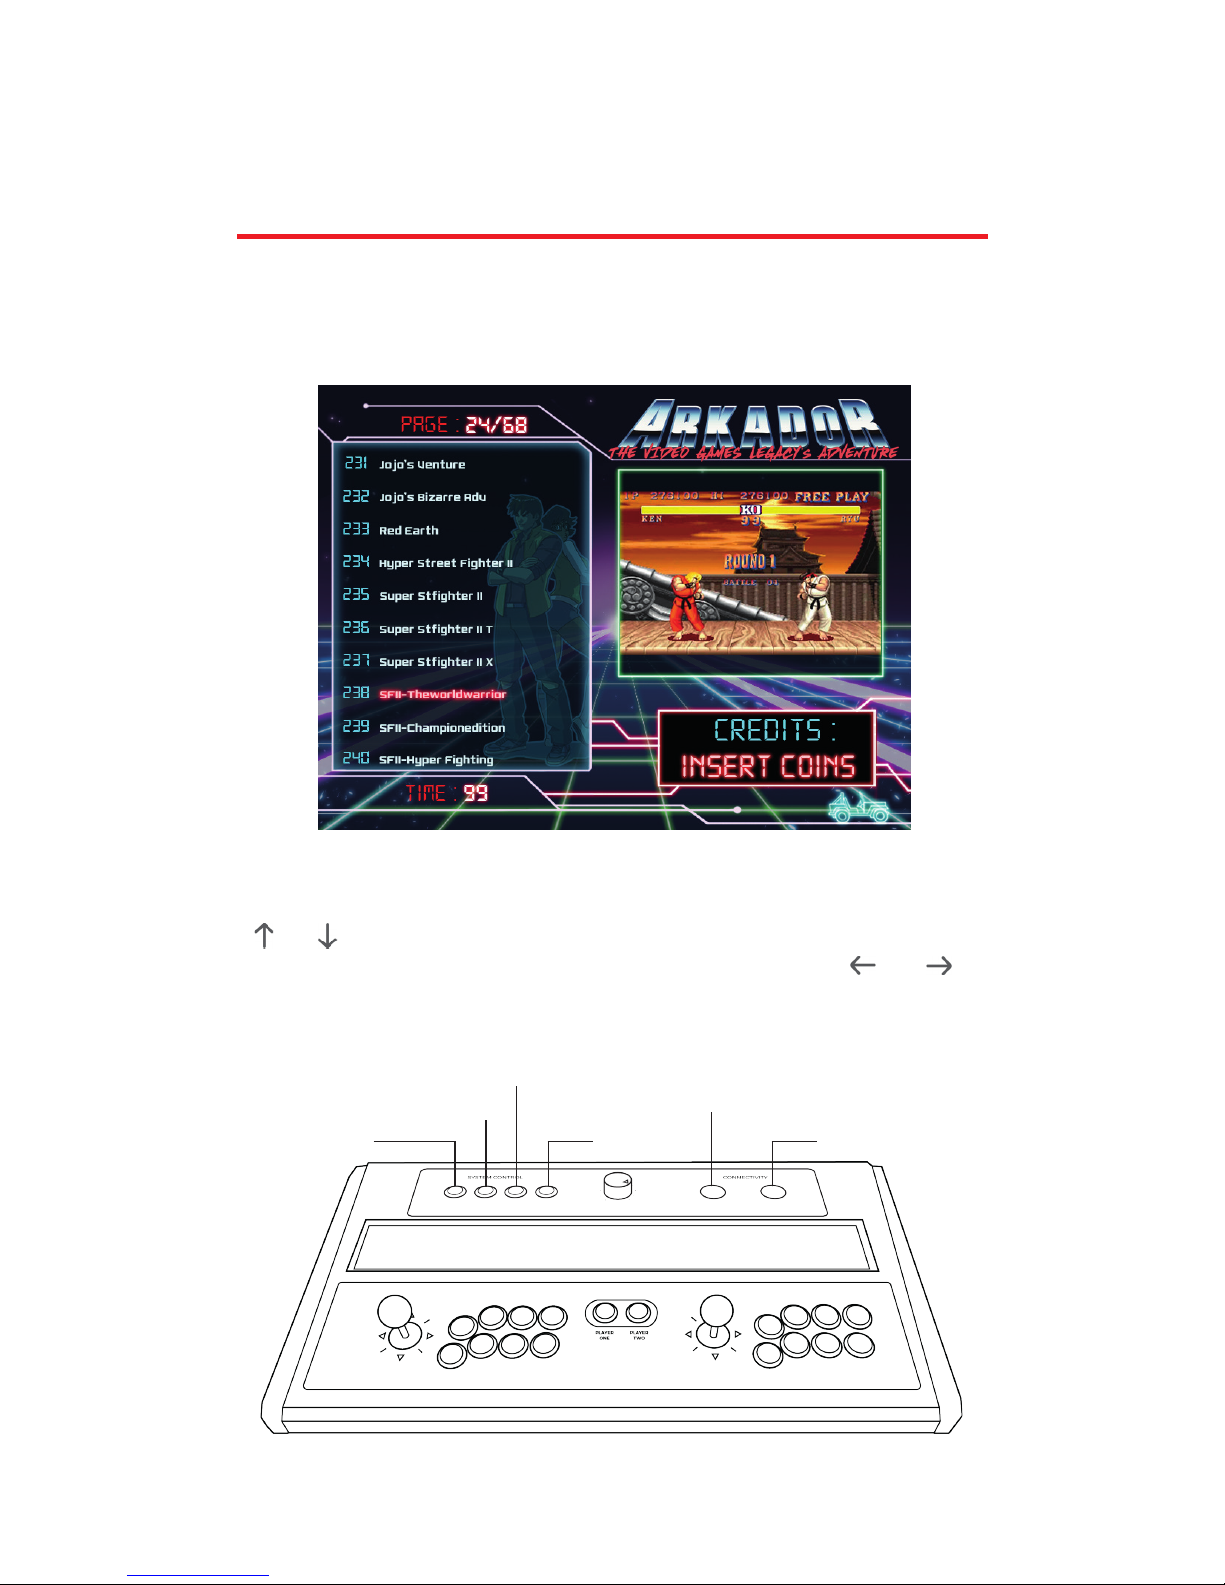
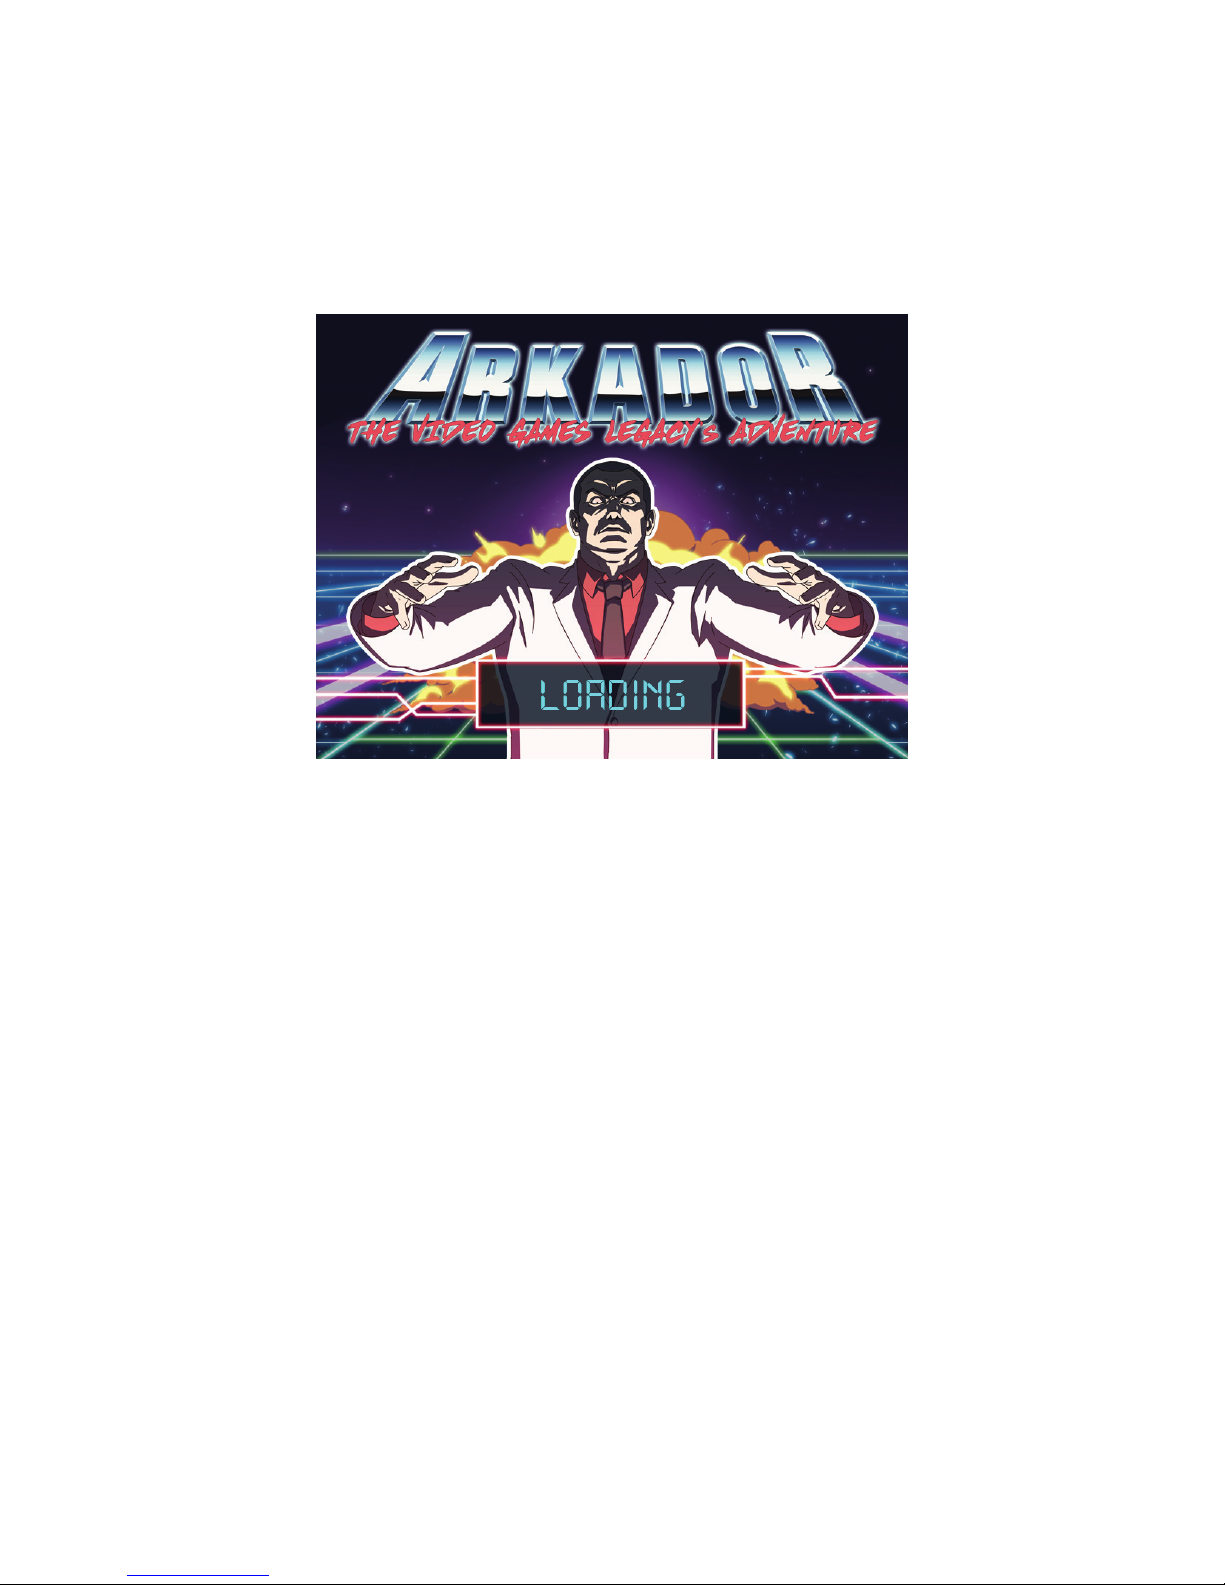
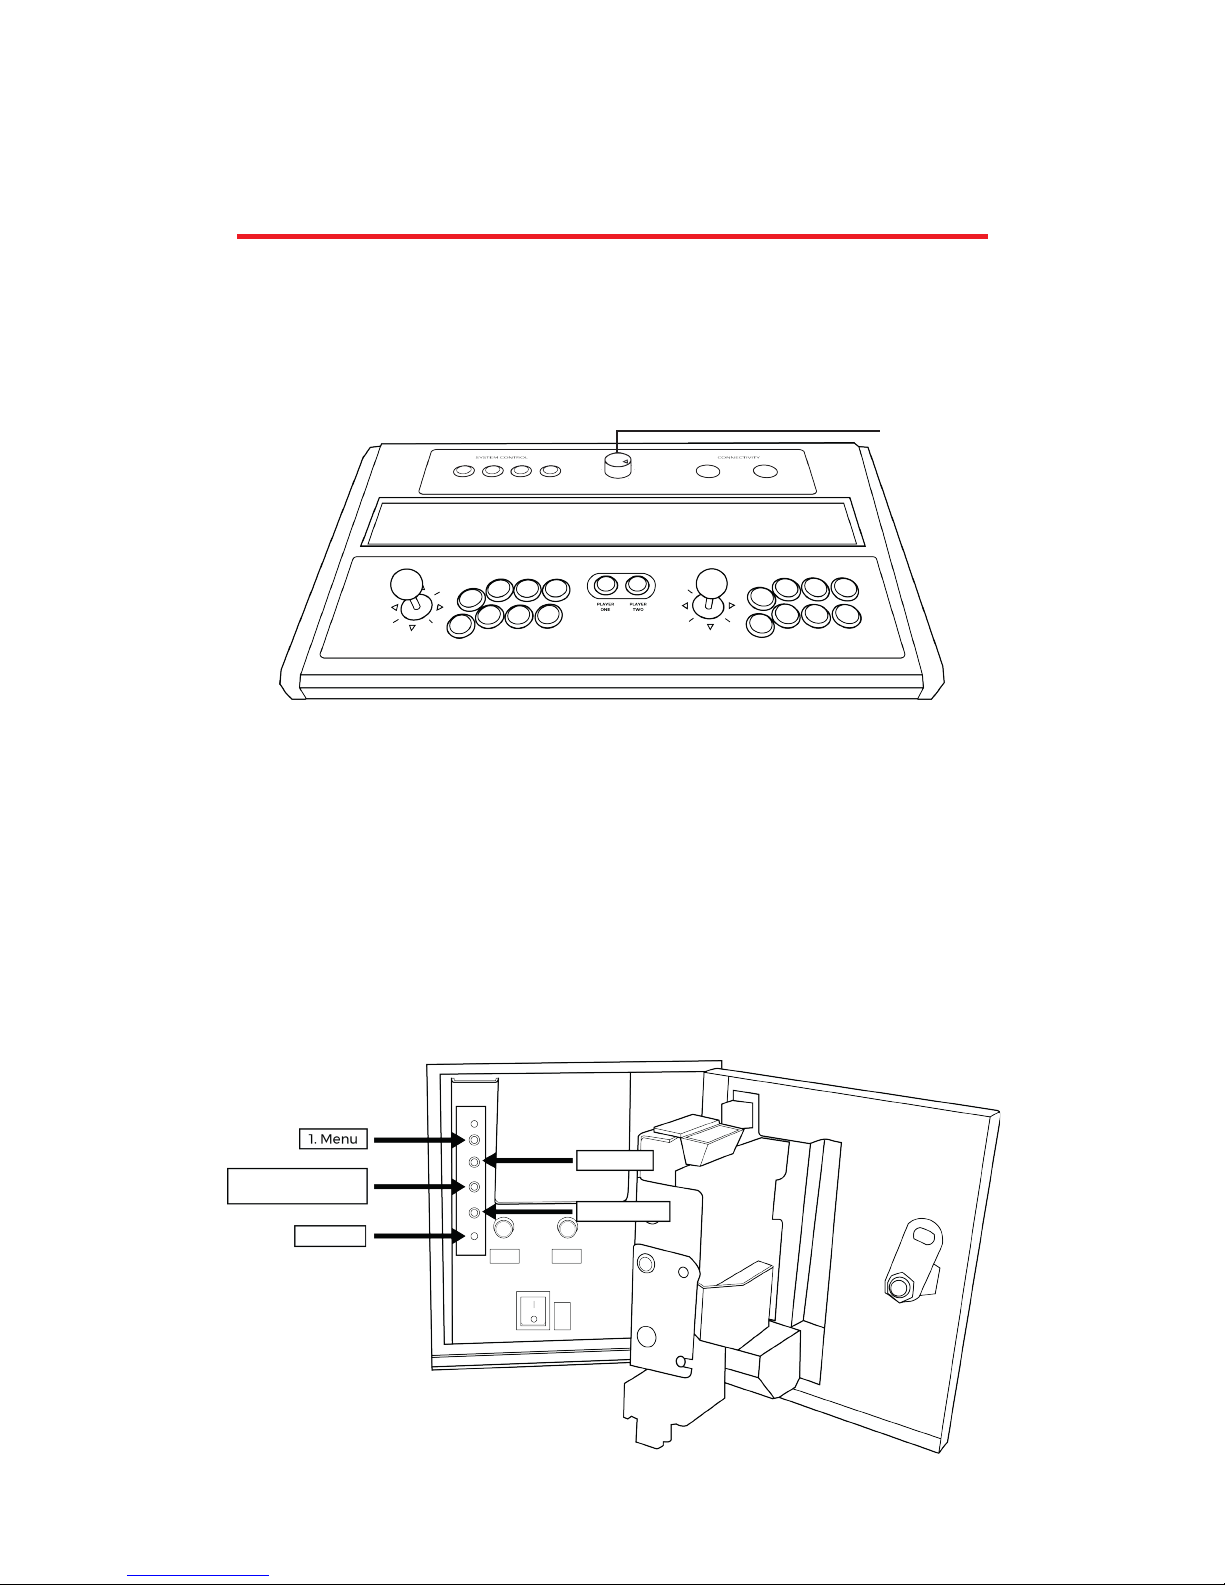
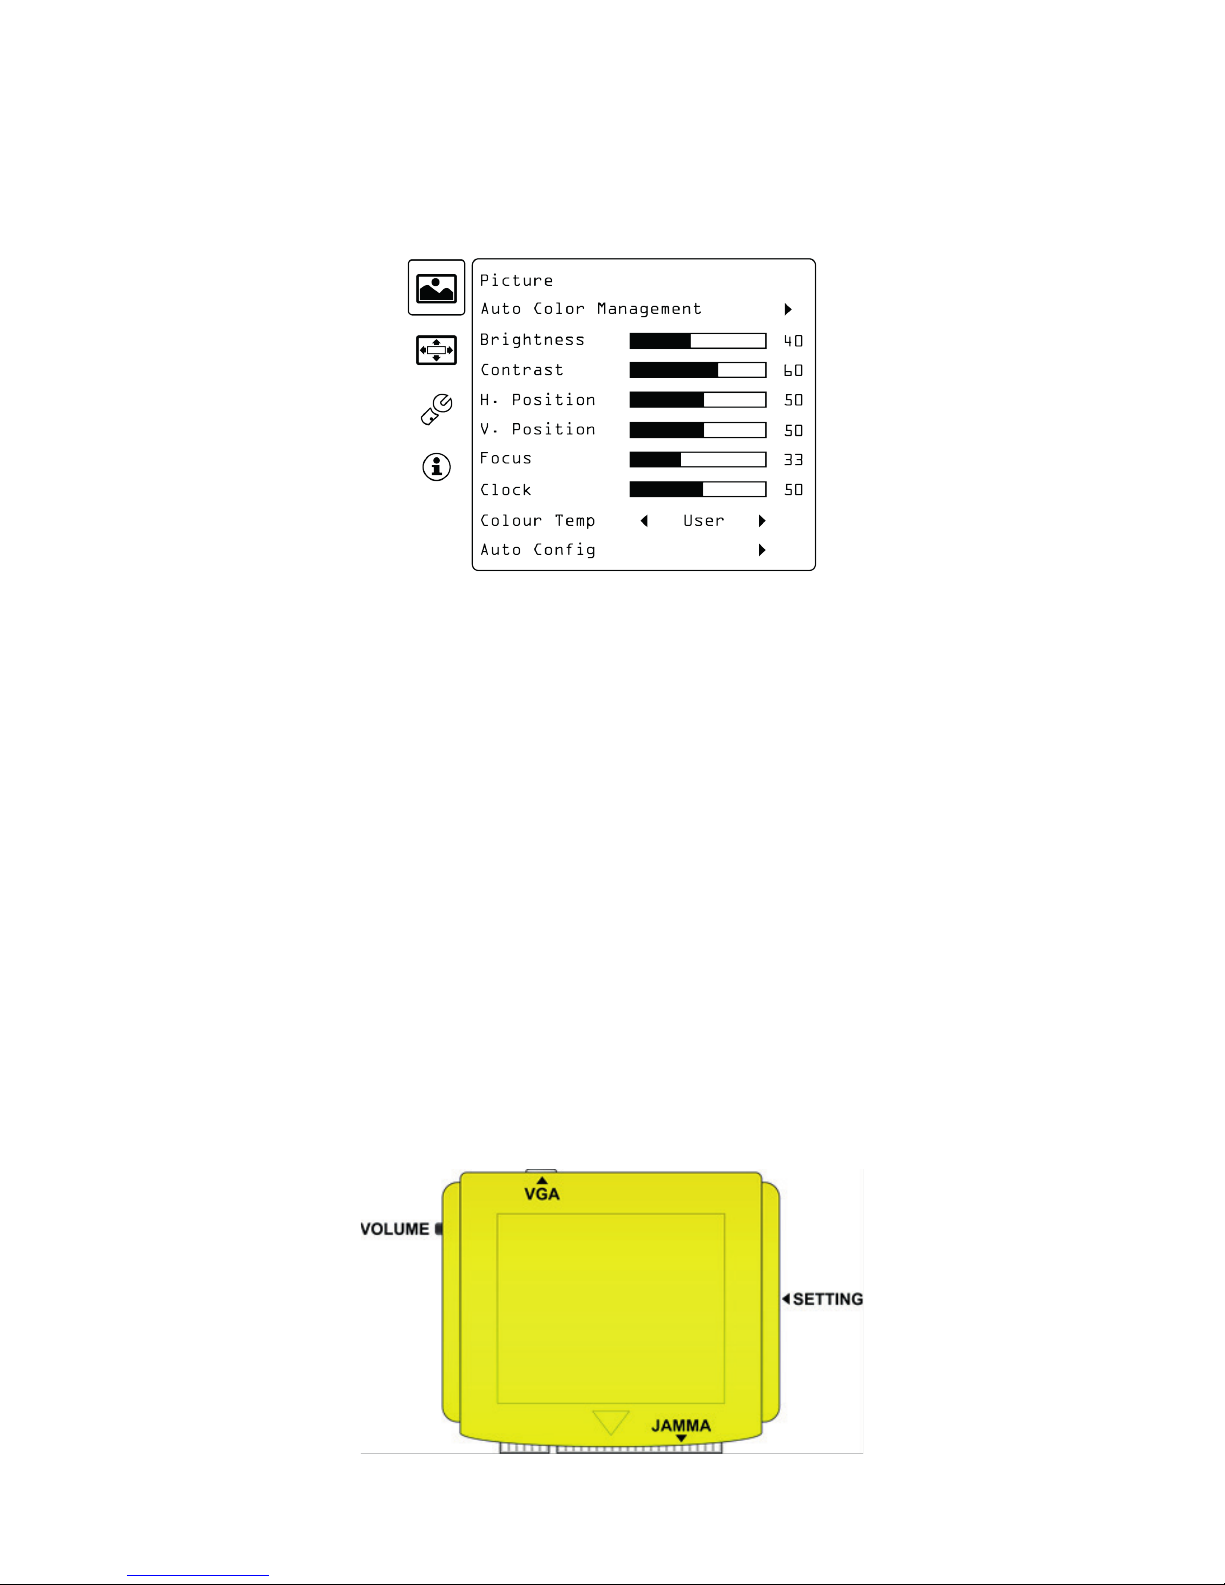
PREMIUM ARCADE MACHINES
ARKADOR 680 games Version
USER MANUAL
Vizion Arcade©


Table of contents
Presentation 1
Getting started 2
Navigation 8
Miscellaneous settings 10
Technical specifications
Maintenance and safety warnings
Warranty service 23
18
21

1
About the user manual
Congratulations on your purchase of the Neo Legend system !
Your Vizion Arcade is equipped with the ARKADOR system with more than
680 games.
The following advice will help you get the most out of your arcade game
for years to come. If it’s not covered by the manual, we recommend getting
the help of a qualified technician.
Safety warning
DO NOT PLACE the Vizion© is an area that is damp or dusty. The terminal
should be kept at an ambient temperature of between 5°C (41°F) et 35°C
(95°F). The console must be kept in an area with good air circulation. It
must be placed on a level and stable surface.
For security reasons, ensure that the doors and other access areas of the
console are kept closed. Open doors can easily be snagged by passing
objects, causing serious damage.
DO NOT USE the console in proximity to a heat source such as a stove or
fireplace, in the proximity of flammable gas, explosives or chemicals or
other flammable products.
Immediately discontinue use of the console if you notice an abnormal
smell or smoke emitting from it.
TRANSPORT PRECAUTIONS. To prepare your console for transport, you
should shut it down and unplug the device, in order to avoid damage to
the connections. You must not transport it whilst it is switched on.
Before moving the console, ensure that you protect the screen and the
panel. WARNING ! Any strikes to the screen can cause permanent damage
to the console. During transport, wherever possible, the console should be
kept upright, and shaking should be avoided. For transport in a vehicle, the
console must be properly secured to prevent falls.
Presentation

2
Getting started
4. Power Cable
1. Keys
2. Antistatic sheer
Find all the needed accessories for your machine in the NEO LEGEND box.
3. Tokens bag

3
2. An antistatic sheer to clean the protection pan of the screen.
Do not wet the sheer before use.
3. A 20 tokens bag to use with your token acceptor
( do not match with € acceptor )
1. The keys to get into your machine.

4
4. A 3 meter power cable to plug.
•
With that cable, join your machine to a 220V plug.
•
You can now turn on your Vizion©.
The ON/OFF switch is behind the coins acceptor’s door
(on the right, just below the panel).
!!! WARNING!!! Do not turn off your machine with that very switch.
You must follow the assigned rules to your game system.
If you do not, your game system may undergo some failures and
a huge decrease of its lifetime.
•
Press ON and wait for the game system to launch.

5
•
If your Vizion’s panel is VERTICAL (folded), you must first put it horizontal.
•
With a cross-head screwdriver, remove 3 et 4 screw and partially unscrew
1 and 2. That split the panel from the machine by sliding it upside.
•
Remove screw 1 and 2 put them aside (will not be useful anymore)
•
Remove left screw (5, 6, 7, 8) and take back both of the red supports.
Put them aside, they won’t be useful anymore.
•
Rescrew partially 5 and 6 on higher holes than before in order to slide
the panel in.

6
•
…then remove the A & B cross-headed screws that are inside.
•
Place the panel on the machine. Once it’s well fit, screw firmly the
panel to the machine with 6 and 8 screws.
•
Plug the 4 pins connectors ( if you have LED in the panel ) and 6 male
pins to 4 pins connectors ( again, if you have LED in the panel ) and
6 female pins of the machine.
•
Start by opening the panel with a N°8 spanner...
6 pins male
connectors
6 pins female
connectors
4 pins male
connectors
4 pins female
connectors
Panel’s cables
Machine’s cables

7
•
Plug the 2 male pins connectors, 12 male pins (K marked) and 15
male pins (J marked) to 2 female pins, 12 female pins (K marked)
and 15 female pins (J marked).
•
Rescrew A and B of the panel and shut it.
Male
Female

8
HOME
PLAYER 1 PLAYER 2
OPTION
BACK
COIN
HEADPHONES
USB PLUGS
•
Once the introduction video is finished, the game selection screen
will show
Navigation
• Using the PLAYER 1 controller, choose a game with the directions
or .
You can access previous or next pages with the directions or .

9
• Appuyez sur CREDIT/COIN afin de mettre un crédit (sauf lorsque le
mode Freeplay est activé).
• Lancez le jeu de votre choix avec le bouton A(1) du JOUEUR 1.
Vous pouvez éteindre votre borne à l’aide de l’interrupteur à l’avant ou à
l’arrière, en bas à droite.
• Appuyez sur START du JOUEUR 1 pour lancer la partie.
• Vous pouvez mettre un autre crédit à tout moment pendant le jeu en
appuyant sur CREDIT/COIN.
• Pour revenir au menu, maintenez simultanément pendant 3 secondes
les boutons START et CREDIT/COIN du JOUEUR 1.

10
You can adjust the volume using the external control knob located at the
center of the panel.
!!! WARNING !!! In order to proceed to screen’s settings, an installed game
system is required.
To settle your screen, you should access to the controller’s remote, placed
behind the coin acceptor’s door.
Your screen is already set for the best rendering.
Sound adjustment
Screen’s settings (optional)
VOLUME
Miscellaneous settings
2. Next
3. Shutdown
4. Previous
5. Back

11
• Press MENU a second time to choose settings such as
brightness, contrast, etc.
You can choose at your convenience these settings with NEXT and
PREVIOUS buttons.
• Confirm your choices with the MENU button.
• Press BACK once you finish your settings.
In order to access to the settings menu, press the first button (MENU) of
the remote. The following menu appears :
Press the SETTING button on the side of the PCB card.
You are now on the card’s settings screen
Setting calibration

12
IO TEST :
This option allows you to test card connections ( credit, joystick,
buttons ). Before the test, the function will appear bright blue.
After the test, it will be highlighted in red. Whilst pressing button A(1),
the function will appear in yellow.

13
SYSTEM SETTINGS :
Press A(1) button to enter into the parameters
SELECT GAME MODE
: Press A(1) button to change the game
selection mode
o WITH COINS : Select a game only with the insertion of a credit
o ANY : Select a game without the need for credit
No matter which parameter is selected, a credit will always be needed to
start the game.
CHANGE COINS SET
: Press A(1) button to change the way in which
credits are handled. Example : 1:1 (one coin gives one credit) or 2:1
(two coins give one credit, etc).
EXIT GAME MODE :
Press on B(2) button to change the way of exiting
the game.
o START+COINS : Press and hold PLAYER 1 START button
whilst putting in a credit to quit the game.
o MENU : Press and hold PLAYER 1 START until the menu appears.
Next, select « Continue » to put a credit on the game,
or « Exit » to re-enter the game selection menu.
AUTO EXIT
: Press A(1) button to activate or deactivate the automatic exit
from games.
o AFTER 3 MINUTES : Automatic exit from the game after
3 minutes without playing.
o OFF : No AUTO EXIT management.

14
•
Difficulty & Lifes :
Press A(1) to enter the settings screen for the diculty and the number
of lives.

15
Use the joystick to select the game settings for which you want edit.
- Press A(1) of PLAYER 1 to change the diculty level.
- Press B(2) to change the number of lives
(Warning, not all games benefit from this option)
- Press C(3) to apply the parameters of the current game to all the
games on the card.
- Press D(4) to exit the parameters screen.
• Display/Hide :
Press B(2) to enter the game settings screen
Move the joystick to select the game which you wish to configure.
- Press A(1) of PLAYER 1 to show/hide the selected game.
- Press B(2) to show all games.
- Press C(3) to hide all games.
- Press D(4) to leave this settings screen.

16
BOOK KEEPING :
The games card can save the number of credits (coins)
used, the total being shown on the top right of the menu «BOOK KEEPING».
If you wish to reset de credit (coins) counter, you must enter the password in
the boxes on the left. By default, this is set to 55555555.
With the joystick, move up or down to change the number, and right or left
to select the next or previous number.
Once confirmation of the password is complete, you can restart the credit
counter (Coin Clear) or change the password (Change Password).

17
SAVE SETTINGS & REBOOT
: Press A(1) to save the parameters to see bring
up the following screen.
FACTORY SETTINGS & REBOOT
: Press A(1) to reset the factory settings
on the card.
Table of contents
Other Neo Legend Arcade Game Machine manuals
Popular Arcade Game Machine manuals by other brands

Atari
Atari Super Breakout OPERATION, MAINTENANCE & SERVICE MANUAL

Universal Space
Universal Space Wildlife PICs Operation manual

BSR
BSR Whac-a-Mole owner's manual

Deltronic Labs
Deltronic Labs Ticket Eater TT-2000 manual

falgas
falgas CARRUSEL FIESTA user guide

Home Leisure Direct
Home Leisure Direct ARCADEPRO Proteus 3442 user manual