Status LED Color
Power ON illuminating
Power OFF
Being charged illuminating
Fully charged
Low battery power notification Flashing
Bluetooth connection standby Flashing
During App connection (1)Dimming
Low storage notification Flashing
During firmware update (1)Dimming
Firmware update failure Flashing
(1) Charging the pen
• Make sure to charge your pen before using.
• The LED light will turn red while the battery is being charged.
When charging is complete, LED light turns green then OFF.
• If your pen is not used for a long period of time and becomes completely discharged,
it may shorten the life of the battery. To best manage the battery life,
charge the battery frequently.
(2) Power ON/OFF & RESET
•
Press the power button to turn the pen on.
- Auto Power function
When you take the cap off or start writing, the pen will automatically be powered on.
The auto power function is enabled when the pen is first connected to the App.
You can change the setting in the App.
•
When the pen is on, press the power button for 2 seconds, the LED light will
start flashing and the pen will turn off.
•
If there is no action taken for more than 20 minutes, the pen will turn off automatically.
(You can change the auto-power-off time in the setting.
The longer auto-power-off time is set, the shorter pen usage time will be available).
•
If you do not use the pen for more than 10 seconds, it will automatically change to
standby mode (low power consumption) to reduce battery power consumption.
•
To reset the pen to factory setting, press the power button for 10 seconds and
the pen will power off and reset.
(3) How to hold
The recognition rate is affected by the direction of the optical sensor’s angle.
Sensor (oval shaped part adjacent to the pen tip) should face downwards.
Deviating from the appropriate degree, or holding the pen in the wrong direction
could cause difficulties with capturing your writing or drawing.
Usage Angle
Hold the pen and maintain
a natural writing angle.
Allowable Recognition Angle
Product’s acceptable recognition
angle is -20° ~ +40°. (90° vertical standard)
•
Direct sunshine or any strong light may cause the loss of recognition of writing.
•
Please be careful not to cover the optical sensor with fingers.
If you do, your writing can not be recognized.
•
Do not apply pressure to the pen lead.
•
Storing pen without pen cap may cause degradation of functionality due to dust and
foreign substance on the optical sensor.
•
The pen cap should be placed on the pen if not in use and if dirty,
please clean with soft cloth or cotton swab.
(4) LED color status display
(1)Dimming : Indicates slowly getting dark and then bright while flashing.
(2)Check if there’s any dirt around optical sensor or on paper.
(1)Dimming
- - - - - - -
(2)Verify optical sensor or
usage environment
Changing ink color after
connecting to the App
illuminating and thenturned OFF
Change color dimming
(1)
Illuminated
(with alarms)
•Neo smartpen can be used when the mobile app is not running.
•The content that you write while the mobile app is off will be transferred later
when the app and Neo smartpen are connected
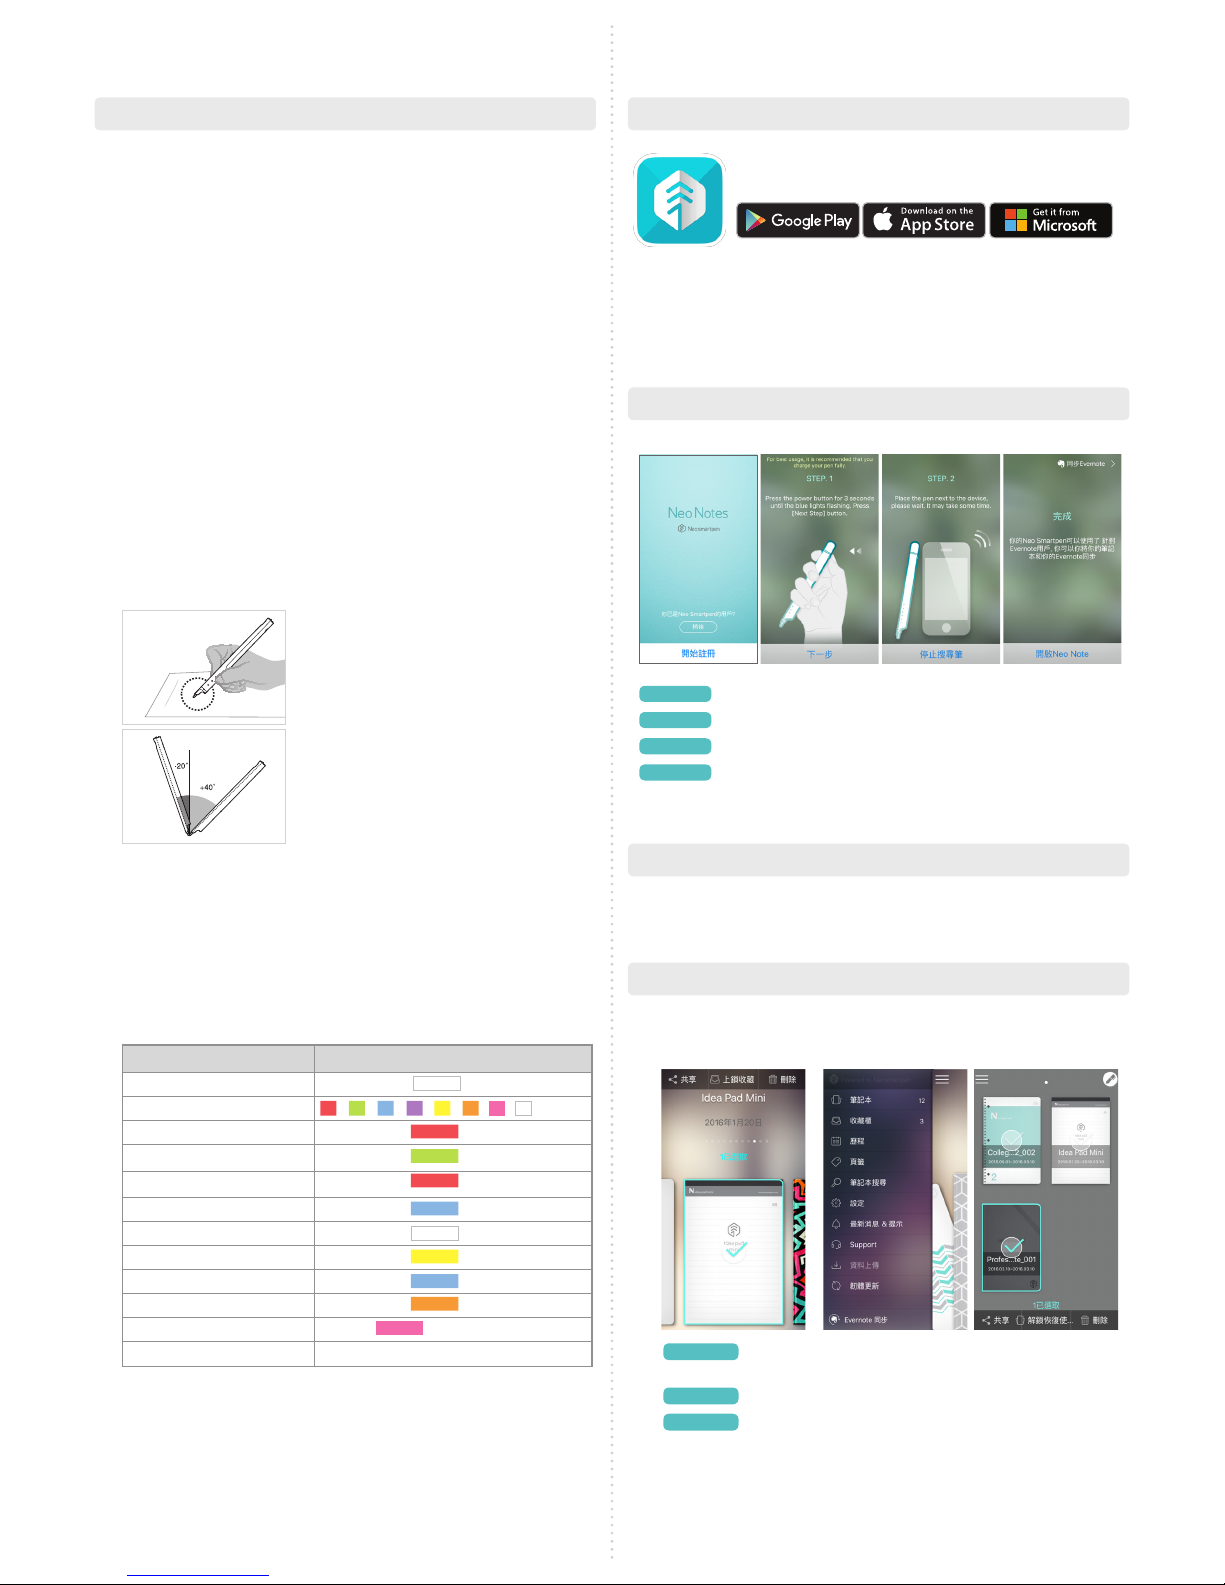
Enable the Bluetooth function of the smart device.
Run Neo Notes and tap the ‘Pen Register Now’ button.
Please follow the instructions as shown in the app.
STEP 01.
STEP 02.
STEP 03.
When the pen has been successfully registered, the Pen Registration
screen appears in the App. Now, press ‘Start Neo Notes’ button
and start writing on N notebooks.
STEP 04.
STEP 04.STEP 01. STEP 02. STEP 03.
ENGLISH
1. How to use Neo smartpen 2. Neo Notes App
3. Registering Smartpen to mobile app
4. Using without app connection (Pen is powered on)
•Smartpen works in tandem with mobile app “Neo Notes”
•The app can be downloaded from Google play, Apple app store or Microsoft store.
•Please search for ‘Neo Notes’, ‘Neo smartpen’ in the search bar to find the App
Neo Notes
(*Functions may differ depending on application version.)
STEP 01. STEP 02. STEP 03.
5. How to use Neo Notes
(1) NoteBox
•
Use notebook “Lock” function if you want to use the same
type of notebooks at the same time.
Long tap on the notebook that you wish to lock, then the
‘Share’,’Lock’ & ‘Delete’ button will appear
Select ‘Lock’ button to move your notebook to NoteBox
You can unlock the notebooks anytime.
STEP 01.
STEP 02.
STEP 03.