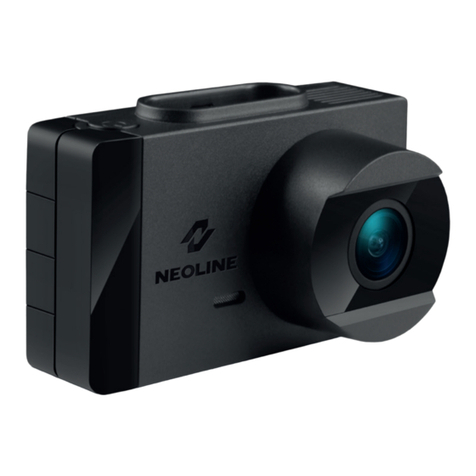
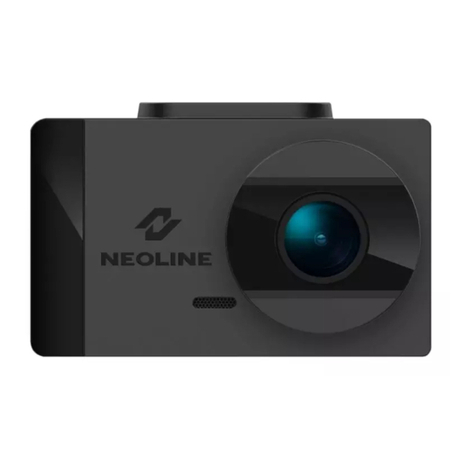
Neoline G-TECH X37 User manual

Video recorder
NEOLINE G-TECH X37
User manual

1
Dear customer!
We appreciate you for purchasing our car video recorder Neoline G-TECH X37. Please,
read thoroughly the manual in order to use the device properly and to extend its
service life. Keep the user manual to use it if necessary.
[ Contents ]
Terms of Use......................................................................................................................................2
Technical specications ................................................................................................................4
Accessories package ......................................................................................................................5
Description of buttons and their functions ...........................................................................6
Assembling of the car video recorder......................................................................................8
Use of device..................................................................................................................................11
Adjustment ....................................................................................................................................15
Possible problems and their solutions .................................................................................17

2
• Please read the terms of warranty service.
• Do not insert or remove memory card from a switched on car video recorder.
Otherwise you might cause damage to the device and recorded les.
• Use only high-quality MicroSD cards of at least 10th class to avoid record
dropouts and delays in the video playback.
• It is recommended to use 8 Gb to 64 Gb memory cards. (Device can support
memory cards with a capacity up to 128 Gb. For this purpose, you need to reformat
the memory card in the FAT32 format).
• Use the device only with accessories supplied with the device. Neoline Company
is not responsible for possible damage to the device in case of use of accessories
of other manufacturers.
• Do not expose the device to re or humidity, the eect of chemically active
substances (petrol, solvent, reagents, etc.).
• It is strictly forbidden to disassemble or modify the device.
• Neoline Company is not responsible for loss of data and/or damage, direct or
indirect, caused to the User or the third party due to the incorrect use of the
device or software, incorrect assembly or use of accessories that were not included
into the accessory package.
• Caution! Some cars supply power to the 12/24V socket connector also with the
ignition switched o. To avoid battery discharge it is recommended to disconnect
car video recorder from a cigarette lighter socket.
• Format your MicroSD card at least one time in two month to avoid damage of its
le system.
• Comply with the temperature conditions of storage and operation (see technical
specications). Avoid long-term exposure of the device to the sun.
[ Terms of use ]

3
• GPS module can operate improperly in a car with athermal windscreen or with
heated windscreen. Since such windscreens include metal coating, GPS module
may not work correctly.
• Mounting on 3M adhesive tape is disposable. Choose right mounting prior to
xation of a mounting on the windscreen.
• Built-in capacitor is designed to complete recording correctly. Operation of the
device is possible only with connection of external power supply.
• Satellites search time may increase depending on the weather conditions, time
of day, terrain, and design features of the car.
A car video recorder is a digital camera designed to record trac conditions and
equipped with special functions.
The manufacturer reserves the right to make changes in the accessories package,
hardware and software of the device without prior notice.

4
[ Technical specications ]
• Processor: NTK96660
• Sensor: OV4689, 4 Mp
• Viewing Angle 160 degrees
• Display: LCD, 2’’
• The video resolution QHD 2560*1440 (30fps) / FHD 1920*1080 (60 fps)/
HD 1280x720P (120 fps)
(basic modes are specied, see Adjustment Clause)
• Video recording format/compression: MP4/H.264
• Bitrate, max.: 24 Мb/s
• Built-in supercapacitor *
• MicroSD memory cards support 10 + class, 8-64 Gb
• Interval of loop recording, min: 1/2/3/5/10
• Continuous recording
• Auto Power On/Auto Power O
• Operating Temperature: -10 С° to +65 С°
• Car plate stamp
• Stamp day/time
• GPS module**
• Wide dynamic range WDR
• Sound recording
• Built-in speaker
• G-sensor
• Motion detection
• Power supply built-in into bracket
• Input voltage of the charger: DC 12-24V
• Input voltage of the device: DC 5V/1A
• Bracket, type: Slider on 3М tape
• Size: 80*50*30,5 mm
• Weight: 76 gr
*Car video recorder is designed for use in a wide temperature range. Capacitor, unlike
the accumulator, has longer service life and is able to work more eciently at low and
high ambient temperatures.
**GPS module is designed to synchronize date and time in car video ecorder, display
and imposing of coordinates and the vehicle speed on the video.

5
• Car video recorder NEOLINE G-TECH X37
• Splitter for 2 USB-ports (2.1А+1А)
• USB-cable
• Bracket with built-in GPS module on 3M tape
• Bracket without GPS module on 3M tape
• Clamp locks for power cable
• User manual
• Warranty Card
[ Accessories package ]

6
[ Description of buttons and their functions ]
1) Button «Power on/Power O»
2) Button «Rec/To the left»
3) Button «Menu»
4) Button «Emergency recording /Conrmation»
5) Button «Microphone/To the right»
6) USB-port in the car video recorder casing
7) AV output
8) Reset button
9) Memory card slot
10) USB-port in connection with the GPS-module

7
LED Indicators
Indicator
Mode
Meaning
Buttons Functions
Power on/Power O
Turn on/turn o the display
Turn on/turn o the device
Enter the Adjustments menu
Make photograph
Return to menu
Open playlist
Block current video le.
1. Choose previous video
2. Delete video
1. Choose next video
2. Block/Unblock video
1. Open video
2. Playback/pause
Start video recording
Stop recording
Turn o audio recording on video, turn on audio
recording on video by second pressure.
The corresponding indicator will be displayed
on the display.
Turn o audio recording on video, turn on audio
recording on video by second pressure.
The corresponding indicator will be displayed
on the display.
When switched on, as well as when
updating the rmware
In video recording mode
Red (continuous)
Red (ashing)
Stand-by mode
Video recording
mode
Playback Mode

8
3 4 5
Turn on the display /turn o the display by second
pressure
Switch to previous setting
Switch to next setting
Return to recording mode
Choose setting
Playback Mode
- Recording mode
- Recording time
- Video resolution
- Recording mode indicator
- Emergency recording
- Microphone
- Memory card
[ Assembling of the car video recorder ]
1. Mounting xation
A. Put the mounting to the slot on the device

9
B. Remove protective cover from the 3М tape
C. Choose appropriate place on the windscreen to provide the best visibility
and mount the car video recorder by tightly pressing it to the windscreen.
2. Connection to the charger.
Insert the car charger into the cigarette lighter. Insert the plug into the USB
connector on the device.
Note: If you use bracket with built-in GPS module please insert the plug
to the USB-port in the bracket’s casing.

10
To enable automatic Power on/Power O on your device after rotation of the
ignition key to the ACC position, use power cable for connection to the on-board
power system (needs to be purchased separately). To receive information on
possible connection and the peculiarities of the fuse box please contact your
vehicle manufacturer.
Please note! Manufacturer is not responsible for failure of the car video recorder
or car’s components due to incorrect connection of a power cable. We advise you
to turn to the specialized service center.
On-board power system power cable
Lay the power cable to the fuse box, as it is shown in Fig. 1.
Connect the power cable with the fuse box according to the manual:
- Connect the end of the yellow wire ACC with accessories fuse
(cigarette lighter, etc.)
- Connect the end of the black wire GND(-) with the car body.
ACC(+12V)
GND
ACC
Fig. 1

11
3. Adjustment of the viewing angle
Adjust of the viewing angle by turning the objective lens in the right direction
(right-left, up-down). Set the objective lens so that the camera captures images
at a ratio of“40% of the sky / 60% of the road” for the best shooting result.
[Operation of the device]
Preparation of the device
А. Insert МicroSD card into a memory
card slot.
Before card insertion switch on the device,
insert a memory card till the complete
xation.
Card insertion: rotate MicroSD card to a
slot, as it is shown on the gure and insert
until it clicks.
Removing the card: Carefully press a card and then remove it from a slot.
PLEASE NOTE: Attempt to insert a card incorrectly will lead to damage of the
device and a memory card. Please, be sure that a memory card is in the right
position.

12
Caution: Do not apply excessive force when inserting a memory card, in order
to avoid damage to the device. To insert a memory card, insert the MicroSD card
into the slot until it locks (until it clicks), if necessary, use a needle to insert a card.
To remove a memory card, press the card until it clicks and remove a card from
the slot, if necessary, use a needle to insert the card.
В. Then plug the charger cable into the Mini-USB connector located on the
device, and insert the charger into a cigarette lighter plug. Start the engine, the
device automatically turns on.
Power On/Power O
1. Automatically: automatically activated when the engine is started and
switched o when the engine stops working. When the engine starts (power is
supplied to the 12/24V car socket) the device will automatically start recording.
After switching o the engine (12/24V car socket power outage) the device
automatically stops recording and saves recorded les.
2. Manually: when the device is connected to the power source and car engine
works, press Power On/Power O button and hold a while to switch on/switch
o the device.
Loop recording
1) Insert MicroSD card to a memory card slot and the loop recording mode
automatically turns on.
2) Duration of video can be 1/2/3/5/10 minutes. It is recommended to set a 3
minutes’ cycle.
3) When the memory card is full, in order to record new video the device will
automatically replace old video les except for the les protected from deletion.
4)Video les shot in the loop recording mode are saved in folder: \DCIM\Movie.
Insert MicroSD card to a memory card slot and the loop recording mode
autmatically turns on.

13
Emergency record
Designed for protection of the current video le from rewrite and erasure. To
protect current video le, press emergency button during recording and the
recorded le will be marked with the special tag that will forbid the device to
delete and rewrite the le.
Note: You can delete “Protected” les on your computer connecting the device
to the computer using the supplied USB-cable. To delete le in the playback
mode, remove protection via Menu or format a memory card.
1) Emergency record turns on automatically with actuation of the G-sensor
(sudden acceleration, braking) or clash. Emergency record is blocked
automatically to prevent erasure during cyclic record.
2) You can start emergency record by pressing the Emergency record button.
Motion detection
If motion detection is activated video shooting will start automatically if there
will be any movement in the frame. If the camera does not recognize any
movement in 60 seconds recording stops automatically. Please note: this
function is designed to be used in a standing vehicle. Do not switch the motion
detection on during driving – it will cause record dropouts and memory card
overow.
Playback mode
1) In stand-by mode, press the button to open list of video les.
2) To switch between les use buttons and and for playback.
3) Press button to exit from playback mode.
4) To delete current le press and conrm your choice with the button.

14
Connection to PC
1) Connect the device to computer using the Mini-USB cable.
2) The device will turn on automatically.
3) Computer will dene the device as a removable drive.
4) You will see three folders:
/Movie (loop recording les)
/EMR (Emergency les)
/Picture (Photos)
5) Copy les that you need to your PC.
Silence mode
By pressing button during video shooting, the user can switch on
or o sound recording. Relevant indicator will appear on the display.
Firmware upgrade
1) Download le with rmware from the ocial site www.neoline.ru, extract
le from the archive.
2) Format memory card and drag the le to the МicroSD memory card.
3) Insert memory card with the le on it to the car video recorder slot.
4) Connect the device to the power source and switch it on.
5) Led indicator will icker while is being downloaded to the device.
6) The device will restart automatically after the end of the process.
7) Check the Adjustment menu if the correct rmware version is displayed.
8) Format memory card via the car video recorder menu.
Please note! Do not disconnect power supply of the car video recorder at
the time of rmware update.

15
[ Adjustments ]
Resolution:
2560х1440Р 30fps, 2304x1296P 30fps, 1920x1080P 60fps, 1920x1080P 60fps,
1920x1080P 30fps, 1280x720P 120fps, 1280x720P 60fps, 1280x720P 30fps.
Loop recording: O/1/2/3/5/10
Exposure: Adjust exposure to receive better image quality depending on light
sources. Index varies between -2.0 and +2.0. Default index is 0.0.
WDR: On/O
Time-lapse recording: switch o/200 msec./1 sec./2 sec./5 sec./10 sec./ 30 sec./
1 min./5 min./10 min. Designed for shooting of one frame after a certain
period of time. We do not recommend to switch this function to avoid missing
important aspects of trac situation.
Motion detection: On/O
GPS: switched on/switched o. When GPS function is o, the device does not
show current speed and location and time/date is not synchronized in
accordance with time zone.
Speed Unit: MPH / KM/H
G-sensor: Low/Medium/High/O
LDWS (Lane Departure Warning System): On/O
FCWS (Frontal Collision Warning System): On/O
Please note! LDWS and FCWS functions might not work properly due
to bad road markings, non-compliance with the distance when
maneuvering and so on.
FCWS and LDWS are available only in Full HD 30 fps shooting mode.

16
Date/time stamp: Switch on/Switch o. Serves to show current date and time
on video.
GPS info stamp: On/O
Speed stamp till 100 KPH: On/O
Camera model stamp: On/O
Sound recording: On/O.
Screen Saver: O/1 sec./ 3 sec./15 sec./30 sec./1 min./3 min. Serves to switch o
display light after set period of time.
Button backlight: On/O.
Date/Time: Set current date and time. If GPS module is on date and time will be
set automatically.
Time zone: Set time zone to update date and time via GPS.
Language: Russian/English
Beep sound: On/O.
Please note! The car video recorder has a stopped recording notication
function. When sound notications are o this function is not available.
It is recommended to use sound notications.
Frequency: 50Hz/60Hz
Image rotation: On/O
Format: MicroSD card formatting. All les stored on the memory card will be
deleted.
Format warning: 15 days/30 days/60 days/O.
Default setting: Returns all settings to the original factory settings.
Cat plate number: allows putting a 10 digits marking on a video.
It is recommended to use car plate number.
Custom Text Stamp: allows to add a personal stamp
Firmware Version: Current rmware version.

17
[ Possible problems and their solutions ]
If despite compliance with operating conditions problems occurred in the
device, use this section to resolve them.
- It is impossible to take pictures or record video.
Check if you have enough free space on the MicroSD card, or if it is blocked.
- Spontaneous stop during recording.
Due to large scope of video les use only high-speed MicroSD cards of at least
10th class from approved manufacturers.
- When you try to view/play pictures and video les,“invalid le”
notication appears on the display.
Unnished recording due to le system error on MicroSD card. Format MicroSD
card.
- Blurred image.
Check if the objective lens is clean from dirt or ngerprints. If there are some
clean the objective lens with soft ber before use (it is recommended to use
special means for maintenance of lenses for not to damage the lens’ surface).
- A darker image when photographing the sky or water. If there is a great
contrast in the scene, it will aect the exposure. Change the settings of the
exposure value on the menu.
- Suspension (there is no picture on the display, the device does not
respond to button presses).
Press the RESET button for a compulsory restart of the device.

Manufacturer:
Viofo.,Ltd
address: 401, Zhupai Industrial Zone,
Minfu Road, Minzhi Street, Longhua,
Shenzhen, China
Made in China
Official site: www.neoline.ru
Service life: 36 months
DC 5V, 1A
Operating temperature: from -10 degrees to +60 degrees
Table of contents
Other Neoline DVR manuals
