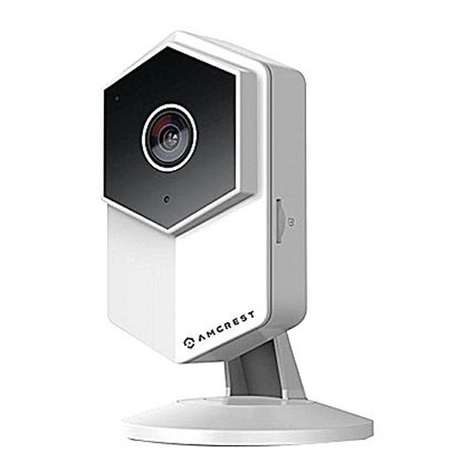
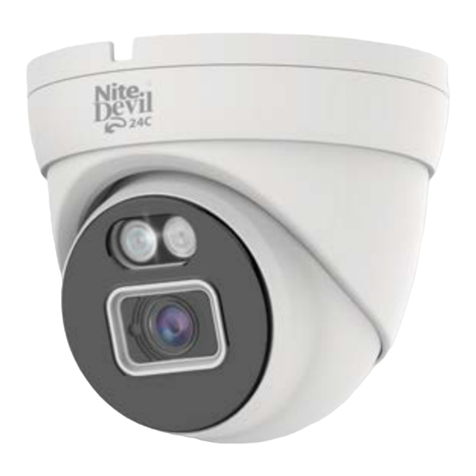
Neposmart NS14WG User manual

© 2017 Nepoware Corporation. All Rights Reserved.
User Manual

© 2017 Nepoware Corporation. All Rights Reserved.
Table of Contents
Getting Started
What’s in the Box 4-5
Setup
Requirements for Installation 6
Initial Setup 6
Neposmart Setup Using an iOS Device
Downloading and Using the Neposmart App
7
Connecting Wireless & Changing Usernames/Passwords
8
Installing Neposmart in your Garage
9-12
Finalizing Setup –Opening/Closing your Garage Door
13
Setting Up Garage Door Alerts
14
Configuring iOS Push Notifications
15-16
Configuring Dropbox Sync Using iOS
17-18
Neposmart Setup Using an Android Device
Downloading and Using the Neposmart App
19
Connecting Wirelessly & Changing Usernames/Passwords
20
Installing Neposmart in your Garage
21
Setting Up Garage Door Alerts
22
Configuring Dropbox Sync Using Android
23-24
Configuring Android Local Notification
25-26
Using Android Wear With Neposmart
27
Neposmart Setup Using a Mac
Installing and Using the Neposmart Application 28-30
Connecting Neposmart Wirelessly 35-36
Installing Neposmart in your Garage 31
Finalizing Setup 32

© 2017 Nepoware Corporation. All Rights Reserved.
Using the iOS App
Using the App 33
Using the Video View 38-39
Neposmart In-App Guided Tutorial 39
Multi-View Mode 40
Viewing Saved Snapshots and Videos 40
Changing Neposmart Settings 41-42
Using the Android App
Using the App 43
Using the Video View 43-44
Neposmart In-App Guided Tutorial 44
Multi-View Mode 45
Viewing Saved Snapshots and Videos 45
Changing Neposmart Settings 46-47
Using the Mobile Web Interface 48-49
Using the Desktop Web Interface 50-52
Web on IE and Neposmart Control on Windows 53-56
Viewing Video Using VLC Media Player 57
Advanced Settings and Features
Neposmart Web Settings 58
Media Settings 58-59
Network Settings 60-61
Door/Garage Settings 61
Motion/Alarm 62-63
Advanced 64-66
System Settings 67-68
Neposmart Quick Reference Card 69-71
Troubleshooting Guide 72-73
Safety Information and Product Care 74-75
Regulatory Compliance Information 76
Technical Specifications 77-78
Warranty 79-80

© 2017 Nepoware Corporation. All Rights Reserved.
Getting Started
Welcome to Neposmart. Neposmart connects directly to your wired or wireless network and allows you to
conveniently open and close your garage door with the built-in Intelligent Garage Controller (patent pending)
and monitor your garage through the integrated HD video camera from anywhere, through any internet-enabled
device. This manual will walk you through the process of installing and using Neposmart.
Video tutorials are also available at https://neposmart.com.
What’s in the Box?
Neposmart IoT
Security Camera
Wireless Antenna
Mount
Magnetic Switch
Ethernet Cable
Screws AC Adapter Bell Wire
Documentation:
Quick Start Guides
Warranty Information
Safety Notice and Product Care
FCC Compliance

© 2017 Nepoware Corporation. All Rights Reserved.
Front View:
1. Camera---The camera allows you to
view what is happening in your garage, home or business
2. Focus ring---Turn to focus the camera if the pictureis
notclear.
3. Ambient light sensor---The ambient light sensor detects
lighting conditions and automatically turns on night vision if
needed.
4. Night vision lights---The night vision lights glow faintly
when camera is in night vision mode.
5. Status lights---Two lights, a red and a blue light
indicate the status of Neposmart. The red light indicatesthat
Neposmart is on and has power. The blue light pulses when
Neposmart is active and is sending and receivingdata.
6. External Speaker---Allows you to hear what is
happening in your garage, home or business
7. SDHC card slot---Insert an SDHC card (supports
cards up to 32 GB) to save snapshots and video from the
integrated camera.
8. Microphone---Allows you to speak through the camera
Rear View:
1. Power port---Connect the included AC adapter topower
Neposmart.
2. WiFi antenna port---Connect the included WiFiantenna
to connect Neposmart to a wirelessnetwork.
3. Reset button---Used for Wifi protected setup or for
resetting Neposmart to factorydefault.
4. Ethernet port and lights--- Connect Neposmart to a
wired network. Two lights indicate network status. The amber
light indicates that the Ethernet port has power. The green
light blinks when Neposmart is sending and receiving data
through the Ethernet port.
5. Audio IN---Connect Neposmart to a line-level
microphone or line-level audio inputdevice.
6. Audio OUT---Connect Neposmart to speakers.
7. OUT/IN Port---Connect Neposmart to your garage door
switch/magnetic door sensor
1
2
3
4
6
7
8
5
4
7
2
1
3
5
6

© 2017 Nepoware Corporation. All Rights Reserved.
Setup
This chapter will walk you through the process of setting up your new Neposmart and connecting it to your garage.
Requirements for Installation
1. YourNeposmart with the included accessories andsoftware
2. A wirelessrouter
Your Neposmart can be connected wirelessly using Wifi or wired using an Ethernet cable. If you are
connecting your Neposmart wirelessly, a moderately strong Wifi signal is necessary. You may also connect
Neposmart using an Ethernet cable or use a Wifi extender or bridge.
3. iOS, Android device, Windows PC or MacOSX
4. A garage door opener with a safety eye system or equivalent safety system. (For Intelligent Garage Controller use)
Initial Setup
This initial setup will show you how to connect Neposmart to your wireless network.
1.
First, connect the Wifi antenna to the antenna port on Neposmart. Note: If you are permanently connecting your
Neposmart in your garage using Ethernet, you may skip thisstep.
2.
Connect Neposmart to a power outlet using the included power adapter. Wait one minute for Neposmart to start. You
may see the camera move around while Neposmart isinitializing.
3.
Connect Neposmart to your network. You can do this in two ways. Youmay simply connect Neposmart using the
included Ethernet cable or using Wifi Protected Setup. If your router or modem does not support Wifi Protected Setup,
you must connect it using an Ethernet cable.
(Skip if Neposmart is connected to your network with an Ethernet cable)
4.
Touse Wifi protected setup, follow the instructions that came with your router. Topair Neposmart with your router,
press the WPS Button on your router and the reset button at the back of your Neposmart Camera for five (5) seconds and
release. Wait one minute and Neposmart should connect to your network. If the pairing process fails, you may repeat this
step or you may also choose to connect your Neposmart to your network with an Ethernet cable.
5.
Youmay now proceed to the appropriate following sections to continue setup.

Neposmart Setup using an iOS Device
If you use an iPhone, iPod touch, and iPad, these instructions will show you how to set up Neposmart with your
device. What you may see on your screen may differ from what is shown here depending on the version of iOS
you are using and the size of your screen.
Step 1 –Downloading and Using the Neposmart App
1. Youmay download the Neposmart app by going to the App Store on your device
and searching “Neposmart.”
You may also scan the QRCode on the right using an application such as RedLaser
2. Open the Neposmart app on yourdevice.
3. Youwill receive a prompt asking whether you would like a quick in-app tour. It is highly recommended to take this
voice guided tour by tapping “YES”.
4.Tap “Add Device” and you should see a list of Neposmart devices. Choose your Neposmart from the list, and type
the default 123456 into the password field and tap “Add” on the upper rightcorner.
5. Tofamiliarize yourself with how the app works, try viewing your actual video feed. Choose your device in the list by
tapping If everything is working properly, you should be able to see some video. Youcan swipe on the video to
move the camera up, down and side to side
VIEW-123456-ABCDE
6. The Icon allows you to open/close your garage door if you have connected one. You will need tocomplete the
Intelligent Garage Setup with your garage door before you can control it via the Neposmart app.
7. More information on using the app can be found in the section on Using the iOS Neposmart app.
8. Toreturn to the list of devices, tap the exit button on the top right
7
A
B
D
C
G
F
E

Step 2 –Connecting Wirelessly & Changing Username/Passwords
1. In the list of Neposmart devices,tap
2. Tap“Device Settings.”
3. A few usernames/passwords need to be changed to make Neposmart more secure. There are a few usernames and
passwords that Neposmart uses:
a. The Camera Administrator is used to view the video, control and change Neposmart Device Settings
Default Username =admin
Default Password = 123456
b. The Door/Garage is used to open/close the garage door
Default Username =garage
Default Password = 2015
c. The Guest is used to view the camera but cannot control and change any Neposmart Device Settings
Default Username = visitor
Password = 123456
4. Tap“User Settings”
5. a. Change the default Camera administrator username/password. Youcan use selected special characters to
strengthen your password.
b.
Change the default Door/Garage administrator username/password if you are going to use the Neposmart Intelligent
Garage Controller. Youcan use selected special characters to strengthen yourpassword.
c.
Change the default Guestusername/password.
6. If you intend to use Neposmart wirelessly, you can connect it to your wireless network by tapping “WiFi Settings”
Youmay have to wait a minute to allow the app to scan for networks. Select a wireless network for Neposmart to
connect to from the list, and enter the password. Tap “Done” when you are finished. If your wireless network SSID is
hidden, you must connect to it using Neposmart web browser settings instead. Please refer to “Network Settings”, page
58 on how to change network settings using the web browser.
7. Your Neposmart is now ready for installation in your garage. Youmay now unplug it and take it and the rest of the items
that it came with to yourgarage.
VIEW-123456-ABCDE
VIEW-123456-ABCDE
A
B

Step 3 –Installing Neposmart in Your Garage
Installing your new Neposmart in your garage is easy. The Neposmart is connected to two things that allow it to monitor
and control your garage door. One of these is the magnetic switch included with Neposmart. This switch is mounted on
your garage door and allows Neposmart to determine whether the door is open or closed. Additionally, Neposmart is
connected to your garage door opening unit switch. This allows Neposmart to open and close your garage door. Both of
these are connected using the included bell wire. Do not install Neposmart if your garage door does not have an electric
eye safety system or equivalent safety system where the door will automatically reverse if something is blocking the door
from closing to prevent harm or property damage.
1. The first thing you will want to do is disconnect your garage door opening unit from electrical power. Youcan do this
from the circuit breakers, or you can unplug your garage door opening unit.
2. Collect your tools. You will need a Phillips screwdriver, a sturdy ladder if you are mounting Neposmart on the ceiling,
wire-cutting pliers, wire strippers (if you do not have wire strippers you can also use a sharp knife or pair of scissors to
carefully strip the wires), a hammer and cord staples or tape.
3. First, you will have to determine how you would like to connect Neposmart to your garage door opening unit. Take
a short look at the button or button panel that you push to open and close your garage door. Neposmart can control
garage doors that have single button or button-only controls directly. If the device that controls your garage directly has
a screen, you will need to connect to your garage door opener wirelessly instead. This is accomplished by connecting
a wireless garage remote control to Neposmart. (See “Connecting Neposmart to Your Wireless Garage Opener
Remote” for instructions)
4. Before you begin connecting, pick a place to mount your Neposmart.
5. Ideally, Neposmart should be mounted so the camera has a good view of your entire garage, or at very least, the part
of the garage you would like to observe. Make sure that the location has a moderately strong Wifi signal or that you
can run an Ethernet cable to it. You may also use a Wifi extender or bridge to improve the Wifi signal if needed. You will
also need a close-by power outlet, or be able to run an appropriately rated extension cord to that location.
6. Now that you have found a place to mount, take a good look at what you are mounting Neposmartto.
If the surface you are mounting on is wood, you can drill holes with a wood drill bit and use the included screws to
mount it. If you are mounting to drywall, use the supplied screw-type drywall anchors to ensure that it will be
secure. If using drywall anchors, screw the anchors in first, and then screw the bracket onto the wall. If you are
mounting to a metal surface, use bolts or metal screws and the appropriate metal drill bit if needed.
7. Finally, attach your Neposmart to the bracket using the tripod socket on the base.

Connecting Neposmart Directly to Your Garage Door Opening Unit
If your garage door opening unit uses a button-only wall-mounted controller as in wall-mounted controller may
have more buttons) you may use this method to install. There are two ways to connect Neposmart directly to your
garage door opening unit. You may choose to connect Neposmart to the wall-mounted switch or directly to the
garage door opening unit.
Connecting Neposmart to a Wall-Mounted Switch
a.
If you are connecting Neposmart to the wall- mounted switch remove it from the wall. These are typically secured
with two screws. (For detailed instructions, consult the manufacturer of your garage door wall mount)
b.
Loosen the two screw terminals on the back of the switch holding the wires connecting to the garage door opening unit.
c.
Next, slide the spade connectors on the end of the bell wires under the screw terminals and tighten.
d.
Remount the switch on the wall.
e.
Find a path for the wires connecting your garage door opening unit to your Neposmart. Lay the wires, and cut them to
the appropriate length.
f.
Toconnect the other end of the bell wires to Neposmart, strip 1 cm or 1/2 an inch of insulation off the ends of the wires.
Insert either of the two wires into either of the two ports marked “OUT” on the rear of Neposmart.
If your garage door opening unit uses a button-only switch, you may also connect Neposmart directly to the garage
opening unit.
a.
Consult the manufacturer of your garage door opener to find the locations of the screw terminals used to connect the
button-only switch. These are usually located under one of the covers for the lights.
b.
Slide the spade connectors under the existing wires and tighten the screws.
c.
Find a path for the wires connecting your garage door opening unit to your Neposmart. Lay the wires, and cut them to
the appropriate length. Securing the wires is highlyrecommended.
d.
Toconnect the other end of the bell wire to Neposmart, carefully strip 1/2 of an inch of insulation off the ends of the
wires. Insert either of the two wires into either of the two ports marked “OUT” on the rear of Neposmart.
B
C
D
E
F
G

Connecting Neposmart to Your Wireless Garage Opener Remote
If your garage door opening unit uses a wall-mounted
controller with a screen, or it is difficult to connect
Neposmart using wires, you may connect Neposmart
to the wireless remote control of your garage opener.
Optionally, you can purchase an extra remote
control for your garage door opening unit from the
manufacturer.
Connecting Neposmart to your existing remote control
a.
Open your remote control carefully and locate the pins of the switch behind the button you push to open or close
the garage door. Pressing this button on the remote control that opens the garage door should connect these pins. Use
a conductivity meter if you are unsure of whether it connects these pins or not when the button is pressed.
b.
Solder a wire carefully to each of the two pins. If your remote has more pins behind each button, use a conductivity
meter to find which pins are connected when the button that opens your garage door is pressed.
c.
Drill or find a place where the wires will exit the body of the remote control. Route the wires out of this place on the
remote control and carefully close the remote control casing.
d.
Strip 1 cm or 1/2 an inch of insulation off the ends of the two wires from the remote control. Insert either of the two
wires into either of the two ports marked “OUT” on the rear of Neposmart.
Tips on Connecting Wires to Neposmart
Neposmart uses push-in wire connectors. When
connecting wires, strip 1 cm or 1/2 an inch of
insulation off the ends of the wires before inserting
them. Push the wires into the holes until they stop
and no bare copper is visible. When they are fully
inserted, the orange tabs should be depressed
If it is difficult to insert the wires, you may push
the orange tabs, insert the wires, and release the
orange tabs. To release the wires, push on the
orange tabs and pull the wires out
I
J
H
K

Mounting and Connecting the Magnetic Switch
The magnetic switch allows Neposmart to determine whether the garage door is opened or closed. The magnetic
switch has two sides. One side has wires leading out of it or terminals. This is the sensor side. The other side contains
a magnet. The magnet side will need to be mounted on the garage door and the sensor side will need to be mounted on
the side of your door, the wall, or the floor. Regardless of how the sensor and magnet are mounted, be wary of
rollers, steel door balancing cables, hinges, springs, and other things that may be attached to your garage door.
1. The sensor needs to be within a certain distance from the magnet to work properly. The sensor should be placed within
two inches of the magnet. Asillustrated in the sensor side is mounted on the top wooden fram near theceiling and
the magnet is attached using a double sided tape on the top frame of the garage door.
2. Youmay mount the magnet to the door with strong, double-sided tape on the smooth top and sides of the magnet
metal or wood screws depending on the material of your garagedoor.
3. With the magnetic switch mounted, you may now find a path for the wires connecting the magnetic switch to
Neposmart. Cut the wires to an appropriate length. Securing the wires to the wall is highly recommended.
4. Strip 1 cm or 1/2 of an inch of insulation off the ends of the wires. Insert either of the wires into either of the two ports
marked “IN” on the rear of Neposmart.
Note: While top wall mounting of the magnetic switch is illustrated, the
switch can be mounted on the side wall or floor depending on your preference and garage layout. Whether the top,
bottom, or sides of the sensor face the magnet does not matter as long as the magnet and center of the sensor are
within 2” of each other. You can mount the magnet and sensor in any orientation as long as they are parallel. To
simplify installation, you can also use double-sided tape on the smooth top surface of the sensor or the smooth sides
or top of the magnet to the door or wall to mount them securely.
A
B
C

Finalizing Setup - Opening/Closing your Garage Door
1. Now that Neposmart is connected to your garage door opener, you can now use Neposmart to open
and close your garage.
2. On your iOS device, bring up the Neposmart app.
3. You can open/close your garage by going to the video view and tap the garage icon . Use your
voice to open and close the garage door. Gently shake your phone and you willhear
Voice Command. Say “please open garage door” or “please close garage door” to activate.
You can also tap the garage icon from the Device List but only use this option if you have a view of
your garage door. The garage icon on the Device List will only be visible if the garage/door password is
changed from its default value and the Neposmart Camera is connected.
4. With the garage magnetic door sensor installed, enable the door sensor by going to Device Settings
and select Door/Garage Settings. Tap and enable Door Detection The heavy duty magnetic switch
delivered with your Neposmart is an N.C. (Normally Closed) sensor. Leave the Door Sensor Type
as N.C.
D
VIEW-123456-ABCDE
E
G
H

Step 4 –Setting Up Garage Door Alerts
There are several options available to receive real-time door alerts and images. These include:
a. Email messages with image attachments when the garage/door opens orcloses
b. Email text alerts using the email to SMS function through your cellular carrier.
c.Apple Push Notification Service (APNS) to receive alerts
d. Door open/close images directly uploaded from your Neposmart to your Dropbox Account.
Email and Text Alerts
1.
Go to Device Settings and tap Email Configuration
2.
In the Email Configuration screen, you can have Neposmart send an email when your garage is opened, closed or
when motion is detected. First, you must pick a sender email address from which to send the alerts. When Neposmart
sends the alerts, it will be sent from that email address. In this example, the sender email address is myneposmart@
hotmail.com. Select your email provider from the dropdown or press “other” to enter a custom SMTP server that is not
listed. In this example, choose Live for smtp.live.com since we are using @hotmail.com. (Check with your email provider
for ‘outgoing server settings’ if you are unsure what the SMTP server is). Enter the email address and Password for
sender email in
3.
Youcan add up to 3 additional recipient email addresses to receive alerts. Enter valid email accounts to the “Recipient”
fields. If you would like Neposmart to send a text message alert, you will need to enter the SMS email address. The
example in is for Verizon (Typical format is <your cell>@<mobile carrier email>.A list of email to SMS email addresses
can be found at http://www.emailtextmessages.com. For instance, if you are using Verizon and your number is
2031234567, then you would enter 2031234567@vtext.com in the list of email addresses.
4.
When you are finished, tap “Done.”
Note: There can be a total of 6 email recipients. To add more than 3 recipients, you can use the web
browser app and go to Settings > Advanced > Email Configuration
A
E
B
2031234567@vtext.com
D
smtp.live.com
C

Configuring iOS Push Notifications
Another notification system utilized by Neposmart is the APNS (Apple Push Notification Services).
Neposmart can send open and close garage door notification using APNS. To enable APNS notification, please do the
following:
1.
When Neposmart is first started, a dialog box will appear “Neposmart” Would like to Send You Push Notifications.
The Neposmart is your IP Camera. Press OK to enable APNS.
2.
Another way to enable APNS for Neposmart is to go to your iOS Settings and tap Notifications Select Neposmart.
Enable Allow Notifications and then select your option whether to enable sounds, Badge App Icon and Show on
Lock Screen
3.
Toenable the sending of notification from Neposmart, go to Neposmart app Device Settings and enable Door Push
Notification and Door Detection.
4.
Toensure everything is in sync and APNS is properly activated, you can exit from your Neposmart app and start it again.
A
B
C
D

VIEW-123456-ABCDE
5.
As soon as you open or close your garage door, a notification will be sent on a Lock screen if enabled or display a
notification when you are using your iOS and the Neposmart app is not running.
6.
Behind the scenes, Neposmart maintains certificate files to allow sending of notification using APNS. The certificate
expires in a year at the time of issuance. APNS will stop sending if the certificates stored in your Neposmart camera has
expired. Before expiration of your certificates, you will be prompted to update the certificates from your Neposmart app. One
visible indication if there is an update needed is the icon on the right of your camera will turn red. When you press the
red
icon, a dialog box will appear. Tap OK and updated certificates (or important software updates) will be applied to
your Neposmart IPCamera.
Congratulations! You have finished setting up Neposmart and ready for use. You can use your
iOS device to control and monitor your garage anywhere, anytime. With the advanced networking
technology used by Neposmart, you do not have to fiddle with your router and do any port forwarding to
access your Neposmart externally from your iOS device. Enjoy!
A
B
C
VIEW-123456-ABCDE
D

Configuring Dropbox Sync Using iOS
Neposmart can be configured to automatically upload open/close door, open door short video clip, and motion
detected files to your local Dropbox account. Once configured, Neposmart will upload two images a few seconds
apart when the garage door opens, a 15 second clip when door opens and two images when the garage door
closes. The two images upload per activity will allow you to see the event without filling up your Dropbox folder. It
can also be configured to upload motion detected events and as soon as motion is detected, two images will be
directly uploaded to your Dropbox a few seconds apart.
1.
Go to Device Settings and tap Dropbox Sync
2.
TapEnable Dropbox Sync.
3.
A Dropbox Setup dialog box will appear.Tap OK to continue. Neposmart will retrieve the Dropbox token and
another dialog box will pop out to enable you to login to your local Dropbox and authorize the upload of files to your
account. You will be given up to five minutes to complete the Dropbox Authorization process before timing out. If you
exceeded the five minutes period, you can start again.
4.
Youwill now be prompted to sign in to Dropbox. Please enter a valid email and password and tap Sign
5.
Press “Allow” to authorize your Neposmart camera to upload files to your Dropboxfolder.
6.
Once successful, your Neposmart camera is now linked to your Dropbox Account.
A
B
C

7.
Tosave door open/close images, you need to enable Save Open Door Images in the Dropbox Sync Setting. You
also need to make sure Door Detection is enabled under Door/Garage Settings.
8.
Tosave a shot video clip when the door opens, you need to enable Save Open Door Video Clip in theDropbox
Sync Setting and make sure Door Detection is enabled under Door/Garage Settings.
9.
Tosave motion images, you need to enable Save Motion Images in the Dropbox Sync Setting. Youalso need to make
sure Motion Alarm is enabled under Motion Settings.
10.
Uploaded files to Dropbox will be stored in the Apps/Neposmart folder. Please do not remove or rename theApps/
Neposmartfolder.
11.
Under the Apps/Neposmart folder, each Neposmart camera that has Dropbox sync enabled will have its ownfolder.
If you run out of space in your Dropbox, you can manually delete files under the Neposmart camera or delete the
Neposmart camerafolder.
12.
For every door open or close event, the following sample image files will be stored.
a)
dooropen0214-073045-1.jpg (this is the first door image dated Feb 14 7:30AM door open image #1)
b)
dooropen0214-073045-2.jpg (this is the second door image few seconds apart dated Feb 14 7:30AM door
open image #2)
c)
doorclose0214-074020-1.jpg (this is the first door image dated Feb 14 7:40am door close image #1)
d)
doorclose0214-074020-2.jpg (this is the second door image dated Feb 14 7:40am door close image #2)
For every door open event, a short video clip with the sample name videodooropen0214-073045.avi will be stored if
enabled.
13.
For motion detected event, the following sample image files will be stored.
a)
motion0215-094520-1.jpg (this is the first motion image dated Feb 15 9:45AM motion image #1)
b)
motion0215-094520-2.jpg (this is the second door image few seconds apart dated Feb 15 9:45AM motion
image #2 )
Neposmart authorization to store images and video clips to your Dropbox is limited to sending images and video to the
apps/Neposmart/<camera name> folder. It is not configured to access any other files or delete files from your Dropbox.
With this, you need to monitor your Dropbox to make sure there is enough space to upload files. Once the files are in your
Dropbox account, you can copy, delete or share your images using the standard Dropbox interface.
D
E
F

A
B
E
G
F
Neposmart Setup using an Android Device
If you use an Android phone, tablet, TV box, or other Android device, these instructions will show you how to use
Neposmart with your device. Certain things including button placements may appear slightly differently depending
on the manufacturer of your device, the version of Android you have on your device, and the size of your screen.
Step 1 –Downloading and Using the Neposmart App
1. Youmay download the Neposmart app by going to the Google Play Store on your device
and searching “Neposmart.” You may also scan the QRCode on your right using an application such
as RedLaser
2. Open the Neposmart app on yourdevice.
3. Youwill receive a prompt asking whether you would like a quick in-app tour It is highly recommended to takethis
voice guided tour.
4.Tap“Add Device” and you should see a list of Neposmart devices. Choose your Neposmart from the list, andtype
the default 1234565 into the password field and tap the checkmark on the upper right corner
D
C
5. Tofamiliarize yourself with how the app works, try viewing your actual video feed. Choose your device in the list by
tapping If everything is working properly, you should be able to see some video. Youcan swipe on the video to
move the camera up, down and side to side
VIEW-123456-ABCDE
6. The Icon allows you to open/close your garage door if you have connected one. You will need tocomplete the
Intelligent Garage Setup with your garage door before you can control it via the Neposmart app.
7. More information on using the app can be found in the section on Using the Android Neposmart app.

8. Toreturn to the list of devices, tap the exit button on the top right
Step 2 –Connecting Wirelessly & Changing Username/Passwords
1. In the list of Neposmart devices, tap the icon
2. Tap“Device Settings.”
3. A few usernames/passwords need to be changed to make Neposmart more secure. There are a few usernames
and passwords that Neposmart uses:
a. The Camera Administrator is used to view the video, control and change Neposmart Device
Settings Default Username = admin
Default Password = 123456
b. The Door/Garage is used to open/close the garage
door
Default Username =garage
Default Password = 2015
c. The Guest is used to view the camera but cannot control and change any Neposmart Device
Settings Default Username = visitor
Password = 123456
4. Tap“User Settings”
5. a. Change the default Camera administrator username/password. Youcan use selected special characters
to strengthen your password.
b.
Change the default Door/Garage administrator username/password if you are going to use the Neposmart
Intelligent Garage Controller. You can use selected special characters to strengthen yourpassword.
c.
Change the default Guestusername/password.
6. If you intend to use Neposmart wirelessly, you can connect it to your wireless network by tapping “WiFi
Network”
You may have to wait a minute to allow the app to scan for networks. Select a wireless network for Neposmart to
connect to from the list, and enter the WiFi password. Tapthe check when you are finished. If your wireless network
SSID is hidden, you must connect to it using Neposmart web browser settings instead. Please refer to “Network
Settings”, page 58, on how to change network settings using the web browser.
VIEW-123456-ABCDE
A
VIEW-123456-ABCDE
B
E
C
F
D
Table of contents
