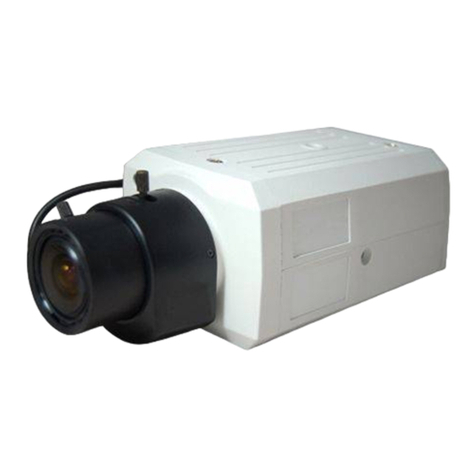
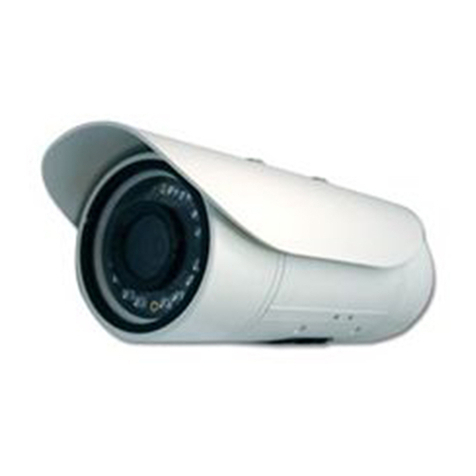
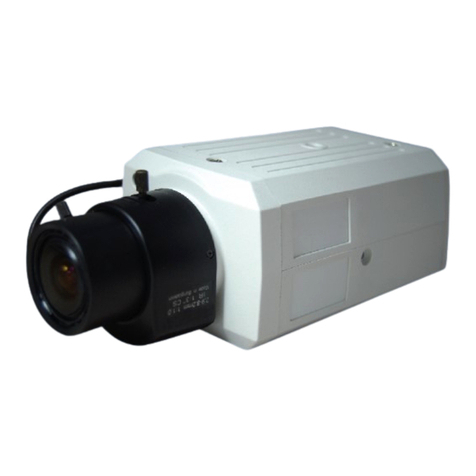
Appro LC-6770 User manual

Before trying to connect or operate this product, please read this manual completely
INSTALLATION &
OPERATION MANUAL
MINI BULLET IP CAMERA
LC-6770


Table Of Contents
SAFETY PRECAUTIONS .............................................................................3
1. PRODUCT FEATURES.............................................................................4
.....................................................................4
NDOOR/ OUTDOOR (POE)..............................5
AMS .............................................................9
..................................................................10
ARE ..........................................................13
...................................................................14
TRANET)............................................................................14
.................................................................................................15
...................................................................18
...................................................................20
PLORER......................................................23
1.1 PRODUCT INSTRUCTIONS.....................................................................4
1.2 PRODUCT FEATURES ......
2. DESCRIPTION OF THE SURFACE .........................................................5
2.1 THE BULLET IP CAMERA I
2.2 THE RESET BUTTON ............................................................................8
2.3 THE ALARM WIRING DIAGR
3. INSTALLATION ......................................................................................10
3.1 HARDWARE INSTALLATION
3.2 MOUNTING AND POSITIONING THE MINI BULLET...................................11
3.3 UPDATING SYSTEM SOFTW
4. Network Configuration..........................................................................14
4.1 CABLE CONNECTIONS.....
4.1.1 Connect to a computer.....................................................................................................14
4.1.2 Connect to a LAN Hub (IN
4.2 CONFIGURE YOUR IP CAMERA NETWORK SETTINGS ...........................15
4.2.1 Set IP Address.................
4.3 TCP/IP COMMUNICATION SOFTWARE.................................................16
4.4 TCP/IP INSTALLATION ....
4.5 TCP/IP CONFIGURATION SETTING ......................................................19
4.6 CONNECTION TESTING....
5. Configuration Using A Web Browser ..................................................22
5.1 MICROSOFT INTERNET EX
1
5.1.1 Connecting the IP camera...............................................................................................23
5.1.2 Live Video.......................................................................................................................24
N......................................................................80
.........................................................................85
5.1.3 Setup ...............................................................................................................................26
6. ADVANCED OPERATIO
7. SPECIFICATIONS...................................................................................83
8. Functions of client PC..
APPENDIX 1. –How to run IP Camera UPnP...........................................86
2

SAFETY PRECAUTIONS
All the following safety and operational instructions to prevent harm or injury to the operator(s) or
other persons should be read carefully before the unit is activated.
To prevent fire or shock hazard, avoid exposing this unit to rain or moisture.
Do not block ventilation openings.
Do not place anything on top of the unit that might spill or fall into it.
Do not attempt to service this unit yourself, as opening or removing covers ma
y
expose you to dangerous voltage or other hazards. Please refer all servicing to
your distributor/ retailer.
Do not use liquid cleaners or aerosols for cleaning.
To prevent fire or electric shock, do not overload wall outlets or extension cords.
PoE warning : If the PoE injector is used instead of the supplied power adaptor, all
of the wiring to and from the injector must be routed/ installed inside a building
/
plant and never routed/ installed outside of the building/ plant.
Please only select a power adapter or power certified by UL and marked at 24Vac
/ 60 Hz, minimum 1A, class 2 or LPS.
CAUTION
RISK OF EXPLOSION IF BATTERY IS REPLACED BY AN INCORRECT TYPE.
DISPOSE OF USED BATTERIES ACCORDING TO THE INSTRUCTIONS.
WARNING
3

1. PRODUCT FEATURES
1.1 Product Instructions
Here's a new series from APPRO -- cameras that act as basic watchguards in your premises --
lightweight, simple formatted, inexpensive, and no fuss to install.
These watchkeepers are the ideal stuff for the safety of your home and office interiors.
Our mini bullet camera brings you dependable video surveillance in a focused & targetted
environment.
The dynamically effective sensor has a resolution at 720P. Our model comes with a f:3.6mm/ F1.8
lens ranging over a spectrum of indoor Fixed Focal Board and outdoor applications. The LC-6770
camera is mounted on a flexible bracket that's stylishly designed to grace your interiors - you can fix
it onto any walls, surfaces or ceilings. The camera itself has a well – knit format and maintains a
suitably low - key presence. It's your genuine plug n play device with easily adjusted settings.
It also offers support for Power over Ethernet ( PoE ), so you can put the device in places which
have no power outlets close by.
1.2 Product Features
1/2.7” OmniVision 720P CMOS sensor.
Simultaneous H.264 and MJPEG video compressions.
Multi-profile applications: Selectable resolutions, frame rates, video qualities, and
compression.
Advanced motion detection (512 zones, sensitivity: 0~100 %).
Supports ONVIF.
4

2. DESCRIPTION OF THE SURFACE
2.1 The Bullet IP Camera Indoor/ Outdoor (PoE)
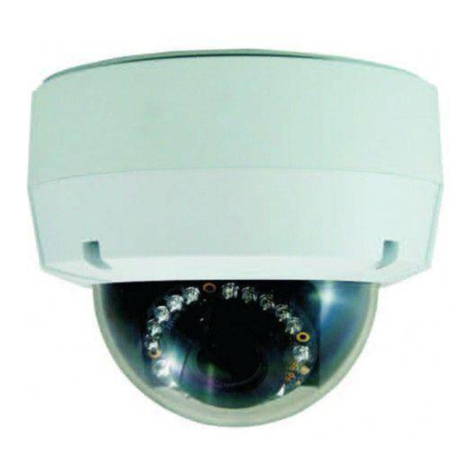
Camera with bracket ( the external view ).
1
2
34
1. Power/Status LED: Indicates the camera's current status.
2. IR LEDs: Infrared LEDs illuminate the camera's field of view at night.
3. Camera Lens: Records video of the surrounding area.
4. ICR Sensor: The IR-Cut Removable sensor measures the lighting conditions and switches
between color and infrared accordingly.
5

The component parts ( the internal view ).
1. Micro SD CARD slot: Insert a Micro SD card for Local storage for storing recorded image and
video. This is used for updating system software and archiving / accessing critical images.
How to install an SD card?
Step 1: Place the camera face down on a non-slip flat surface.
Step 2: Unscrew the weatherproof sheath by holding the base of the camera firmly and rotating the
barrel counter-clockwise. Exercise caution when removing the weatherproof sheath to
avoid damaging the internal components.
Step 3: Insert your Micro SD card into the slot with the notch oriented to the rear of the camera.
Step 4: Replace the weatherproof sheath ensuring a tight fit.
NOTE: To ensure that the camera stays weatherproof, users are advised to ensure that the
weatherproof sheath is secured firmly in place.
6

The Cable Harness:
13
2
45
1.
PowerConnector
:A DC 12V inlet that connects to an external power supply.
2.
ResetButton
: Recover to factory default. (Refer to section 2.2 The Reset Button.)
3.
DI/DOConnector
:This is a 4-PIN connector including the Digital output/input, DC output
and GROUND items for connecting with external devices.
4.
AudioOut(Green)
: Provides the camera’s audio signal to a speaker or stereo.
5.
AudioIn (Red)
: The connector is used to connect the audio output from other devices to the
camera.
6.
EthernetPort
: This is a standard RJ-45 connector for 10/100 Mbps Ethernet networks. PoE
(Power over Ethernet) function: Provides power to the device via the same cable as used for
the network connection.
7

2.2 The Reset Button
You can use the Reset button to reset the camera operations back to default. Press the Reset
button for about 10 seconds. Blue screens of the analog output are displayed, and a text saying
RESETTING… appears.
[SETUP]
Network Setup
a. LAN Settings (You can manually reset this function by yourself.)
b. PPPOE Settings (You can manually reset this function by yourself.)
Dynamic DNS
a. DYNAMIC DNS SETTING (You can manually reset this function by yourself.)
IMAGE SETUP
a. VIEWER TYPE
b. IMAGE SETTINGS
AUDIO AND VIDEO
a. VIDEO PROFILE 1
b. VIDEO PROFILE 2
c. AUDIO SETTINGS
MOTION DECTION
a. Video Motion setting
TIME AND DATE
a. TIME CONFIGURATION
b. AUTOMATIC TIME CONFIGURATION
c. SET DATE AND TIME MANUALLY
Event Setup
a. Server
b. Media
c. Event
d. Recording
[ADVANCED]
DI and DO
a. DI and DO
b. LED
c. VIDEO OUTPUT
ICR
a. ICR
HTTPS
a. HTTPS
Access List
a. Allow List
b. Deny List
8

2.3 The Alarm wiring diagrams
This is a 4-PIN connector including the Digital output/input, DC output and GROUND items for
connecting with external devices.
12V
9

3. INSTALLATION
Please follow the instructions and the diagram below to set up the system.
3.1 Hardware Installation
1. Plug in the power connection to the IP camera.
2. Plug in the IP camera cable.
3. Confirm the correct network connection status (PC/ HUB/ IP camera).
4. In the PC IE Browser, key in the camera’s IP online to link up to the live first page.
10

3.2 Mounting and Positioning the Mini Bullet
Camera Mounting:
Step 1
Position the mounting bracket in the desired location.
Step 2
Mark the surface behind the mounting bracket with a pencil.
Step 3
Use a 6mm drill bit to make required holes
approximately 25mm deep.
Step 4
Insert wall anchors and affix the bracket using
the screws provided.
1
Step 5
Ensure the cable is seated in the cable channel.
Step 6
Suspend the camera from the two protruding studs near the top of the mounting
bracket.
Step 7
Insert and tighten the remaining screw into the hole on
the camera base.
2
11

Camera Positioning
Step 1
Using a Torx Security screwdriver, loosen the screw on the top of the camera
housing.
Step 2
Swivel the camera along it's horizontal axis until you achieve the desired
angle.
3
Step 3
Using a Torx Security screwdriver, tighten
the screw on the top of the camera housing
firmly.
Step 4
Rotate the camera around its vertical axis by adjusting the base.
Step 5
Rotate the camera to adjust for positioning by rotating the barrel.
4
12

13
3.3 Updating System Software
If the system software of the IP Camera needs to be upgraded, please take the following steps to
safely process it.
Important: Before carrying out the following procedures, please ensure the SD card is
working and the file of the system firmware is intact
1. Create a directory named UPGRADE (upper-case or lower-case letters are no difference) in
the SD card if it does not exist.
2. Copy the file of UPDATE.BIN to the UPGRADE -directory.
3. If the IP Camera is running, please power it off first.
4. Insert the SD CARD into the IP Camera.
5. Remove the Ethernet cable from the RJ-45 port and then power on the IP Camera.
6. In 5 to 10 seconds, a message reading "UPDATE PROCESSING" will show up on the screen
on a blue background; if not, please check out steps 1 to 6 carefully or else inform your
technical support while ignoring the following steps.
7. DO NOT power off the IP Camera while this update process is running until the message
"UPDATE OK RESET PLEASE" appears on the screen; it might take 15 to 30 seconds to
appear.
8. If the message "UPDATE NG RESET PLEASE" appears rather than "UPDATE OK RESET
PLEASE", please write down the error messages shown on the screen and inform your
technical support, while ignoring the following steps.
9. Power off the IP Camera when this update process is finished, then remove the SD card from
the IP Camera.
10. Reconnect the Ethernet cable to the RJ-45 port if necessary.
11. Power ON the IP Camera and it will work normally if the entire update procedure goes
correctly.
12. Verify the version of the system software.
WARNING:
You must perform Steps 1 to 2 on a PC.
Ensure you are using the correct UPDATE.BIN file in Step 2, otherwise the IP Camera
will not work properly.
If the power of the IP Camera is suddenly lost in step 7, please remove the SD card first
and turn on the IP Camera next to test its operation. If the IP Camera remains working
normally, please go back to step 3; otherwise, please inform your technical support.
In step 9, if the SD card is not removed and the IP Camera does not get online as well,
the updating process must be repeated again after rebooting the IP Camera.
Make sure that the SD card is inserted in a correct position in step 4, or the IP Camera
will suffer permanent physical damage.
If the message "CSUM ERROR" appears in step 7, it implies a problem in the file of
UPDATE.BIN.
Do not interrupt the process when the unit is updating, or it will crash.

4. Network Configuration
4.1 Cable Connections
Please follow the instructions below to connect your IP camera to a computer or a network and to
choose a proper RJ-45 cable configuration for connections.
Physical specifications of the RJ-45 cable for Ethernet
Wire Type Cat. 5
Connector Type RJ-45
Max. Cable Length 100 m
Hub Wiring Configuration Straight Through
PC Wiring Configuration Straight Through
4.1.1 Connect to a computer
Use a straight LAN cable to connect directly to a computer.
CABLE
TO PC LAN CARD RJ-45
IP CAMERA
4.1.2 Connect to a LAN Hub (INTRANET)
The RJ-45 PIN configuration for connecting with a LAN Hub is shown below.
HUB
TO NETWORK
14

4.2 Configure Your IP Camera Network Settings
Upon connecting with the network hardware, you need to activate the network function and
configure the proper network settings of the IP camera.
4.2.1 Set IP Address
You need to set an IP address for the unit if the LAN unit isn’t connected to a DHCP server.
Otherwise, please follow the instructions given below:
Note: The default static IP is 192.168.1.168.
Set the IP, MASK and GATEWAY. The following is a sample setting.
IP: 192.168.1.X
MASK: 255.255.255.0
GATEWAY: 0.0.0.0
NOTE: When only one IP camera is connected to a computer or LAN, you can freely assign
an IP address for the IP camera. For example only, there is a range of IP camera’s IP
address from 192.168.1.1 to 192.168.1.254. When using IP ranges on a dedicated
security link, you can use almost any IP if configured correctly, however, if using
your corporate Network, please consult your IT Department before assigning any
IPs.
When an IP camera is connected to a WAN, you must acquire a unique, permanent
IP address and correctly configure the MASK and GATEWAY settings according to
your network architecture. If you have any questions regarding those settings,
please consult a qualified MIS professional or your ISP.
NOTE: When connecting to a network, each connected IP camera must be assigned a
unique IP, which must be in the same class type as your network address. IP
addresses are written as four sets of numbers separated by periods; for example,
192.168.1.1 Therefore, if the connected network is identified as Class C, for example,
the first three sets of numbers of the IP camera IP address must be the same as the
network address. If the connected network is identified as Class B, the first two sets
of numbers of the IP camera IP address must be the same as the network address. If
you have any questions regarding these settings, please consult a qualified MIS
professional or your ISP.
15

4.3 TCP/IP Communication Software
Follow the procedure below to install the TCP/IP communication program in your computer.
1. Click Start, and then click Control Panel.
2. Double click the Network Connections icon to enter the windows.
1. Right-click your network connection and then click Properties.
16

2. On the General tab, check if the Internet Protocol (TCP/IP) is included in the list. If the TCP/IP
is included, please process section 4.5. If it is not included, please follow section 4.4 to install
the TCP/IP.
17

4.4 TCP/IP Installation
On the General tab of the Connection Properties, under “This connection uses the following items”,
click Internet Protocol (TCP/IP). Then click Install. Select Protocol from the network component
type then click Add. Select Microsoft TCP/IP from the network protocol then click OK. Click Close
to return to the Network Connections window.
18
Table of contents
Other Appro Security Camera manuals

Appro
Appro LC-7533D User manual

Appro
Appro LC-7514 User manual

Appro
Appro BV-7105 User manual

Appro
Appro LC-7533 User manual

Appro
Appro LC-7421D User manual

Appro
Appro LC-7233 User manual

Appro
Appro LANCAM LC-7214P User manual

Appro
Appro LC-7516 User manual

Appro
Appro LC-7411 User manual

Appro
Appro SD-7800 User manual