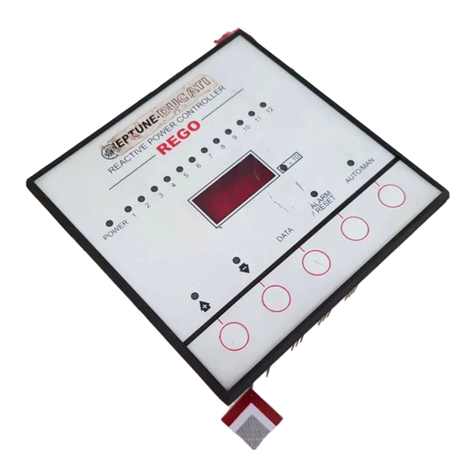
Neptune RM-12P User manual


SUMMARY
Safety Precautions ....................................................................................................................................................1
Important Note for System Connection .............................................................................................................1
1. INTRODUCTION ..........................................................................................................................................................................2
1.1 General Information ............................................................................................................................................2
1.2 Front Panel .................................................................................................................................................................2
1.3 Rear Panel ..............................................................................................................................................................4
2. INSTA ATION ........................................................................................................................................................5
2.1 Commissioning of RM-12P...............................................................................................................................5
2.2 Capacitor Sequence ...........................................................................................................................................5
3. SETTINGS .................................................................................................................................................................5
3.1 Operation Mo e an Capacitor Power Settings ......................................................................................................5
3.2 Target Cos
j
Value Setting ....................................................................................................................................6
3.3 Last Capacitor Step Number Setting ..................................................................................................................................7
3.4 Switching Program Setting ..................................................................................................................................8
3.5 Switching on&off for Capacitor Steps an Discharge Time Settings .............................................................................8
3.6 Connection an Power Value Settings .............................................................................................................10
3.7 Current an Voltage Transformer Ratio Settings .......................................................................................................12
3.8 Reset Setting .....................................................................................................................................................14
3.9 Alarm Setting .....................................................................................................................................................15
3.10 Fan Relay Settings .....................................................................................................................................................22
3.11 Computer Communication Setting .................................................................................................................................23
3.12 Passwor Activation an Change Settings .............................................................................................................25
4. DISP AYING OF INSTANTANEOUS VA UES ......................................................................................................27
Cos
j,
Total Cos
j
, Voltages ................................................................................................................................27
Currents, Active Powers, Total Active Powers ...........................................................................................................28
Reactive Powers, Total Reactive Powers, Apparent Powers, Total Apparent Powers, Total Apparent Powers.....29
Active Import Energy, Active Export Energy, In uctive Reactive Energy, Capacitive Reactive Energy,
Temperature, Error Co es ................................................................................................................................................30
5. ERROR CODES ...................................................................................................................................................31
6. COMPUTER COMMUNICATION (MODBUS RTU) ............................................................................................32
APPENDIX .......................................................................................................................................................................31
Error Messages ................................................................................................................................................31
Register Tables ..................................................................................................................................................32
Capacitor Calculation Table ............................................................................................................................................37
Technical Features ..............................................................................................................................................38
Menu Map ........................................................................................................................................................39
INTE IGENT REACTIVE POWER MANAGEMENT
RM-12P

Precautions for Safe Use and Installation
Consult the operating instructions before using the equipment. If these precautions are not properly observed
and carried out, it can cause physical accident or damage to the equipment.
We thank you for your smart choice. To obtain the best results from your equipment:
carefully read the operating instructions,
observe the precautions mentioned in this user manual.
1
2
3
4
5
6
7
8
9
10
INTE IGENT REACTIVE POWER MANAGEMENT
RM-12P
ATTENTION!
No responsibility is assured by the manufacturer or any of its subsidiaries for any consequences rising out of the use
of this material.
Important Note for System Connection.
First, connection type of auxiliary supply, voltage measurement input and current measurement input must be
3 phase-neutral. Device must be operated after completing the 3-phase connections.
Always a 3-phase capacitor must be connected to the first step. Remaining single phase and 3-phase capacitors
can be connected to any other step.
1
2
Do not power-up the device before verifying terminal connections.
1
Maintenance, installation and operation of RM-12P must be performed only by the qualified electricians.
Do not operate undervoltage.
Do not open the RM-12Ps housing. There are no user servicable parts inside it.
RM-12P is connected to the network by means of a current transformer. Do not disconnect the current transformer
terminals. If you disconnect them, be sure to short-circuit or connect them to another parallel load which have low
impedance. In case of failure, dangerously high voltage at the secondary side of current transformer may cause an
electric shock.
Do not use this product for any other purpose than its original task.
When device is connected to the network, do not remove the front panel.
Do not clean the device with solvent or similar items. Only clean with a dried cloth.
Verify terminal connections when wiring.
Electrical equipment should be serviced only by your competent seller.
Device is only suitable for panel mounting.
Generator Input
Target Cosj2 is activated and target Cosj is disabled, which are programmed in the menu, when the voltage (110~250
V AC is applied to the generator input.
Monitoring the measured temperature
In order make a correct measurement, J type (Fe/Cu-Ni thermocouple must be connected to TEMP terminal and keep
worked at least 30 min. In order to observing the measured environmental temperature, press UP/DOWN buttons untill the
displaying the xxx.x value.
NOTE: RM-12P temperature measurement feature is optional.

225.5
228.7
223.4
1.2 Front Panel
On the front panel, 3 display lines, 4 buttons and also alarm, capacitor
step and display leds exist. Measured parameters are observed in the
related displays. Displayed values for related parameters are selected via
indicator leds. When an alarm exists, related alarm led blinks. 12 capacitor
step leds indicates, which capacitor step is switched on. Detail information
about buttons, display, alarm and capacitor step leds will be explained
in the coming sections.
INTE IGENT REACTIVE POWER MANAGEMENT
RM-12P
1.2.a Button Functions
UP
DOWN
ESC
SET
:
:
:
:
Go to next menu or increase related value.
Go to previous menu or decrease related
value.
Exit from a menu or cancel the data entry.
Enter to a menu or confirm the data entry.
1. INTRODUCTION
1.1 General Information
Power factor controllers are used for measurement and control of power
factor control units for central reactive power compensation. The power
factor, which is defined as ratio of active power (W to apparent power
(VA , measured by power factor controller is compared with the set values
to provide necessary compensation.
RM-12P power factor controller is designed for reactive power compensation
in single phase and 3-phase systems.
RM-12P compensates each phase separately and so, this makes
RM-12P series a unique solution for unbalanced load compensation. In
order to perform this process, single phase and 3-phase capacitor steps
must be connected to the device at the same time.
Measured Parameters :
Phase Voltage (L1,2,3-N Measurement
Phase Current (L1,2,3-N Measurement
Cos
j
Value (L1,2,3-N Measurement
Average (Ind./Cap. Cos
j
Value Measurement
Active Power (W , Reactive Power (VAr , Apparent Power
(VA Measurement
Total Active Power (Ind./Cap. , Total Reactive Power
(Ind./Cap. , Total Apparent Power (Ind./Cap. Measurement
Active Energy (Wh-Import/Export , Reactive Energy
(VArh-Import/Export Measurement
Measuring up to 19th Harmonic (V, I, W, VAr, VA 1,3,5,.....,19
*Temperature Measurement
1
2
3
4
5
6
7
8
9
*Optional
2
Type PR16
(144x144)
143
99
121
138.4
144
18
34.5
67
1 Panel cut-out dimension must be 139 mm x 139 mm
(Type PR16 .
2 Before installation, remove the mounting brackets.
3 Mount the device to the front panel.
4 Insert the mounting brackets.
5 Wire thickness for voltage and current terminals must be
2,5 mm2.
6 CAT5 cable is recommended for RS-485 input terminal.
Excessive force can damage the device.
Turn the scre into the terminals and tighten until the
RM-12P is secured in place.
DIMENSIONS

1.2.b Front Panel Functions
INTE IGENT REACTIVE POWER MANAGEMENT
RM-12P
In order to enter to the menu, SET button
must be pressed for 3 seconds.
3
Display of phase 1.
Display of phase 2.
Display of phase 3.
Go to next menu or increase related value.
Exit from a menu or cancel the data entry.
(In the measurement mode, it is used to exit from
harmonic menu
Enter to a menu or confirm the data entry.
(In the measurement mode, it is used to observe
the harmonic values of current, voltage and
power values
Go to the previous menu or decrease related
value.
Represents measurement values with mega unit
(x106.
Represents measurement values with kilo unit
(x103.
Shows the status of each capacitor steps.
Programmable menus which are set by pressing
SET button for 3 seconds.
Indicates if the operating mode is automatic or
manual.
(If it is continuously ON, RM-12P operates in
Automatic Mode. If it blinks, RM-12P operates
in Manual Mode
If Cosj light is ON, target Cosj value can be set
between Inductive 0,8 - Capacitive 0,8
(In the measurement mode, Cosj values of
related phases are displayed .
Press SET button for 3 seconds, select STEP/V
light to select step number
(In the measurement mode, voltage values of
related phases are displayed .
Press SET button for 3 seconds, select
PROGRAM/I light to select power sequence
program.
(In the measurement mode, current values of
related phases are displayed
Press SET button for 3 seconds, select TIME/W
led to set switching on delay time, switching off
delay time and discharge time.
(In the measurement mode, active power and
total active power (Ind./Cap. values of related
phases are displayed
1. 1
2. 2
3. 3
4. Up Button
5. Esc Button
6. Set Button
7. Down Button
8. M ed
9. k ed
10. 1,2,3,.......,12 eds
11. SET Menu
12. OTO/MAN ed
13. Cosj ed
14. Step / V ed
1 5. Program / I ed
16. Time / W ed
:
:
:
:
:
:
:
:
:
:
:
:
:
:
:
:
17. Capacitors / VAr ed
18. Network / VA ed
19. Reset / HAR ed
20. Alarm / h ed
21. RS-485
22. C- ed
23. Normal ed
24. C+ ed
25.
26.
27.
28.
29.
30.
31.
32.
:
:
:
:
:
:
:
:
:
:
:
:
:
:
:
:
Press SET button for 3 seconds, select
CAPACITORS/VAr led to set capacitor values
and capacitor connections (R, S, T, RST .
(In the measurement mode, reactive power
and total reactive power values of related
phases are displayed .
Press SET button for 3 seconds, select
NETWORK/VA led to set current transformer
ratio (Ctr , Voltage transformer ratio (Vtr and
calculation method (Calc .
(In the measurement mode, apparent power
and total apparent power values of related
phases are displayed
Press SET button for 3 seconds, select
RESET/HAR led to reset energy values,
reactive energy ratios and alarms.
Press SET button for 3 seconds, select
ALARM/h led to set alarms for overvoltage,
reactive/active ratio, temperature and
harmonics.
In this menu, address, baudrate and parity
values for RS-485 communication protocol are
set.
This led represents that RM-12P is waiting for
switching capacitor steps off.
This led represents that RM-12P will not switch
any capacitor steps on&off.
This led represents that RM-12P is waiting for
switching capacitor steps on.
In case of any failure, alarm relay switches on
and alarm led lights.
In case of connection failure, led lights.
If reactive energy ratios exceed preset values,
% led lights.
If voltage harmonic ratios exceed preset
values, led lights.
When target power factor value is not reached
although all the capacitor steps are switched
on, led lights.
If capacitor is not connected to the related
step, lights is ON.
When voltage value exceeds preset value,
V> light is ON.
When measured temperature value increase
fan measured value after 10 second fan led
light will be on (This is optional .
225.5
228.7
223.4
2423 22
12
13
14
15
16
17
18
19
21
11
4
20
7
6
5
26
27
29
30
31
25
9
1
3
2
28
8
32
10

INTE IGENT REACTIVE POWER MANAGEMENT
RM-12P
Warnings :
1.3 Rear Panel
4
CONNECTION DIAGRAM
* Current value of 3-Fuses, which are connected to protect the capacitors, is chosen according to the nominal current
value of capacitors.
** Optional.
15 16 17 18 19 20 21
5678910
K
K
K
6A
Alarm Relay
11 12
C1 C6 C7 C12
22 23 24 25 26 27 28
2A 2A 2A
k1
l1
k2l2k3l3
k1
l2k2
l3k3
l1
29 30 31 32
N
3
2
1
****
Generator
Input
13 14
110~250 V AC
1234
L1 L2 L3 N
GNDBTR A
RS485
Connection type of auxiliary supply, voltage measurement input and current measurement input must be 3 phase-neutral. Device
must be operated after finishing of the 3-phase connections.
After the device has energized, it finds connection errors and corrects automatically.
Phase current should not be aqual to zero in order to let the device to sense the connection error. Device sense the connection error
according to Active Power direction.
Device switching ON and OFF the 1st steps 3-phase capacitor during the correction of connection errors (Phase sequence error and
polarity error of Current Transformer . Device may not correct the connection errors if there are too many instant variations for loads and
nonlinear loads (Such as Thyristor or triac controlled frequency inverter, UPS etc. . In this case, user should disconnect the device and restart
it to making the same operation.
This operation also can be operated as turning ON the Auto SET function in Auto menu. In this case device corrects the errors and
then calculates the capacitor values.
After connection errors are corrected; capacitor steps are calculated with turning ON the Auto Setup function in Auto menu (Refer to
Automatic Capacitor Recognition menu .
It is an obligation to connect a 3-phase capacitor for 1st step. All steps are measured seperately if the program-10 (PS-10 is selected
in Program menu. In this program (PS-10 ; single or 3-Phase capacitors can be connected according to requirements of the system in
any sequence.In case of choosing one of the other programs, device measures the 1st steps power value and then calculates the other steps
respectly to this value. Device calculates the capacitor values which will be switched ON according to selected program; device switches
ON / OFF the required steps.
Connection of circuit breaker or automatic fuse is highly recommended between the network and RM-12P. Circuit breaker must be
in close proximity to the device.
All used fuses must be FF type and the current values of the fuses must be 2A or 3A and 6A (Refer to Connection Diagram .
Generator input must be activated only when the network is supplied by the generator. Otherwise device will be switched to the generator
position for every kind of generator starts including the maintaining purposes.
In order make a correct measurement, J type (Fe/Cu-Ni thermocouple must be connected to TEMP terminal.
a)
b)
c)
d)
e)
f)
g)
Fan Relay
3837
**
33 34 35 36
J Type
Fe/Cu-Ni
+
**
TEMP.

INTE IGENT REACTIVE POWER MANAGEMENT
RM-12P
2. INSTA ATION
When RM-12P is powered-up for the first time, if the power value of
any phase is negative, RM-12P switches on&off the first capacitor step
automatically and it recognizes and records the connections.
Later, automatic setup (Refer to page 6 - Automatic setup is selected
on the menu in order to automatic recognition of the connections and
connected capacitor steps.
After automatic recognition, RM-12P checks all capacitor step values.
If variable loads exist in the system, first of all these variable loads must
be disconnected and then automatic setup process must be done.
Otherwise, power factor controller may not measure capacitor step powers
correctly. Capacitor step powers and connection types also can be
recognized to the power factor controller manually.
(Refer to page 10 - Setting of the capacitors connection and power values
After the recognition of capacitor step powers, target Cosj
value is set in order to start the compensation. Factory set value for target
Cosj is ind. 1.000 and Cosj2 is ind. 0.900
Note: PFC decreases the switching on&off time to 3 seconds in
Automatic Setup mode but discharge time is not changed. After the
automatic setup process, set values become valid.
Device finds connection errors and corrects automatically. Power
values of the capacitor steps are measured automatically according
to program selection. If PS-10 program is selected, power values of
all capacitor steps are measured (Refer to Program Section . If any
other program is selected, device measures first capacitor step value
and then calculates other capacitor steps according to the selected
program. For this reason,
a 3-phase capacitor must be connected to the first step. Then, single
phase and / or 3-phase capacitors can be connected with random
sequence to the other steps.
2.1 Commissioning
2.2 Capacitors Sequence
3. SETTINGS
3.1.a Operating Mode Setting
RM-12P has two operating modes which are automatic and
manual. Manual mode is used for test purposes. In this mode,
capacitor steps are switched on&off to test relay outputs. In
manual mode, capacitor steps are switched on by SET
button and ESC button. Factory set values for switching on
(t-on and switching off (t-of time is 10 sec. These values can
be changed by the Delay menu (Refer to delay time setting .
In manual mode, step numbers, which will be switched on&off,
can be programmed in Step menu (Refer to step number
setting . Even if manual mode is selected, device switches to
automatic mode after 5 minutes.
When automatic mode is selected, AUTO/MAN LED lights on
continuously.
When manual mode is selected, AUTO/MAN LED blinks.
3.1 Operating Mode and Capacitor Power Settings
5
Press SET button for 3 sec. in order to enter to the menu.
Press SET button for parameter settings in Auto menu.
Press UP or DOWN button to select operating mode.
Press SET button to select the operating mode.
(on: Automatic Mode, of: Manual Mode .
Numerical values of the parameters are set via buttons in the
display. The blinking digit indicates which digit will be set.
Numerical value of the related digit is increased or decreased via
UP or DOWN button. To set the next digit, SET button is
used and also ESC button is used to set the previous digit.
Warning: Device warns user by blinking (short ON, long OFF)
led of the capacitor steps which will be switched on. Also
device warns user by blinking (long ON, short OFF) led of the
capacitor steps which will be switched off.
For proper operation, 3-Phase, neutral, voltage and current terminals
must be connected as in the connection diagram. Device does not work
properly without 3-phase connection.
The most important point is connecting 3-phase capacitor to the first
step. Remaining single phase and 3-phase capacitors can be connected
to the other steps.
After capacitor steps connection, if temperature measurement
function will be used, J-Type 0-400 V thermocouple must be connected.
(Temperature measurement feature is optional
Lastly, computer communication connection must be done.
Do not power-up the device before verifying terminal connections.
To first step, always a 3-phase capacitor must be connected.
3 sec.
Warning: If fast load variation exists together with
compensation capacitors, device can not detect
correct connection at first time and may find after
several attempts. If device can not finish this
detection, C/k calculation can not be accomplished.

INTE IGENT REACTIVE POWER MANAGEMENT
RM-12P
3.1.b Automatic Mode Setting
When device starts to operate, it checks connections and if
there is a connection error, corrects it automatically. For this
function, 3-phase voltage and current connections must
completely be done.
Warning: If fast load variations exist together with
compensation capacitors, device can not detect correct
connection at first time but after several attempts. If device
can not finish this detection, C/k calculation can not be
accomplished.
After correcting connection errors, if Auto:On option is selected
device starts to measure capacitor steps automatically according
to program selection. When PS-10 program is selected, all
capacitor steps are measured. In other programs, only first
capacitor step power is measured and other capacitor steps
are calculated and recorded according to the selected program.
Note: After this process, calculated power values of all
capacitor steps always must be controlled. In order to have
correct power values for capacitor steps, current and voltage
transformer ratios must be entered correctly. If current and
voltage transformer ratios are not entered, these ratios are
supposed to be 1 and capacitor powers are calculated
according to these values.
(Refer to VT and CT ratio settings)
Note: If automatic setup is selected as on, automatic mode
starts immediately without waiting to escape from the menu.
6
In Auto operatý menu, press DOWN button to enter the
Auto Setup menu.
Press SET button to change Auto Setup mode.
Press UP or DOWN button to enable (on) or disable (of) the Automatic
Setup mode.
In this menu, required COSj value in the inductive area is set.
3.2.a Inductive Cosj Setting
3.2 Target Cosj Setting
Target Cosj value can be set between Ind. 0,800-Cap.0,800.
RM-12P tries to reach systems Cosj value to the set value. Cosj set
value must be in the range of the smallest capacitor step power (QCk.
Switching on and off demand occur outside of this range.
Press SET button for 3 sec. in order to enter to the menu.
Find Target Cosj menu by using UP/DOWN buttons.
When Target Cosj menu is displayed, Cosj led lights on the display.
Press SET button for inductive Cosj value setting in Target Cosj
menu.
Press SET button for inductive Cosj value setting.
By UP/DOWN buttons, select inductive Cosj value between 0,800 -
1,000 and then press SET button. To quit, press ESC button.

INTE IGENT REACTIVE POWER MANAGEMENT
RM-12P
7
In this menu, last capacitor step number is set between 1-12 for
RM-12P. For example, if this value is 8, it means that first eight capacitor
step (1......8 is selected. After this setting, device must be powered-up
again.
Note : When program 10 (PS-10) is selected, device detects steps
without capacitors automatically. These steps are always switched off
by device. In this case, only capacitor connected steps are functional.
3.3 ast Capacitor Step Number Setting
Press UP/DOWN buttons to find capacitor step number (StEP)
menu. When step number menu is displayed, step led lights.
SAUE
If you do not want to set another parameter, in order to quit from the
menu, press ESC button one by one until SAVE SEt yES is displayed.
Press SET button to save your changes or press ESC button to quit
without saving.
Press SET button to enter step number.
Press UP/DOWN buttons to enter step number between 1-12
and then press SET button. If you do not want to set another
parameter, press ESC button.
SAUE
If you do not want to set another parameter, in order to quit from the
menu, press ESC button one by one until SAVE SEt yES is displayed.
Press SET button to save your changes or press ESC button to quit
without saving.
3.2.b Capacitive Cosj Setting
SAUE
If you do not want to set another parameter, in order to quit from the
menu, press ESC button one by one until SAVE SEt yES is displayed.
Press SET button to save your changes or press ESC button to quit
without saving.
In this menu, required COSj value in capacitive area is set.
Press UP/DOWN buttons to set
COSj
parameter.
Press SET button for Cosj value settings in capacitive area.
Press UP/DOWN buttons to set capacitive Cosj value between
0,800-1,000 and then press SET button. If you do not want to
set another parameter, press ESC button.
Press SET button for 3 sec. in order to enter to the menu.
3 sec.

INTE IGENT REACTIVE POWER MANAGEMENT
RM-12P
8
3.4 Switching Program Setting
RM-12P has 10 different program modes which determines the
power ratio sequence of the capacitor steps.
Three different switching programs are supported by RM-12P.
a) inear Operation: The switching program begins always from
the first step to the last one in both switching on and off mode.
The advantage of this switching program is the possibility of a
large selection of capacitor steps. This switching program is
selected by 01 option.
b) Rotational Switching: This switching program is rotational
between equal steps in the clockwise direction and this switching
program is rotational to ensure that the capacitor switching cycles
are uniformly distributed over all steps and to provide minimum
switching steps for maximum service life time of the system.
There are 8 different rotational switching programs (02, 03, 04,
05, 06, 07, 08, 09 .
The ratio between capacitor steps is very important. When choosing
the ratio between capacitor steps, the rating of each capacitor
step value may exceed that of the first by a maximum amount
equal to the of the preceding capacitor steps value.
c) PS-10 Program: If PS10 program is selected, RM-12P
calculates electrical parameters of the capacitor steps
automatically. RM-12P counts swithing on&off times of all capacitor
steps and so most necessary step is switched on.
Thus, maximum service life time of the system is ensured.
NOT: In PS-10 program, connection types and power values of the
single phase capacitor steps can be set by user. In Auto setup mode
power values of all capacitor steps are measured.
In other switching programs, only first capacitor steps power value
can be set (except PS-10 program). Other capacitor steps power value
are calculated automatically according to the first capacitor steps
power value.
Press UP/DOWN buttons to select program (Prog) menu.
In this menu capacitor steps sequence is selected.
When program menu is displayed, program led lights.
SAUE
If you do not want to set another parameter, in order to quit from the
menu, press ESC button one by one until SAVE SEt yES is displayed.
Press SET button to save your changes or press ESC button to quit
without saving.
Press SET button to select the switching program.
Enter desired program number between 01-10 and press SET
button. If you do not want to set another parameter press ESC
button.
PROGRAM SEQUENCE
01
02
03
04
05
06
07
08
09
*10
linear
1.1.1.1................
1.1.2.2................
1.2.2.2................
1.2.3.3................
1.2.4.4.................
1.1.2.4................
1.2.3.4................
1.2.4.8................
Capacitor step values are calculated automatically.
* Recommended switching program.
In order to decrease harmful effects of instant reactive power loads to the
relays and capacitors, delay time (in terms of seconds for capacitor steps
is entered in this menu.
Switch-on delay time must be set according to system requirement in
order to achieve compensation targets and also to provide long life time
for contactors and capacitors.
3.5.a Switch-On Delay Time Setting
Note: t-on and t-of time periods must be set according to the systems
requirements. If t-on time is set very long, relay can not switch on until
the end of this time period and so target compensation ratios can not
be achieved.
If t-on time is set too short, capacitor steps switch on&off frequently
incase of fast load variations and this causes to shorten the life time
of contactors and capacitors. For this reason, it is very important to
set these time periods according to your systems requirement.
Press UP/DOWN buttons to select delay time (dE y) menu.
In this menu switch on&off delay time is set. When delay time
menu, is displayed, time led lights.
Press SET button for 3 sec. in order to enter to the menu.
3.5 Switching On&Off and Discharge Time Settings
Press SET button for 3 sec. in order to enter to the menu.
3 sec.
3 sec.

INTE IGENT REACTIVE POWER MANAGEMENT
RM-12P
9
3.5.b Switch-Off Delay Time Setting
Press SET button to select Delay menu.
Press SET button to set switch on delay time (dE y t-on).
Enter a value between 1-1800 seconds and then press SET
button. If you do not want to set another parameter, press ESC
button.
SAUE
If you do not want to set another parameter, in order to quit from the
menu, press ESC button one by one until SAVE SEt yES is displayed.
Press SET button to save your changes or press ESC button to quit
without saving.
Switch-off delay time must be set according to system requirement in
order to achieve compensation targets and also to provide long life time
for contactors and capacitors.
By UP/DOWN buttons, select switch-off delay time
(dE y t-of) menu.
Press SET button to set switch-off delay time.
SAUE
If you do not want to set another parameter, in order to quit from the
menu, press ESC button one by one until SAVE SEt yES is displayed.
Press SET button to save your changes or press ESC button to quit
without saving.
Enter a value between 1-1800 seconds and then press SET
button. If you do not want to set another parameter, press ESC
button.

INTE IGENT REACTIVE POWER MANAGEMENT
RM-12P
10
Discharge time must be set according to determined time periods by the
capacitor suppliers. If discharge coil or contactors, which have discharge
coils, are used, discharge time can be shorten according to do instructions
defined by the suppliers.
3.5.c Discharge Time Setting
By UP/DOWN buttons, select discharge time menu
(dE y t-on).
Press SET button to set discharge time (t-rC).
Enter a value between 1-1800 seconds and then press SET
butto. If you do not want to set another parameter, press ESC
button.
SAUE
If you do not want to set another parameter, in order to quit from the
menu, press ESC button one by one until SAVE SEt yES is displayed.
Press SET button to save your changes or press ESC button to quit
without saving.
3.6.a First Capacitor Step Setting
First capacitor step is used to find connection. For this reason, 3-phase
capacitor must be connected to the first step. So, connection setting for
first capacitor step is not possible and always RST connection type is
selected.
When setup parameter is selected as on in Auto menu, if any program
(except PS-10 , is selected, power value of the first capacitor step is
measured and other steps power values are calculated according to
selected program. When Setup:of is selected, power values of all
capacitor steps (including first capacitor step can be set manually.
Note : When setup parameter is selected as on in Auto menu, after
completing the measurement of capacitor powers according to the
selected program, RM-12P continues to work in setup:off mode.
In this menu, power values and connection types of all capacitor steps are
set.
There are 5 different connection types for capacitors which are R, S, T,
RST and off. Also capacitor step measurement for power values can be
set between 0,02-2,00. If off option is selected, there is no need to set
any power value.
Note : For first capacitor step, different connection type is impossible
andRST connection type always must be selected. Because first
capacitor step is used to detect correct connection.
Note : If PS-10 program is selected, capacitor powers can be set
separately for each capacitor step. However, if any program, except
PS-10, is selected, only first capacitor steps power value (C-01) can
be set manually. Capacitor powers for other steps are calculated
according to the selected program.
3.6 Connection Type and Power Value Settings
for Capacitors
By UP/DOWN buttons, select capacitor (CAP) menu. When
capacitor menu is displayed, capacitor (C/VAr) led ligths.
Press SET button for capacitor settings.
Press SET button for 3 sec. in order to enter to the menu.
3 sec.

INTE IGENT REACTIVE POWER MANAGEMENT
RM-12P
11
Press SET button for capacitor settings.
First capacitor step is used to find connection For this reason,
3-phase capacitor connection to first step is a must and also there is not
any connection setting for first step. Connection type is selected as RST
and it can not be changed. Press SET button to set power value of the
first capacitor step.
Enter power value of the first capacitor step and then press SET button.
If you do not want to set any parameter, press ESC button.
Note : If PS-10 program is selected, capacitor powers can be set
separately for each capacitor step. However, if any program
(except PS-10) is selected, only first capacitor steps power value
(C-01) can be set manually. Capacitor powers of other steps are
calculated according to the selected program.
SAUE
If you do not want to set another parameter, in order to quit from the
menu, press ESC button one by one until SAVE SEt yES is displayed.
Press SET button to save your changes or press ESC button to quit
without saving.
When PS-10 (Program 10 is selected, connection type and capacitor power
value settings of all capacitor steps can be selected. When a program
(expect PS-10 is selected, only first capacitor steps setting can be done
and other steps can not be set but calculated automatically by the device.
By UP/DOWN buttons, second capacitor steps connection type can be
set as r, S, t or rSt. If this parameter is selected as oF, capacitors
which are connected to the second step are disabled.
Note : After automatic calculation of the capacitors, if oF is displayed
in any step, it means that related capacitor could not be calculated,
defected or there is no connected capacitors in the related step.
3.6.b Second Capacitor Step Setting
By UP/DOWN buttons, find C-02 menu.
Press SET button to select connection type.
2
Enter power value of the second capacitor step and then press SET
button. If you do not want to set another parameter, press ESC button.
Press SET button to set second capacitor step value.

INTE IGENT REACTIVE POWER MANAGEMENT
RM-12P
12
2
SAUE
If you do not want to set another parameter, in order to quit from the
menu, press ESC button one by one until SAVE SEt yES is displayed.
Press SET button to save your changes or press ESC button to quit
without saving.
Enter power value of the second capacitor step and then press SET
button. If you do not want to set another parameter, press ESC button.
CAP C-03
In this menu, capacitor setting for third step are done.
CAP C-04
In this menu, capacitor setting for fourth step are done.
CAP C-05
In this menu, capacitor setting for fifth step are done.
CAP C-06
In this menu, capacitor setting for sixth step are done.
CAP C-07
In this menu, capacitor setting for seventh step are done.
CAP C-08
In this menu, capacitor setting for eighth step are done.
CAP C-09
In this menu, capacitor setting for nineth step are done.
CAP C-10
In this menu, capacitor setting for tenth step are done.
CAP C-11
In this menu, capacitor setting for eleventh step are done.
CAP C-12
In this menu, capacitor setting for twelveth step are done.
Above capacitor steps settings are done just like second capacitor step
(C-02 setting .
In this menu, current transformer ratio can be set between 1-2000.
For example : For 150/5 current transformer, CT ratio must be set as 30.
Note : Take care that this value must be the ratio not CT primary or
secondary value.
3.7.a Current Transformer Ratio Setting
To obtain accurate power values, current and voltage transformer ratios
must be set correctly. If any value was not set as current and voltage
transformer ratios, these values are supposed to be 1 and capacitor
powers will be calculated according to these values.
Current and voltage transformer ratios can be set separately.
By UP/DOWN buttons, find current and voltage transformer ratio menu
(trF). When this menu is selected, transformer (VA/TRF) led lights.
Press SET button to set CT and VT ratios.
Press SET button to set CT ratio.
Enter CT ratio between 1-2000 and press SET button. If you do not want to
set another parameter, press ESC button.
SAUE
If you do not want to set another parameter, in order to quit from the
menu, press ESC button one by one until SAVE SEt yES is displayed.
Press SET button to save your changes or press ESC button to quit
without saving.
3.7 Current and Voltage Transformer Ratio Settings
Press SET button for 3 sec. in order to enter to the menu.
3 sec.

INTE IGENT REACTIVE POWER MANAGEMENT
RM-12P
13
In this menu, voltage transformer ratio is set between 1-2000.
For example: For 34,5 kV / 100 V transformer, VT ratio must be set as 345.
Note : Take care that this value must be ratio but not VT primary or
secondary value.
3.7.b Voltage Transformer Ratio Setting
By UP/DOWN buttons, find voltage transformer ratio (Vtr menu.
Press SET button to set VT ratio.
Enter VT ratio between 1-2000 and press SET button. If you do not want
to set another parameter, press ESC button.
SAUE
If you do not want to set another parameter, in order to quit from the
menu, press ESC button one by one until SAVE SEt yES is displayed.
Press SET button to save your changes or press ESC button to quit
without saving.
3.7.c Reactive Energy Calculation Method Setting
Three different methods exist for reactive energy calculation in RM-12P.
Brief informations about these methods are explained in below table.
Related values which must be entered in the menu are also indicated in
the table in order to select reactive power calculation methode for mechanical
and digital energymeters.
By UP/DOWN buttons, find reactive energy calculation method (CA C).
Press SET button to select calculation method.
In order to select reactive energy calculation method (for mechanical and
digital energymeter , enter a value between 0-5 and press SET button.
If you do not want to set another parameter, press ESC button.
SAUE
If you do not want to set another parameter, in order to quit from the
menu, press ESC button one by one until SAVE SEt yES is displayed.
Press SET button to save your changes or press ESC button to quit
without saving.
0
2
4
1
3
5
Description
It is the most preferred reactive power calculation
methode.
Total value of the multiplication of Vn and In values up
to 19 th harmonics. This calculation method is mostly
preferred for network analysers.
S
V
n
.I
n
.sin(j
n
)
n=1
¥
Reactive Energy
(Q)
Digital Energymeter
(Each phase separately)
Mechanical Energymeter
(Vectorel summation of 3-phase)
90° rotation of
voltage vector and
multiply with current
S2-P2
S
2
-P
2
Power Triangle Method : According to this method;
Q =
(Q : Reactive power, S : Active power, P : Apparent power)

INTE IGENT REACTIVE POWER MANAGEMENT
RM-12P
14
In this menu, alarms, ratios (reactive/active ratios and energymeters are
reset.
While device operates, existing alarms are reset in this menu by selecting
yES option.
Note : When an alarm exists, alarm relay switches on. Also related led
lights and alarm code is displayed. Even if alarm conditions do not
exist, alarm relay still switches on. In reset menu, alarms are reset and
so alarm relay is switched off. If alarm conditions still exist, even if
alarms are reset in the reset menu, alarm relay switches on again.
If alarm conditions does not exist, alarm relay continues,to its normal
operation.
3.8.a Alarm Reset Setting
3.8 Reset Settings
By UP/DOWN buttons, find reset menu. When reset menu is selected,
reset led lights.
Press SET button for reset settings.
Press SET button for alarm settings.
By UP/DOWN buttons, select yES to delete alarm values or no to
cancel the delete process and then press SET button.
3.8.b Reactive/Active Ratio Reset Setting
In this menu, reactive/active ratio, which is calculated by device, is reset.
SAUE
If you do not want to set another parameter, in order to quit from the
menu, press ESC button one by one until SAVE SEt yES is displayed.
Press SET button to save your changes or press ESC button to quit
without saving.
By UP/DOWN buttons, find reactive/active ratio reset (rAtE) menu.
Press SET button for reactive/active ratio reset settings.
By UP/DOWN buttons, select, yES to delete reactive/active ratio or
no to cancel the delete process and then press SET button.
Press SET button for 3 sec. in order to enter to the menu.
3 sec.

INTE IGENT REACTIVE POWER MANAGEMENT
RM-12P
15
In this menu, alarm values for over voltage, reactive/active ratio,
*temperature and THD can be set saparately.
Device has 2 relay outputs (except capacitor step relays .wihc are alarm
relay and *fan relay.
If any mentioned alarm condition (except temperature exists, alarm relay
switches on and also related error led and alarm led ( light.
(Refer to errors section for details
Also related error code is displayed. (Refer to page 30 for alarm codes
* Optional
In this menu, over voltage alarm values are Preset. Entered also value
consists of 3-phase. If any phase value exceeds the set value and also
alarm condition still exists even if entered delay time is over, alarm relay
switches on and also over voltage led (V> lights.
3.9.a Over Voltage Alarm Setting
3.9 Alarm Settings
In this menu, over voltage value is set between 0-300 V (for Vtr=1 .
If this value is set as 0, this function is disabled.
3.9.a.a Over Voltage Setting
By UP/DOWN buttons, find Alarm (A r) menu. When Alarm menu is
selected, alarm led lights.
Press SET button for voltage settings.
Over voltage value (SP-H), delay time (dE y) and over voltage step (StEP)
parameters can be set in this menu. In order to set these parameters,
press SET button.
In this menu, energy counters are reset.
3.8.c Energy Counter Reset Setting
By UP/DOWN buttons, find energy counter reset menu.
Press SET button for energy counter settings.
By UP/DOWN buttons, select yES to delete reactive/active ratio or
no to cancel the delete process and then press SET button.
SAUE
If you do not want to set another parameter, in order to quit from the
menu, press ESC button one by one until SAVE SEt yES is displayed.
Press SET button to save your changes or press ESC button to quit
without saving.
Press SET button for 3 sec. in order to enter to the menu.
3 sec.

INTE IGENT REACTIVE POWER MANAGEMENT
RM-12P
16
If one or more phase voltage value exceeds preset voltage value,an alarm
occurs at the end of adjusted delay time. Delay time can be set between
0-250 seconds.
3.9.a.b Over Voltage Delay Time Setting
SAUE
If you do not want to set another parameter, in order to quit from the
menu, press ESC button one by one until SAVE SEt yES is displayed.
Press SET button to save your changes or press ESC button to quit
without saving.
Press SET button for over voltage (SP-H settings.
Enter the over voltage value between 0-300 V and if you want to set another
parameter, press SET button otherwise press ESC button.
Note : If over voltage value is set as 0, this function is disabled.
Press DOWN button to set over voltage delay time (dE y) menu.
3.9.a.c Switch On&Off Setting for Over Voltage
Alarm Setting
Press SET button to set delay time.
SAUE
If you do not want to set another parameter, in order to quit from the
menu, press ESC button one by one until SAVE SEt yES is displayed.
Press SET button to save your changes or press ESC button to quit
without saving.
Enter the over voltage delay time between 0-250 seconds and if you want
to set another parameter press SET button otherwise press ESC
button.
Press DOWN button, in order to pass from over voltage menu to the
over voltage step (StEP) menu.
In order to protect the capacitors from over voltage, when an over voltage
alarm occurs, capacitors switch on&off settings are done in this menu.
If on is selected, when over voltage error occurs, capacitor steps
switch on.
If off is selected, when over voltage error occurs, capacitor steps
switch off.

INTE IGENT REACTIVE POWER MANAGEMENT
RM-12P
17
If reactive/active ratio exceeds preset value, an alarm occurs. This ratio
can be set for inductive/active and capacitive/active separately between
0-99 %. When capacitive/active ratio of the network exceeds preset value,
an alarm occurs. If this value is set as 0, this function is disabled.
3.9.b Reactive / Active Ratio Setting
In order to provide accurate compensation, high set value of
capacitive/active ratio is set in this menu. This value can be set between
0-99 %. When capacitive/active ratio of the network exceeds preset value,
an alarm occurs. If this value is set as 0, this function is disabled.
3.9.b.a Capacitive Ratio Setting
Press SET button for capacitor step settings.
By UP/DOWN buttons, select on or off option and press SET
button. If you do not want to set another parameter, press ESC button.
SAUE
If you do not want to set another parameter, in order to quit from
the menu, press ESC button one by one until SAVE SEt yES
is displayed. Press SET button to save your changes or press
ESC button to quit without saving.
By UP/DOWN buttons, find Alarm (Alr) menu. When Alarm menu is
selected, alarm led lights.
Press SET button for alarm settings.
By UP/DOWN buttons,find reactive/active ratio (rAtE) menu.
Press SET button for capacitive/active and inductive/active ratio settings.
Press SET button to set capacitive/active ratio.
Enter the capacitive/active ratio between 0-99 % and press SET button,
press ESC button, if you do not want to set another parameter.
Press SET button for 3 sec. in order to enter to the menu.
3 sec.

INTE IGENT REACTIVE POWER MANAGEMENT
RM-12P
18
3.9.b.b Inductive Ratio Setting
SAUE
If you do not want to set another parameter, in order to quit from the
menu, press ESC button one by one until SAVE SEt yES is displayed.
Press SET button to save your changes or press ESC button to quit
without saving.
In order to provide accurate compensation, high set value of inductive/active
ratio is set in this menu. This value can be set between 0-99 %. When
inductive/active ratio of the network exceeds preset value, an alarm occurs.
If this value is set as 0, this function is disabled.
When Alr rAtE CAP is displayed, find rAtE Ind menu by using
UP/DOWN buttons.
Enter the inductive/active ratio between 0-99 % and press SET button.
If you do not want to set another parameter, press ESC button.
Press SET button for inductive/active ratio settings.
Enabling the alarm relays according to high value of temperature is
programmed in this menu. This value can be programmed between
00.0-99.9 °C.
(Refer to Technical Features section for measurement ranges
3.9.c.a Programming the Hihg imit of Temperature Alarm
Note : Temperature measurement feature is optional for RM-12P.
In order to protect the capacitors from over temperature, high (HEAt SP-
H , low (HEAt SP-L set values between 00.0-99.9 °C and step protection
(HEAt StEP are programmed in this menu. After a 10 sec. increasing of
the high value of the temperature, which is programmed in the device,
RM-12P gives an alarm signal (Erro r-10 ; according to selected step value
(HEAt STEP relays going to be switched-off or keep remained. After the
temperature decrease the lower limit then alarm situation is disabled.
3.9.c Temperature Alarm Settings
SAUE
If you do not want to set another parameter, in order to quit from the
menu, press ESC button one by one until SAVE SEt yES is displayed.
Press SET button to save your changes or press ESC button to quit
without saving.
Press SET button for alarm settings.
By UP/DOWN buttons, find fan relay (HEAT menu.
By UP/DOWN buttons, find Alarm (A r) menu. When Alarm menu
is selected, alarm led lights.
Press SET button for 3 sec. in order to enter to the menu.
3 sec.
Table of contents
Other Neptune Controllers manuals
Popular Controllers manuals by other brands
GE
GE ASTAT XT QT 0008U Series user manual

DoorBird
DoorBird A1081 Series installation manual
Omega
Omega HE-XL103 manual
WAREMA
WAREMA 4M230.12 2Down REG manual

Edge Electrons
Edge Electrons EDGEIQ EE-202-0050 INSTALLATION, COMMISSIONING AND OPERATION MANUAL

Castle Creations
Castle Creations Pixie-7 quick start guide
Biene Electronics
Biene Electronics BR900-RF manual

Lance Design
Lance Design TDC-100B Preliminary installation and operation manual
Naturela
Naturela NPBC-V3C-B user manual
Siemens
Siemens GEB-1E Series Mounting instructions

PIETRO FIORENTINI
PIETRO FIORENTINI REVAL 182 Technical manual
AMS
AMS AMS KCU Operation and service manual
