Nesco NC-59102 WINDY User manual

Instruction Manual
คู่มือการใช้งาน
VACUUM CLEANER
MODEL : NC-59102 WINDY
1400 W 220 V 50 Hz

1

A.
B.
D.
F.
G.
H.
I.
J.
K.
L.
M.
P.
2

3
1.
2.
3.
4.
5.
6.
7.
8.
9.
10.
11.
12.
13.
14.
15.
16.
17.
18.
19.

4
20.
1.
2.
3.
5
4.
5.
6.
7.
8.

6
9.
10.
1.
2.
3.
4.

7

8

English
Dear Customer
Thank you for choosing a NESCO appliance. The experience, design, feature
and technology of this appliance, as well as the strict quality controls used during
manufacture, will provide full satisfaction for many years.
Introduction
Carefully read and understand this manual and any label attached to the tool
before use. Keep these instructions with the product for future reference. Ensure
all persons who use and service this product are acquainted with this manual.
A.
B.
C.
D.
E.
F.
G.
H.
I.
J.
K.
L.
M.
N.
O.
P.
Tube
Controller
Handle
Flexible hose
Hose connection inlet
Front cover
Cord rewinder button
Full bag indicator
Wind out plate
Speed controller
ON/OFF switch
Plug
Small brush
Narrow nozzle
Sofa brush
Floor Brush
9

1.
2.
3.
4.
5.
6.
7.
8.
9.
10.
11.
12.
13.
14.
15.
16.
17.
18.
19.
20.
Read all instructions before operating.
Check that the appliance is in perfect condition and working order once unpacked.
The appliance is covered by NESCO warranty in the event of original faults.
Check the voltage on the base corresponds to the mains voltage in your home.
Always remove the plug from the power socket when the appliance is not in
use and before carrying out any cleaning or maintenance operations.
Always remove the plug from the power socket after operating is completed.
Never use methylated spirits or other solvents to clean the appliance.
Do not use appliance to vacuum liquids.
Never leave the appliance unattended when it is switched on. Keep the
appliance out the reach of children or the inrm.
This appliance is for domestic used only. Use as described in this instruction
booklet.
Do not switch the appliance on if it appears to be fault in anyway. For repairs
or accessories, contact your dealer or an authorized service center.
If the supply cord is damaged, it must be replaced by the manufacturer or
its service agent.
Unplug from outlet when not in use and before cleaning. Allow to cool before
putting on of taking off parts.
The use of accessory attachments not recommended by the appliance
manufacturer my cause injuries.
Do not let cord hang over edge of table or counter or touch hot surfaces.
Do not remove the plug from the socket by pulling the cable or the appliance
itself.
Do not run the appliance over the power cable.
Do not use the appliance to vacuum lighted, matched, cigarette ends or
hot ash.
Do not use the appliance on wet surfaces.
Do not obstruct to air intake or outlet vents.
Do not use the appliance to vacuum needles, drawing-pins or string.
10
Instruction for use assembling the vacuum cleaner:
1. Let the end of the house insert into the air intake socket until it clicking position.
After using, press the button and drag the end of the hose out.
11
2.
3.
4.
5.
6.
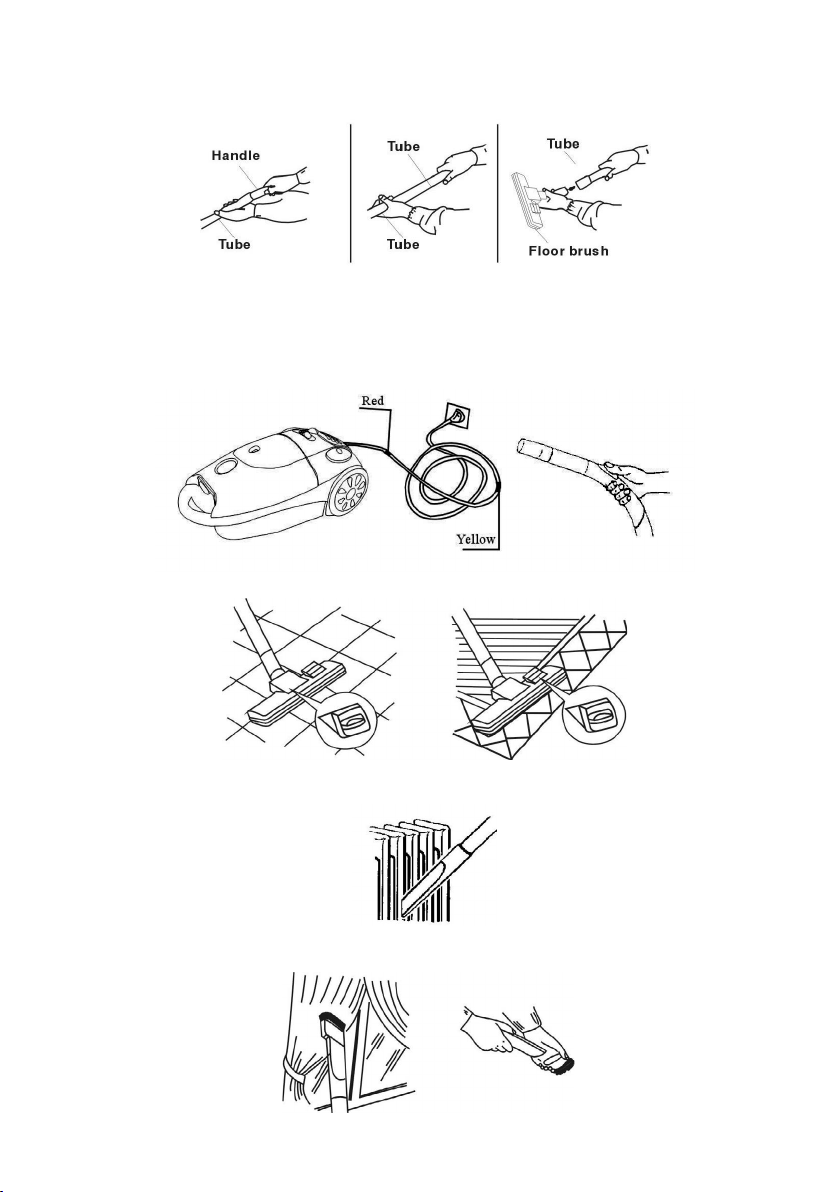
Fit the extension tube to the handle, tube and tube to oor brush as showing
in the picture.
Pull the wire to suitable length. Insert the plug into power socket. First make the
speed adjust button to MIN press the switch to run the machine. The vacuum
cleaner begins to work. The part, which can adjust wind volume, is on the
handle. The speed-controller can adjust the power. (Attention: Don not extend
the cable beyond the RED mark)
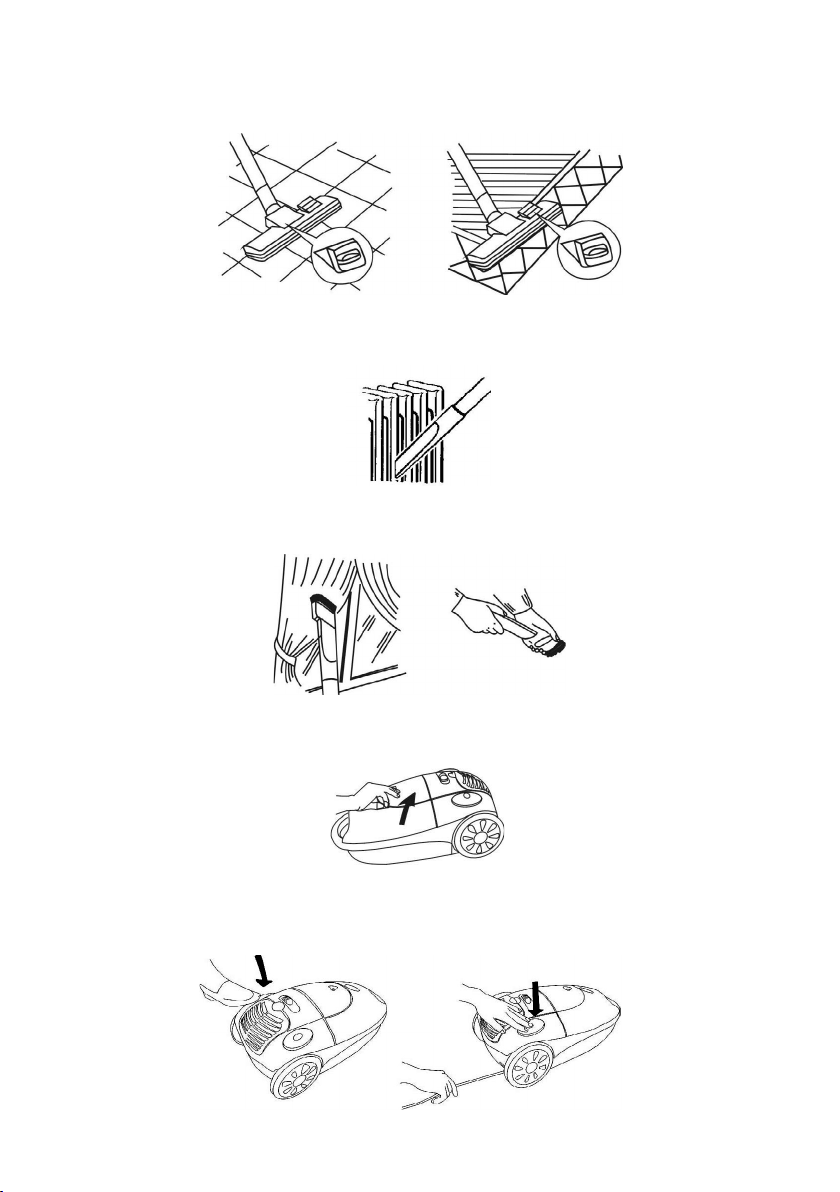
Using accessories, bristles extended for hard oors. Bristles retracted for carpets.
Narrow nozzle for cleaning, comers, edges of drawer etc.
The small brush is t for curtains and clothing. Plus t to narrow nozzle as showing
in the picture.

12
7.
10.
8.
Placing the accessories. Put the narrow nozzle and the small brush into
accessories box after using.
Replacing the dust bag, when the dust bag is full, the color of the sign turns
into red at this moment the dust bag should be replace. Open the front cover
as showing in the picture. Take out the bag an empty the dust or replace the
bag.
After using, press the switch to stop the machine, pull out the wire and press
wire-rolling switch to roll back the wire steadily. If the power cable can’t is
rewind completely. Please pull out the power cable a little bit and press the
rewinder button again. You can repeat the rewinding steps until the cable is
rewind completely.
9. After using, you can put them as the gure follows.

13
•
•
•
•
•
•
•
•
Damage or defect from misunderstand how to use or service form non
authorized people.
Damage or defect from or follow this instruction manual.
Electrical shock or nay electrical problem.
Lost or damage some part by accident or natural damage.
Some parts are shelf life, need replacement.
Warranty only in service area
This instruction may be changed without prior notice.
Company reserved the right to change all details before notice.
•
•
•
•
When the motor lter is dirty, remove the lter and wash carefully in liquid or
water. Allow the lter to dry completely before replacing it.
The dust bag should often be replaced often in order to avoid barrier.
When the lter is full of dust, it should be washed or replaced. (Attention:
Don’t wash the lter in the washing machine or dry it with electrical heaters
please rex it after drying lter in air.
Don’t clean the outer-shell of the cleaner in petrol oil-like liquid. Please rub is
with water and soft soap liquid. (Attention: Don’t clean the machine with the
cloth full of water. Don’t let the water ow into the vacuum cleaner.
Warranty moter only
•
•
•
Damage or defective from manufacturer, dealer & service
1 year warranty for household use only
Use according to this instruction carefully.

บริษัท เนสโก้ โปรดักส์ (ประเทศไทย) จำ�กัด
www.nescoproduct.com

Table of contents
Languages:
Other Nesco Vacuum Cleaner manuals


Popular Vacuum Cleaner manuals by other brands

Parkside
Parkside PNTS 1500 B2 translation of original operation manual

HAKO
HAKO Advantage 15721000 owner's manual

Panasonic
Panasonic MCCG902 - CANISTER VACUUM - MULTI LANGUAGE operating instructions

Pullman Holt
Pullman Holt 86ASB54C Specifications

Xiaomi
Xiaomi Mi Robot Vacuum-Mop 2 Ultra Auto-empty... user manual

Hoover
Hoover U5093940 owner's manual


