Nesco NC-61101 STORM User manual

Instruction Manual
คู่มือการใช้งาน
Wet&Dry Vacuum Cleaner
MODEL : NC-61101 STORM
1400 W 220-240 V~ 50-60 Hz
1

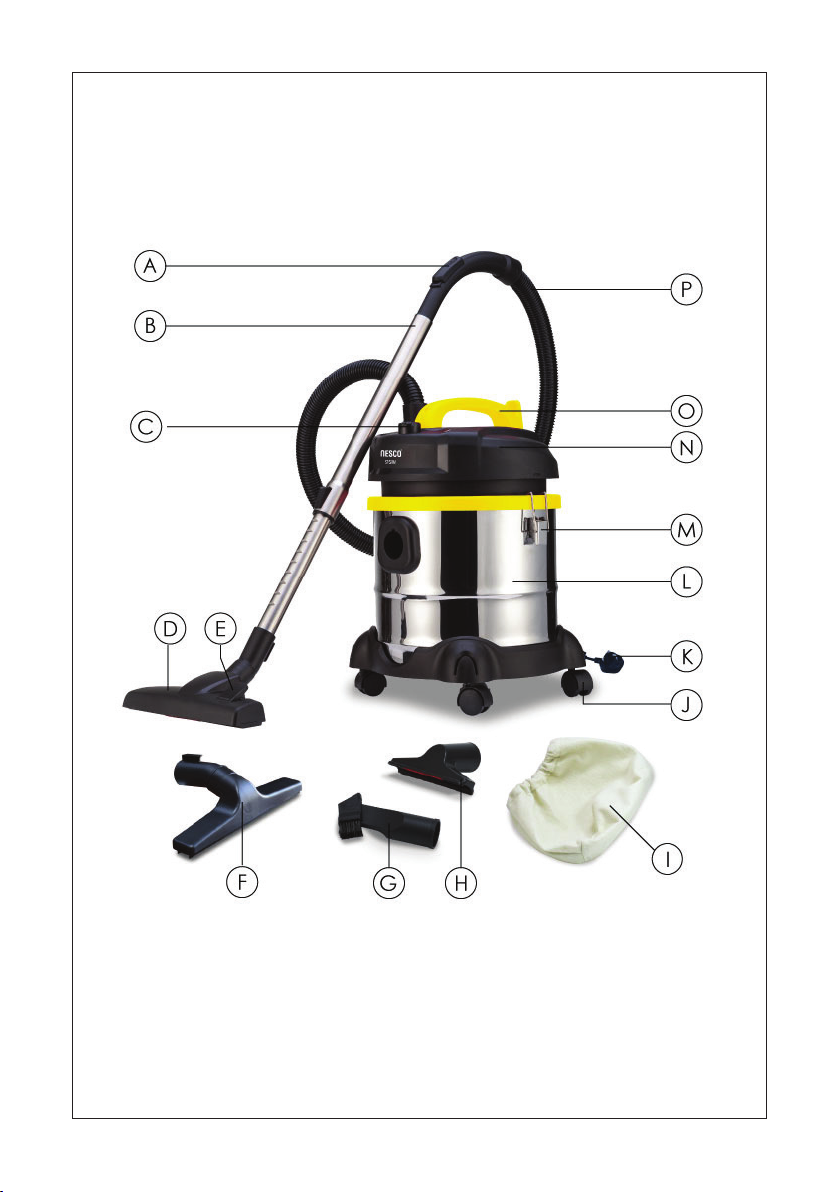
A.
B.
D.
F.
G.
H.
I.
J.
K.
L.
M.
P

3
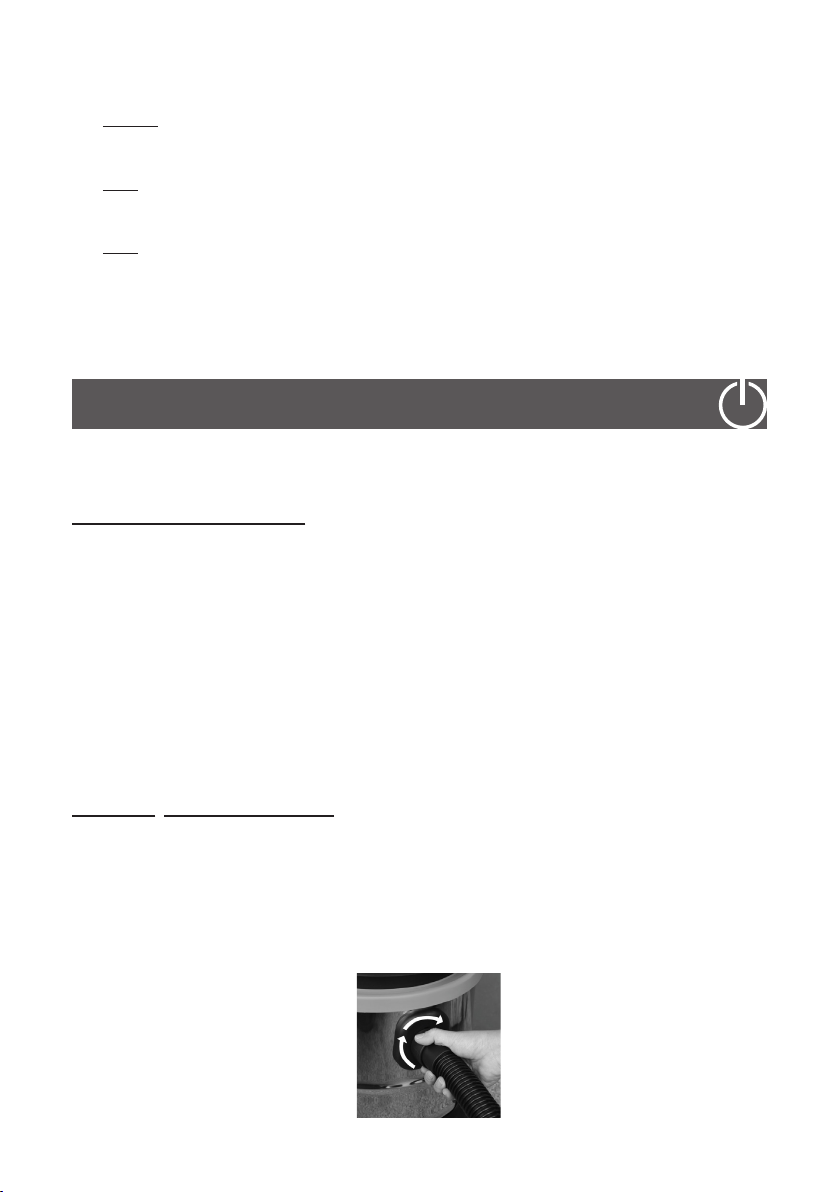
1.
3.
4.
5.
6.
7.
8.
9.
10.
11.
13.
14.
15.
4
1.
3.
4.
5.
6.
7.
8.
1.
16.
17.
18.
19.
Table of contents
Languages:
Other Nesco Vacuum Cleaner manuals


