Nestbox Eco Barn Owl Nest Box User manual

Page 1
User Guide
Eco Barn Owl
Nest Box
(O1BAPZZZZ)

Page 2
Welcome to your new Eco Barn Owl Nest Box
Thank you for purchasing one of the Nestbox Company’s family of products. We
hope you and the Barn Owls will enjoy many years use with this nest box.
This is an advanced nest box for Barn Owls, the development of which has taken
into account our experience of over 10 years of previous models, advice from
Barn Owl specialists, customer comments and recent advances in manufacturing
and materials technology.
This box is kind to the environment. With the exception of the floor, it is made
from highly durable and solid recycled plastic, specially formulated for a very
long life outside in all weathers. The wooden floor is just as eco-friendly, con-
structed from FSC® certified OSB (economically made of wood shavings from
waste and other sustainable sources).
This Guide is provided to help you (and the owls) get the most from this box, but
we realise that many of our customers have worked out better ways of doing
things, so please let us know of any tips you have, or improvements to this guide
which you would suggest.
Inside the Carton
When you unpack the box it comes in, you should find the following items:
Fully assembled nest box Front and Back panels
for Fixing Bracket
2 Hatch Closures
Camera Bracket
and OSB floor
If you don’t find any of these immediately, have a look inside the nest box; we
sometimes pack items inside for transit.
Page 1

Page 3
Putting the Box up in Position
The Eco Barn Owl Nest Box is suitable for fitting to a wall (inside or out), or
fitting outside to a tree.
When fitting inside, we suggest it should be high up (at least 3 metres if possi-
ble). Near the apex of a roof is ideal, providing there is enough ventilation to
avoid overheating when the sun shines on the roof. Please ensure that the
owls have permanent access to the roof space, and that the entrance to the box
is in full view of any visiting owls.
When siting a box outside (on a building or tree) there are a number of factors
to consider which are likely to contribute to how attractive the box is to barn
owls and the success of the box for rearing a brood of owls.
We recommend that the box is at least 4.5 metres high.
To minimise the risk of overheating it is best to site the box somewhere
shaded that avoids too much direct sunshine (especially in the middle of the
day).
To reduce rain being blown into the box, if possible face the box away
from the prevailing wind.
It is best to choose a location where any passing owls can clearly see the
entrance hole (and with a good view out).
When erecting and inspecting the box, please pay special attention to your
personal safety.
Carrying heavy weights and working at these heights on ladders can be dan-
gerous if you do not take the appropriate precautions to avoid falling or other
accidents. Whilst we have designed this nest box to facilitate safe working, it
is the user’s responsibility to ensure that it is used safely.
The separate Mounting Bracket should be fitted to the tree or wall etc first,
and then the box should be fitted onto the hooks on the bracket.
We suggest before climbing up the ladder etc, first
take the back panel of the bracket, and bend the sides
in through a right angle with the grooves inside the
angle.
Page 2

Page 4
Then take the front panel of the bracket and fit it onto the
back panel, with the hooks coming right through the slots,
with the tabs behind the hooks fitting flush
with the front panel.
Next, separate the 2 parts of the bracket, and fit the
back of the bracket to the tree or wall etc (making
sure the hooks face upwards) This can be done with
screws (as shown) or nails either using the holes
provided, or drilling additional
holes. Alternatively, slots are pro-
vided for attaching the bracket to a
tree etc with straps or cable.
Once the back is attached, fit the front of the bracket onto it.
Before taking the box up the tree we suggest you remove
(and leave behind) the wooden floor, Hatch Closures and Camera Bracket, as
these can all be fitted once the box is in position up the tree.
Take the box up the tree etc (you may find it helps to put a
loop of cord or rope through the keyholes so you can hang the
box over your shoulder while taking it up the ladder). Hook
the box onto the bracket, using the elongated keyholes in the
back of the box. Pull the box down
so that it is securely held.
The bracket takes the full weight of
the box, and we recommend secur-
ing the box in a vertical position
using the bottom bracket (which
should be “curled” so that it is flat
on the surface of the wall or tree). It may be useful to
put a small block of wood etc between the box and the
wall or tree to get it vertical.
As an alternative, the box can be fitted without using the Fixing Bracket, sim-
ply by using screws or nails with the elongated keyholes.
Page 3

Page 5
Fitting Out Box
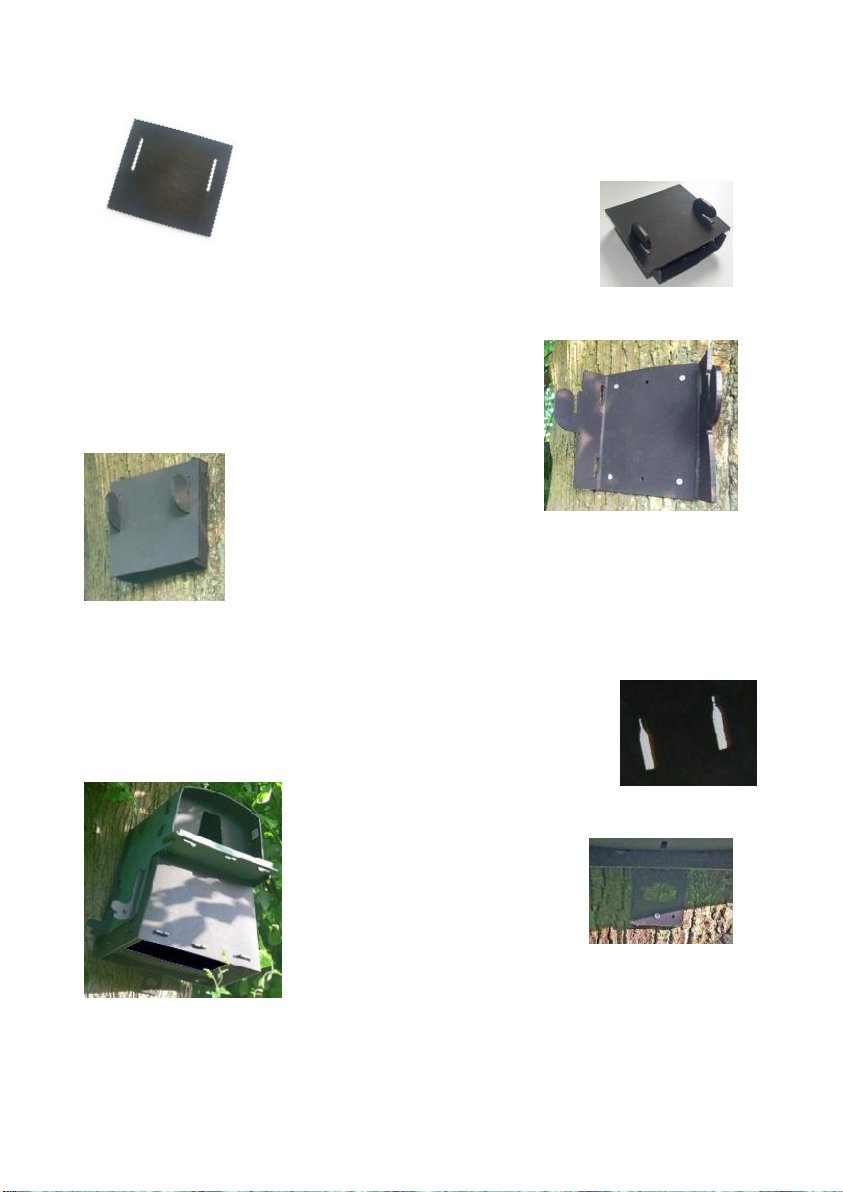
To get the box ready for use, secure the side hatch with the 2 Hatch Closures.
These are simply fitted by putting their “T-shaped” lugs into the slots at the
side of the hatch, and then sliding them down. They can be fitted either way
up, whichever is more convenient. Please note that when in situ these are de-
signed to be used by the owls as perches, so you may notice an owl sitting on
one in due course.
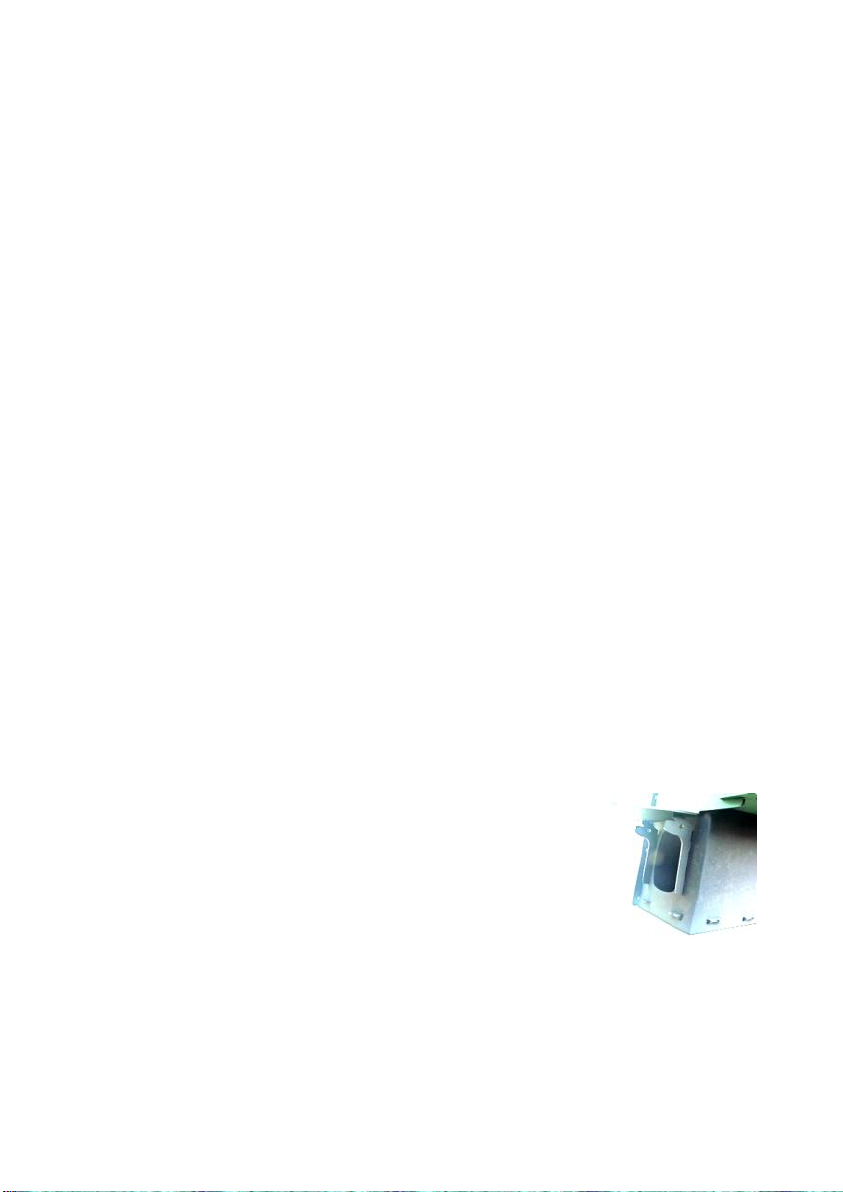
Fit the Camera Bracket from the inside of the box into the 2 slots in the top
left corner of the back panel.
Finally, manoeuvre the wooden floor into position, up through the large hole
in the plastic floor. It simply rests in place on the plastic edges to the floor.
Service and Maintenance
Please note that as Barn Owls are a protected species, occupied nests
should not be visited unless you hold a licence.
Your box should last for many years without any attention, except for the
floor. We would suggest removing this for cleaning and inspection every year
or two. It is designed to be sacrificial, ie because it will become damp in use,
it will deteriorate and we suggest it should be replaced every few years with a
new floor. Replacement floors are available from our web site.
The Access Hatch on the left side of the box is provided for inspection and
ringing etc of resident owls by suitably licenced users, as well as others when
there are no owls using the box. The Hatch has an integral hinge where the
groove separates it from the roof/side panel. Although
stiff to use at first, it will open at right angles, once the
Hatch Closures have been removed by sliding up and out
of their slots. The Hatch Closures are designed to hold
the hatch up and out of the way by sliding them back into
the slots in the box. If you are concerned about dropping
the Hatch Closures while working on the box, we have
put a hole in each of them, suitable for attaching a cord to
ensure they do not fall to the ground. The size and shape of the access hole is
designed to reduce the possibility of birds escaping around the side of your
arm whilst you are inspecting the box.
Page 4

Page 6
Specifications, Warranty etc
The specifications of the product described and the contents of this User
Guide are subject to change without notice, as part of our continuous im-
provement process.
Whilst every care has been taken in the preparation of this document, we real-
ise that it will still be possible to improve it. If you find any errors, omissions
or points which are not clear, or have any suggestions for improving it, please
let us know by email at mail@nestbox.co.uk. We will endeavour to deal with
any problem to your satisfaction, and learn from it for future versions.
The contents of this document may not be reproduced in whole or in part ex-
cept for your personal use.
The Nestbox Company Limited warrants all its products against defects in
materials and manufacture for 6 months from the date of purchase. If a defect
is discovered, The Nestbox Company will repair or replace the product (at its
option) free of charge, provided it is returned to the address in this User Guide
at the customer’s expense.
The Nestbox Company Limited is not able to accept any responsibility for any
loss, damage, or loss of data suffered by any customer or third party as a re-
sult of use, misuse or malfunction of the product or this User Guide. In par-
ticular, whilst the product has been extensively tested, we are unable to war-
rant that is error free.
If you have a further technical or user question relating to the product, please
Care for the Environment
As you might expect, The Nestbox Company cares deeply about the Environ-
ment. We have adopted an Environmental Policy designed to demonstrate
our commitment to operating our business in harmony with the natural and
man made environments. If you wish to see the full policy, it is available to
read on our web site.
Our products are developed to be economical with natural resources, both in
manufacture and use. We comply with the relevant laws and regulations, in-
cluding those relating to the Restriction of Hazardous Substances (known as
RoHS) and Waste Electronic and Electrical Equipment (WEEE).
Page 5

Page 7
The plastic used in this product is 100% recycled Low Density Polyethylene. The
wood used in our products comes from responsibly managed forests, as part of
our commitment to the Forest Stewardship Council.
When you have finished using this product, please dispose of it responsibly.
This User Guide is printed on recycled paper.
Accessories for your Nest Box
Our comprehensive range of accessories is designed to enable customers to make
the best use of their purchase. Why not accessorise your equipment to extend its
capabilities and make it do exactly what you want? The following examples of
our accessories may be of interest:
There is already a Camera Bracket in this Nest Box, and we sell a range of camera
kits suitable for fitting into this box, either for DIY fixing, or we can fit them for
you.
Replacement Floor for Eco Barn Owl Nest Box (O3A81ZZZZ)
We recommend replacing the floor panel of your nest box every few years.
Wired Camera Kit (C3K6ZNFZZ)
Atiny colour camera, including a 20 metre cable to go to your TV, sound and
lights for night viewing. Straightforward and rewarding!
Wireless Camera Kit (C3K11YBNF)
A wireless colour camera with sound, night viewing and battery box. Convenient,
with no trailing cables and practical.
Advanced Wireless Camera Kit (C3K2ZNFZZ)
An advanced wireless colour camera system with sound, innovative lighting sys-
tem which improves the pictures night and day, and superior electronics to extend
battery life.
Connection to PC/Laptop (C5A37ZZZZ)
This small converter allows you to feed pictures from your camera straight into
your computer. No need to install any hardware inside the computer.
You can find the full range of accessories
on our web site, www.nestbox.co.uk,
or just scan the QR code here:
Page 6

Page 8
The Nestbox Company Limited
Eastcote House
Barston Lane
Eastcote
Solihull
West Midlands
B92 0HS UK
Telephone: +44 (0) 1675 442299
Fax: +44 (0) 1675 442544
Web site: www.nestbox.co.uk
This publication, our products and our designs are
© Copyright 2014 The Nestbox Company Limited
and certain of them are protected by UK Patent 2420242
WEEE Producer Registration Number WEE/HA3702UR
Battery Producer Registration Number BPRN03345
All our products are tested
for compliance with the
relevant directives, and carry
the CE Mark
This manual suits for next models
1
Table of contents
Other Nestbox Lawn And Garden Equipment manuals