Net to Net Technologies UIM-2T1 User manual

UIM-2T1
T1 Loop Bonding Uplink Interface Module
1.0 INSTALLATION
1.1 Unpack and Inspect the Equipment
The following components should be included:
z1 UIM-2T1
z4 #6 Phillips Panhead Nylon Locking Screws
z2 #6 Phillips Beige Flathead Screws
If there is any visible damage, do not attempt to connect the device. Contact Customer Support at 1-
877-638-2638 (1-603-427-0600 for international customers) or [email protected] .
1.2 Configure the T1 Ports
The T1 Configuration Switches for both Port 1 and Port 2 are on the component side of the UIM-2T1
circuit board, opposite the faceplate/label. When facing the Configuration Switches, Port 1 switches
are on the left and Port 2 switches are on the right. Switches for both ports are numbered from left
to right, #1-8.
Installation Instructions
CAUTION Net to Net Technologies strongly recommends the use of proper electrostatic discharge (ESD) precautions when
handling this equipment.
NOTE Port 2 Configuration Switches on the UIM-2T1 are NOT USED: frame type, line code and line attenuation for
Port 2 are determined by the Port 1 switch settings. BOTH ports determine speed and timing configurations via
communication with the remote T1 equipment to which the UIM-2T1 is connected.
PORT 1 SWITCHES
Switch # Configuration Switch # Configuration
1not used 5LINE ATTENUATION
2not used 6
3FRAME TYPE 7not used
4LINE CODE 8not used
220-0000084 rev 01

1.2.1 Frame Type
Frame type is the data encapsulation method. A T1 frame consists of 192 data bits (an 8-bit
sample of each of the 24 T1 data channels), plus a synchronization bit, transmitted at a rate of
8,000 frames per second across the T1 line.
1.2.1.1 Extended Super Frame
Extended Super Frame (ESF) format, used in Wide Area Networks (WANs), assembles
data into 24-frame transmission clusters and integrates Facilities Data Link (FDL) which
provides in-service monitoring and diagnostics as well as Cyclic Redundancy Check (CRC)
which scrutinizes data integrity and detects line errors.
1.2.1.2 Super Frame
Super Frame (SF) format assembles data into 12-frame transmission clusters. SF does
not utilize FDL or CRC.
1.2.2 Line Code
Line code is the T1 mode of transmission. The two line code options outlined below fall within
the International Telecommunication Union - Telecommunication Standardization Sector (ITU-
T) G.703 Standards for Transmission Facilities.
1.2.2.1 Bipolar with 8 Zero Substitution
Bipolar with 8 Zero Substitution (B8ZS) is used to accommodate the minimum ones
density requirement in the North American public network. B8ZS line encoding helps
prevent loss of synchronization between the UIM-2T1 and remote T1 equipment by using
bipolar violations to guarantee the presence of pulses in the T1 line.
1.2.2.2 Alternate Mark Inversion
Alternate Mark Inversion (AMI) simply alternates positive and negative pulses. Although
AMI links typically encounter long strings of zeros which can potentially cause loss of
synchronization between units, Net to Net Technologies' products meet the North
American minimum ones density requirement internally such that, even with AMI, loss of
synchronization is prevented between the UIM-2T1 and remote T1 equipment (just as it
is with B8ZS).
1.2.3 Line Attenuation
Shorter distances between the UIM-2T1 and remote T1 equipment require increasing line
attenuation in order to prevent the T1 signal from becoming too strong for repeaters, switches
and other T1 transmission equipment that may be encountered along the line. Increased
transmit line attenuation translates to decreased transmit line amplitude.
Port 1 Configuration Switches #5 and #6 work in tandem with one another to provide four
attenuation options for the T1 line(s):
Switch #3 Frame Type
down Extended Super Frame
up Super Frame
Switch #4 Line Code
down Bipolar with 8 Zero Substitution
up Alternate Mark Inversion
220-0000084 rev 01

1.2.3.1 0 dB
Receivers on most newer T1 transmission equipment can automatically adjust for
incoming amplitude, allowing them to run at zero attenuation regardless of distance.
1.2.3.2 -7.5 dB, -15 dB, -22.5 dB
Some older T1 transmission equipment cannot automatically adjust for incoming
amplitude and line attenuation must be set accordingly.
1.3 Install the UIM-2T1
1.3.1 IP DSLAM Installation
The UIM-2T1 provides an upstream network connection, via a multiplexer uplink module
(MUM), for Net to Net Technologies' IP DSLAMs; neither an IP DSLAM nor a MUM can function
without an uplink interface module (UIM).
1.3.1.1 Affix the UIM-2T1 to a MUM
zSelect a port on the MUM for installation of the UIM-2T1: either port (1 or 2) may
be used. Although not required for operational purposes, if redundancy is desired
two UIMs may be installed on a MUM, one in each port.
zRemove the blanking plate from the selected port.
zCarefully slide the faceplate of the UIM-2T1 under the lip of the MUM faceplate at
the selected port opening such that the UIM-2T1 circuit board is facedown and the
UIM-2T1 label shows through the MUM port opening with the UIM-2T1 model name
along the right-hand edge.
zEnsure that the mounting holes on the UIM-2T1 are lined up with the
corresponding pems on the MUM circuit board and that the board-to-board
connector key pins are properly aligned.
zGently press down across the center of the UIM-2T1 circuit board until the board-
t
o-board connector is fully seated.
Switch #5 Switch #6 Attenuation
down down 0 dB
up down -7.5 dB
down up -15 dB
up up -22.5 dB
NOTE The UIM-2T1 can be installed on a MUM that is already in service, though you must remove the
MUM from the IP DSLAM chassis in order to do so. Removal of a MUM from a powered IP
DSLAM will not affect the operational status of other modules within the chassis; it will
however, disengage the IP DSLAM's upstream network connection.
CAUTION Blanking plates should be stored for possible future use: if a UIM-2T1 is
removed from a MUM, it must be replaced with either another UIM or a
blanking plate. DO NOT OPERATE AN IP DSLAM WITH A MUM THAT HAS AN
OPEN UIM PORT.
220-0000084 rev 01

zSecure the UIM-2T1 circuit board to the MUM circuit board, at the pems, with the
(4) provided panhead screws.
zSecure the UIM-2T1 faceplate to the MUM faceplate using the (2) provided beige
flathead screws.
1.3.1.2 Install the MUM in an IP DSLAM Chassis
The IPD12000 is a fourteen slot chassis; slots 1-12 are reserved for interface modules
and slots 13-14 are reserved for multiplexer uplink modules (MUMs). The IPD4000 is a
five slot chassis; slots 1-4 are reserved for interface modules and slot 5 is reserved for a
MUM.
zAlign the MUM with the slot module guides of the chosen slot for installation
(either slot 13 or 14 on the IPD12000 or slot 5 on the IPD4000).
zSlide the MUM firmly into the chassis. DO NOT USE EXCESS FORCE.
zVerify that the PWR (Power) LED on the MUM faceplate is illuminated.
zTighten the fastening screws on the MUM faceplate.
1.3.2 Mini DSLAM Installation
zRemove the (8) beige flathead screws securing the Mini DSLAM chasis and carefully lift
off the chassis cover. Set the screws aside.
zSelect a port on the Mini DSLAM for UIM-2T1 installation: either port (1 or 2) may be
used. Although not required for operational purposes, if redundancy is desired two UIMs
may be installed on a Mini DSLAM, one in each port.
zRemove the blanking plate from the selected port.
zCarefully slide the faceplate of the UIM-2T1 under the inside lip of the Mini DSLAM at the
selected port opening such that the UIM-2T1 circuit board is facedown and the UIM-2T1
label shows through the Mini DSLAM port opening with the UIM-2T1 model name along
the right-hand edge.
zEnsure that the mounting holes on the UIM-2T1 are lined up with the corresponding
pems on the Mini DSLAM circuit board and that the board-to-board connector key pins
are properly aligned.
zGently press across the center of the UIM-2T1 until the board-to-board connector is fully
seated.
CAUTION Disconnect all power sources from the Mini DSLAM before installing the UIM-2T1.
CAUTION Blanking plates should be stored for possible future use: if a UIM-2T1 is removed from
a Micro DSLAM, it must be replaced with either another UIM or a blanking plate. DO
NOT OPERATE A MINI DSLAM WITH AN OPEN UIM PORT.
220-0000084 rev 01

zSecure the UIM-2T1 circuit board to the Mini DSLAM circuit board, at the pems, with the
(4) provided panhead screws.
zSecure the UIM-2T1 faceplate to the front of the Mini DSLAM using the (2) provided
beige flathead screws.
zReplace the Mini DSLAM chassis cover and secure with the original (8) beige flathead
screws.
2.0 CONNECTING THE T1 LINE(S)
The primary feature of the UIM-2T1 is loop bonding capability, though it functions with a single T1
connection as well.
2.1 Loop Bonded Connection
Using two T1 lines for one network connection (loop bonding) will net twice the speed and data
passing capability as a single T1 connection. A second T1 line can also be considered a backup for
the first, and vice versa, should one of the lines become disabled. A UIM-2T1 can only establish loop
bonded connections with other Net to Net loop bonding capable T1 provider equipment. See Net to
Net's T1 Loop Bonding Product to Product Feature Compatability list
(http://www.nettonet.com/support/docs/230-0000034 ).
Plug the T1 cables into the T1 RJ45 Ports on the UIM-2T1 faceplate; the order of connection is not
important. Verify both connections: the Port 1 and Port 2 Lnk LEDs on the UIM-2T1 faceplate will
flash green to indicate the connections are established and operational.
2.2 Single T1 Connection
A single line connection can be established between a UIM-2T1 and any of Net to Net's T1 provider
equipment, regardless of loop bonding capability.
Plug the T1 cable into one of the two T1 RJ45 ports on the UIM-2T1 faceplate; either port (1 or 2)
may be used. Verify the connection: the T1 Lnk LED on the UIM-2T1 faceplate (Port 1 Lnk or Port 2
Lnk depending upon which port was connected) will flash green to indicate the connection is
established and operational.
2.3 T1 RJ45 Pinout
If you are using a shielded T1 cable for your network connection, it must be grounded through pins
3, 6, 7 and 8.
220-0000084 rev 01

3.0 ADDITIONAL INFORMATION
3.1 LED Indications
(A pulsing LED blinks steadily at a rate of once per second. A flashing LED blinks at a
more rapid, less constant rate.)
3.2 Regulatory Compliance
T1 RJ45 PINOUT
Pin 1 Rx Ring Pin 5 Tx Tip
Pin 2 Rx Tip Pin 6 not used
Pin 3 not used Pin 7 not used
Pin 4 Tx Ring Pin 8 not used
LED State Indication Additional Information
Port 1
Lnk and
Port 2
Lnk
flashing
green
T1 connection is established and
active
Traffic is flowing.
solid green problematic T1 connection A connection exists but there is indication of
a problem with the T1 line.
no
illumination
Red Alarm
The incoming connection to the
UIM-2T1 has been lost; no data is
being received.
If the outgoing connection from the UIM-
2T1 has also been lost then the remote T1
equipment is in Red Alarm as well.
Port 1
Alm and
Port 2
Alm
no
illumination
T1 is operational An established T1 link has no alarm
indications and is operational UNLESS the
T1 Lnk LED remains unlit as well, in which
case the UIM-2T1 is in Red Alarm.
solid amber Yellow Alarm
The outgoing connection from the
UIM-2T1 has been lost; no data is
being transmitted.
The remote T1 equipment has lost its
incoming connection and is in Red Alarm.
pulsing
amber
Blue Alarm
An indirect connection has been
lost; the UIM-2T1 may no longer
be receiving data from the remote
T1 equipment.
The remote T1 equipment has lost a
connection with an intermediate device and
is in Red or Yellow Alarm.
NOTE The following regulatory compliance information applies to the UIM-2T1 as installed in a Mini DSLAM or on a
MUM in an IP DSLAM.
220-0000084 rev 01

3.2.1 US Federal Communications Commission (FCC)
3.2.1.1 Class A Equipment
Note: This equipment has been tested and found to comply with the limits for a Class A
digital device, pursuant to part 15 of the FCC Rules. These limits are designed to provide
reasonable protection against harmful interference when the equipment is operated in a
commercial environment. This equipment generates, uses and can radiate radio
frequency energy and, if not installed and used in accordance with the instruction
manual, may cause harmful interference to radio communications. Operation of this
equipment in a residential area is likely to cause harmful interference in which case the
user will be required to correct the interference at his own expense.
Caution: Changes or modifications not expressly approved by the manufacturer could
void the user’s authority to operate the equipment.
3.2.1.2 T1 Equipment
Note: This equipment complies with Part 68 of the FCC rules and bears a label that
contains the FCC registration number. This information must be provided to the
telephone company if requested. This equipment should be connected to the telephone
network or premise wiring using compatible modular plugs and cabling in compliance
with the requirements of Part 68 of the FCC rules, using the following standard jack
types:
zRJ-48H: TNE1500-P-12-XX or TAM1500-12
zRJ-48C: TNE1500-X, TNE1520-X, UIM-T1 or UIM-2T1
In the unlikely event that this equipment harms the telephone network, the telephone
company can temporarily disconnect your service. The telephone company will try to
warn you in advance of any such disconnection, but if advance notice isn’t practical, it
may disconnect the service first and notify you as soon as possible thereafter. In the
event such a disconnection is deemed necessary, you will be advised of your right to file
a complaint with the FCC. Additionally, the telephone company may, from time to time,
make changes in its facilities, equipment, or operations that could affect the operation of
this equipment. If this occurs, the telephone company is required to provide you with
advance notice so you can make the modifications necessary to maintain uninterrupted
service.
Caution: This unit does not contain any user serviceable parts. Repair service and/or
warranty information may be obtained by contacting Customer Support at Net to Net
Technologies, Inc.:
zAddress: 112 Corporate Drive, Portsmouth, NH 03801
zPhone: (603) 427-0600 / (877) 638-2638
zEmail/Website: [email protected] / www.nettonet.com
3.2.2 Industry Canada
3.2.2.1 Class A Equipment
This Class A digital apparatus complies with Canadian ICES-003.
Cet appareil numérique de la Classe A est conforme à la norme NMB-003 du Canada.
3.2.2.2 T1 Equipment
Notice: The Industry Canada label identifies certified equipment. This certification means
t
hat the equipment meets telecommunications network protective, operational, and
220-0000084 rev 01

safety requirements as prescribed in the appropriate Terminal Equipment Technical
Requirements documents. The department does not guarantee the equipment will
operate to the user's satisfaction.
Before installing this equipment, users should ensure that it is permissible to be
connected to the facilities of the local telecommunications company. The equipment
must also be installed using an acceptable method of connection. The customer should
be aware that compliance with the above conditions may not prevent degradation of
service in some situations.
Repairs to certified equipment should be coordinated by a representative designated by
t
he supplier. Any repairs or alterations made by the user to this equipment, or equipment
malfunctions, may give the telecommunications company cause to request the user to
disconnect the equipment.
Users should ensure for their own protection that the electrical ground connections of
the power utility, telephone lines and internal metallic water pipe system, if present, are
connected together. This precaution may be particularly important in rural areas.
Caution: Users should not attempt to make such connections themselves, but should
contact the appropriate electric inspection authority, or electrician, as appropriate.
220-0000084 rev01
© Copyright 2002 Net to Net Technologies, Inc.
™ The Net to Net Logo is a trademark of Net to Net Technologies, Inc.
Worldwide Headquarters
Net to Net Technologies
112 Corporate Drive
Portsmouth, NH 03801
USA
+1 877-638-2638
http://www.NetToNet.com/
EMEA Headquarters
Net to Net Technologies
Victoria House 19 Park Way
Newbury Berkshire RG14 1EE
UK
+44 (0) 1635 570950
220-0000084 rev 01
Table of contents
Other Net to Net Technologies Network Card manuals
Net to Net Technologies
Net to Net Technologies UIM-2E1 User manual
Net to Net Technologies
Net to Net Technologies UIM-E3 User manual

Net to Net Technologies
Net to Net Technologies UIM-E1 User manual
Net to Net Technologies
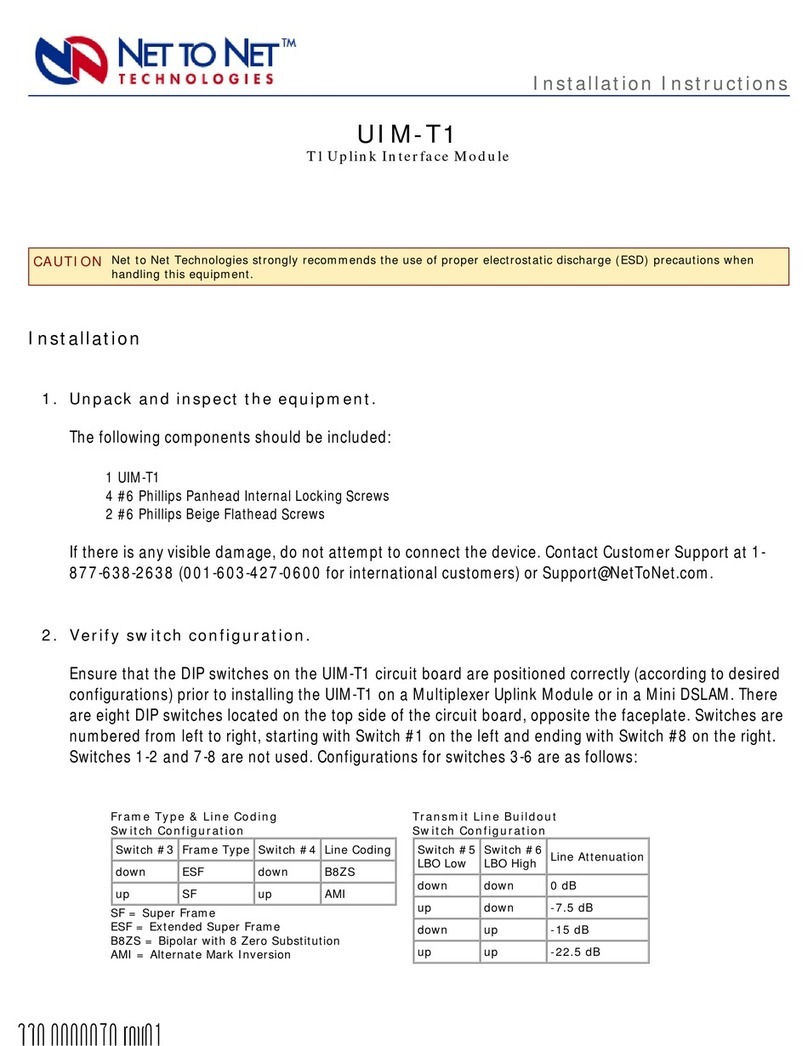
Net to Net Technologies UIM-T1 User manual
Net to Net Technologies
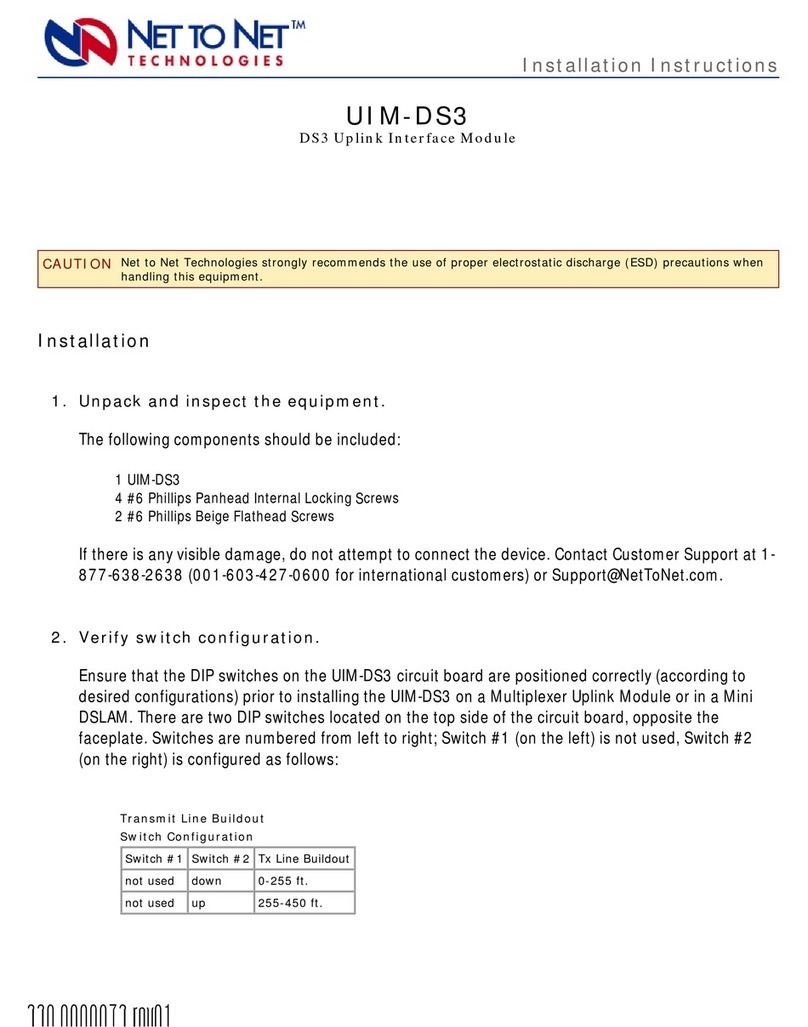
Net to Net Technologies UIM-DS3 User manual
Popular Network Card manuals by other brands

TRENDnet
TRENDnet TEW-641PC user guide
Hawking
Hawking HWU54D user manual
Continental Access
Continental Access CICP18ACCNETBD installation instructions
National Instruments
National Instruments Measure Data Acquisition user manual
Lantronix
Lantronix Device Server UDS 10 user guide
ZyXEL Communications
ZyXEL Communications G-102 user guide
