manuals.online logo
Brands
  1. Home
  2. •
  3. Brands
  4. •
  5. NetComm Wireless
  6. •
  7. Modem
  8. •
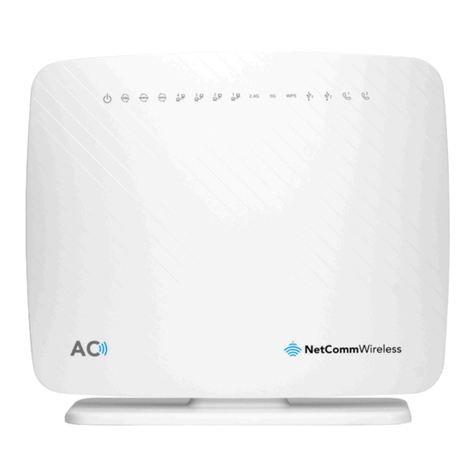
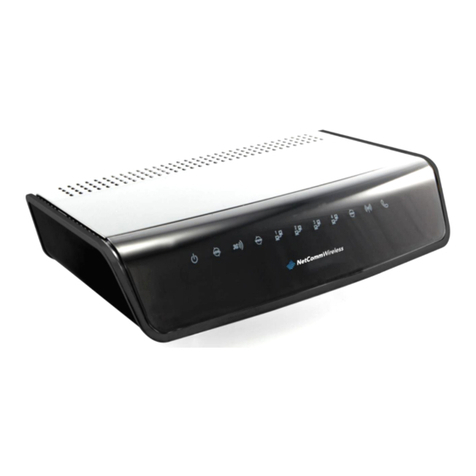
  9. NetComm Wireless Contact NF18ACV User manual

NetComm Wireless Contact NF18ACV User manual

#ADSLguide
31Page
www.letsbemates.com.au 1300 UR MATE (87 6283) support@letsbemates.com.au
STEP 1 - Locate the wall socket in your home
Find the telephone wall socket in your home. They’re
most commonly found in the main living room space or
bedrooms, but can sometimes be in the kitchen area.
It should look something like the photo below. Make
a note of all the sockets in your home, even ones that
may be in non-ideal locations such as bedrooms.
If your home has an older style wall socket shown
below (typically the plug is a yellow square with 3
prongs), you’ll need to purchase a Jackson adapter
that allows you to plug in a modern RJ11 phone
cable. These adapters can be purchased at all most
electronics and computer stores.
If you are planning to use your landline telephone
service, you will need to purchase and connect an
ADSL in-line filter/splitter to connect your telephone
and your modem. An ADSL splitter can be purchased
at most major electronics stores.
STEP 2 - Connect your ADSL modem
Disconnect all devices in your home such as
telephones, modems, fax machines or anything else
that is plugged into a telephone wall socket. It is very
important that you have no other devices plugged into
sockets in your home for the initial setup. After setup,
any devices plugged into a telephone wall socket will
need to use a filter/splitter.
Take your modem/router’s power supply cable and use
it to connect your modem/router’s power port to an
electrical outlet. Switch the power point on. Plug the
included grey telephone cable that comes with your
ADSL modem into the DSL port on the back of your
ADSL modem. Plug the other end of the telephone
cable into your wall socket.
The setup should look like the below image once
completed if you are not using a splitter/filter:
The setup should look like the below image once
completed if you are using a splitter/filter:
You will now need to wait for the DSL light on your
modem to turn solid - this may take up to 15 minutes.
DO NOT UNPLUG THE DEVICE DURING THIS TIME.
ADSL connection guide
#ADSLguide
32Page
www.letsbemates.com.au 1300 UR MATE (87 6283) support@letsbemates.com.au
OPTION 1: I chose the MATE supplied modem/router
Your MATE Communicate modem comes pre-
configured and does not require any setup to connect
your ADSL service. Simply ensure the supplied grey
telephone cable is plugged in - one end needs to be
plugged into the grey DSL port on the back of your
modem, and the other end to the wall socket in your
premises. Ensure the power cable is plugged into the
back of your modem and is connected to a power
outlet and switched on.
Your MATE modem/router will begin broadcasting Wi-
Fi as soon as it is plugged into power, turned on and
has finished booting up. You can then connect your
devices such as computers, phones and tablets via
Wi-Fi.
The modem’s Wi-Fi name and password are printed
on a separate card included with the modem. The Wi-
Fi name and password is also shown on the bottom
of the modem as “WiFi Network Name” and “WiFi
Password” for both the 2.4GHz and 5GHz networks.
If you have a computer nearby that you would like
to connect via Ethernet, take another Ethernet cable
and plug one end into any one of the modem’s yellow
Ethernet ports (labelled LAN).
If you have issues connecting your MATE supplied
If the DSL light on your ADSL modem does not turn
solid after 15 minutes and you have more than one
socket in the home, please plug your ADSL modem
into other sockets in your home, and turn the power
on and off once plugged in. Leave your ADSL modem
plugged into each socket for up to 15 minutes until the
DSL light on the modem turns solid.
If the DSL light on your ADSL modem does not turn
solid green after 15 minutes and you have tried to
connect this on ALL phone wall sockets in your home,
there may be an issue with your phone line.
Please plug a standard telephone handset (with no
filter) into the phone socket. Listen for a dial tone and
make sure you can make a call without hearing any
noise interference or static sounds. Ensure the dial
tone is clear.
If you have more than one phone socket in your home,
plug your handset (without a filter) into each of those
sockets and make a call, listening for line noise. If you
hear line noise when your phone is plugged into one
socket but not another, there may be a problem with
your internal wiring.
If you have no dial tone on any socket in your
home, please contact our support team for further
troubleshooting.
Connecting your modem/router - ADSL
#ADSLguide
33Page
www.letsbemates.com.au 1300 UR MATE (87 6283) support@letsbemates.com.au
modem/router, please contact our support team at
support@letsbemates.com.au or 1300 876 283 for
further troubleshooting.
OPTION 2: I chose BYO modem/router
Your BYO modem/router will need to be configured
with your new MATE Communicate ADSL details to
work. You will require an ADSL modem to use this
service.
1. First, ensure the supplied telephone cable with
your modem/router (this is usually grey or white)
is plugged from the DSL/ADSL port on the back
of your BYO modem, into the wall socket in your
premises. Ensure the power cable is plugged into a
power outlet and switched on.
2. You will now need to connect your BYO modem/
router to your device. You’ll need a computer,
laptop, tablet or smartphone that is connected to
your BYO modem/router via Ethernet or Wi-Fi.
3. Once you have connected your device to your
BYO modem/router, open the web browser on your
connected device and type in your modem/router’s
default gateway/admin IP address in the address
bar. This will be printed on the bottom or back of
your modem depending on the make and model.
Some of the most common addresses are 192.168.1.1,
192.168.20.1, 10.1.1.1 and 10.0.0.138.
4. Once you have accessed the gateway of your
modem/router, you may see a login page. If there’s
a username field, the default username will almost
always be admin (it may even already be filled
in). The default password is typically admin or
password. If you can’t log in with these settings,
please check the manufacturer’s website for your
BYO modem/router’s default login settings. If your
BYO modem router is secondhand or you have used
it previously, it may have custom login details set.
If you need to, you can factory reset the modem
router to return it to the default settings.
5. From here, it gets a little tricky to offer general
advice for all BYO modem/routers. The layout of
modem/router settings pages can vary greatly
for each different modem. If you get stuck or it is
not clear where you should change your Internet
settings, you need to check the manufacturer’s
website for support information. Ideally, your
modem will have a Setup Wizard or Quick Setup
that will run automatically the first time you log in to
the settings, or there’ll be a fairly obvious button to
launch it.
6. The Setup Wizard should run you through
entering the required broadband settings, step by
step. The most important settings are the following:
• Encapsulation or Connection Type
• MUST BE SET TO PPPOE
• Connection Mode/Access Type/Service Type
• MUST BE SET TO ADSL
• VPI/VCI Settings
• VPI 35 VCI 8
This will then allow you to enter your username
(sometimes called Login or User ID) and password
which are supplied in your MATE Welcome Letter
email.
7. After completing the Setup Wizard and saving
your settings, give the modem some time. Some
modem routers reboot automatically after every
new configuration, while others simply need a
few minutes to apply the settings. Take a look
at the lights on your modem router. Most should
now be green, blue, purple or another “positive”
colour. Many modem routers have lights that flash
to indicate connection activity, so you shouldn’t
be concerned if any lights are flashing unless the
manufacturer’s support information specifically
advises that flashing lights indicate a problem.
8. Hop on one of your computers or Wi-Fi devices
and try to visit a website. If it works, your nbn™
Internet is up and running! If you have issues
connecting, please contact our support team at
support@letsbemates.com.au or 1300 876 283 for
further troubleshooting.

Other manuals for Contact NF18ACV

2

Other NetComm Wireless Modem manuals

NetComm Wireless NTC-3000-04 User manual

NetComm Wireless

NetComm Wireless NTC-3000-04 User manual

NetComm Wireless NWL-221 User manual

NetComm Wireless

NetComm Wireless NWL-221 User manual

NetComm Wireless NTC-3000-01 User manual

NetComm Wireless

NetComm Wireless NTC-3000-01 User manual

NetComm Wireless NB16WV-02 User manual

NetComm Wireless

NetComm Wireless NB16WV-02 User manual

NetComm Wireless 3GM2WN User manual

NetComm Wireless

NetComm Wireless 3GM2WN User manual

NetComm Wireless NL1901ACV User manual

NetComm Wireless

NetComm Wireless NL1901ACV User manual

NetComm Wireless NTC-3000-01 User manual

NetComm Wireless

NetComm Wireless NTC-3000-01 User manual

NetComm Wireless Contact NF18ACV User manual

NetComm Wireless

NetComm Wireless Contact NF18ACV User manual

NetComm Wireless NF17ACV User manual

NetComm Wireless

NetComm Wireless NF17ACV User manual

NetComm Wireless NTC-100 User manual

NetComm Wireless

NetComm Wireless NTC-100 User manual

Popular Modem manuals by other brands

Multitech MultiModem MT2834ZPW owner's manual

Multitech

Multitech MultiModem MT2834ZPW owner's manual

Black Box Async MP Line Driver Card manual

Black Box

Black Box Async MP Line Driver Card manual

TURBOCOMM EC420 user manual

TURBOCOMM

TURBOCOMM EC420 user manual

NextWave Wireless BMX-SPT user guide

NextWave Wireless

NextWave Wireless BMX-SPT user guide

Motorola SURFboard SBV5322 installation guide

Motorola

Motorola SURFboard SBV5322 installation guide

Aztech UM9800-U user manual

Aztech

Aztech UM9800-U user manual

Obihai OBi202 quick start guide

Obihai

Obihai OBi202 quick start guide

Huawei E180 user guide

Huawei

Huawei E180 user guide

Zte I600 user manual

Zte

Zte I600 user manual

Zte Velocity USB Stick user guide

Zte

Zte Velocity USB Stick user guide

Zoomtak Telephonics ADSL X5 quick start

Zoomtak Telephonics

Zoomtak Telephonics ADSL X5 quick start

Digicom SNM15 Operation manual

Digicom

Digicom SNM15 Operation manual

TRENDnet TFM-PCIV92I Specifications

TRENDnet

TRENDnet TFM-PCIV92I Specifications

Campbell RavenXTG GPRS/EDGE instruction manual

Campbell

Campbell RavenXTG GPRS/EDGE instruction manual

Smartenit EZIComm 5010K quick start guide

Smartenit

Smartenit EZIComm 5010K quick start guide

Paradyne Hotwire 8775 installation instructions

Paradyne

Paradyne Hotwire 8775 installation instructions

ZyXEL Communications Omni TA128 user manual

ZyXEL Communications

ZyXEL Communications Omni TA128 user manual

ActionTec External 56K Call Waiting user manual

ActionTec

ActionTec External 56K Call Waiting user manual

manuals.online logo
manuals.online logoBrands
  • About & Mission
  • Contact us
  • Privacy Policy
  • Terms and Conditions

Copyright 2025 Manuals.Online. All Rights Reserved.