manuals.online logo
Brands
  1. Home
  2. •
  3. Brands
  4. •
  5. NETGEAR
  6. •
  7. Storage
  8. •
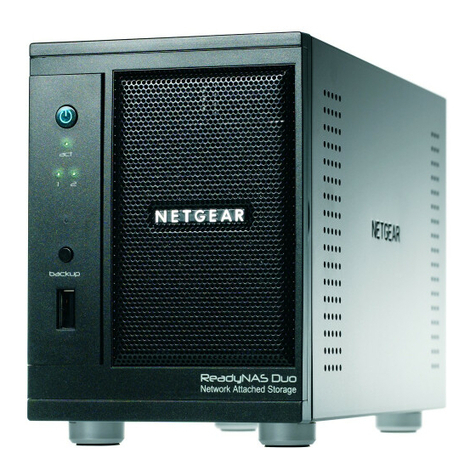
  9. NETGEAR ReadyNAS Duo User manual

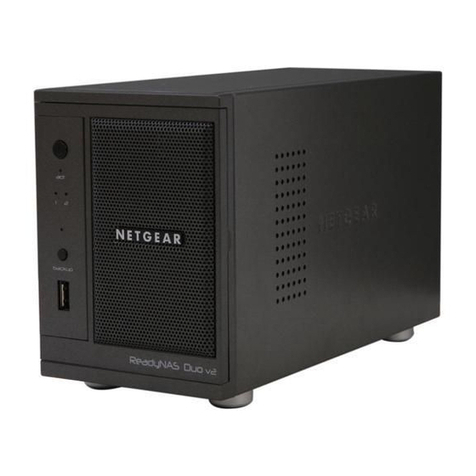
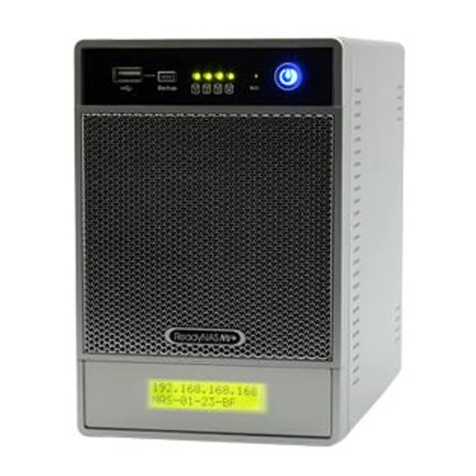
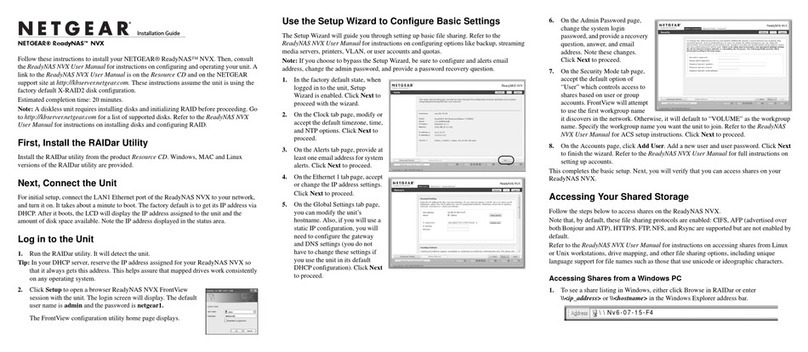
NETGEAR ReadyNAS Duo User manual

ReadyNAS
English
)o>
To
get
started
with
your ReadyNAS
follow these steps,
or
see
your
ReadyNAS
installation guide (included):
1. Insert
new
drives,
connect
the
Ethernet
and
power
cables, and
then
turn
on
your
ReadyNAS,
or
if
your
ReadyNAS already
has
drives installed,
connect
the
Ethernet
and
power
cables, and
then
turn
on
your
ReadyNAS.
If
you
are inserting used drives, see
your
ReadyNAS installation guide.
2.
On a
browser
on
the
connected computer,
visit
the
ReadyCLOUD
web
site
at
http./
/readycloud.netgear.com.
NETGEAR®
Deutsch
~
Befolgen
Sie
diese Schri
tte
,
urn
lhr ReadyNAS zu
start-
en, oder konsultieren
Sie
das
lnstallationshandbuch
des
ReadyNAS (im Lieferumfang enthalten):
1. Setzen
Sie
neue Festplatten ein, schliefSen Sie das
Netzwerk-
und Stromkabel
an
und schalten Sie dann lhr
ReadyNAS ein. Wenn
in
lhrem ReadyNAS bereits Festpl
atten
installiert sind, sch
li
efSen
Sie
das
Netzwerk
-und Stromkabel
an
und schalten
Sie
anschliefSend
lhr
ReadyNAS ein.
Wenn
Sie
berei
ts
verwendete
Festplatten einsetzen,
konsultieren
Sie
das lnstallationshandbuch des ReadyN
AS
.
2. Rufen Sie
uber
den Browser des angeschlossenen
Computers
die ReadyCLOUD Websi
te
unter
http://reodyc/oud.
netgeor.
com
auf.
Fran<;ais
~
Pour demarrer avec
votre
ReadyNAS, suivez les
etapes suivantes
ou
consultez le guide d'installation
de
votre
ReadyNAS
(fourni)
:
1. lnserez de nouveaux disques,
connectez
le cable
Ethernet
et
le cable d'ali
mentation,
puis allumez
votre
ReadyNAS.
Si
des disques
sont
deja installes dans
votre
ReadyNAS,
connecte
z
le
cable
Ethernet
et
le cable d'alimentation, puis
allumez
votre
ReadyNAS.
Si
vous inserez des disques utilises, consultez le guide
d'installation
de
votre
ReadyNAS.
2. Sur un ordinateur connecte a Internet, utilisez un navigateur
pour
vous
re
ndre sur
le
site Web de ReadyCLOUD a l'adresse
suivante : http./ /reodyc!oud.netgeor.com.
Espanol
~
Para comenzar a
utilizar
su
ReadyNAS, siga los
pasos especiflcados en
Ia
guia de instalaci6n de
ReadyNAS
(incluida):
1. lnserte los nuevas controladores,
conecte
los cables
Ethernet y de alimentaci6n y encienda ReadyNAS.
0 bien,
si
su
ReadyNAS ya
tiene
los controladores
instalados,
conecte
los cables Ethernet y de
alimentaci6n y, a continuaci6n, encienda ReadyNAS.
Si
va a insertar controladores utilizados, consulte
Ia
guTa
de instalaci6n de ReadyNAS.
2.
En
un navegador del equipo conectado, visite
el
sitio
web de ReadyCLOUD en http://readycloud.netgear.com.
Italiano
~
Per iniziare a
utilizzare
ReadyNAS,
attenersi
alia
seguente procedura
oppure
fare
riferimento
alia
Guida
all'installazione
di ReadyNAS
(inclusa):
1. lnserire
le
nuove unita, collegare
il
cava
Ethernet
e
il
cava di alimentazione, quindi accendere ReadyNAS
oppure,
se
le
unita sono gia installate
su
ReadyNAS,
collegare
il
cava
Ethernet
e
il
cava di alimentazione,
quindi accendere ReadyNAS.
Per inserire unita usate, vedere
Ia
Guida all'installazione
di ReadyNAS.
2. Aprire
il
browser
da un
computer
collegato e visitare
il
sito Web di ReadyCLOUD all'indirizzo
http://readycloud.
netgear.
com.
11~111
~~~
~II
11111111111111111111111111111111111111111111111111111
203-11422-01
NETGEAR, Inc.
September
2014
350
East Plumeria Drive
San
Jose, CA
95134,
USA
no-pyCCKI/1
~
'-1To6bl Ha'-laTb
pa6oTy
c
ReadyNAS,
BblnOilHMTe OnMC3HHble
HM>Ke
Aeif1CTBI;1JI
1;1111;1
o6paTMTecb
K PyKOBOACTBY
no
ycTaHOBKe
ReadyNAS
(BXOAJI~eMy
B KOMnileKT nocTaBKM):
1.
BcTaBbTe
HOBble
.QVICKII1,
no.o.KnK>4VITe
Ka6enb
Ethernet K
noKanbHOIII
ceTII1
111
Ka6enb
nii1TaHII1~,
a
3aTeM
BKnK>4VITe
ReadyNAS.
Vln111,
ecn111
.Q111CKII1
B
ReadyNAS
y>Ke
ycTaHosneHbl,
no.QKnK>4VITe
Ka6enb
Ethernet
111
Ka6enb
nii1TaHII1~,
a
aaTeM
BKnK>4VITe
ReadyNAS.
Ecnv.
Bbl
ycTaHaBnlt1saeTe
.Q111CKII1,
6biBWII1e
s
aKcnnyaTa~v.v.,
o6paTII1Tecb
K
PyKoBO.QCTBY
no
ycTaHOBKe
ReadyNAS.
2.
Vlcnonb3Y~
6payaep
Ha
nO.QKnK>4eHHOM
K
CeTII1
KOMnbK>Tepe,
noceTII1Te
se6-ca~T
ReadyCLOUD no
a.o.pecy
http
:1
/readyc/oud.netgear.com.
NETGEAR,
the
NETGEAR
logo, and Connect
with
Innovation are trademarks
and/or
registered
trademarks
of
NETGEAR,
Inc.
and/or
its subsidiaries
in
the
United States and/or other countries.
Information
is
subject
to
change
without
notice. ©
NETGEAR
, Inc. All rights reserved.
NETGEAR®
ReadyNAS OS 6 Desktop Storage
Systems Installation Guide
Contents
Package Contents . . . . . . . . . . . . . . . . . . . . . . . . . . . . . . . . . . . . . . 3
Basic Setup
............................................
4
Reformat Disks
.........................................
9
Additional Information
...................................
11
2
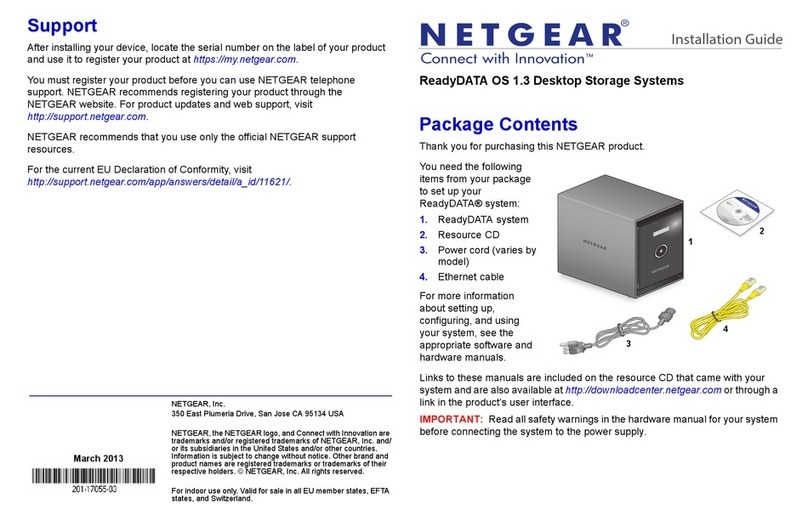
Package Contents
ReadyNAS
system
Ethernet
cable
Power
adapter
and
power
cord
(varies
by
model)
IMPORTANT: Read all safety warnings
in
the hardware
manual for your system before connecting the system to the
power supply.
3
Basic
Setup
After you follow these instructions, your ReadyNAS
is
ready to
use
in
a production environment. Setup takes approximately 15
minutes.
'Y
To
set
up
your
storage
system:
1.
Install all available disks that you want to use
in
your ReadyNAS
system.
Note:
If you are using previously formatted disks that contain
data, you must reformat these disks before continuing. See
Reformat
Disks
on
page
9.
For a list
of
supported disks, see the Hardware Compatibility List
at netgear.com/readynas-hcl.
For information about installing disks, see the hardware manual
for your system or visit https://www.youtube.com/
watch?v=hLiuOVeXd-Y
2.
Place your system
in
a location that provides adequate ventilation.
High-capacity disks can produce considerable heat. It
is
important to ensure that the fan exhausts are unobstructed.
For a complete list
of
placement considerations, see the
hardware manual for your system.
3.
Connect the power adapter
to
the power cord.
4.
Connect the power adapter
to
the back of the system and plug the
power cord into a wall outlet or power strip.
5.
Use
an
Ethernet cable to connect
an
Ethernet port
on
the storage
system to your network.
6.
If necessary, press the
Power
button to turn
on
the system.
7.
Wait for the Power LED
to
turn solid blue or for the status display
screen
to
display the system's
IP
address.
4
8.
Visit readycloud.netgear.
com
on a computer that uses the same
local area network (LAN) and Internet connection as your
ReadyNAS system.
NETGEAR
. ReadyCLOUD
'.,
-Set up
anew
~
ReadyN
AS
-
\ I /
Sei up connected
~
storage
on
your
N1ghthawk
R7000
Eng
lish •
Note: Ifyour computer cannot access the Internet, install and run
the RAIDar utility instead. Download RAIDar to a computer
connected to the Internet and transfer the downloaded file to the
computer on the same LAN as your ReadyNAS system.
You
can
find the latest version
of
RAIDar at
www
.
netgear
.com/raidar.
5
9. Click the Start button for setting up a new ReadyNAS.
NETGEAR
'
ReadyCLOuo
·
Welcome
to
ReadyCLOUD
Th
~"'lt"K"'
~
a
se
~
up
and Jt.rr
,~you
ReaoyNAS
...
e..!Lil..M.O!.t
~
t
a
rt
by
~ettmg
up
your
Redd
yN
t
•S
i
C.cnn{'"f:
Ready""
;A
C)
...
.J
•tn11r
ro1;te1
2 P
t.Jg
n
t:0','\E'
cord
~
(16
c·•
{._.;v-:·
00.:.,.
fl)
~top<.
~tt''
~~
Dtscover
[ngl»h •
--
10. Verify that you performed the "Start by setting up your ReadyNAS"
steps.
11. Click the Discover button.
12. ReadyCLOUD automatically detects your ReadyNAS system on
the network.
NETGEAR
'
Re
a
dyCLOUD
"
\Jew
ReadyNAS
Di
scc
ve
··
ect
Setup
6
13. Click the
Setup
button.
N
~
Select Installation type:
• Setup
with
ReadyCLOUD
(Default)
ReadyCLOUD enable5 cloud like access
to
your
ReadyNAS
content
from
your
PC,
Mac
and
Smart
Dev1ces
Offtme Installation (Advanced)
Offi1ne mstallat1on configures
your
ReadyNAS
for
access w1thln
your
home
or
office
network
only ReadyCLOUO access can be configured
at
a later stage
-(ai)Cel
7
I
14. Select the mode that you want to use to set
up
your system:
• Option
1.
Select the Setup with ReadyCLOUD (Default)
button.
a Complete the Create a ReadyCLOUD Account fields
and click the Next button, or click the Sign
in
to an
Existing Account button and sign
in
to your account.
b Follow the prompts to configure your ReadyNAS system.
• Option
2.
Select the Offline Installation (Advanced):
a Enter admin for the user name, enter password for the
password, and click the OK button.
Note:
You
can change these credentials when you configure
your system. NETGEAR recommends that you change your
password as soon as possible.
The ReadyNAS local admin page displays
in
your browser
and launches a setup wizard.
b Follow the prompts
of
the setup wizard to configure your
ReadyNAS system.
The setup process
is
complete.
You
can begin using your ReadyNAS
storage system.
8
Reformat
Disks
If you are using previously formatted disks that contain data, you
must reformat the disks before you can use them with your
ReadyNAS system.
Warning:
This process erases all data and reformats all disks into a
single X-RAID volume.
If
you want to preserve the data on the disks,
you mustback up the data to an external drive before using the disks
in
your
ReadyNAS storage system.
Y To
reformat
previously
formatted
disks:
1. If your system
is
powered on, gracefully power off the system.
See Additional Information
on
page
11.
2. Install the previously formatted disks.
For a list
of
supported disks, see the Hardware Compatibility List
at http://www.netgear.com/readynas-hcl.
For information about installing disks, see the hardware manual
for your system.
3.
Using a straightened paper clip, press and hold the Reset button.
4.
Press the Power button.
The system powers on.
5.
Continue pressing the Reset button until the system enters boot
mode:
• If you are using a 2-bay storage system, the Power, Disk
1,
Disk
2,
and Backup LEOs light when the system
is
in
boot
mode.
•
~f
you are using a 4-bay or 6-bay storage system, the status
display screen indicates that the system
is
in
boot mode.
9
6.
Select the factory default option from the boot menu:
• Ifyou are using a 2-bay storage system, do the following:
a Scroll through the boot menu options by pressing the
Backup button.
b
When only the Disk 1 LED
is
lit, press and release the
Reset button.
• Ifyou are using a 4-bay storage system, do the following:
a Scroll through the boot menu options by pressing the
Backup button.
b
When the status display screen shows the factory
default option, press and release the Reset button.
• If you are using a 6-bay storage system:
a Scroll through the boot menu options using the arrows
on
the touch pad.
b When the status display screen shows the factory
default option, press the OK button.
The system initiates a short disk test that takes 2 to 5 minutes.
Then, a 10-minute time-out period begins. After
10
minutes, the
factory default process starts.
7.
(Optional) Press the Backup
or
OK button to skip the 10-minute
time-out period and begin the factory default process immediately.
The system returns to its factory default settings and reformats all
installed disks for use with ReadyNAS OS
6.
When the factory default process
is
complete, the reformatted disks
are ready to use with your system.
10
Additional Information
To
help keep your storage system healthy and prevent the risk
of
data loss, follow these rules
of
usage:
• Never replace more than one disk at a time while the system
is
powered on.
• If you must power off your system, power it off gracefully, when
possible.
~
To
gracefully power off a 2-bay storage system:
Press the Power button twice.
~
To
gracefully power off a 4-bay or 6-bay storage system:
Press the Power button three times.
For more information about setting up, configuring, and using
your system, see the software and hardware manuals for your
system.
Links to these manuals are available at
support.netgear.comlproduct!ReadyNAS-OS6 or through a link
in
the
product's user interface.
11
Support
Thank you for purchasing this NETGEAR product.
You
can visit
www.netgear.com/support to register your product, get help, access the latest
downloads and user manuals, and join our community. We recommend that
you use only official NETGEAR support resources.
For product updates and web support, visit support.netgear.com.
We recommend that you use only the official NETGEAR support resources.
You
can get the user manual online at downloadcenter.netgear.com
or
through a link
in
the product's user interface.
Trademarks
©NETGEAR, Inc., NETGEAR, and the NETGEAR Logo are trademarks
of
NETGEAR, Inc. Any non-NETGEAR trademarks are used for reference
purposes only.
Compliance
For the current
EU
Declaration
of
Conformity, visit
http://support.netgear.com/app/answers/detail/a_id/11621
/.
For regulatory compliance information, visit
http://www.netgear.com/about/regulatory/.
See the regulatory compliance document before connecting the power
supply.
NETGEAR, Inc.
350 East Plumeria Drive
San Jose, CA 95134 USA
201
-1
6958-08
August 2015
NETGEAR®
(€
<D
Declaration
of Conformity
U.S.
Head Office:
NETGEAR
Incorporated,
350
East
Plumeria Drive,
San
Jose,
CA
95134
E.U
Head Office:
NETGEAR
INTERNATIONAL
LIMITED,
Building 3, University Technology Centre,
Curraheen
Road,
Cork, Ireland
declares under
our
sole responsibility that the product
Product
Name:
Advanced Network Storage
Part
Number:
RND-2E
to which this declaration relates
is
in conformity with the following normative European and International
standard(s).
Safety
[!l
EN
60950-1
:2006+A
11
:2009+A
1:201 O+A12:2011
+A2:2013
[!l
IEC
60950-1 :2005
(2"d
Edition); Am 1
:2009
fMC
[!l
EN
55022:2010+A1
:2011
[!l
EN
55024:2010
By
conformance with the standard(s) referenced, this product follows the provisions
of
the directives listed below.
1!J
EMC
Directive 2004/108/EC
l!l
Low Voltage Directive
2006/95/EC
l!l
Ecodesign Directive
2009/125/EC
RoHS
1!J
EN
50581:2012
1!J
RoHS
Directive 2011
/65/EU
Date
of
issue: Nov 20,
2014
Location:
San
Jose,
California, USA
Name: David Kay
Title: Regulatory Compliance Manager
Signature:
204-1
0658-01
Location: Cork, Ireland
Name: Antoinette Switzer
Title: Director,
NETGEAR
INTERNATIONAL
LIMITED,
Authorized representative located within the
European Union
Signature:
November 2014

Other manuals for ReadyNAS Duo

4

Other NETGEAR Storage manuals

NETGEAR MA701 - 802.11b 11 Mbps Compact Flash Card User manual

NETGEAR

NETGEAR MA701 - 802.11b 11 Mbps Compact Flash Card User manual

NETGEAR RN12P1210-100NAS - ReadyNAS 3200 RN12P1210 NAS... User manual

NETGEAR

NETGEAR RN12P1210-100NAS - ReadyNAS 3200 RN12P1210 NAS... User manual

NETGEAR RN12P0610-100NAS - ReadyNAS 3200 RN12P0610 NAS... User manual

NETGEAR

NETGEAR RN12P0610-100NAS - ReadyNAS 3200 RN12P0610 NAS... User manual

NETGEAR ReadyNAS OS 6 Desktop Storage Systems User manual

NETGEAR

NETGEAR ReadyNAS OS 6 Desktop Storage Systems User manual

NETGEAR ReadyNAS 2120 User manual

NETGEAR

NETGEAR ReadyNAS 2120 User manual

NETGEAR ReadyNAS Series User manual

NETGEAR

NETGEAR ReadyNAS Series User manual

NETGEAR ReadyNAS RR4360X User manual

NETGEAR

NETGEAR ReadyNAS RR4360X User manual

NETGEAR ReadyNAS Duo User manual

NETGEAR

NETGEAR ReadyNAS Duo User manual

NETGEAR SC101 - Storage Central NAS Server User manual

NETGEAR

NETGEAR SC101 - Storage Central NAS Server User manual

NETGEAR SC101 - Storage Central NAS Server Installation guide
NETGEAR

NETGEAR SC101 - Storage Central NAS Server Installation guide

NETGEAR RND2110v2 User manual

NETGEAR

NETGEAR RND2110v2 User manual

NETGEAR RNDP200U-100NAS User manual

NETGEAR

NETGEAR RNDP200U-100NAS User manual

NETGEAR SC101T - Storage Central Turbo Network Drive Installation guide

NETGEAR

NETGEAR SC101T - Storage Central Turbo Network Drive Installation guide

NETGEAR SC101 - Storage Central NAS Server User manual

NETGEAR

NETGEAR SC101 - Storage Central NAS Server User manual

NETGEAR ReadyNAS NV+ User manual

NETGEAR

NETGEAR ReadyNAS NV+ User manual

NETGEAR SC101 - Storage Central NAS Server User manual

NETGEAR

NETGEAR SC101 - Storage Central NAS Server User manual

NETGEAR ReadyNAS 2120 v2 User manual

NETGEAR

NETGEAR ReadyNAS 2120 v2 User manual

NETGEAR ReadyNAS Duo User manual

NETGEAR

NETGEAR ReadyNAS Duo User manual

NETGEAR ReadyDATA 516 User manual

NETGEAR

NETGEAR ReadyDATA 516 User manual

NETGEAR ReadyNAS RMEM04 User manual

NETGEAR

NETGEAR ReadyNAS RMEM04 User manual

NETGEAR ReadyNAS Duo User manual

NETGEAR

NETGEAR ReadyNAS Duo User manual
NETGEAR EDA 500 User manual

NETGEAR

NETGEAR EDA 500 User manual

NETGEAR RND44751G - ReadyNAS NV+ NAS Server User manual

NETGEAR

NETGEAR RND44751G - ReadyNAS NV+ NAS Server User manual

NETGEAR ReadyNAS 102 User manual

NETGEAR

NETGEAR ReadyNAS 102 User manual

Popular Storage manuals by other brands

Sungrow SC2400UD-MV-US System manual

Sungrow

Sungrow SC2400UD-MV-US System manual

Dahua EVS71 Series user manual

Dahua

Dahua EVS71 Series user manual

HP StorageWorks P4000 Series Maintenance Guide

HP

HP StorageWorks P4000 Series Maintenance Guide

Sans Digital TOWERRAID TR5M1 Detailed user's manual

Sans Digital

Sans Digital TOWERRAID TR5M1 Detailed user's manual

DANE-ELEC SO SPEAKY - quick start guide

DANE-ELEC

DANE-ELEC SO SPEAKY - quick start guide

Quantum LTO3 A-Series quick start guide

Quantum

Quantum LTO3 A-Series quick start guide

Overland Storage NEO 8000 Replacement Instruction

Overland Storage

Overland Storage NEO 8000 Replacement Instruction

Seagate Pipeline HD Pro Serial ATA ST31000533CS product manual

Seagate

Seagate Pipeline HD Pro Serial ATA ST31000533CS product manual

LaCie D2 BLU-RAY XL user manual

LaCie

LaCie D2 BLU-RAY XL user manual

CRU DataPort 25 quick start guide

CRU

CRU DataPort 25 quick start guide

IBM TS2250 Setup, operator, and service guide

IBM

IBM TS2250 Setup, operator, and service guide

Synology DiskStation DS3018xs Hardware installation guide

Synology

Synology DiskStation DS3018xs Hardware installation guide

LaCie DataShare datasheet

LaCie

LaCie DataShare datasheet

STONEFLY VSO-40T-V2 Setup guide

STONEFLY

STONEFLY VSO-40T-V2 Setup guide

HP Surestore Disk Array 12h - And FC60 Installation

HP

HP Surestore Disk Array 12h - And FC60 Installation

Dot Hill Systems SANnet II 200 Technical description

Dot Hill Systems

Dot Hill Systems SANnet II 200 Technical description

SanDisk microSDHC Specifications

SanDisk

SanDisk microSDHC Specifications

IBM 01K1316 User guide supplement

IBM

IBM 01K1316 User guide supplement

manuals.online logo
manuals.online logoBrands
  • About & Mission
  • Contact us
  • Privacy Policy
  • Terms and Conditions

Copyright 2025 Manuals.Online. All Rights Reserved.