manuals.online logo
Brands
  1. Home
  2. •
  3. Brands
  4. •
  5. NETGEAR
  6. •
  7. Switch
  8. •
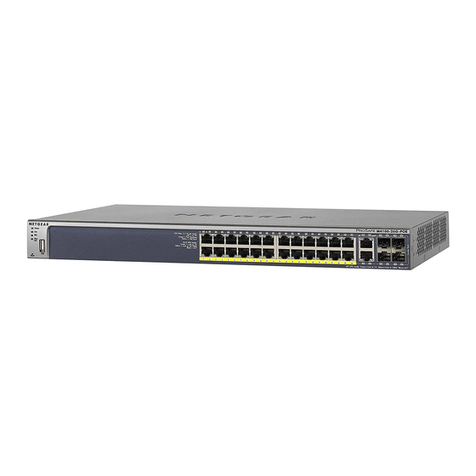
  9. NETGEAR M4250 Series User manual

NETGEAR M4250 Series User manual

Installation Guide
We recommend using the following cables and, if applicable, SFP modules:
• Category 5e (Cat 5e) or better cable for a copper port at 1 Gbps or 2.5 Gbps.
• NETGEAR AGM734 module for a copper port at 1 Gbps.
• NETGEARAGM731ForAGM732Fmoduleforaberportat1Gbps.
• NETGEAR AXM761, AXM762, AXM763, AXM764, or AXM765 module for a
berportat10Gbps.
• NETGEARAXC761(1m),AXC763(3m),AXC765(5m),AXC767(7m),
AXC7610(10m),AXC7615(15m),orAXC7620(20m)cableforaberport.
Note: If purchased, SFP modules and cables are shipped separately.
This switch is designed for indoor use only. If you want to connect it to a device
located outdoors, the outdoor device must be properly grounded and surge
protected, and you must install an Ethernet surge protector inline between the
switch and the outdoor device. Failure to do so can damage the switch.
Before connecting this switch to outdoor cables or devices, see
https://kb.netgear.com/000057103 for safety and warranty information.
Log in and congure the switch
Youcanloginandconguretheswitchthroughtheout-of-band(OOB)port
(which is also referred to as the service port), through any Ethernet network port,
or through a console port. By default, the switch functions as a DHCP client.
Tologinandconguretheswitch,useone of the following methods:
• Main local browser user interface. Use the main local browser user
interface,abbreviatedasmainUI,throughtheOOBportoranyEthernet
network port (see Access the main UI or AV UI to congure the switch).
• Audio-video local browser user interface.Usetheaudio-videolocal
browseruserinterface,abbreviatedasAVUI,throughtheOOBportorany
Ethernet network port (see Access the main UI or AV UI to congure the
switch).
• CLI.Usethecommand-lineinterface(CLI)throughtheType-CUSBconsole
portorRJ-45RS232consoleport.YoucanconguretheIPaddressmanually
orusetheezcongutility(seeAccess the CLI to congure the switch).
AV Line of Fully Managed Switches
M4250 Series
Set up the switch
Prepare the installation site so that mounting, access, power source, and
environmental requirements are met.
Note: For more information about these requirements, the hardware setup
process,theLEDs,andhowtoconnectdevices,seethehardwareinstallation
guide, which you can download by visiting
https://www.netgear.com/support/product/m4250.aspx#download.
1. Install the switch using one of the following methods:
• On a at surface. Attach one of the rubber footpads that came with the
switch on each of the four concave spaces on the bottom of the switch.
• In a rack.Usetherack-mountkitthatissuppliedwithyourswitch.
2. Apply AC power.
ThePowerLEDlightssolidyellowwhiletheswitchconductsapower-onself-
test(POST).AfterthePOSTcompletes,thePowerLEDindicatestheresults:
• Solid green. The switch is functional.
• Solid yellow.ThePOSTfailed.
IfthePowerLEDdoesnotlightatall,checktoseethatthepowercableis
plugged in correctly and that the power source is functioning.
3. Connect devices to the switch.
Access the main UI or AV UI to congure the switch
You can use a computer on the same subnet as the switch to access either the
main UI or the AV UI over the switch’s default IP address.
1. CongureyourcomputerwithastaticIPaddress:
• For access over an Ethernet network port, use an IP address in the
169.254.0.0/16subnet.Forexample,use169.254.100.201.
• ForaccessovertheOOBport,useanIPaddressinthe192.168.0.0/16
subnet.Forexample,use192.168.0.100.
2. Connect an Ethernet cable from an Ethernet port on your computer to an
EthernetnetworkportontheswitchortotheOOBportontheswitch.
3. LaunchawebbrowserandenterthedefaultIPaddressoftheswitchinthe
addresseldofthebrowser:
• Main UI. To access the main UI, do the following:
-For access over an Ethernet port, enter http://169.254.100.100.
- ForaccessovertheOOBport,enterhttp://192.168.0.239.
• AV UI. To access the AV UI, do the following:
-For access over an Ethernet port, enter http://169.254.100.100:8080.
- ForaccessovertheOOBport,enterhttp://192.168.0.239:8080.
A login window displays.
4. Enter adminfortheusername,leavethepasswordeldblank,andclickthe
Login button.
Onrstlogin,theswitchforcesyoutospecifyapassword.
5. Specify a password and log in again using your new password.
6. Conguretheswitchsettings.
OneachUIpage,ifyoumakechanges,besuretosavethechanges.
Note: Makesurethattheswitchisrunningthelatestrmwareversion.To
downloadrmware,visit
https://www.netgear.com/support/product/m4250.aspx#download.
Note: For more information about using the main UI or AV UI, including
information about how to assign a static IP address to the switch, see one of the
user manuals, which you can download by visiting
https://www.netgear.com/support/product/m4250.aspx#download.
NETGEAR, Inc.
350 East Plumeria Drive
San Jose, CA 95134, USA
NETGEAR INTERNATIONAL LTD
Floor 1, Building 3
University Technology Centre
Curraheen Road, Cork,
T12EF21, Ireland
© NETGEAR, Inc., NETGEAR and the NETGEAR Logo
are trademarks of NETGEAR, Inc. Any non‑NETGEAR
trademarks are used for reference purposes only.
Access the CLI to congure the switch
TousetheCLIforinitialcongurationandassignastaticordynamicIPaddress
totheswitch,connectacomputerorVT100/ANSIterminaltooneoftheconsole
ports on the switch.
1. Depending on the connector type at your computer or terminal, and the port
that you are using on the switch, use one of the following cables, both of
which are included in the product package:
• USBconsolecableforusewiththeType-CUSBconsoleport.
Note: To use the Type-C USB port, you must install the USB driver on the
computer. You can download the driver by visiting
https://www.netgear.com/support/product/m4250.aspx#download.
• ConsolecableforusewiththeRJ-45RS232consoleport.
2. Connect one end of the cable to the appropriate port on the switch and
connect the other end to your computer or terminal.
3. If you connect a computer to a console port on the switch, start a terminal
emulation program:
• OnacomputerwithaWindowsoperatingsystem,youcanuse
HyperTerminal or Tera Term.
• OnacomputerwithaMacoperatingsystem,youcanuseZTerm.
• OnacomputerwithaLinuxoperatingsystem,youcanuseMinicom.
4. Conguretheterminalemulationprogramtousethefollowingsettings:baud
rate,115,200bps;databits,8;parity,none;stopbit,1;owcontrol,none.
5. At the user prompt, log in to the switch using the user name admin and press
Enter. At the password prompt, do not type a password but press Enter.
Onrstlogin,theswitchforcesyoutospecifyapassword.
6. Specify a password and log in again using your new password
YoucannowusetheCLItomanuallyconguretheswitch,includingtheIP
address,ortousetheezcongutility,continuewiththenextstep.
7. Atthenextcommandprompt,typeezcong and press Enter.
Theezcongutilityisnowrunningontheswitch.
Netgear Switch) #ezcong
EZ Conguration Utility
8. Using the ezcongutility,setupthebasicswitchconguration,includinga
static IP address and subnet mask.
YoucanalsousetheswitchIPaddressthatyoumanuallycongureintheCLIor
thatisassignedbytheezcongutilitytologintotheswitch’smainUIorAVUI:
• Main UI. Enter http://<ipaddress>inthewebbrowseraddresseld.
• AV UI. Enter http://<ipaddress>:8080inthewebbrowseraddresseld.
Note: FormoreinformationaboutCLImanagement,seetheCLIreference
manual, which you can download by visiting
https://www.netgear.com/support/product/m4250.aspx#download.
Find the IP address assigned by a DHCP server
By default, the switch functions as a DHCP client and gets its IP address from
aDHCPserverinthenetwork.TondtheassignedIPaddressoftheswitch’s
managementinterfaceorOOBport,connectacomputerorVT100/ANSI
terminal to one of the console ports on the switch.
1. Make sure that the switch is connected to a DHCP server.
2. Set up a console connection with the switch.
For information about setting up a console connection, see Steps 1 through 6
in Access the CLI to congure the switch.AfteryouareloggedinandattheCLI
commandprompt,continuewiththenextstep.
3. At the command prompt, type one of the following commands:
• TondtheIPaddressofthemanagementinterface,typethe
show ip management command, and press Enter.
• TondtheIPaddressoftheOOBport(whichisalsoreferredtoasthe
service port), type the show serviceport command, and press Enter.
The active IP address displays.
4. To log in to the switch’s main UI or AV UI, use either the management
interfaceIPaddressortheOOBportIPaddress:
• Main UI. Enter http://<ipaddress>inthewebbrowseraddresseld.
• AV UI. Enter http://<ipaddress>:8080inthewebbrowseraddresseld.
Support and Community
Visit netgear.com/support to get your questions answered and access the latest
downloads.
You can also check out our NETGEAR Community for helpful advice at
community.netgear.com.
Regulatory and Legal
Si ce produit est vendu au Canada, vous pouvez accéder à ce document en
français canadien à https://www.netgear.com/support/download/.
(If this product is sold in Canada, you can access this document in Canadian
French at https://www.netgear.com/support/download/.)
For regulatory compliance information including the EU Declaration of
Conformity, visit https://www.netgear.com/about/regulatory/.
See the regulatory compliance document before connecting the power supply.
For NETGEAR’s Privacy Policy, visit https://www.netgear.com/about/privacy-policy.
By using this device, you are agreeing to NETGEAR’s Terms and Conditions at
https://www.netgear.com/about/terms-and-conditions. If you do not agree, return
the device to your place of purchase within your return period.
July2020

Other manuals for M4250 Series

3

Other NETGEAR Switch manuals

NETGEAR EN308TC - 8 Port 10 Base-T Hub User manual

NETGEAR

NETGEAR EN308TC - 8 Port 10 Base-T Hub User manual

NETGEAR ProSafe GSM5212P User guide

NETGEAR

NETGEAR ProSafe GSM5212P User guide

NETGEAR ProSafe JGS524 v2 User manual

NETGEAR

NETGEAR ProSafe JGS524 v2 User manual

NETGEAR GS724TP - ProSafe Smart PoE Switch User manual

NETGEAR

NETGEAR GS724TP - ProSafe Smart PoE Switch User manual

NETGEAR ProSAFE S3300-28X User manual

NETGEAR

NETGEAR ProSAFE S3300-28X User manual

NETGEAR ProSafe GS504 User manual

NETGEAR

NETGEAR ProSafe GS504 User manual

NETGEAR FS518 - Switch User manual

NETGEAR

NETGEAR FS518 - Switch User manual

NETGEAR ProSafe GS510TP Manual

NETGEAR

NETGEAR ProSafe GS510TP Manual

NETGEAR XS728T ProSAFE Manual

NETGEAR

NETGEAR XS728T ProSAFE Manual

NETGEAR ProSAFE GS105PE User manual

NETGEAR

NETGEAR ProSAFE GS105PE User manual

NETGEAR ProSafe FS105v2 User manual

NETGEAR

NETGEAR ProSafe FS105v2 User manual

NETGEAR GS716T - ProSafe Switch Manual

NETGEAR

NETGEAR GS716T - ProSafe Switch Manual

NETGEAR GS748Tv4 Manual

NETGEAR

NETGEAR GS748Tv4 Manual

NETGEAR ProSafe GSM7328 User manual

NETGEAR

NETGEAR ProSafe GSM7328 User manual

NETGEAR GS348PP User manual

NETGEAR

NETGEAR GS348PP User manual

NETGEAR FSM7326P - ProSafe Managed Switch Instruction Manual

NETGEAR

NETGEAR FSM7326P - ProSafe Managed Switch Instruction Manual

NETGEAR ProSafe GS104 User manual

NETGEAR

NETGEAR ProSafe GS104 User manual

NETGEAR GS205 User manual

NETGEAR

NETGEAR GS205 User manual

NETGEAR ProSafe GS700TP User manual

NETGEAR

NETGEAR ProSafe GS700TP User manual

NETGEAR PROSAFE XS716E User manual

NETGEAR

NETGEAR PROSAFE XS716E User manual

NETGEAR GS700TR Series User manual

NETGEAR

NETGEAR GS700TR Series User manual

NETGEAR FS516 - Switch User manual

NETGEAR

NETGEAR FS516 - Switch User manual

NETGEAR GS316P User manual

NETGEAR

NETGEAR GS316P User manual

NETGEAR FSM7328S - ProSafe Switch User manual

NETGEAR

NETGEAR FSM7328S - ProSafe Switch User manual

Popular Switch manuals by other brands

Champion Power Equipment RELIANCE CONTROLS ARM Series installation manual

Champion Power Equipment

Champion Power Equipment RELIANCE CONTROLS ARM Series installation manual

Pickering PXI 40-618 user manual

Pickering

Pickering PXI 40-618 user manual

Ei Electronics Ei1529RC instructions

Ei Electronics

Ei Electronics Ei1529RC instructions

Neol 8XS R2 user guide

Neol

Neol 8XS R2 user guide

HPE 12500 Series Command reference

HPE

HPE 12500 Series Command reference

AURES HUB-RETAIL-KL18.1 product manual

AURES

AURES HUB-RETAIL-KL18.1 product manual

Agilent Technologies Agilent 3499A Quick reference guide

Agilent Technologies

Agilent Technologies Agilent 3499A Quick reference guide

Gembird UHB-U3P7P-01 user manual

Gembird

Gembird UHB-U3P7P-01 user manual

IBM xSeries 300 Service guide

IBM

IBM xSeries 300 Service guide

ATX Q-Series Power BAQ-UP Installation & operation manual

ATX

ATX Q-Series Power BAQ-UP Installation & operation manual

steute RF 96 SW868-NET Mounting and wiring instructions

steute

steute RF 96 SW868-NET Mounting and wiring instructions

Nortel Passport 8600 Series Documentation roadmap

Nortel

Nortel Passport 8600 Series Documentation roadmap

StarTech.com C2-H46-UAC-CBL-KVM quick start guide

StarTech.com

StarTech.com C2-H46-UAC-CBL-KVM quick start guide

Avocent AMX5000 brochure

Avocent

Avocent AMX5000 brochure

IMC Networks PoE Giga-MiniMc Operation manual

IMC Networks

IMC Networks PoE Giga-MiniMc Operation manual

LevelOne GSW-1675T user guide

LevelOne

LevelOne GSW-1675T user guide

Lindy 32810 user manual

Lindy

Lindy 32810 user manual

Crestron GreenLight DIN-8SW8 Operations & installation guide

Crestron

Crestron GreenLight DIN-8SW8 Operations & installation guide

manuals.online logo
manuals.online logoBrands
  • About & Mission
  • Contact us
  • Privacy Policy
  • Terms and Conditions

Copyright 2025 Manuals.Online. All Rights Reserved.