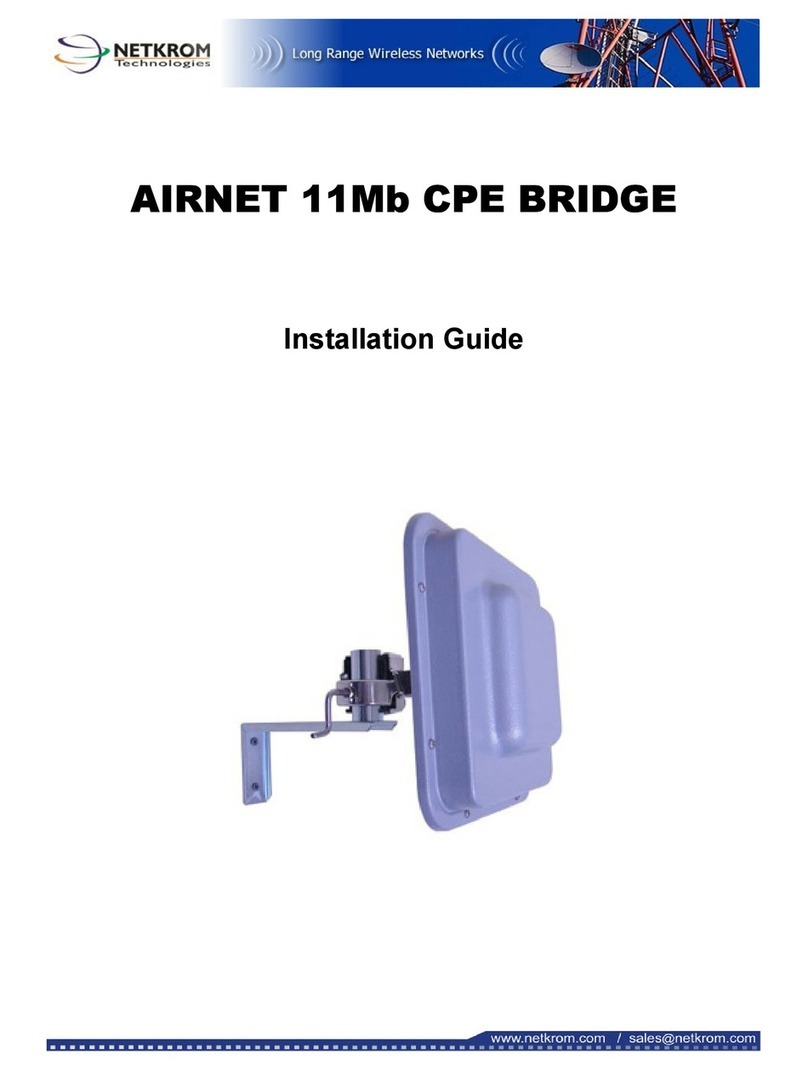
Netkrom WaveKrom Backhaul BH-1000 User manual

Page 1 of 184 NETKROM OS and NETKROM
NMS User Manual
WaveKROM Backhaul
NETKROM OS & NETKROM NMS
User Manual
December, 2009 - v2.4.1

Page 2 of 184 NETKROM OS and NETKROM
NMS User Manual
© 2006 NETKROM Inc. No part of this publication may be reproduced or
transmitted in any form or by any means, electronic or mechanical,
including photography, recording, or any information storage and retrieval
system without written consent. Information in this manual is subject to
change without notice, and does not represent a commitment on the part of
NETKROM.
NETKROM shall not be liable for incidental or consequential damages
resulting from the furnishing, performance, or use of this manual.
All brand names used in this manual are the registered trademarks of their
respective owners. The use of trademarks or other designations in this
publication is for reference purposes only and does not constitute an
endorsement by the trademark holder.

Page 3 of 184 NETKROM OS and NETKROM
NMS User Manual
Table of Contents
Hardware Installation ..........................................................................7
Warnings..............................................................................................7
Package contents...................................................................................8
Setup Requirements...............................................................................9
WaveKROM Backhaul Installations.......................................................... 10
Mounting the WaveKROM Backhaul in the pole or tower ............................ 14
1. Product Overview .......................................................................... 15
1.1 Compatibility and Requirements..................................................... 15
1.2 NETKROM NMS Features............................................................... 15
1.3 NETKROM Features ...................................................................... 15
1.4 NETKROM NMS Installation Guide................................................... 16
2. NETKROM NMS........................................................................... 17
2.1 Overview of NNMS Interface.......................................................... 17
2.1.1 NETKROM NMS Main Menu........................................................................19
2.1.2 Network Topology Tab Information Panes....................................................20
2.1.3 Node Shortcut Menu.................................................................................21
2.2 Getting Started with NNMS ........................................................... 22
2.2.1 Auto-Discovering Nodes............................................................................22
2.2.2 Configuring a New Node ...........................................................................24
2.2.3 Moving and Resizing Icons ........................................................................26
2.2.4 Adding Background Map Images ................................................................26
2.2.5 Saving and Loading Profiles.......................................................................28
2.2.6 Using the Node Shortcut Menu...................................................................28
3. IP Networking ............................................................................ 35
3.1 Using the Network Interfaces Tree ................................................. 36
3.2 Configuring Basic IP Settings......................................................... 36
3.2.1 IP Address..............................................................................................36
3.2.2 Subnet...................................................................................................36
3.2.3 Enable/Disable Selected Interface ..............................................................36
3.2.4 PTP IP Address........................................................................................36
3.2.5 MAC Address...........................................................................................37
3.2.6 MAC Spoofing..........................................................................................37
3.2.7 STP Enable .............................................................................................37
3.3 Configuring Global Settings........................................................... 37
3.3.1 Default Gateway......................................................................................37
3.3.2 IP Forwarding..........................................................................................37
3.3.3 DNS1 and DNS2 ......................................................................................38
3.4 Using Special Interface Commands................................................. 38
3.4.1 Network Bridge Commands .......................................................................38
3.4.2 Virtual Interface Commands......................................................................39
3.5 Using Table View ......................................................................... 40
3.6 Configuring VLANs ....................................................................... 41
3.6.1 Adding VLAN Interfaces ............................................................................42
3.6.2 Removing VLAN Interfaces........................................................................43
3.6.3 Modifying VLAN Interfaces ........................................................................43
3.6.4 Uploading VLAN Interfaces........................................................................43

Page 4 of 184 NETKROM OS and NETKROM
NMS User Manual
4. Static IP Routing ........................................................................ 44
4.1 Configuring Routing Tables and Entries........................................... 45
4.1.1 Adding a New Routing Table......................................................................45
4.1.2 Remove an Existing Routing Table..............................................................46
4.1.3 Adding Static Routing Entries ....................................................................46
4.1.4 Removing Static Routing Entries ................................................................47
4.1.5 Modifying Static Routing Entries.................................................................47
4.1.6 Repositioning Static Routing Entries ...........................................................47
4.2 Configuring Static Rules................................................................ 47
4.2.1 Adding Rule Entries..................................................................................48
4.2.2 Removing Rule Entries..............................................................................49
4.2.3 Modifying Rule Entries..............................................................................49
4.2.4 Repositioning Rule Entries.........................................................................49
5. Wireless .................................................................................... 50
5.1 Setting Operational Modes ............................................................ 51
5.1.1 Selected Operational Mode........................................................................51
5.1.2 Configuring an Access Point.......................................................................52
5.1.3 Configuring WDS Mode.............................................................................55
5.1.4 Configuring Repeater Mode .......................................................................56
5.1.5 Configuring AP Client and Station Modes .....................................................58
5.1.6 Using Site Survey Operation......................................................................59
5.2 Configuring Radio Settings............................................................ 61
5.2.1 Selecting Physical Layer Options ................................................................62
5.2.2 Setting Channels and Frequencies..............................................................62
5.2.3 Setting Transmission Rates .......................................................................62
5.2.4 Setting the MAC Address...........................................................................62
5.2.5 Setting Frag............................................................................................63
5.2.6 Setting RTS ............................................................................................63
5.2.7 Selecting Diversity Options........................................................................63
5.2.8 Selecting Antenna Options ........................................................................63
5.2.9 Setting Transmitted Power........................................................................63
5.3 Configuring Security Settings ........................................................ 64
5.3.1 Setting Wired Equivalent Privacy (WEP) ......................................................64
5.3.2 Setting Wi-Fi Protected Access (WPA) .........................................................65
5.3.3 Configuring Access Control Lists (ACL)........................................................67
5.4 Configuring Atheros Advanced Capabilities ...................................... 68
5.5 Wireless Topology Scenarios.......................................................... 71
5.5.1 Point-to-Point Links..................................................................................71
5.5.2 BSSID Extended Repetition .......................................................................73
6. Dynamic Routing - RIP ................................................................ 74
6.1 RIP General Parameters................................................................ 75
6.2 RIP Protocol Parameters ............................................................... 76
6.3 RIP Redistribute Parameters.......................................................... 77
7. Firewall and NAT ........................................................................ 78
7.1 Firewall and NAT Chains ............................................................... 78
7.1.1 Firewall Chains........................................................................................78
7.1.2 NAT Chains.............................................................................................78
7.2 Configuring Firewall Rules............................................................. 79
7.2.1 Configuring Firewall Matching Fields ...........................................................80
7.3 Configuring NAT Rules.................................................................. 84
7.3.1 Configuring NAT Matching fields.................................................................85
7.3.2 Examples ...............................................................................................88

Page 5 of 184 NETKROM OS and NETKROM
NMS User Manual
8. DHCP........................................................................................ 92
8.1 Configuring a DHCP SERVER.......................................................... 92
8.1.1 Setting DHCP Server Fields .......................................................................93
8.1.2 Lease Time Strategies ..............................................................................96
8.2 Configuring a DHCP CLIENT........................................................... 96
8.3 Configuring a DHCP Relay............................................................. 97
9. WAN......................................................................................... 99
9.1 Configuring a PPPoE CLIENT.......................................................... 99
9.1.1 Setting PPPoE Client Fields......................................................................100
9.2 Configuring a PPTP Client.............................................................101
9.2.1 Setting PPTP Client Fields........................................................................102
10. Quality of Service............................................................... 104
10.1 The QoS window tab ................................................................104
10.1.1 Traffic Classes ......................................................................................105
10.1.2 Traffic Policies ......................................................................................106
10.1.3 Network Interfaces................................................................................106
10.2 Differentiating network traffic....................................................107
10.3 Guarantees and Limitations.......................................................108
10.3.1 Committed Information Rate (CIR) ..........................................................109
10.3.2 Peak Information Rate (PIR)...................................................................109
10.3.3 Excess Burst Size (EBS).........................................................................109
10.3.4 Committed Burst Size (CBS)...................................................................110
10.3.5 Priority ................................................................................................110
10.4 Example: Bandwidth reservation for FTP Servers..........................111
10.4.1 Single Class per Policy ...........................................................................112
10.4.2 Parallel Classes.....................................................................................114
10.4.3 Class Hierarchy.....................................................................................116
10.5 Example: Elimination of P2P Traffic ............................................118
10.5.1 Shared Policies .....................................................................................120
10.6 Example: Access Point Bandwidth Sharing...................................120
10.6.1 New QoS Entry .....................................................................................120
10.6.2 QoS Statistics.......................................................................................122
10.7 Design Guidelines and Limitations ..............................................123
10.7.1 Destination/Source MAC match type ........................................................123
10.7.2 Application match type ..........................................................................124
10.7.3 Child to Parent class relation...................................................................124
10.7.4 PIR on parallel classes ...........................................................................124
10.7.5 Efficiency considerations ........................................................................125
10.8 Frequently Asked Questions ......................................................125
10.8.1 Submit, Apply Changes: I'm confused!.....................................................125
11. HotSpot Wizard.................................................................. 126
11.1 HotSpot Main Tab ....................................................................126
11.2 Using the HotSpot Wizard .........................................................128
11.2.1 WAN ...................................................................................................128
11.2.2 LAN.....................................................................................................130
11.2.3 DHCP ..................................................................................................131
11.2.4 NAT & Protection...................................................................................132
11.2.5 Wireless ..............................................................................................136
11.2.6 Radius.................................................................................................137
11.2.7 Authentication Type...............................................................................137
11.2.8 Walled Garden......................................................................................139
11.2.9 Advertisement......................................................................................139

Page 6 of 184 NETKROM OS and NETKROM
NMS User Manual
11.2.10 Web Customization..............................................................................140
11.2.11 Summary...........................................................................................141
11.2.12 Enabling the HotSpot...........................................................................142
11.3 Backend Radius Configuration Example.......................................143
11.3.1 MAC Authentication...............................................................................143
11.3.2 UAM Authentication...............................................................................144
11.4 HotSpot Configuration Example .................................................144
11.5 Troubleshooting.......................................................................155
11.5.1 Cannot set wireless interface configuration ...............................................155
11.5.2 DNS Error ............................................................................................155
11.5.3 Cannot obtain an IP address...................................................................155
11.5.4 Obtained an IP address but cannot Ping HotSpot .......................................156
11.5.5 HotSpot running, but no activeDHCP Server..............................................156
11.5.6 A user not authenticated, but can access the Internet ................................156
11.5.7 NETKROM NMS lost connectivity with Hotspot............................................156
12. System Services ................................................................ 157
12.1 Configuring SNMP Settings........................................................157
12.2 Configuring HTTP Settings.........................................................159
12.3 Configuring SSH Settings..........................................................160
12.4 Configuring NTP Settings ..........................................................161
12.5 Setting the Administrator Password............................................162
13. Monitoring and Statistics..................................................... 164
13.1 Using the Status Info Dialog Box................................................164
13.2 Using the Current Throughput Graph..........................................164
13.3 Viewing Packet Statistics ..........................................................165
13.4 Viewing the ARP Table..............................................................166
13.5 Viewing the Open Connections List.............................................167
13.6 Using Monitor Utilities...............................................................167
13.6.1 Pinging (ICMP Utility).............................................................................167
13.6.2 Using Traceroute...................................................................................169
13.7 Viewing System Properties........................................................170
14. System Tuning................................................................... 171
15. MRTG Support ................................................................... 174
15.1 Using MRTG............................................................................174
16. WISP Easy Wizard.............................................................. 175
17. APPENDIX - I..................................................................... 176
17.1 Restore to Factory Defaults Settings...........................................176
18. Index ............................................................................... 179

Page 7 of 184 NETKROM OS and NETKROM
NMS User Manual
H
Ha
ar
rd
dw
wa
ar
re
e
I
In
ns
st
ta
al
ll
la
at
ti
io
on
n
Warnings
Do not work on the system or connect or disconnect cables during periods of lightning
activity.
Do not locate the antenna near overhead power lines or other electric light or power
circuits, or where it can come into contact with such circuits. When installing the
antenna, take extreme care not to come into contact with such circuits, as they may cause
serious injury or death.
Only trained and qualified personnel should be allowed to install, replace, or service this
equipment.
To meet regulatory restrictions, the radio and the external antenna must be professionally
installed. The network administrator or other IT professional responsible for installing
and configuring the unit must be a suitable professional installer. Following installation,
access to the unit should be password protected by the network administrator to maintain
regulatory compliance.
The WaveKROM Backhaul and PoE injector can be damaged by incorrect power
application. Read and carefully follow the installation instructions before connecting the
system to its power source.

Page 8 of 184 NETKROM OS and NETKROM
NMS User Manual
Package contents
Take a moment to ensure you have all of the following parts in your Outdoor Waterproof
Unit installation kit before you begin installing the product. If any parts are missing, please
contact your local vendor or contact us at 305-4182232.
KIT CONTAINS
1. Two WaveKROM Backhaul (Either BH-1000 or BH-1000-C)
2. Two Mounting brackets (include: 2 Wall/ Pole mounting system and 4 screw nuts)
3. Two PoE Injectors
4. Two Power Cables
5. Two RJ45 Waterproof Connector System
6. CD ROM
2
3
4
1 5
6
2
1
3
4
5
6

Page 9 of 184 NETKROM OS and NETKROM
NMS User Manual
Setup Requirements
Before starting, please verify that the following is available:
CAT5/5e or FTP Outdoor Ethernet cable (from the WaveKROM Backhaul to PoE
Injector)
At least one computer is installed with the NNMS and a wired or wireless network
interface adapter
TCP/IP protocol is installed and IP address parameters are properly configured on all
your network’s nodes
Important!
Configure and verify the WaveKROM Backhaul operations first before you mount the
unit in a remote location.
You may need to install a lightning arrestor to protect your WaveKROM Backhaul from
the lightning.
For choosing the best location for your WaveKROM Backhaul choose an elevated
location where trees, buildings and large steel structures will not obstruct the antenna
signals and which offers maximum line-of-sight propagation with the users.
Select an appropriate antenna to improve range and/or coverage. Additionally, the
WaveKROM Backhaul also lets you fine-tune parameters such as the transmit power to
achieve the best results.

Page 10 of 184 NETKROM OS and NETKROM
NMS User Manual
WaveKROM Backhaul Installations
The diagram below shows the overall setup of the WaveKROM Backhaul.

Page 11 of 184 NETKROM OS and NETKROM
NMS User Manual
Step 1:
Connect your UTP or FTP Outdoor cat.5 Ethernet cable with waterproof connector to the RJ-
45 connector on the WaveKROM Backhaul. Then connect the other end of the cable to the
PoE injector.
For the Netkrom PoE, the recommended length of the RJ45 Category 5 cable is up to 260 feet
or 80 meters.
1.- Remove the thin enclosure nut
from the feedthru assembly. This
can be discarded. Loosen the
compression nut completely
2.- Insert the RJ45 connector thru
the feedthru assembly
3.- Tighten the compression nut
loosely to the feedthru assembly
4.- Screw the entire feedthru
assembly into the RJ45-ECS
housing which is already mounted
in the enclosure. There should be a
rubber gasket between the two
assemblies. Tighten the feedthru
assembly to create a seal.
5.- The final step is to tighten the
compression nut until the gaskets
are tight around the Cat5 cable.
Always push the cable toward the
connector while tightening to
ensure good strain relief of cable to
connector.
Enclosure Nu
t
Feedthru Assembly
Compression Nu
t
RJ-45 ECS Housing

Page 12 of 184 NETKROM OS and NETKROM
NMS User Manual
Step 2: (Only in case of the BH-1000-C, which has one N-Female connector)
Connect the external antenna to the N Female connector of the WaveKROM Backhaul.
Step 3:
From the PoE injector connect one cat.5 Ethernet cable to the WaveKROM Backhaul and
another cat.5 cable to a switch or PC.

Page 13 of 184 NETKROM OS and NETKROM
NMS User Manual
Step 4:
Connect the power cable supplied in the Netkrom PoE kit to the main electrical supply and the
power plug into the socket of the injector.
Now, turn on your power supply. Notice that the POWER LED has lighted up.
This indicates that the WaveKROM Backhaul is receiving power through the Netkrom PoE
Injector and that connection between your Wireless Radio and your network has been
established.
Note:
Please use the PoE injector provided in the package. Using a PoE with a different voltage
rating will damage this product.

Page 14 of 184 NETKROM OS and NETKROM
NMS User Manual
Mounting the WaveKROM Backhaul in the pole or
tower
The WaveKROM Backhaul device can be mounted on the pole or tower as shown in
following:
1.- Attach the mounting bracket to the back of
the radio using the four hex screws provided.
(Do not over tighten the screws.)
Note: The bracket in the illustration side
shows the normal orientation which allows the
wireless unit to be pointed up towards the base
station antenna. However, if you live
somewhere that would require you pointing
the device down towards the base station
antenna (for example, you are on the side of a
mountain in view of the base station antenna
below), reverse the bracket so the Netkrom
wireless radio Unit can be “tilted” downward
when you aim the WaveKROM Backhaul in a
later step.
2.- You can use the pipe bracket assembly for
either thin or thick poles by just inverting the
position of one of the elements as it shown on
the right.
3.- Mount the WaveKROM Backhaul to the
top of the pipe or other support and point the
WaveKROM Backhaul in the approximate
direction of the base station antenna, then
hand-tighten the nuts on the mounting system.

Page 15 of 184 NETKROM OS and NETKROM
NMS User Manual
1
1.
.
P
Pr
ro
od
du
uc
ct
t
O
Ov
ve
er
rv
vi
ie
ew
w
The NETKROM Network Management System (NNMS) is used to
configure and manage wireless networks of NETKROM nodes.
NETKROM NMS has been designed to provide network administrators
with a comprehensive and simple way to control and configure their
network nodes.
1.1 Compatibility and Requirements
The NETKROM NMS software operates on any PC or Mac supported by
Java. That is any version of Microsoft Windows
(98/ME/2000/NT/XP/VISTA) or GNU/Linux.
1.2 NETKROM NMS Features
Optimized communication protocol between NETKROM's software
and NETKROM NMS featuring high levels of interactivity.
Additionally an advanced encryption scheme can guarantee secure
configuration and monitoring of NETKROM nodes.
Easy wizard-based configuration of NETKROM Hot-Spot.
Easy WISP Configuration Wizard
New graph-based statistics providing real time bandwidth utilization
per network interface.
New robust network topology display.
Built-in Multi Router Traffic Grapher (MRTG) support
1.3 NETKROM Features
Advanced fault tolerant mechanisms guaranteeing node stability.
Advanced Hotspot functionality
Web Redirect (Universal Access Method)
MAC Authentication
Bandwidth Management
User Information and Radius Statistics
Walled Garden
Advertisement URLs
Configurable redirection page

Page 16 of 184 NETKROM OS and NETKROM
NMS User Manual
Multiple bridged high speed interfaces
Administration MAC
Radius Attributes Support
WAN Interface configuration (PPPoE, PPTP)
DHCP leases information added.
Wireless Functionality
Advanced Wireless Security (WPA, 802.1x)
Best Channel Selection Algorithm
Country Code Selection (+ out of band modes)
Wireless to wireless traffic filtering
Mac Address Spoofing
Advanced Firewall functionality
NTP (Network Time Protocol) service
1.4 NETKROM NMS Installation Guide
For a Windows installation, double-click the NETKROM_vX_setup.exe
installer and follow the prompts. The installer comes bundled with jre 1.4,
so you do not have to pre-install it.
For a Linux or Macintosh installation, unzip the NNMSvX_jars.zip file
and launch the application as java –jar NNMSvX.jar from the current
directory. JRE (v1.4) must be preinstalled.

Page 17 of 184 NETKROM OS and NETKROM
NMS User Manual
2
2.
.
N
NE
ET
TK
KR
RO
OM
M
N
NM
MS
S
If your goal is to deploy several wireless access points in one system,
central management is recommended. Even if you plan to begin with a
smaller network, but expect to expand in the future, a centrally managed
system should be considered. The NETKROM Network Management
System (NNMS) provides an effective, turnkey management solution that
covers the needs of most users.
Using NNMS you can:
Manage access points and devices on the wireless network
Configure network nodes, polling settings, and other parameters
Load and save network configurations
Configure and view network topology
Auto-discover available nodes
Analyze network traffic using the Multi Router Traffic Grapher
(MRTG)
2.1 Overview of NNMS Interface
The user interface utilizes typical drop down menus, short cut menus
(right click) and tabbed/sub-tabbed panes inside the main window.
NNMS Main Window
The NETKROM NMS window is a graphical user interface that facilitates
viewing, configuring and monitoring your wireless network. The interface
includes a typical main menu, tabbed panes containing graphical and
textual information and shortcut menus that allow you to navigate to other
windows, tabs and dialog boxes.
Figure 1. NNMS Main Window

Page 18 of 184 NETKROM OS and NETKROM
NMS User Manual
Main Menu
The NETKROM NMS window features a menu system with four main
menu headings: File, Tools, Utilities and Help.
Figure 2. NNMS Main Menu System
Tabbed Panes
The main body of the NNMS window displays information in tabbed
panes. When NNMS starts the Network Topology tab is available. This
tab contains three information panes: the Topology Map, the Registered
Node List and the Node Status pane.
Figure 3. NNMS Tabbed Panes
Node Shortcut Menu
Many other functions are accessible via the Node Shortcut Menu, which
includes the following items: GUI-Node Connectivity Settings, Open
Status Window, Advanced Node Configuration, Save Configuration,
Unlock, Back Up, FW Upgrade, Reboots, Current Throughput, Wisp
Easy Wizard (WEW) and Remove. From the Node Shortcut Menu you
can access additional tabbed windows used in configuring and monitoring
the network.

Page 19 of 184 NETKROM OS and NETKROM
NMS User Manual
Figure 4. Node Shortcut Menu
2.1.1 NETKROM NMS Main Menu
Using NNMS menus you can manage system profiles, implement tools to
discover, add and view nodes, launch utilities and access help information.
RW menus include:
File
Save Profile – Save the current NNMS profile
Load Profile – Load a previously saved NNMS profile
Load Background Image – Load a background image (typically a
map) to be displayed in the Topology Map
NNMS Settings – Set polling interval and polling port values
Exit – Exit NNMS
Tools
View Topology – Display the Topology Map tab
Add New Node – Open the Insert New Node dialog box
License Manager – Display the License Manager tab
Discovery Manager – Open the Auto Discovery dialog box
Utilities
MRTG – Open the MRTG window
Help
Home Page – Access the NETKROM website
About – Display the NETKROM introductory window

Page 20 of 184 NETKROM OS and NETKROM
NMS User Manual
2.1.2 Network Topology Tab Information Panes
Figure 5. The NETKROM NMS Window
Topology Map
Located in the center pane, the Topology Map displays icons
representing network nodes and connection information describing the
layout of the network. It also can display a map graphic in the background.
Registered Node List
Located in the left pane, the Registered Node List displays all registered
nodes on the network
Node Status
Located in the bottom pane, the Node Status area displays the following
information on the currently selected node
Firmware Version – The number representing the firmware version
residing in the node
Up Time – The length of time the node has been operating
Key Level
NNMS Connectivity – The ratio of successfully received probe
responses
All panes are resizable and can be adjusted according to user preferences.
This manual suits for next models
1
Table of contents
Other Netkrom Antenna manuals
Popular Antenna manuals by other brands

Palomar
Palomar PAL-OCF1606 product manual

Directive Systems & Engineering
Directive Systems & Engineering DSEFO144-15 Assembly instructions

KVH Industries
KVH Industries TracPhone V11 hts user guide

Panorama Antennas
Panorama Antennas LG-SX Series Installation instruction
HP
HP J9659A Guide
Antop
Antop OMNIPRO Series installation instructions

HyperLink Technologies
HyperLink Technologies HG2415Y installation instructions

Hughes Network Systems
Hughes Network Systems DiRECWAY DW4000 installation guide
Spinner
Spinner BN 666000 installation guide

SureCall
SureCall SC-550W datasheet

RCA
RCA ANT1600 - TV Antenna - Indoor user guide

Channel Master
Channel Master CM-9521A user manual
