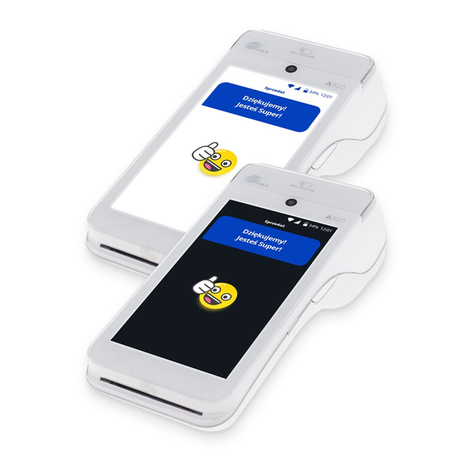
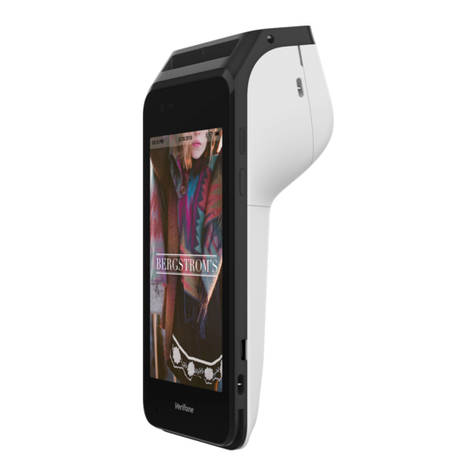
NetPay Pax A Series User manual

02
intelligent
payments For technical support call: 0333 311 0200 (Option 3)
Visit our website at www.netpay.co.uk
Contents
A920 quick start guide ............................................................................... 03
01. What is in the box?........................................................................................04
02. Physical setup of your device.......................................................................04
02.01. Initial device setup (IMPORTANT) ......................................................04
02.02. Changing the thermal paper roll..........................................................04
02.03. Changing the battery............................................................................05
03. Power On/Off and Sleep Mode....................................................................05
03.01. Power On...............................................................................................05
03.02. Power off...............................................................................................05
03.03. Sleep mode...........................................................................................05
04. Connecting to Wi-Fi.......................................................................................06
POSitive user guide.................................................................................... 07
05. Using the POSitive Payment application.....................................................07
05.01. Features of POSitive.............................................................................08
05.02. Conducting a Sale ................................................................................09
05.03. Conducting a Sale with Gratuity.......................................................... 11
05.04. Conducting a Sale with Cashback ...................................................... 14
05.05. Conducting a Refund ........................................................................... 16
05.06. Conducting a Sale or Refund when the customer is not present..... 18
05.07. Conducting a Pre-Authorisation.......................................................... 19
05.08. Conducting a Completion.................................................................... 21
05.09. Accessibility Mode...............................................................................23
05.10. Reprinting and Viewing Receipts ........................................................27
05.11. Viewing System Information ...............................................................28
05.12. Reconciliation (Z Report).....................................................................29
05.13. Generating an X report ........................................................................29
05.14. Viewing the transaction history ..........................................................30

04
intelligent
payments For technical support call: 0333 311 0200 (Option 3)
Visit our website at www.netpay.co.uk
01. What is in the box?
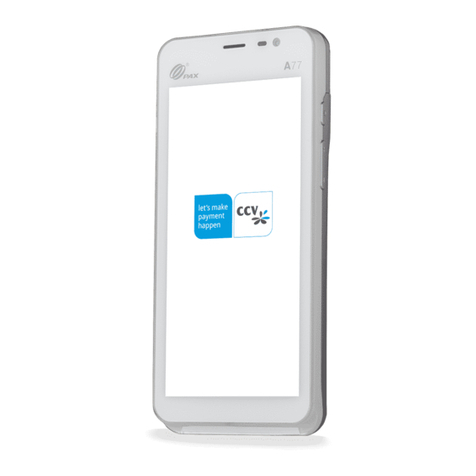
1 x PAX A920 terminal 1 x UK AC mains cable
1 x USB cable 1 x Thermal paper roll
1 x PAX A920 quick start guide
02. Physical setup of your device
02.01. Initial device setup (IMPORTANT)
To start using the device, some initial setup steps need to be followed.
Turn your device on and connect it to your Wi-Fi network, see section 4 on how to
do this. Once connected, wait a few seconds for your cong les to begin installing,
the terminal will then reboot automatically. After the reboot has nished you will
then have to set your Supervisor password, the default username and password
is 1234.
Finally, navigate to the “Admin Menu” and tap the “Cycle Keys” function to establish
a connection to the acquirer.
02.02. Changing the thermal paper roll
Removing the thermal paper roll
To remove the thermal paper, turn the device over and pull the paper cover
latch away from the device. The top section of the device will pivot downwards.
To remove the paper, simply pull the paper roll out.
Installing a new thermal paper roll
To install a new thermal paper roll, insert paper roll with the paper poking out of the
top of the device. Then, close the lid until the lid snaps into place. Ensure the lid is
fully closed so that the paper roll fully engages the paper. Tear off any excess paper.
PLEASE NOTE
These steps must be followed in order to start taking payments on your device.
If you are having trouble or encountering an error, please contact technical
support 24 hours a day, 7 days a week on: 0333 311 0200 (Option 3).

05
intelligent
payments For technical support call: 0333 311 0200 (Option 3)
Visit our website at www.netpay.co.uk
02.03. Changing the battery
Removing the battery
To remove and the battery, turn the device over to show the back of the terminal.
Then, locate the battery cover and slide the open/close slide switch to the right.
Next, lift the battery cover from the terminal, and pivot the lid upwards to remove.
Finally, lift the battery from the bottom edge, swing upwards from the bottom
and pull out.
Installing a new battery
To install a battery, rst remove the protective cover over the battery connectors.
Next, insert the battery with the gold connectors towards the top right side.
Slide the battery upwards, whilst carefully pushing the bottom into place.
Insert the top of the battery lid into the lid hinges. Then, lower the bottom
of the lid cover until it is ush with the case. Finally, slide the lid switch to the
left to lock the battery cover.
03. Power On/Off and Sleep Mode
03.01. Power On
Press and hold the power button for three seconds until the screen powers on.
03.02. Power off
Press and hold the power button for three seconds until the power menu is shown.
Tap power off, and then power off again. A “shutting down…” message will show
when the terminal is turning off.
03.03. Sleep mode
To put the device in or wake the device from sleep mode, click the power button.

06
intelligent
payments For technical support call: 0333 311 0200 (Option 3)
Visit our website at www.netpay.co.uk
04. Connecting to Wi-Fi
To connect the device to Wi-Fi, please click the three lines in the top right-hand
corner of the screen, and select “Wi-Fi Settings”, as shown in Figure 01. The device
will then be redirected to the Wi-Fi settings page.
The device will automatically search and bring up available Wi-Fi networks. Please
complete the connection process and click the back arrow on the bottom left of the
screen when complete, as shown in Figure 02.
If you have come from the 02.01 Initial device setup section, click here to return.
Figure 01 Figure 02

07
intelligent
payments For technical support call: 0333 311 0200 (Option 3)
Visit our website at www.netpay.co.uk
POSitive user guide
05. Using the POSitive Payment application
From the bootup screen please click “Payments”, once the application has loaded
you will be prompted for an ID and password, as shown in Figure 03. By default,
both these elds are 1234. You will then be prompted to set a new password.
This is the manager account. Once you are logged you will be at the main menu
of the POSitive payment application, this is shown in Figure 04.
The main menu shown in Figure 04 is the “Home Screen” for the POSitive payment
app and will be heavily referenced in the remainder of this document.
Figure 03 Figure 04

08
intelligent
payments For technical support call: 0333 311 0200 (Option 3)
Visit our website at www.netpay.co.uk
05.01. Features of POSitive
From the “Main Menu” you are able to:
• Conduct sales (with gratuity and cashback).
• Conduct refunds.
• Conduct card not present sales.
• Conduct pre-authorisations and completions.
• Reprint and view receipts.
• Test the acquiring connection.
From the “Admin Menu” you are able to:
• Print software and hardware information.
• Reconcile with Z reports.
• Generate X reports.
• Print the transaction history.
• Manage user accounts.

09
intelligent
payments For technical support call: 0333 311 0200 (Option 3)
Visit our website at www.netpay.co.uk
05.02. Conducting a Sale
To conduct a sale, from the Main Menu shown in Figure 04, choose “Sale”.
Key in the amount of the sale and select “Done”, as shown in Figure 05.
You will be prompted to “Tap, Swipe or Insert”; or complete the transaction with the
“Card Not Present” feature, as shown in Figure 06.
If the customer is present, please ask the customer to do one of the following:
• Tap the card on the contactless reader.
• Swipe the card through the magstripe reader.
• Insert card into the card reader, Figure 07 will display on the screen.
If the customer is not present, select the Card Not Present button:
• Key in the card number and expiry date and select “Done”.
• Key in the CSC number and select “Done”.
If all details are valid the terminal will process the transaction.
Figure 05 Figure 06 Figure 07

10
intelligent
payments For technical support call: 0333 311 0200 (Option 3)
Visit our website at www.netpay.co.uk
If the transaction has been approved a green tick is displayed, shown in Figure 08.
If the transaction has failed a red cross is displayed, as shown in Figure 09.
The sale process is now complete, the application will return to the Main Menu.
Figure 08 Figure 09

11
intelligent
payments For technical support call: 0333 311 0200 (Option 3)
Visit our website at www.netpay.co.uk
05.03. Conducting a Sale with Gratuity
To conduct a sale with gratuity, from the Main Menu (Figure 04), choose “Sale”.
Key in the amount of the sale and select “Done”, as shown in Figure 10.
If gratuity is enabled you will then be prompted to add a gratuity to the payment,
as shown in Figure 11. If “Yes” is selected you will be asked to select the gratuity
amount, as shown in Figure 12. Once the amount is chosen please select “Accept”.
Figure 10 Figure 11 Figure 12

12
intelligent
payments For technical support call: 0333 311 0200 (Option 3)
Visit our website at www.netpay.co.uk
You will be prompted to “Tap, Swipe or Insert”; or complete the transaction with the
“Card Not Present” feature, as shown in Figure 13.
If the customer is present, please ask the customer to do one of the following:
• Tap the card on the contactless reader.
• Swipe the card through the magstripe reader.
• Insert card into the card reader, Figure 14 will display on the screen.
If the customer is not present, select the “Card Not Present” button:
• Key in the card number and expiry date and select Done.
• Key in the CSC number and select Done.
If all details are valid the terminal will process the transaction.
Figure 13 Figure 14

13
intelligent
payments For technical support call: 0333 311 0200 (Option 3)
Visit our website at www.netpay.co.uk
If the transaction has been approved a green tick is displayed, shown in Figure 15.
If the transaction has failed a red cross is displayed, as shown in Figure 16.
The sale with gratuity process is now complete, the application will return to the
Main Menu.
Figure 15 Figure 16

14
intelligent
payments For technical support call: 0333 311 0200 (Option 3)
Visit our website at www.netpay.co.uk
05.04. Conducting a Sale with Cashback
To conduct a sale with cashback, from the main menu (Figure 04), choose “Sale”.
Key in the amount of the sale and select “Done”, as shown in Figure 10.
You will be prompted to “Tap, Swipe or Insert”; or complete the transaction with the
“Card Not Present” feature, as shown in Figure 17.
As cashback can only be processed through the card reader or magstripe reader,
please ask the customer to do one of the following:
• Swipe the card through the magstripe reader.
• Insert card into the card reader.
If cashback is enabled you will then be prompted if cashback is required, as shown
in Figure 18. If “Yes” is selected you will be asked to input the cashback amount,
as shown in Figure 19. Once the amount is chosen please select “Yes”.
Figure 17 Figure 18 Figure 19

15
intelligent
payments For technical support call: 0333 311 0200 (Option 3)
Visit our website at www.netpay.co.uk
Please ask the customer to enter their PIN code, if all details are valid the terminal
will process the transaction.
If the transaction has been approved a green tick is displayed, as shown in Figure 20.
If the transaction has failed a red cross is displayed, as shown in Figure 21.
The sale with cashback process is now complete, the application will return to the
Main Menu.
Figure 20 Figure 21

16
intelligent
payments For technical support call: 0333 311 0200 (Option 3)
Visit our website at www.netpay.co.uk
05.05. Conducting a Refund
To conduct a refund, from the Main Menu shown in Figure 04, choose “Refund”.
Key in the amount of the refund and select “Done”, as shown in Figure 22.
You will be prompted to “Tap, Swipe or Insert”; or complete the transaction with the
“Card Not Present” feature, as shown in Figure 23.
If the customer is present, please ask the customer to do one of the following:
• Tap the card on the contactless reader.
• Swipe the card through the magstripe reader.
• Insert card into the card reader, Figure 24 will display on the screen.
If the customer is not present, select the Card Not Present button:
• Key in the card number and expiry date and select “Done”.
• Key in the CSC number and select “Done”.
If all details are valid the terminal will process the transaction.
Figure 22 Figure 23 Figure 24

17
intelligent
payments For technical support call: 0333 311 0200 (Option 3)
Visit our website at www.netpay.co.uk
If the refund has been approved a green tick is displayed, as shown in Figure 25.
If the transaction has failed a red cross is displayed, as shown in Figure 26.
The sale or refund process is now complete, the application will return to the
Main Menu.
Figure 25 Figure 26

18
intelligent
payments For technical support call: 0333 311 0200 (Option 3)
Visit our website at www.netpay.co.uk
05.06. Conducting a Sale or Refund when the customer
is not present
To conduct a sale or refund if the customer is not present, from the Main Menu
shown in Figure 04, choose “Card Not Present”.
Choose either “Sale” or “Refund”
as shown in Figure 27, the terminal
will then redirect to a secure
payment screen:
• Type in the amount.
• Type in the card details.
• Enter optional reference.
• Select Start Transaction.
If all details are valid the terminal will
process the transaction.
If the transaction has been approved
a green tick is displayed. If the
transaction has failed a red cross
is displayed.
The sale or refund process is now
complete, the application will return
to the Main Menu.
Figure 27

19
intelligent
payments For technical support call: 0333 311 0200 (Option 3)
Visit our website at www.netpay.co.uk
05.07. Conducting a Pre-Authorisation
To conduct a Pre-Authorisation, from the Main Menu shown in Figure 04,
choose “Pre-Auth”.
Key in the amount of the pre-auth and select “Done”, as shown in Figure 28.
As contactless cannot be used for a pre-auth, you will be prompted to “Swipe
or Insert”, or complete the transaction with the “Card Not Present” feature
as shown in Figure 29.
If the customer is present, please ask the customer to do one of the following:
• Swipe the card through the magstripe reader.
• Insert card into the card reader, Figure 30 will display on the screen.
If the customer is not present, select the “Card Not Present” button:
• Key in the card number and expiry date and select “Done”.
• Key in the CSC number and select Done.
If all details are valid the terminal will process the transaction.
Figure 28 Figure 29 Figure 30

20
intelligent
payments For technical support call: 0333 311 0200 (Option 3)
Visit our website at www.netpay.co.uk
If the transaction has been approved a green tick is displayed, as shown in Figure 31.
If the transaction has failed a red cross is displayed, as shown in Figure 32.
The pre-auth process is now complete, the application will return to the Main Menu.
Figure 31 Figure 32
Other manuals for Pax A Series
1
This manual suits for next models
1
Table of contents
Other NetPay Payment Terminal manuals


