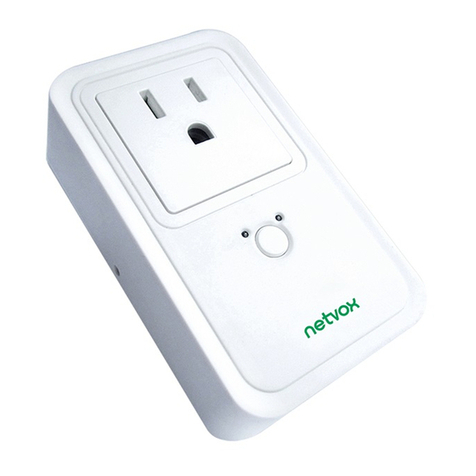
netvox Z809B User manual

ZigBeeTM-Power Socket with Power Consumption Monitoring
User Manual
Dimmable Socket with Power Detection
Model: Z809B
Energy Consumption Monitoring Series
For Home Automation
20150105
FW V5.0
HW V1.3

Z809B
Other Netvox related devices
Switch controller
Simple controller Z501 series
Multiple/Scene controller Z503
Wall switch ZB02 series
Light sensing switch Z302B
On/Off Status Indicator
(red | green)
Button switch
Network Indicator
(red | green)
Binding key

Introduction
NETVOX Z809B is a ZigBee Home Automation enabled power socket with level control
and power/energy/current/voltage consumption monitoring. It acts as a router device in
the Home Automation profile network. It can be manually switched through a soft on/off
switch or switched wirelessly through a paired remote controller. Consumption reading
can be captured and displayed on ZiG-BUTLER -Netvox application software, or on any
3rd party ZigBee enabled in-home display.
What is ZigBee?
ZigBee is a short range wireless transmission technology which defined for a minimum
complexity, low power consumption, low data rate, cost effective wireless solution. ZigBee
lies in between wireless markup technology and Bluetooth. ZigBee is based on
IEEE802.15.4 standard, the mutual co-ordination between thousands of sensors to
exchange data. Sensor to sensor or node-to-node communication is achieved through
relays of control data between devices with only a fraction of energy use which denoted
for highly transmission efficiency.
Note: Wireless communication, in some real use cases, can be limited by the signal
blockage. Please consult your service provider or place of purchase.
Product Specification
Fully IEEE 802.15.4 compliant (ZigBee
Pro)
Utilizes 2.4GHz ISM band, up to 16
channels
Up to 150 meters non-obstacle
wireless transmission distance
100~240VAC, 50/60HZ input power
Resistive load max: 3A/220VAC
Consumption monitoring range 50mA
to 3A, with ±1% accuracy
Up to 150 meters non-obstacle
wireless transmission distance
Simple operation and device
configuration
Operating Ambient: -10 oC to 50oC / 5~85% RH
max.
Storage Ambient: -40 oC to 85oC

Setting up the Z809B and network
To allow Z809B to function, it must first join to a ZigBee network. When it is given powered
it will automatically start searching for an existed network. So before you give power to
Z809B, please make sure it is within the wireless coverage distance (150 meters or less)
and make sure first you have the permit-join feature enabled either on a coordinator or
a router device in the network so that when Z809B is powered on Z809B will automatically
join to the network.
*For how to enable permit-join please refer to the router or coordinator device user manual
Operation:
Make sure you have detached any home appliance from Z809B. And also restore the
device back to its factory default setting. Refer to Restore to factory setting section.
Step 1: Make sure you have open up permit-join function (valid for 60 seconds) of a
coordinator or a router
Step 2: Now plug in Z809B into AC power socket to power it. Z809B device will start to
search for the network within reach.
Step 3: if joining is successful, the green network light will turn solid lit.
Setting Up Summary
(1) Startup and network association
(2) Bind the device with other device where applicable (i.e. bind it with a ZigBee
switch for wireless control).
(3) It is ready to be used.
Step 1. Startup and Network Association
Note: please also refer to Absent of Coordinator Indication
section of the manual.

To wirelessly control Z809B, it is required to pair with ZigBee enabled on/off/level
controller. If you do not wish to control Z817B with a remote or a switch, you may skip this
step and go to How to use Z809B.
Pairing operation:
1). Hold press the binding key for 3 seconds until you see the network indicator
flash green once while it sends binding request to the air.
2). Likewise, do the same on the level switch to exchange binding according to the
instructions of that device
3). When binding is successful the green indicator on Z809B will flash 5 times then
return to solid lit. If successful you should be able to wireless control Z809B.
Otherwise it flashes quickly 10 times indicating pairing unsuccessful.
Clear pairing setting:You may remove the pairing between the two or more devices.
Unbinding procedure is exactly the same as binding operation. When you repeat the
binding operation, the two devices will remove the binding information stored..
Step 2. Device pairing for On/Off/Level control (binding)

How to use Z809B
Dimmer
Z809B is only suitable for dimming use. Application such as light level control is applicable
where dimmable light bulbs are used. Non-dimmable light bulbs are not to be used with
this device as the dimming effect will not be obvious.
Remote control
When the device has joined to the network and paired (see Device pairing for
On/Off/Level control) with a remote controller the device is ready to be used. Z809B
should now be able to responds to on, off, level control command from a wireless remote
controller.
Operation: If the Z809B device is properly paired with a switch device, you should see
Z809B respond to on or off instruction wirelessly.
When the Off button is press twice and then press On button once, Z809B will stay Off.
This is to prevent from accidental turning the device on.
Manual switch
When the button switch is pressed, Z809B increases the output by 1/8th. As you keep
pressing until it passes the brightest, Z809B will decrement the output until its output is
totally turned off.
The On/Off status indicator turns red when the output is totally Off or green when output is
On.
Absent of Coordinator Indication
A ZigBee network required a coordinator to maintain network and other services. Z809B
would indicate to the user of whether the coordinator is present or is within the effective
signal transmission by means of LED indication.
After Z809B joined to a network, it checks once every 10 minutes for the coordinator. After
3 detecting attempts that the coordinator is not within the effective range, its network
indicator will flash 30 times in green. In the normal operation, the network indicator stays
solid green without flashing.

Permit other device to join
Z809B is featured to be a router in the network. It permits other devices to join the network.
In normal operation, by default the router device Z809B does not permit any device to join
to the network to protect the network from unexpected or unauthorized join attempt. You
will need to open up the permit-join on Z809B or on other router device to allow new
devices (a router or an end device) to join.
Operation:
1. Short press the binding key once.
2. The permit join is now enabled for 60 seconds and the green network indicator will
flash 60 times.
3. Z809B waits the new device to join in automatically. Please note that the maximum
waiting time to join is 60 seconds. Repeat the process if you missed the 60 seconds
period.
Power Consumption Reporting
When the load is attached to the device, the embedded meter reads the supplied current
drawn overtime. Z809B reports the readings to a paired target device normally an in-home
display or consumption data logger. Ensure that you go through Consumption reporting
and also Configure reporting time interval described in ZiG-BUTLER page, otherwise
Z809B will not sent consumption reading properly when misconfigured.Z809B can report
the consumption reading to Netvox’s ZiG-BUTLER or to any 3rd party in-home display.
If target device pairing is not done (refer to Consumption reporting in ZiG-BUTLER
section),Z809B will, by default, report at time interval of 180s minimum or 300s maximum.
The reportable change is 2048.
Units
Power drawn overtime is measured. Current (unit mA), Voltage (unit V), Power (unit kW)
and Energy (unit kWh). Z809B stores a new value read and updates such value and
clears up the previous. User may want to return the reading back to zero when wish. Refer
to Resetting Power Consumption Summation section bellow.
Possible reading losses
Z809B stores the reading to the memory at every 30 seconds and 15 seconds for some
Z809B. If power is disconnected from power source, the reading in the temporal buffer will
not be recorded.
Reading accuracy
If the output current is above 50mA, the reading accuracy of current, voltage, power and
energy is ±1%. Current detection range is between 50mA to 3A.

Resetting Power Consumption Summation
Z809B updates and stores the last energy reading in kwh. In some cases user would wish
to return the counter to zero. Same feature can be found in ZiG-BUTLER software with the
Recalculate button.
Operation:
Hold press Binding Key for 20 seconds then release the key when the green network
indicator flashes 4 times, within 2 seconds, short press the button switch once. If
successful the green network indicator will flash once.
Restore to factory setting
Z809B is capable of storing and saving includes network routing information. If you wish to
remove Z809B from an exited network, you would need to clear the saved routing
information to join to a new network by simply reset the device to restore to the factory
setting.
*notes: restore Z809B back to factory default will not reset power consumption summation.
Please refer to Resetting Power Consumption Summation section above.
Operation
1. While the device is given power, hold press the binding key for 15 seconds then
release the key when the green network indicator flashes 3 times then, within 2 seconds,
short press the button switch once.
2. If restore to factory setting is successful, you should see the indicator light flashes 10
times.
Soon the device will reboot by itself. In so the entire ZigBee network and required
information is cleared. It will enter network search to attempt to join to a network. Refer to
network association section of this manual.
Power Overload
Upon detecting current exceeds 5A, the output will be switched off within 30 seconds.

Summary of Key function and corresponding display
Function Key Display
Restore to factory
setting
Hold press binding key
15s then within 2s
press test button once.
3 flashes (hold press
binding key)
Then 10 flashes if
successful
Permit Join Short press binding
key once
Flashes 60 times in
60 seconds.
Resetting power
consumption
summation
Hold press binding key
20s then within 2s
short press test button
once.
4 flashes (hold press
binding key)
1 flash (test button
once)
Device Pairing Hold press binding key
3s.
1 flash (hold press
binding key)
5 flashes if
successful,
otherwise flashes
quickly 10 times

Configuration setting
As mentioned in How to use Z809B section, when the Off button is press twice and then
press On button once, Z809B will stay Off. This is to prevent from accidentally turning the
device on. This is a factory default setting. Programmer may, however, overwrite this
setting permanently by setting On Level attribute to any value between 0x00 to 0xFE.
0xFF is the factory default.
Installation Notes:
1、Z809B stores power consumption data once every 30 seconds, thus the power
data of last 30 seconds before power-fail could probably be lost. (24C01, 30
seconds; 24C02, 15 seconds….)
2、 Z809B is designed as a light dimmer. No other electric appliances but dimmable
lights can be attached to this product.
3、 Z809B is not a waterproof product, use it indoor only.
4、Load Protection: The current is over 3A → it will be off-load in 2 seconds.
5、After it is off-load, the Bit1 (Current OverLoad) of the parameter ACAlarmsMask
will be checked:
Bit1 (Current OverLoad) is 1 →it sends the alarm message;
Bit1 (Current OverLoad) is 0 →it doesn’t send the alarm message
When it sends the alarm message →AlarmCluster = 0x0B04; AlarmCode = 0xF0;
indicator flashes 10 times.
6、Z809B is using PWM dimming with leading Triac technology. Please DO NOT use
improper light/lamp/device or it may cause damages. For example, regular LED
lamp which does not support dimmer features, gas-discharge lamp, home
appliance, computer, or on-off relay is not supported.
7、The maximum electrical load of Z809B:
a. Resistive Load (incandescent light bulb): 3A/600W.
b. Dimmable fluorescent lamp or dimmable LED lamp: 100W. Parallel
connection is not recommended.
c. DO NOT connect coil transformer for dimming.

Clusters of Home Automation for Z809B
1.End Point(s):0x01
2.Device ID:Dimmer Light (0x0101 )
3.EndPoint Cluster ID
Attributes of the Basic Device Information attribute set
Identifier Name Type Range Access Default Mandatory
/ Optional
0x0000 ZCLVersion 8-bit
Unsigned
integer
0x00 –0xff Read
only
0x03 M
0x0001 ApplicationVersion 8-bit
Unsigned
integer
0x00 –0xff Read
only
0x32 O
0x0002 StackVersion 8-bit
Unsigned
integer
0x00 –0xff Read
only
0x35 O
0x0003 HWVersion 8-bit
Unsigned
integer
0x00 –0xff Read
only
0x0D O
Cluster ID for Z809B
Server side Client side
EP 0x01 (Device ID: Dimmer Light (0x0101 )
Basic(0x0000)None
Identify (0x0003)
Groups (0x0004)
Scenes (0x0005)
On/Off (0x0006)
Level Control (0x0008)
Commission(0x0015)
Electrical Measurement(0x0B04)
Diagnostics(0x0B05)
Simple Metering(0x0702)

Identifier Name Type Range Access Default Mandatory
/ Optional
0x0004 ManufacturerName Character
string
0 – 32
Bytes
Read
only
netvox O
0x0005 ModelIdentifier Character
string
0 – 32bytes Read
only
Z809BE
3R
O
0x0006 DateCode Character
string
0 – 16 bytes Read
only
2014112
1
O
0x0007 PowerSource 8-bit
Enumeration
0x00 –0xff Read
only
0x01 M
Attributes of the Group server cluster
Identifier Name Type Range Access Default Mandatory
/ Optional
0x0000
NameSupport
8-bit bitmap 10000000 Read
Only
0x80 M

Important Maintenance Instructions
As the device is not water proof it is recommended to keep the device in a dry place.
Liquid and heavy moisture contains minerals that may oxidize the electronic circuitry. In
case of liquid spill, please leave the device to completely dry before storing or using.
This device can be only used with dimmable bulb/light.
Do not use or store the device in a dusty area. Dust may cause electronic parts to
destroy.
Do not use or store the device in an over heated place. Store in a hotter temperature
than the suggested maximum temperature may shorten the life span of the device; and
may damage the battery and causing the housing to deform.
Do not use or store the device in a very cold place than the suggested minimum
temperature. The water can be condensed inside the device when moving to an area that
is higher in temperature. This can severely damage the PCB board and circuitry. This may
shorten the life span of the device; damage the battery and cause the housing to deform.
Do not throw or strongly vibrate the device. This may damage connectivity of the
electronic parts and other sensitive components on the PCB board.
Do not use any strong chemical or washing to cleanse the device.
Do not use any coloring materials on any removable parts which my cause poor
connections and may keep the device from function properly.
All the above applies to the purchased products, battery and other packaged items. If any
unusable or damaged items are found please return the product to your nearest
authorized repairing center.
Table of contents
Other netvox Accessories manuals

netvox
netvox RA0716A User manual

netvox
netvox R720FLD User manual

netvox
netvox R311LA User manual
netvox
netvox R718CK2 User manual

netvox
netvox R315 Series User manual

netvox
netvox R718CT User manual

netvox
netvox R718PA5 User manual

netvox
netvox R311DB User manual

netvox
netvox R311CB User manual

netvox
netvox RA0701 User manual

netvox
netvox RA0708 User manual

netvox
netvox R718B1 Series User manual

netvox
netvox RB11E User manual

netvox
netvox ZB11C1 User manual

netvox
netvox R718VA User manual

netvox
netvox R816B User manual

netvox
netvox RB11E User manual

netvox
netvox R727 User manual

netvox
netvox Z808B User manual

netvox
netvox R313M User manual