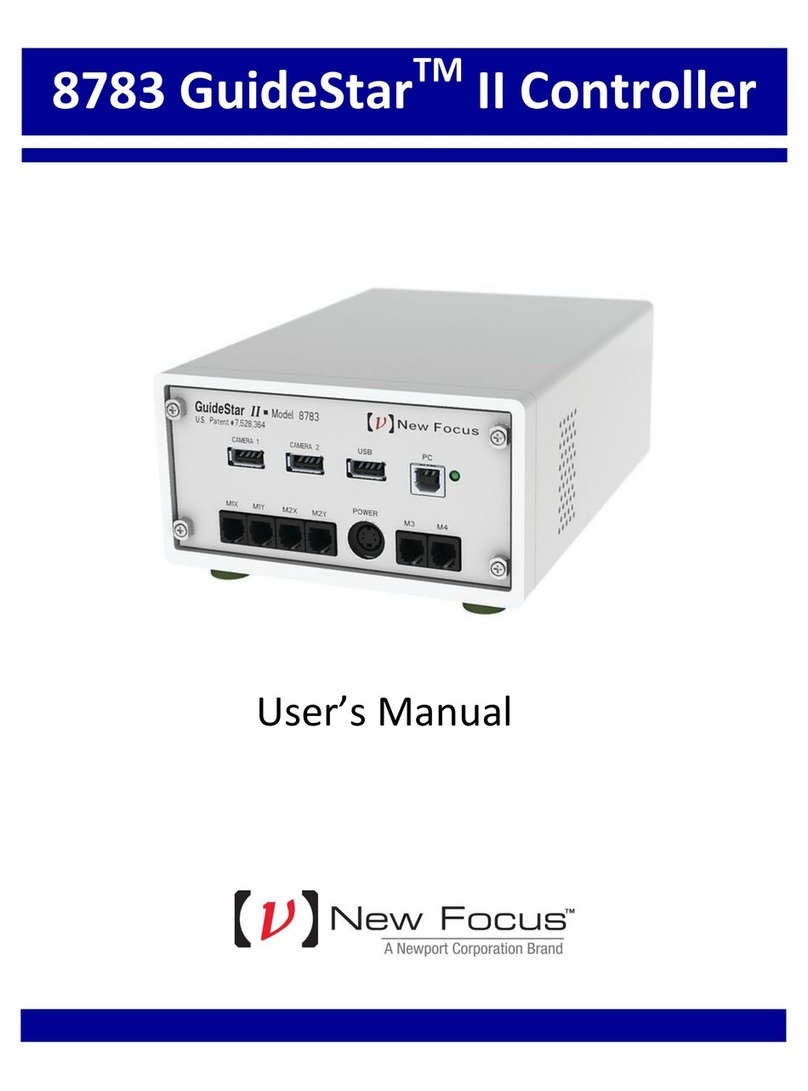
New Focus LB1005 User manual

Item No. P2102297 Rev. A
Operating Manual
LB1005 High-Speed Servo Controller
Bookham
2584 Junction Ave.
San Jose, CA 95134
(408) 919-1500


LB1005 Operating Manual Table of Contents
Bookham [New Focus logo] Revision 1 i
Contents
Contents................................................................................................................ i
Chapter 1 : Introduction...................................................................................... 1
Safety Considerations...................................................................................................................1
Table of Symbols ..........................................................................................................................1
Parts List.......................................................................................................................................2
Electrical Fuse & Voltage Selection..............................................................................................2
Front Panel Connections & Controls.............................................................................................3
Rear Panel Connections & Controls .............................................................................................5
Chapter 2 : Getting Started................................................................................ 7
Typical Setup ................................................................................................................................7
Typical Operation........................................................................................................................10
Chapter 3 : Detailed Operation........................................................................ 13
Signal Architecture......................................................................................................................13
Filter Transfer Functions.............................................................................................................14
Setting Output Voltage Limits......................................................................................................15
Using the Integrator Hold............................................................................................................16
Applying Modulation Inputs.........................................................................................................16
Appendix A : Specifications............................................................................ 17
Appendix B : Service & Maintenance............................................................. 19
Appendix C : Warranty..................................................................................... 21


LB1005 Operating Manual Introduction
Bookham Revision 1 1
Chapter 1: Introduction
This manual contains information for operating the New Focus LB1005 High-
Speed Servo Controller. The LB1005 is a high-performance, standalone
instrument that provides the appropriate analog signal conditioning for
achieving stable feedback control. The LB1005 is particularly suited for high-
bandwidth filtering required to stabilize the intensity and frequency of many
laser systems. This chapter addresses pertinent safety issues and correct usage of
this instrument, as well as defines all front and rear panel connections. Please
carefully read this chapter before using the LB1005. Chapter 2 helps users
immediately get started using the LB1005 in their application, while Chapter 3
has more complete details of the operation of the LB1005.
Safety Considerations
The LB1005 is a versatile instrument that can be used in a variety of feedback
control applications. However, the LB1005 is not intended for fail-safe
operation in hazardous environments or life-threatening situations. The user
assumes full responsibility for correct and safe usage of the LB1005 in accordance
with any applicable laws, codes, regulations, and standards pertaining to their
specific application. Bookham is not liable for any consequential damage due to
misapplication or failure of the LB1005.
Table of Symbols
Alternating current
Caution – risk of electric shock
Caution – refer to manuals
Fuse
On (AC voltage supply)
Off (AC voltage supply)

Introduction LB1005 Operating Manual
2 Revision 1 Bookham
Parts List
The LB1005 is shipped in a package designed to provide excellent protection. The
shipping box should be saved for future transportation or storage needs.
Carefully remove and inspect the following items that are contained in the
shipping box:
•LB1005 Servo Controller
•LB1005 Operating Manual
•AC Power Cord
Electrical Fuse & Voltage Selection
The LB1005 is pre-configured at the factory to work with the AC mains voltages
for your region. Before supplying electrical power to the LB1005, confirm that
the power entry module located on the rear panel is installed with the proper
fuses and set to the correct wallplug AC voltage. Use Table 1 to determine the
appropriate fuse and voltage settings.
Table 1: Fuse & Voltage Settings
AC Mains*
V~ Tolerance
V~ Fuse Rating**
Module Voltage
Wheel Setting
100 90—110 100Vac
120 108—132 250 V
0.50 A T 120Vac
220 198—242 220Vac
230-240 207—264 250 V
0.25 A T 240Vac
* 50/60 Hz only. **Module only accepts dual metric 5 x 20 mm fuses.
To operate at another AC mains voltage, follow the procedure below:
•With a small screwdriver, pry open fuse cover of the power entry module on
rear panel. The AC power cord must be removed from module socket before
opening fuse cover.
•Carefully pull out the voltage selection wheel from the module. Re-insert so
that correct AC voltage setting is facing outwards.
•Pull out the two fuse holders located below voltage selection wheel. Insert
correct fuses into each fuse holder and re-insert back into module. Install fuse
holders so that arrows on fuse cover and fuse holder align.
•Snap fuse cover back into place. Verify that the correct AC mains voltage can
be read through fuse panel before attaching the AC power cord.

LB1005 Operating Manual Introduction
Bookham Revision 1 3
Front Panel Connections & Controls
Figure 1: LB1005 Front Panel
1. A, -B:The error signal is generated from the voltage difference of these BNC
inputs. Both voltage channels have 1-MΩinput impedance and an input
voltage range of ±10 V. For single-ended operation, these BNC connectors
auto-terminate upon disconnection of cables.
Warning: For proper operation, cables attached to either of these inputs must be
driven with a voltage source or terminate into a low impedance. Make sure that any
attached BNC cable connectors are fully inserted and fastened to the panel connector.
2. Input Offset:This 10-turn locking knob controls a stable offset voltage that
can be added or subtracted from the voltage difference of the Aand –B
inputs. This offset can be adjusted over a range of either ±1 V or ±10 V,
selected by the rear panel Input Offset Range switch. The Input Offset can
also be disabled. The offset voltage corresponds linearly to the dial readout:
VOffset =(0.2n−1) ×VMaxRange , where nis the number of turns read from the dial
indicator. For example, a dial value of n= 5.00 indicates a (near) zero offset
voltage.
3. Error Monitor:This BNC output connector is a voltage monitor for the error
signal generated by the input difference amplifier. The DC-coupled error
monitor has unity gain with a nominal output voltage range of ±10 V and a
bandwidth of 10 MHz.
4. Sweep In:This BNC input allows a low frequency periodic sweep signal to
be added to the output of the LB1005. The input impedance is 1 MΩand the

Introduction LB1005 Operating Manual
4 Revision 1 Bookham
input voltage range is ±10 V. See Sweep Center and Sweep Span controls
discussed below for more details.
5. Output:This BNC output is the control signal from the proportional-integral
(P-I) filter, summed with the sweep and modulation signals. This output has
an impedance of 50 Ωand a drive current of ±20 mA.
6. Sweep Center (Output Offset):This 10-turn knob adjusts the offset voltage
of the signal from Output. The offset voltage can be adjusted from the
negative voltage limit (fully counter clockwise) to the positive voltage limit
(fully clockwise). See the section Setting Output Voltage Limits in Chapter 3 for
more details on setting the output voltage limits.
7. Sweep Span:This 1-turn knob controls the attenuation of the Sweep In
signal. Attenuation is near linear from zero (Off, fully counter-clockwise) to
unity gain (fully clockwise). This knob is used to adjust the amplitude of the
sweep input signal.
8. P-I Corner:This 12-position switch sets the proportional-integral (P-I) corner
frequency of the filter. See the section Filter Transfer Functions in Chapter 3
for details.
9. LF Gain Limit:This 9-position switch controls the low frequency gain limit
(LFGL) of the loop filter. This knob is only active when the Acquire switch is
in LFGL mode. See the section Filter Transfer Functions in Chapter 3 for
details.
10. Gain:This 10-turn knob continuously controls the overall feedback gain of
the loop filter from -40 dB (fully counter clockwise) to +40 dB (fully
clockwise). Gains from -30 dB to +30 dB have a dial indicator reading that is
near linear from indices n = 2 to 8 (~10 dB/turn).
11. Acquire switch: This 3-position switch is used to acquire lock. Table 2 shows
the function for each switch position.
Table 2: Functions for Acquire Switch
Position Function
Lock Off Integrator is reset. No control signal is summed into output signal.
LFGL P-I filter is enabled with a low frequency gain limit determined by LF Gain
Limit switch. See the section Filter Transfer Functions in Chapter 3.
Lock On P-I filter is enabled with full integrator. Low frequency gain limit is disabled.

LB1005 Operating Manual Introduction
Bookham Revision 1 5
12. LED lock indicator:This LED light indicates the operating status of the
LB1005. Table 3 shows the correspondence of the LED color to the operating
conditions of the LB1005.
Table 3: LED Lock Indicator
LED Color Condition
Unlighted OFF: LB1005 is either disconnected from the AC mains supply, or
the rear panel power switch is in Off position (0).
Green LOCKED:
Acquire switch is placed in either LFGL or Lock On position,
AND
Error signal voltage is within ±0.33 V.
AND
Output signal voltage is NOT within 10% (scaled to full voltage range)
of either the positive or negative output voltage limits.
Red UNLOCKED: All remaining operating conditions.
Rear Panel Connections & Controls
12
345
6
78 5
6
Figure 2: LB1005 Rear Panel
1. Power switch:This switch is pushed up to |position to turn on AC mains
power to LB1005.
2. Power entry module:The AC power cord must be connected between this
instrument receptacle and a properly grounded mains receptacle. The
LB1005 can be configured to operate with the following AC mains voltages:
100, 120, 220, and 230-240 VAC. Please carefully read the preceding section
Electrical Fuse & Voltage Selection for instructions on installing the proper fuses
and setting the correct AC supply voltage.

Introduction LB1005 Operating Manual
6 Revision 1 Bookham
3. Input Offset Range: This 3-position switch determines the voltage range for
the Input Offset front panel knob. For more information, please see the above
section Front Panel Connections & Controls). Selecting the Off position disables
the Input Offset control so that no voltage offset is added.
4. Output Voltage Limits:These 15-turn trimpots determine the output
voltages that clamp the positive and negative voltage rails of the Output. See
section Setting Output Voltage Limits in Chapter 3 for more details.
5. Mod 1 Input, Mod 2 Input:Input signals to these BNC connectors are
summed into the Output signal. Each modulation input has an input voltage
range of ±10V, 1-MΩinput impedance, and 1-MHz bandwidth. See the
section Applying Modulation Inputs in Chapter 3 for more details.
6. Attn 1, Attn 2:These 15-turn trimpots attenuate the corresponding input
modulation signals from off (fully counter-clockwise) to unity gain (fully
clockwise). See the section Applying Modulation Inputs in Chapter 3 for more
details.
7. Aux Output:This BNC connector is the control voltage output directly from
the P-I filter section, bypassing the summing amplifier. The Output Voltage
Limits do not apply to this output. The output range is ±10 V with 50-Ω
output impedance.
8. Int Hold Input:This TTL logic input switches off the error signal input to the
P-I filter and holds the integrator output voltage at its current value. Table 4
shows logic levels for this input. Since this input is pulled low, the BNC can
be left unconnected for normal operation.
Table 4: Logic Levels for Int Hold Input
TTL Logic Level Function
Low (<0.8 V) Normal P-I filter operation.
High (>2.4 V) No error input to filter. Integrator holds its current voltage value.

LB1005 Operating Manual Getting Started
Bookham Revision 1 7
Chapter 2: Getting Started
This chapter explains the typical setup and operation of the LB1005 Servo
Controller. This chapter should help less experienced users rapidly adapt the
LB1005 to their specific servo application. Keep in mind that while the LB1005
has a flexible architecture that lends itself well to many feedback control
applications, not all types of operation can be adequately addressed in this
manual. The following are general guidelines for operating the LB1005, and
some deviation from these procedures may be required to meet specific
application needs. Demanding applications will require familiarity with
feedback control theory and good characterization of all system components.
The primary function of the LB1005 is to condition an input signal from a
detector and to provide an output signal to a transducer that controls a system
parameter. The output control signal forces the system parameter to a desired
value regardless of external disturbances, such as thermal fluctuations or
mechanical noise, which invariably affect the system. The difference between the
desired value and the actual value of the controlled parameter is typically called
the error signal. For instance, the parameter to be controlled might be the
intensity of a diode laser that has its optical output detected by a photodiode.
The LB1005 generates an error signal from the photodiode signal and then filters
this error signal to provide a control signal that changes the injection current to
the diode laser such that a stable optical power is maintained.
Typical Setup
The LB1005 is designed to easily integrate with other instruments and devices.
This section describes the various electrical signal connections that might be
made to and from the LB1005. Some typical signal connections between
common instruments are shown in Figure 3. Pay careful attention not to exceed
any damage thresholds when making connections between instruments.
NOTE: Before powering the LB1005, make sure that the fuse and voltage settings
are correct for your region’s wallplug electrical power (see the Electrical Fuse &
Voltage Selection section of Chapter 1.)
1. Detector output to LB1005 A& –B inputs: To provide feedback, the
parameter to be stabilized must first be detected. For example, a simple
photodiode might suffice for detecting optical intensity. For instances where
the laser wavelength is stabilized, spectrometers based on atomic/molecular
or interferometer resonances are needed to detect optical wavelength shifts.
The common characteristic of all detectors is that they produce a nonzero
slope that is locally monotonic around the desired lock point.

Getting Started LB1005 Operating Manual
8 Revision 1 Bookham
The input section of the LB1005 is a high-impedance, differential amplifier
stage that offers flexibility in interfacing to many types of detector outputs.
The Aand -B inputs can be used together with differential signals to remove
common-mode noise and systematics. Single-ended signals can also be
connected, as shown by connection 1a, by simply leaving the unused channel
unconnected, or, as depicted by connection 1b, by attaching a stable voltage
source that generates an external setpoint voltage. Alternatively, the Input
Offset knob can provide DC offset to the detector signals. To invert either
differential or single-ended signals, reverse the A& -B connections.
Figure 3: Typical signal connections for LB1005
2. LB1005 Output to transducer input: To close the feedback loop, an
electrically tuned transducer is necessary for varying the controlled
parameter. For example, a piezoelectric transducer (PZT) to which a cavity
mirror is mounted can tune the wavelength of a laser. Typically, the output
of the LB1005 does not interface with the transducer directly but instead
provides the input to an amplifier system that conditions the control signal to
properly drive the transducer. For the PZT discussed above, the control
signal from the LB1005 Output will usually feed a high-voltage amplifier that
connects to the PZT. Be careful not to exceed any input voltage limits of the
transducer. If necessary, the Output voltage of the LB1005 can be limited by

LB1005 Operating Manual Getting Started
Bookham Revision 1 9
setting the Output Voltage Limit trimpots located on the rear panel. See
section Setting Output Voltage Limits in Chapter 3 for more details.
3. LB1005 Error Monitor output to oscilloscope: The Error Monitor allows the
user to view the actual error signal that is being processed by the P-I filter.
Since integral feedback forces the error signal to zero voltage, the parameter
that is being controlled will assume whatever value corresponds to zero error
(equal to zero volts). Observing the Error Monitor enables the user to adjust
offsets so that the locking point corresponds to the desired value of the
controlled parameter. The error signal is also an excellent diagnostic for
monitoring the lock condition and optimizing the feedback gain. Because the
time domain behavior of the error signal is so important to understanding the
feedback control, viewing the Error Monitor output on an oscilloscope is
highly recommended.
4. Function generator output to LB1005 Sweep In: For detector signals that are
derived from optical resonances, it is convenient to sweep the transducer so
that the optical frequency scans over the resonance. Observing the resonance
on an oscilloscope often makes it easier to offset the error signal so that the
locking point (at zero volts) aligns with the desired optical frequency (see
Figure 4 below for an example). Furthermore, sweeping the transducer helps
to locate the resonance and place the optical frequency within the locking
range of the servo system. To add sweep capability, connect a low-frequency
(30—60 Hz is usually sufficient) triangle waveform from a function generator
to the Sweep In connector, as shown by connection 4a. The sweep signal will
then be output to the transducer, with its amplitude controlled by the Sweep
Span knob. To synchronize the sweep with the Error Monitor signal, also
connect the function generator output to the oscilloscope’s timebase trigger,
shown by connection 4b.
Figure 4: Typical oscilloscope signals are shown for locking to the side of an optical
resonance. The dashed horizontal lines indicate ground for denoted signals. a) A triangle

Getting Started LB1005 Operating Manual
10 Revision 1 Bookham
waveform from a function generator sweeps the optical frequency transducer over multiple
resonances. A photodetector measures the corresponding transmission response. b) The
Sweep Span reduces the frequency sweep so that only one resonance is shown on the Error
Monitor signal. The Sweep Center tunes the frequency to locate a particular resonance, and
“center” the lock point prior to applying the feedback. The Input Offset locates the lock
point on the slope of the resonance. Note that the two lock points have opposite gain signs.
Typical Operation
The controls of the LB1005 are conveniently arranged for acquiring and
optimizing lock. In this section, five steps are suggested that will meet the needs
of most applications. Figure 5 shows the controls that are most likely to be
adjusted for each step. The solid lines indicate controls that are used most often,
while the dashed lines show controls that are less frequently adjusted.
1. Reset integrator: Before locking, reset the integrator by moving the Acquire
switch to the Lock Off position.
2. Find the locking point: Many applications will require the user to search for
the locking point, such as the side or center of an optical resonance. Turn on
sweeping by clicking the Sweep Span knob from its Off position, adjusting it
for a wide span. Use the Sweep Center knob to adjust the transducer bias so
that the lock feature is “centered” within the scan. If needed, the desired lock
point can be adjusted to zero voltage with the Input Offset knob while
monitoring the error signal. Adjust both the Sweep Center and Sweep Span
controls so that the oscilloscope scan shows the discriminator slope of the
lock feature. Figure 4 illustrates these concepts for a “side lock” to a
resonance.
3. Acquire lock: The Acquire toggle switch offers two gain settings for turning
on the feedback control. When acquiring lock, sometimes it is helpful to limit
the DC gain of the integrator. The LFGL position is an intermediate lock
mode that applies the P-I filter with a low frequency gain limit (see section
Filter Transfer Functions of Chapter 3 for details). The LF Gain Limit front
panel switch determines the setting for this gain limit, and is typically only
set once for a specific servo application.

LB1005 Operating Manual Getting Started
Bookham Revision 1 11
Figure 5: Typical Operation of Controls
The Lock On position disables the low-frequency gain limit and applies the
full integrator gain to the output. Most servo systems should be locked in
this position to minimize DC errors. When correctly locked, the Error Monitor
signal should be very near zero volts, and the LED indicator light should be
green (see Figure 6 for more details.)
4. Turn off sweep: If the output was swept to find the lock point, then it is
good practice to turn the Sweep Span knob to Off after acquiring lock. This
completely disables the sweep signal, and prevents the feedback from
working “overtime” to correct the error induced by the sweep signal.
5. Adjust filter: The P-I Corner frequency can be tuned for optimal
performance and stability. Once optimized, it rarely needs to be revisited.
However, re-tuning the Gain knob is done fairly often to find the maximum
gain setting. A common procedure is to increase the gain until an oscillation
is observed on the Error Monitor, and then reduce the gain until the oscillation
just barely stops.

Getting Started LB1005 Operating Manual
12 Revision 1 Bookham
Maximum Output Voltage (+10 V)
Minimum Output Voltage (-10 V)
Positive Voltage Limit V+
Negative Voltage Limit V-
Full Voltage Range
∆VR= V+- V-
V+- 0.1 ∆VR
V-+ 0.1 ∆VR
Ground (0 V)
Output Signal
Ground (0 V)
Maximum Input Voltage (+10 V)
Minimum Input Voltage (-10 V)
Positive Saturation Voltage (0.33 V)
Negative Saturation Voltage (-0.33 V)
Error Monitor
Figure 6: Voltage limits for the LED Lock Indicator. This LED indicator monitors
when the Error signal exceeds the input saturation voltage range or when the
Output signal is nearing an output rail. The LED lights green (“Locked”) when the
Acquire switch is in either the Lock On or LFGL position, and both the Error and
Output signal voltages fall within the shaded areas above. For all the other
conditions (“Unlocked”), the LED lights red. These conditions are good indicators
when the feedback control is (or is close to) misbehaving.

LB1005 Operating Manual Detailed Operation
Bookham Revision 1 13
Chapter 3 : Detailed Operation
Signal Architecture
The LB1005 is comprised of three stages of analog signal processing. Figure 7
shows the different sections and how the various input signals are used to derive
the output signal. Each section is briefly described below. See Appendix A for
more detailed specifications.
Proportional-
Integral (PI) Filter
Acquire
Gain (K)
P-I Corner (fPI)
LF Gain Limit
Int Hold
LED Aux
Output
VControl =VError K2
π
fPI
s1+s
2
π
fPI
⎛
⎝
⎜
⎞
⎠
⎟
2. Filter Section
V
Contro
l
Difference
Amplifier
A
Error
Monitor
-B
Offset Adjust (±10V)
1. Input Section
V
Error =
V
A−
V
−B+
V
Offset
V
A
V
Offset
V
−
B
V
E
rro
r
Summing
Amplifier
Output
Sweep Center
+ Voltage Limit
- Voltage Limit
V
Cente
r
V
M
od 2
V
Output
V
Output
=
V
Control
+
V
Center +
α
Span
V
Sweep +
α
Mod1
V
Mod1
+
α
Mod 2
V
Mod 2
3. Output Section
V
Sweep
Sweep In Sweep Span
α
Span
V
M
od1
Mod 1
α
M
od1
α
M
od 2
Mod 2
+
+
+
+
+
Figure 7: Schematic of LB1005 Signal Architecture
1. Input Section: The input section is a difference amplifier with an adjustable
voltage offset. Common-mode voltages ranging from ±10V can be
subtracted. Error signals (observed at the Error Monitor) that exceed the
voltage range ±330 mV saturate the filter amplifier.
2. Filter Section: This section converts the error signal to a control signal with a
proportional-integral (P-I) filter. Front panel controls adjust the overall loop
gain, the P-I corner frequency, and an optional low-frequency gain limit. A
toggle switch is used to disable/enable the output of the P-I filter for
acquiring lock. See the next section for more details about the transfer
functions available from this filter. An optional TTL input can be used to
disable the error signal input and hold the P-I filter output at its current
value.
3. Output Section: The output section is a summing amplifier that adds the P-I
control signal to other auxiliary signals, such as external sweep and
modulation inputs. The output voltage range of this section can be limited by
rear panel trimpot adjustments.

Detailed Operation LB1005 Operating Manual
14 Revision 1 Bookham
Filter Transfer Functions
This section describes the transfer functions available from the P-I filter, which
are shown in Figure 8. The filter is specifically designed to have independent
control over the three main parameters that shape the filter frequency response:
•P-I Corner (fPI): This is the 3-dB break frequency beyond which proportional
gain dominates over integral gain. For the switch setting Int, the filter
becomes a true integrator with no proportional gain term. In this case, the
integral gain matches that of the 3 kHz P-I Corner setting.
•Gain (K): This is the amount of proportional gain. The gain can be adjusted
continuously on a log scale. Changing this gain does not alter any of the
corner frequencies of the filter.
•LF Gain Limit (g): This is the gain limit for low frequencies, as measured
from the proportional gain value. The integrator is turned off for frequencies
lower than the following 3-dB corner frequency: fLFGL =f
PI
×10−g(dB )/20dB
[]
. For
the switch setting Prop, the integral gain is completely turned off (g = 0), and
the filter operates only in proportional mode.
f
G(f)
-20 dB/decade
φ
(f)
0°
-90°
90°
Integral gain Proportional gain
“90dB”
“80dB”
Ð
“Prop.”
LF Gain Limit ( g)
P-I Corner (fPI)Gain (K)
f
PI
f
L
FGL
Lock On
LFGL
0 dB
VControl s
()=VError s
()K
d1+s
2
π
fPI
⎛
⎝
⎜ ⎞
⎠
⎟ ,d=s/2
π
fPI LockOn
1+gs
2
π
fPI
()
/g LFGL
⎧
⎨
⎩
Figure 8: Proportional-integral Filter Gain with Low Frequency Gain Limit

LB1005 Operating Manual Detailed Operation
Bookham Revision 1 15
The design of the P-I filter minimizes transient behaviors when switching
between corner values. Under most circumstances, switching corner frequencies
can be performed without losing lock, which aids in searching for optimal
operation. However, the gain change when switching in and out of Int mode is
fairly large, and re-locking will typically be necessary to use the integrator-only
mode.
The Acquire toggle switch controls the output of the filter section:
•Lock Off:The integrator is reset. The control voltage is zero.
•LFGL:The P-I filter output is enabled, but the low frequency gain is limited
according to the LF Gain Limit switch. This mode is useful for acquiring lock
and situations where limiting the DC gain is necessary.
•Lock On:The integrator of the P-I filter is fully enabled. The LF Gain Limit
is disabled.
The LB1005 operating bandwidth refers to the frequency where the proportional
gain falls off by 3 dB. The filter functions specified in Figure 8 are guaranteed to
the minimum specified bandwidth of 10 MHz. Behavior of the filter response
beyond this frequency is unspecified.
Setting Output Voltage Limits
The positive and negative voltage limits of the LB1005 Output can be
independently adjusted with the Output Voltage Limit trimpots located on the
rear panel. The following procedure can be used to set the output voltage limits:
1. To set the positive (negative) limit, turn the Sweep Center (Output
Offset) knob fully clockwise (counter-clockwise). The Output signal
should now be at the positive (negative) voltage limit.
2. Monitoring the Output voltage on an oscilloscope or voltmeter, turn the
+(-) trimpot on the rear panel until the desired positive (negative)
output limit voltage is reached. Clockwise adjustment of these trimpots
results in a more positive voltage.
When adjusting both output voltage limits, specified operation only occurs if the
voltage difference between the negative and positive limits is greater than 2 V.
Unspecified behavior occurs if this condition is violated.
The total 10-turn range of the Sweep Center knob is automatically adjusted to
correspond to the full output voltage range as determined by the positive and
negative output voltage limits.
Warning: Carefully measure output voltages from the LB1005 before connecting to a
device that can be damaged by overvoltage.

Detailed Operation LB1005 Operating Manual
16 Revision 1 Bookham
Using the Integrator Hold
The LB1005 has a feature that allows the user to electronically trigger the
integrator output to “hold” its current value. When a TTL digital “high” signal is
applied to the rear panel Int Hold BNC connector, the error signal input to the
filter stage integrator is disabled until the TTL signal goes to a “low” state. (The
Int Hold BNC can remain unconnected for normal operation.) This feature is
useful for dealing with exceptional perturbations to the controls system that
would force it to misbehave, such as coming permanently unlocked.
One possible application of the Int Hold function uses a digital signal that toggles
to its high state when the error signal exceeds some maximum allowable
excursion limit. For example, if certain operating regions of the error signal
result in indeterminate behavior of the controls system (such as railing the
integrator), more reliable operation can be obtained if the feedback is temporarily
switched off during the time that the error signal is in these regions. When a
disturbance causes the error to exceed a specified limit, the Int Hold is toggled
high to disable the feedback and hold the integrator output (control signal) at its
current value. The (uncontrolled) output is now prevented from following the
large error perturbation that would otherwise have driven the control system
into an unrecoverable state. Instead, the control voltage is maintained at a safe,
fixed value until the disturbance recedes. When the disturbance passes and the
error signal returns to its normal operating window, the digital signal to Int Hold
reverts to its low state and feedback control resumes.
Applying Modulation Inputs
The LB1005 has two external modulation inputs that are independently available
for such applications as adding a modulation frequency to the output for lock-in
detection or summing in a feedforward correction signal for improving the
command response of the feedback control. The signals applied to these inputs
are summed with the sweep and control signals to form the output signal. Rear
panel trimpots located near each of the modulation BNC connectors provide
adjustable attenuation of these signals. Turn fully clockwise for unity gain and
fully counter-clockwise to turn off the modulation. When a modulation input is
not in use, its attenuation trimpot should be turned fully counter-clockwise to
prevent unwanted “pick-up” from the other modulation channel.
Table of contents
Other New Focus Controllers manuals
Popular Controllers manuals by other brands
Texas Instruments
Texas Instruments Stellaris MDL-BDC24 Getting started guide
Disaster Area Designs
Disaster Area Designs DMC.micro PRO manual
Micropelt
Micropelt EnOcean MVA003E User manual and device specification
Abelko
Abelko IMSE WebMaster Pro user guide
sisel
sisel ENDA ET1413R quick start guide
SKYDANCE
SKYDANCE V1 quick start guide
