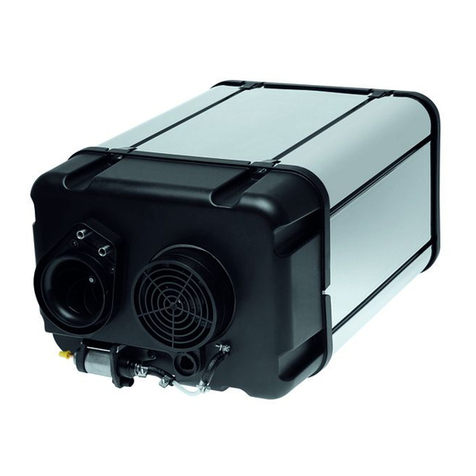
Newmac NMRK-1 User manual

PORTABLE RADIANT HEATER
MODEL NMRK-1
Important Guidelines
Please read and save these instructions. Read carefully before attempting to assemble, install, operate or
maintain the product described. Protect yourself and others by observing all safety information. Failure to
comply with instructions could result in personal injury and/or property damage! Retain instructions for future
reference. Should you need further information contact the manufacturer.
Danger Warning
If the information in this manual is not followed exactly, a re or explosion may result causing property
damage, personal injury or loss of life.
U. S. Residents
The installation of the equipment shall be in accordance with the regulation of authorities having jurisdiction
and NFPA 31.
852962C-3304H
PRO
NEWMAC
NEWMAC
227 Industrial Park Road
South Pittsburg, TN 37380
(800) 750-2723
CALIFORNIA PROPOSITION 65 WARNING:
This product can expose you to chemicals including carbon monoxide, which
is known to the State of California to cause cancer, birth defects and/or other
reproductive harm. For more information, go to www.P65warnings.ca.gov
Ce produit peut vous exposer à des produits chimiques, y compris le
monoxyde de carbone, qui est connu dans l'État de Californie pour causer
le cancer, des malformations congénitales et / ou d'autres problèmes de
reproduction. Pour plus d'informations, visitez www.P65warnings.ca.gov

-2-
Warning:
Keep a safety distance from all combustibles
materials in accordance with the guidelines of
this manual. Improper use of this unit may result
in re, poisonous gas, and explosion. Do not use
in a place where there are gasoline, solvent,
paint thinner, dust, or other ammable objects or
dangerous chemicals substances are stored. Warning:
Use this heater only in well ventilated areas. When
using this unit in a location where ventilating
equipment is not prepared separately, ventilation
is required for proper combustion and exhaustion.
Refer to the ventilating section of this manual.
Warning:
This unit is not intended for the use inside of a
residential home or RV vehicle. Improper use of
this heater can result in serious injury or death
from burns, re, explosion, electrical shock, and/
or carbon monoxide poisoning.
WARNING:
Before using this heater, please read the
operating instruction very carefully. This user’s
manual has been designed to instruct you as
to the proper manner in which to assemble,
maintain, store, and most importantly, operate
this unit in a safe and efcient manner.
Attention:
Always unplug the heater when not in use. Do
not leave this unit unattended while burning.
Voltage/Hz/amps 1201/60/10
Power Consumption 95W
BTU/hr., kW/hr. Max 60,000 (Max 17Kw)
Fuel Tank Capacity 3.2 gal (12liter)
Fuel Consumption 0.42 gal/hr (1.6 l/h)
Heating Area 968ft² (90m²)
Max. Heating Time 7.5 hr
Type Of Fuel Oil Kerosene
Max. Outlet Temp 950°F (510°C)
Overheat Safety OKAY
Dimension (L x W x H) 21.7” x 12.2” x 21.3”
Weight 30.4 lbs (13.8Kg)

-3-
Safety Information
CARBON MONOXIDE POISONING
This heater is a direct burning type heater that burns the kerosene/light oil then heat. This product is primarily
intended for temporary heating of well ventilated buildings under construction, alteration, or repair. Direct
heating type means that every substance burned at heater enter into the inside of the heating space directly.
Some carbon monoxide is generated from this product whose combustion rate is 98%. Ordinary person can
endure a little bit of carbon monoxide however, preventative measures should be taken with proper ventilation.
Improper ventilation not in compliance with this manual could lead to death. Use this heater only in well ventilated
areas. Early signs of carbon monoxide poisoning resemble u-like symptoms such as headaches, dizziness, and/
or nausea. Some people are more affected by carbon monoxide than others. These include pregnant women,
those with heart or lung problems, anemia, or those under the inuence of alcohol, or at high altitudes. Never use
this heater in living or sleeping areas.
Comply with the following without fail:
• Check the unit for shipping damage. If the unit is damaged, promptly inform dealer where you purchased
heater. Do not use a damaged unit.
• Do not alter this product. Do not use this product if it has been altered.
• Use only kerosene or light oil fuel. In the case of light oil, movement may not be smooth in a specic
environment.
• Do not use fuel such as gasoline, benzene, alcohol, white gas, camp stove fuel, paint thinners, or other
explosive fuels in this heater (THESE ARE VOLATILE FUELS THAT CAN CAUSE A FIRE OR EXPLOSION).
• Primarily for use outdoors, if used indoors insure adequate ventilation.
• Open space of min. 1m² per 23,000Kcal is required. Refer to the ventilation section of this manual.
• Do not use at a residential street.
• Do not use in a place where the product is exposed to water, rain, or sprayed liquid.
• Do not use where ammables such as gasoline, paint thinner, or volatile vapors/liquids are stored.
• Keep all combustible materials away from this heater.
MINIMUM CLEARANCES
Front/Ceiling: 5ft, Sides/Rear: 3.12ft
• Use only on a stable and level surface.
• Do not block air inlet (rear) or air outlet (front) of heater. Do not use duct work in front or at rear of this unit.
• Keep out of reach of children and animals.
• Do not move or handle heater while still hot.
• Do not transport heater with fuel in its tank.
COOLING AND VENTILATING PROCESS
This unit needs plenty of air (oxygen) to burn the fuel in the combustion chamber. To achieve a good combustion,
proper ventilation is necessary. If there is to much air from the ventilation system a blue ame will be generated
and ignition could fail. If there is poor ventilation a yellow ame will be generated. Poor ventilation will cause a
lot of smoking and smell. To prevent overheating if the air gets to hot while in use a cooling fan will be activated
along with a ventilating fan.
ELECTRIC CIRCUIT PROTECTION
This heater’s electrical system is protected by a fuse mounted to the PCB Assembly that protects it and other
electrical components from damage. If your heater fails to operate, check this fuse rst and replace as needed.
Refer to specication chart.
FLAME DETECTOR
This unit utilizes a photocell to monitor the ame in the burn chamber during normal operation. Should the burner
ame extinguish, it will cause the heater to shut off.
OVERHEATING PROTECTION SENSOR
This unit is equipped with a heat sensor designed to detect overheating during normal operation. If the
temperature of the heater goes over 176 °F to 194 °F the sensor will activate and cause the combustion chamber
to stop.
SETTING TEMPERATURE CONTROL FUNCTION
Use the temperature control knob to set the desired temperature. The unit will activate when the room
temperature is lower than the temperature shown in the display window.

-4-
Unpacking
Guard Assembly (For Canada Only)
Open the carton and remove all items. Check all of the items for shipping damage. If anything is damaged,
promptly inform the dealer where you purchased the unit.
NOTE: Do not throw away the box or other packing material, save for storage purposes.
Guard
Guard
Guard - S
Guard - U
Shell
Shell
Guard support
Interception
Guard Guard
Guard - S
Guard - U
Shell
Shell
Guard support
Interception
Guard
Guard
Guard - S
Guard - U
Shell
Shell
Guard support
Interception
Guard Guard
Guard - S
Guard - U
Shell
Shell
Guard support
Interception
Step 1 Step 2
Step 3 Step 4

-5-
Electrical Diagram

-6-
Using Fuel
For optimal performance of this heater it is strongly suggested that 1-K kerosene be used. 1-K kerosene has
been rened to virtually eliminate contaminants, such as sulfur, which can cause a rotten egg odor during the
operation of the heater. Light oil can be use however kerosene is recommended. Bulk fuel storage should be a
minimum of 25 ft. from heaters, torches, portable generators, or other sources of ignition. All fuel storage should
be in accordance with federal, state, or local authorities. Never put the fuel or heater in a location with direct
sunlight. Do not store the unit with fuel inside it. The fuel will go bad and cause the heater to malfunction.
REFUELING
Never ll the fuel tank in the living space, only ll the tank outdoors. Do not overll your heater and be sure the
heater is level. The rst time you light the heater, it should be done outdoors. This allows the oils, etc., used in
manufacturing heater to be burned off outside.
VENTILATION
Minimum 19ft² of fresh air ventilation is required for proper ventilation.
Operating method
1. Fill fuel tank with kerosene or No. 1 fuel oil. The unit is full when the needle of the ow-meter is aimed at “F”.
2. Always close the fuel cap after refueling.
3. Plug in the power supply.
4. Turn thermostat control knob to desired setting and push power switch to “ON” position. Power indicator
lamp will light and heater will start.
SHUTTING DOWN THE HEATER
Once the power supply switch is in the “OFF” position, the combustion will stop. The fan will continue to run for
an additional 3 to 4 minutes to cool the unit.
MAINTENANCE
USE ORIGINAL EQUIPMENT REPLACEMENT PARTS. Use of third party or other alternate components will void
warranty and may cause unsafe operating conditions.
FUEL TANK
Flush every 200 hours of operation or as needed. When cleaning, use gasoline or kerosene NOT water. Allow to
dry completely after cleaning. WARNING: REMOVE ALL GASOLINE BEFORE REFUELING!
FILTER
There are two different injection lters on the pump lter (or oil lter). Clean two times a year or as needed by
rinsing them with kerosene or gasoline.
Warning:
Do not refuel if the unit is overheated. Refueling the overheated unit could result in explosion.
Warning:
The major electrical components of this heater are protected by a safety fuse mounted to the PCB board.
If your heater fails to start, check this fuse rst and replace as necessary. You should also check your power
source to insure that proper voltage and frequency are being supplied to the heater.
Warning:
Unplugging the heater before the cooling fans have stopped may cause damage to the unit.
Warning:
Never service heater while it is plugged in or while hot!
Warning:
Do not leave the heater unattended while in operation.

-7-
FAN BLADES
Clean the fan blades 2 times a year or more as needed. There are
two fans on this unit, the ventilating fan located on the burner and the
cooling fan. Clean each fan blade with a wet cloth. Be careful not to
break or damage the blades. Allow the fan blades to completely dry
before assembling and using them.
NOZZLE
The nozzle should be cleaned or exchanged once a year as
needed. If contaminated fuel has be used, clean or replace the
nozzle immediately. To clean the nozzle, take it out of the burner,
disassemble then soak in kerosene or gasoline.
SPARK PLUG
Clean and regap the spark plug after every 600 hours of use or as
needed. Remove the spark plug from the burner and clean with an
iron brush. Electrode space should maintain the distance of 3.5 to
3.7mm.
PHOTOCELL
Clean photocell annually or as needed. Clean photocell lens with
cotton swab dipped in alcohol.
LONG TERM STORAGE
1. Open the fuel cap and remove the fuel.
2. Clean the inside of the tank with kerosene or gasoline. DO NOT
USE WATER! Water will cause rust.
3. Completely dry the tank.
Never store this unit with fuel in the tank. Long stored fuel causes
damage to this unit. Make sure storage place is free of dust and
corrosive fumes. Store unit in a well ventilated area. Store the heater
in the original box with the original packing material and keep user’s
manual with heater.
Warning:
Do not clean or repair this product while the fan is running or the unit is plugged in.
fan blade fan blade
Photocell

-8-
Troubleshooting
Possible Cause Corrective Action
E0
Power Supply Error
If plugged in while the switch is in the “ON” position. Unplug and turn the switch to “OFF”
position. Plug in and turn switch to “ON”
E1
Photocell (Flame Sensor) Error
Oil Shortage
Bad Photocell (Flame Sensor)
Incomplete Combustion
Contamination of Fuel Filter
Ignition Failure"
Check the fuel tank (Fill the fuel if needed)
Check and clean or replace Photocell
Using Designated Fuel
Clean or replace Fuel Filter
Check Wire Connection
Check Spark Plug For Normal Firing (clean
or replace if needed)
E2
Temperature sensor (Thermistor) Error
Bad Connection or mis-operation of Sensor Check Wire Connection
Replace Sensor"
E3
Anti-overheating Sensor (Thermostat) Error / Tip-over Switch Error
Unusual internal overheating
Product inclined or overturned
Restart After Cooling
Restart on at surface
LO Below 1 °F Normal
HI Over 99 °F Normal
OH It stops when the temperature reaches to 140 °F Restart After Cooling
CN Continuously operating without set-temperature Normal
Blinking Error during operation Check Error Code
Re-operating after reset

-9-
Key Part N° Description
1 892832 Fuel Gauge Assembly
2 81282 Fuel Hose
3 81283 *Fuel Filter
4 80733 Cooling Motor
5 892833 Cooling Fan Assembly
6 892821 Insulator
7 81284 *Nozzle
8 81285 Spark Plug
9 80734 *P.C.B
10 80736 Blower Assembly
11 83765 Electronic Pump
12 80738 Tip Over Switch
13 80739 Ignitor
14 81286 *Thermostor
15 80740 Thermostat
16 88270 Burner Gasket
17 80741 *Sub P.C.B
18 892846 Guard, Canada (not shown)
* Slightly changed or omitted
Repair Parts
In order to maintain warranty, components must be replaced
using original manufacturers parts purchased through your dealer
or directly from the appliance manufacturer. Use of third party
components will void the warranty.
11
12
14 13
10
17
1
4
5
6
7
8
2
9
15
16
3

-10-
LIMITEDWARRANTY
UnitedStatesStoveCompanywarrantsthisproduct,totheoriginalretailpurchaseronly,tobefreefrom
defectsinmaterialandworkmanshipforaperiodofone(1)yearfromthedateoftheinitialpurchaseas
evidencedonaninvoice,cancelledcheck,salesreceipt,etc.Intheeventofadefect,thisLimited
Warrantyshallbelimitedtotherepairorreplacementofparts,whichprovedefectiveundernormaluse
andservicewithinthelimitedwarrantyperiod,andwhichUnitedStatesStoveCompanydeemsatits
reasonablediscretion.THELIMITEDWARRANTYSETFORTHHEREINISTHESOLEWARRANTY
PROVIDEDTOPURCHASERANDISINLIEUOFALLOTHERWARRANTIESANDREPRESENTATIONS,
EXPRESSORIMPLIED.UNITEDSTATESSTOVECOMPANYMAKESNOREPRESENTATIONSOR
WARRANTIESWHATSOEVER,EXPRESSORIMPLIED,WITHRESPECTTOTHEPRODUCT,OTHERTHAN(i)
THELIMITEDWARRANTYABOVE,AND(ii)ANYIMPLIEDWARRANTIESIMPOSEDBYAPPLICABLELAW
WHICHCANNOTBEWAIVEDORDISCLAIMEDUNDERAPPLICABLELAW.ALLOTHERWARRANTIESOF
ANYKIND,INCLUDINGWITHOUTLIMITATIONIMPLIEDWARRANTIESOFMERCHANTABILITYAND
FITNESSFORAPARTICULARPURPOSE,AREHEREBYDISCLAIMEDANDEXCLUDEDTOTHEFULLEST
EXTENTNOTPROHIBITEDBYAPPLICABLELAW.ThisLimitedWarrantygivesthepurchaserspecificlegal
rights;apurchasermayhaveotherrightsdependinguponwhereheorsheresides.Somestatesdonot
allowtheexclusionorlimitationofspecial,incidentalorconsequentialdamages,orstatelawmayaffect
thedurationoflimitations,sotheaboveexclusionandlimitationsmaynotbeapplicable.
OTHERLIMITATIONS:UnitedStatesStoveCompanydisclaimsallotherwarrantiesforproductsthatare
purchasedfromsellersotherthanauthorizedretailersordistributors.Thisproductmustbeproperly
installed,maintainedandoperatedinaccordancewiththeinstructionsprovidedherein.Furthermore,
UnitedStatesStoveCompanyrequiresreasonableproofofthedateofpurchasefromanauthorized
retailerordistributor.ThisLimitedWarrantydoesnotcoveranyoperationalfailuresordifficultiesdue
tonormaluseandwearandtear,accident,abuse,misuse,alteration,misapplication,improper
installationorimpropermaintenanceorservicebyyouoranythirdparty.Failuretoperformnormaland
routinemaintenanceontheproduct,shippingdamage,damagerelatedtoanimals,anddamagedueto
weatherarenotcoveredunderthisLimitedWarranty.Inaddition,thisLimitedWarrantydoesnotcover
damagetothefinishontheproduct,suchasscratches,dents,discoloration,rustorotherweather
damage.Thiswarrantydoesnotapplytoproductspurchasedforrentaluse.UnitedStatesStove
Companyassumesnoresponsibilityforanydefectscausedbythirdparties.UnitedStatesStove
Companydoesnotauthorizeanypersonorcompanytoassumeforitanyotherobligationorliabilityin
connectionwiththesale,installation,use,removal,return,orreplacementofitsproducts,andnosuch
representationsarebindingonUnitedStatesStoveCompany.
CLAIMPROCEDURE:Alltransportationcostsforthereturnofthedamagedproductorpartswillbethe
responsibilityofthepurchaser.Uponreceiptoftheproduct,UnitedStatesStoveCompanywillexamine
itanddetermineiftheproductcontainsadefect.UnitedStatesStoveCompanywillrepairorreplace
andreturntheitem,freightpre‐paid.IfUnitedStatesStoveCompanyfindstheitemtobeinnormal
operatingcondition,ornotdefective,theitemwillbereturnedfreightcollect.Purchasershallspecify
themodelnumber(s)andserialnumber(s)ofanyproduct(s)whenmakinganyclaimswithUnitedStates
StoveCompany.Pleaseusethefollowingtoidentifyyourproduct:
Model#:____________________
Serial#:_____________________

Notes

Notes

Notes

-11-
GARANTIE LIMITÉE
L’entreprise United States Stove Company garantit ce produit, seulement à l'acheteur commercial original,
d’être sans défaut matériel ou manutentionnaire pour une période d’un (1) an, à partir de la date d’achat
initiale, tel que convenu sur la facture, sur le chèque annulé sur le reçu de l’achat, etc. En cas de défaut, cette
garantie limitée est limitée à la réparation ou au remplacement des pièces qui se prouvées défectueuses selon
l’usage normal et le service normal, convenu à l’intérieur de la garantie limitée, et qui est jugé convenable à
la discrétion de l’United States Stove Company. LA GARANTIE LIMITÉE DÉNOTÉE CI-JOINT EST LA SEULE GARANTIE
FOURNIE À L'ACHETEUR ET EST EN LIEU DE TOUT AUTRE GARANTIE OU REPRÉSENTATION, EXPRESSE OU IMPLICITE.
L’UNITED STATES STOVE COMPANY NE FAIT AUCUNE REPRÉSENTATION OU GARANTIE QUE CE SOIT, QU’ELLE SOIT
IMPLICITE OU EXPRESSE, EN RESPECT AU PRODUIT, AUTRE QUE (i) LA GARANTIE LIMITÉE MENTIONNÉE CI-DESSUS, ET
(ii) TOUTE GARANTIE IMPLICITE IMPOSÉE PAR LA LOI APPLICATION QUI NE PEUT ÊTRE ANNULÉE OU DÉCLINÉES SELON
LA LOI APPLICABLE. TOUTE AUTRE GARANTIE, DE TOUT GENRE, INCLUANT MAIS SANS S’Y LIMITER AUX GARANTIES
IMPLICITES DE QUALITÉ MARCHANDE OU D’APTITUDE POUR UN BUT PARTICULIER, SONT DONC DÉCLINÉES ET
EXCLUSES AU PLUS HAUT POINT SELON LA LOI APPLICABLE. Cette garantie limitée donne à l'acheteur des droits
légaux spécifiques; un acheteur pourrait avoir des droits différents selon son lieu de résidence. Certains états
ne permettent pas l'exclusion ou la limitation de dommages spécifiques, accessoires ou consécutifs, ou des lois
d’état qui peuvent affecter la durée des limitations; l’exclusion et les limitations précédentes pourraient ne pas
s’appliquer.
AUTRES LIMITATIONS: L’United States Stove Company décline toutes autres garanties pour les produits qui sont
achetés auprès d’autres vendeurs que ceux autorisés. Ce produit doit être proprement installé, entretenu et
doit fonctionner selon les instructions ci-jointes. De plus, l’United States Stove Company requiert une preuve
raisonnable de la date d'achat effectuée auprès du fournisseur ou du distributeur autorisé. Cette garantie limitée
ne couvre pas les échecs ou les difficultés opérationnelles dus à un usage régulier et à l’usure, aux accidents, aux
abus, à l’abus, aux altérations, à l’installation ou à l’entretien incorrects effectués par vous ou par une troisième
partie. Un échec d’effectuer l’entretien normal et routinier de ce produit, les dommages d’expédition, les
dommages effectués par des animaux, et ceux faits par les événements météorologiques ne sont pas couverts
dans cette garantie limitée. Également, cette garantie limitée ne couvre pas le dommage fait au fini de ce
produit, comme les égratignures, les bosses, la discoloration du produit, la rouille ou tout autres dommages faits
par les événements météorologiques. Cette garantie ne s’applique pas aux produits achetés pour la location.
L’United Stated Stove Company n’assume aucune responsabilité envers les défauts effectués par des troisièmes
parties. L’United States Stove Company n’autorise aucune personne ou aucune entreprise d’assumer pour elle-
même toute obligation ou toute forme de responsabilité pour la vente, l’installation, l’utilisateur, l’enlèvement, le
retour ou le remplacement de ses produits, et aucune de ces représentations ne permette de lier l’United States
Stove Company.
PROCÉDURE DE RÉCLAMATION: Tous les coûts de transport pour le retour d’un produit ou de pièces endommagés
seront de la responsabilité de l'acheteur. Au moment de la réception du produit, l’United States Stove Company
examinera et déterminera si le produit est défectueux ou non. L’United States Stove Company réparera ou
remplacement et retournera le produit, par transport prépayé. Si United States Stove Company trouve que le
produit fonctionne selon les normes de fonctionnement normales, et qu’il n'est pas défectueux, le produit sera
retourné par port dû. Les acheteurs devront spécifier le numéro du mpdèle et le numéro de série de tout produit
lorsqu’ils feront les réclamations auprès d’United States Stove Company. Veuillez fournir les informations suivantes
afin d’identifier votre produit:
Modèle ____________________
No de série _____________________

-10-
Diagramme de réparation
Référence No. de pièce Description
1 892832 Assemblage De Jauge De Carburant
2 81282 Tuyau De Carburant
3 81283 *Filtre À Carburant
4 80733 Moteur De Refroidissement
5 892833 Ensemble Ventilateur De
Refroidissement
6 892821 Isolant
7 81284 *Ajutage
8 81285 Bougie D'allumage
9 80734 * P.C.B
10 80736 Ensemble souffleur
11 83765 Pompe Électronique
12 80738 Tip Over Switch
13 80739 Ignitor
14 81286 * Thermostor
15 80740 Thermostat
16 88270 Joint De Brûleur
17 80741 * Sub P.C.B
18 892846 Garde, Canada (non représenté)
*Changement omis ou léger
Afin de maintenir cette garantie, les
composantes doivent être remplacées par
des pièces d'origine du fabricant qui ont
été achetées via votre détaillant ou bien
directement chez le fabricant de l'appareil.
L'utilisation de composantes provenant de
tiers annulera la garantie.
11
12
14 13
10
17
1
4
5
6
7
8
2
9
15
16
3

-9-
Dépannage
Cause possible Résolution de problème
E0
Erreur d'alimentation
Si le produit est branché alors que l’interrupteur
est en position « EN MARCHE »
Débranchez-le et mettez l’interrupteur en
position « ARRÊT » Branchez le produit et tournez
l’interrupteur en position « EN MARCHE ».
E1
Erreur de cellule photoélectrique (détecteur de flamme)
Épuisement de pétrole
Mauvaise cellule photoélectrique (Détecteur de
flamme)
Combustion incomplète
Contamination du filtre d'essence
Échec d’allumage
Vérifiez le réservoir de carburant
(remplissez le réservoir au cas où)
Vérifiez, nettoyez ou remplacez la cellule
photoélectrique en utilisant le carburant approprié
Nettoyez ou remplacez le filtre à carburant
Vérifiez la connexion des câbles
Vérifiez la prise d’allumage pour déterminer s’il y a
un allumage approprié (nettoyez-la ou remplacez-
la si nécessaire)
E2
Erreur de détecteur de la température (thermistor)
Mauvaise connexion ou mauvais
fonctionnement du détecteur.
« Vérifiez la connexion des câbles
Remplacez le détecteur »
E3
Erreur de détecteur anti-surchauffe (thermostat)/ Erreur de renversement de l’interrupteur.
Surchauffe interne inhabituelle
Le produit est incliné ou renversé
Redémarrez après le refroidissement
Redémarrez le produit sur une surface plate.
LO Sous 1 °F Normal
HI Au-dessus de 99 °F Normal
OH Le radiateur s'arrête lorsque la température atteint 140 °F Redémarrez après le refroidissement
CN Opération continue sans température préprogrammée. Normal
Clignote Erreur durant le fonctionnement Vérifiez le code d’erreur
Redémarrez après la réinitialisation

-8-
Avertissement:
Ne laissez jamais ce radiateur sans surveillance lorsqu'il
fonctionne!
FILTRE
Il y a deux types de filtres à injection ou de filtres à pompes (ou des
filtres à huile) Nettoyez deux fois par année ou aussi souvent que
nécessaire; rincez avec du kérosène ou du pétrole.
PALE DE VENTILATEUR
Nettoyez les pales du ventilateur deux fois par année, ou aussi
souvent que nécessaire. Ce produit est équipé de deux ventilateurs;
un ventilateur est localisé sur le brûleur et l’autre sur le ventilateur
de refroidissement. Nettoyez chaque pale du ventilateur avec
un tissu mouillé. Soyez prudent: ne brisez pas ou n’abîmez pas les
pales. Séchez les pales du ventilateur complètement avant de les
assembler et de les utiliser.
EMBOUT
L’embout doit être nettoyé ou changé une fois par année,
ou aussi souvent que nécessaire. Si vous avez utilisé du
carburant contaminé, veuillez nettoyer ou remplacer l’embout
immédiatement. Retirez l’embout du brûleur, démontez-le et
trempez-le dans du kérosène ou de l'essence pour le nettoyer.
BOUGIE D’ALLUMAGE
Nettoyez la bougie d’allumage et ajustez-la avec les jauges
d’épaisseur après 600 heures d'utilisation, ou aussi souvent que
nécessaire. Retirez la bougie d’allumage du brûleur et nettoyez-la
avec une brosse d'acier. L’espace entre les électrodes doit être
maintenu entre 3,5 et 3,7 mm.
CELLULE PHOTOÉLECTRIQUE
Nettoyez chaque année ou aussi souvent que nécessaire. Nettoyez
les lentilles de la cellule photoélectrique avec un tampon de coton
trempé dans de l’alcool.
ENTREPOSAGE À LONG TERME.
1. Soulevez le bouchon du carburant et videz-le.
2. Nettoyez l’intérieur du réservoir avec du kérosène ou de
l'essence. N’UTILISEZ PAS DE L’EAU! L'eau créera de la rouille.
3. Séchez le réservoir complètement.
N’entreposez jamais ce produit avec du carburant dans
le réservoir. Du carburant entreposé sur une longue période
endommagera le produit. Assurez-vous que l'espace d’entreposage
n’est pas poussiéreux et ne contient pas de fumées corrosives.
Entreposez le produit dans un endroit bien ventilé. Entreposez le
radiateur dans la boîte originale avec le matériel d’emballage
original; conservez le manuel de l’utilisateur avec le radiateur.
Avertissement:
Ne nettoyez pas ou ne réparez pas ce produit lorsque le
ventilateur est en fonction ou lorsqu’il est branché.
pale de
ventilateur écrou
du ventilateur
Ventilateur de
refroidissement Ventilateur
pale de ventilateur
Protecteur
d’air
Panneau
de contrôle
Prise d’allumage
Tête du brûleur
Embout
Voilure xe
Diuseur
Panneau
de contrôle
Cellule
photoélectrique

-7-
Utiliser le carburant
Pour une performance maximale de ce radiateur, nous suggérons l’utilisation d’un kérosène 1-K. Le kérosène
1-K a été raffiné afin de virtuellement éliminer les contaminants, comme le sulfure, qui peut émettre une
odeur d’œufs pourris durant le fonctionnement du radiateur. De l’huile légère peut être utilisée; le kérosène
est cependant recommandé. Les espaces d’entreposage du carburant doit être à un minimum de 25 pi
de radiateur, de torches, de générateurs portables ou d’autres sources d’allumage. Tout entreposage du
carburant doit être fait selon les exigences des autorités fédérales, des états, ou locales. Ne jamais mettre le
carburant ou le radiateur sous la lumière directe du soleil. Ne jamais entreposer ce produit lorsqu’il contient
encore du carburant. Le carburant pourrait devenir mauvais et pourrait causer le mauvais fonctionnement du
radiateur.
RAVITAILLEMENT
Ne remplissez jamais le réservoir de carburant du radiateur dans un espace habitable: remplissez-le à
l’extérieur. Ne surremplissez pas le radiateur et assurez-vous qu’il soit au niveau. Le premier allumage de votre
radiateur doit être fait à L’EXTÉRIEUR. Ce premier allumage permettrait aux huiles, etc. utilisées durant la
fabrication du radiateur d’être brûlées à l’extérieur.
VENTILATION
Une ventilation d’un minimum de 19 pi2 d’air frais est requis pour une ventilation appropriée.
Méthode de fonctionnement
1. Remplissez le réservoir de carburant avec du kérosène ou de l’huile de carburant à no. 1. Ce produit est
plein lorsque l’indicateur du débitmètre atteint « F ».
2. Toujours refermez le bouchon du réservoir après le ravitaillement.
3. Branchez le câble d’alimentation.
4. Positionnez la poignée du contrôle du thermostat au réglage désiré, et mettez l’interrupteur en position
« EN MARCHE ».
La lampe d’indication de l’alimentation s'allumera et le radiateur commencera.
FERMETURE DU RADIATEUR
Une fois l’interrupteur de l’alimentation est en position « ÉTEINT », la combustion arrêtera. Le ventilateur
continuera de fonctionner entre 3 et 4 minutes afin de refroidir le produit.
ENTRETIEN
UTILISEZ LES PIÈCES DE REMPLACEMENT ORIGINALES. L’utilisation de composantes provenant d’une
troisième partie ou de composantes alternatives annulera la garantie et pourrait causer des conditions de
fonctionnement non sécuritaires.
RÉSERVOIR À CARBURANT
Videz toutes les 200 heures de service, ou aussi souvent que nécessaire. Utilisez du gaz ou du kérosène pour
nettoyer le produit, mais PAS de l’eau. Séchez complètement afin de nettoyer le radiateur. AVERTISSEMENT:
ENLEVEZ LE GAZ AVANT DE RAVITAILLER LE PRODUIT!
Avertissement:
Ne ravitaillez pas le produit lorsqu’il surchauffe. Ravitaillez le produit lorsqu’il est en surchauffe pourrait
provoquer une explosion.
Avertissement:
Les composantes électriques principales de ce radiateur sont protégées par un disjoncteur de sécurité
monté sur le panneau PCB. Vérifiez ce disjoncteur en premier et remplacez-le si nécessaire si le radiateur
refuse d’allumer. Vous devez également vérifier votre source d'alimentation afin de vous assurer que le
voltage et la fréquence sont appropriés pour le radiateur.
Avertissement:
Débrancher le radiateur avant l’arrêt des ventilateurs de refroidissement pourrait endommager le produit.
Avertissement:
N’entretenez jamais le radiateur lorsqu’il est encore branché ou lorsqu’il est chaud!

-6-
Diagramme électrique
FONCTIONNEMENT DE LA LAMPE
RÉGLAGE DU VOLUME DE LA TEMPÉRATURE AFFICHAGE/RÉGLAGE
DE LA TEMPÉRATURE PIÈCE
NOIR/BLANC
NOIR
NOIR
EMBOUT S/W
CÂBLE D'ALIMENTATION 22V CA~240
V
50/60Hz
TERRE VERT/JAUNE
ALIMENTATION
FUSIBLE
5A/220VAC
NOIR
NOIR
MOTEUR
DU
VENTILATEUR
MOTEUR
DE
REFROIDIS-
SEMENT
POMPE
I.C
S.V
(CARBURANT)
NOIR
BOUGIE D'ALLUMAGE
BRUN
BLEU/
JAUNE
FONCTIONNEMENT
S/W
CONTRÔLE PCB PRINCIPAL
AFFICHAGE ET RÉGLAGE P.C.B DE LA
TEMPÉRATURE
BLEU/
JAUNE
NOIR/
BLANC
NOIR/
BLANC
THERMISTOR
THERMOSTAT CELLULE
PHOTOÉLECTRIQUE
BLANC
BLANC
ROUGE
ROUGE

-5-
Déballage
Ouvrez la boîte et enlevez les pièces. Vérifiez le produit pour des dommages causés lors du transport. Si le
produit est endommagé, informez rapidement le fournisseur vous ayant vendu ce produit.
REMARQUE: Ne jetez pas la boîte ou les autres matériaux d’emballage; sauvegardez-les afin d’entreposer le produit
lorsque nécessaire.
Boîte
d’emballage
Manual
Styromousse
Poignée et boulon d'essai
Partie principale
Assemblée de garde (pour le Canada seulement)
La protection
La protection - S
La protection - U
Coquille
Coquille
Support
de garde
La protection
Interception
La protection
La protection - S
La protection - U
Coquille
Coquille
Support
de garde
La protection
Interception
La protection
La protection - S
La protection - U
Coquille
Coquille
Support
de garde
La protection
Interception
La protection
La protection - S
La protection - U
Coquille
Coquille
Support
de garde
La protection
Interception
Étape 1 Étape 2
Étape 3 Étape 4
Table of contents
Other Newmac Heater manuals


