Newton Waterproofing NP400LLPS Quick start guide

2
For more information, visit us online www.newtonwaterproong.co.uk
This is a dual purpose document that is designed to be the reference manual for the installation of the
Pumping System and then should be handed over to the occupier as the user manual and service record.
Panel Serial Number
Date Installed
Installation Company
Installation Engineer
Service Contact Number
WARNINGS
SHOCK HAZARD – DO NOT OPEN
THIS PUMPING SYSTEM PANEL MUST ONLY BE INSTALLED BY TRAINED ENGINEERS.
NO USER SERVICE PARTS INSIDE PANEL - DO NOT OPEN.
THE MAINS POWER INPUT MUST BE ISOLATED BEFORE SERVICE OF PANEL OR PUMPS.
Please keep this Operational Manual with the system Control Panel at all times. The service engineer should
conrm ndings using the service sheet below.
INFORMATION CONTENTS & WARRANTY STATEMENT
Date of service Engineer name Company

Call us for more information on +44 (0)1732 360095
3
PAGE
INTRODUCTION 4
ENCLOSURE 4
PANEL HIGHLIGHTS & CONNECTIONS 5
CONNECTIONS TO GRID MAINS 6
CONNECTION DIAGRAM 7
DISPLAY & CONTROLS 8
PANEL DIMENSIONS
225 mm wide x 145 mm deep x 315 mm high. Weight - 1.58 kg
WARRANTY STATEMENT
Limited Product Warranties. The Control Panel and probe set have a one-year limited product warranty from
date on delivery note or invoice to the customer. Delivery note must include the product code number and serial
number of the product. The pump has a 3-year manufacturers warranty or a 5-year back-to-base warranty if the
pumps are serviced by a Newton approved service engineer.
What is covered by this limited hardware warranty?
This limited warranty covers warranty back to base (Newton Waterproong Systems) only for defects in materials
and workmanship. The manufacturer will exchange the product with a product that is new or which has been
manufactured from new or serviceable used parts and is at least functionally equivalent to the original product.
What is not covered by this limited hardware warranty?
• Products the supplier has not received payment for
• Normal wear and tear
• Problems caused by defective electrical power supply
• Failure to follow product installation instructions and user instructions
• Failure to perform preventive maintenance of the supplied product or the system the product is used within
• Usage that is not in accordance with the product instructions
• Servicing not authorised by the manufacturer
• Problems caused by connecting devices not supplied or authorised by the manufacturer
Warranty Information
This warranty gives you specic legal rights, and you may also have other rights which may vary from area to
area (or jurisdiction to jurisdiction). The manufacturers responsibility for malfunctions and defects in the product
is limited to repair and replacement as set forth in this warranty statement. All expressed and implied warranties
for the product, including but not limited to any implied warranties and conditions of merchantability and tness
for a particular purpose, are limited in time to the term of the limited warranty period reected on your delivery
note or invoice. No warranties, whether expressed or implied, will apply after the limited warranty period has
expired.
We do not accept liability beyond the remedies provided for in this limited product warranty or for
consequential or incidental damages, including without limitation, any liability for third party claims against you,
for damages for products not being available for use. Our liability will be no more than the amount you paid for
the product that is the subject of a claim. This is the maximum amount for which we are responsible. Newton
Waterproong Systems reserve the right to change the product specication at any time.
IMPORTANT - This manual has been produced for the specic use of the Newton NP400LLPS pumping system
and should be the main reference document for the installation and safe use of the panel. Please also familiarise
yourself with the manual included in the packaging, supplied by the manufacturer.
INFORMATION CONTENTS & WARRANTY STATEMENT

4
For more information, visit us online www.newtonwaterproong.co.uk
INTRODUCTION, FEATURES, ENCLOSURE & CONNECTIONS PANEL HIGHLIGHTS & CONNECTIONS
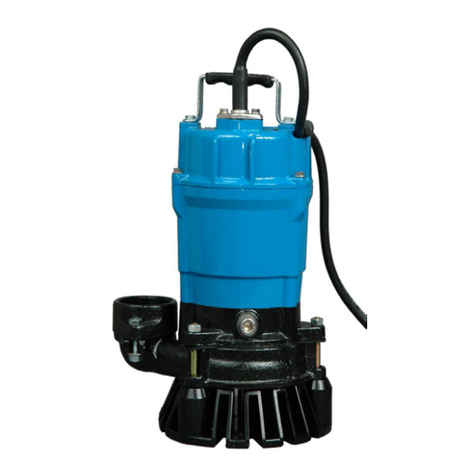
The Newton NP400LLPS pumping system comprises of a Control Panel, Probe Set and a single Newton NP400PP
puddle pump. The panel is simple to install and is enclosed in an IP55 rated casing.
The panel has one power supply input which should be connected to a 230V power supply.
The Newton SP1 Panel features interfaces for use with the optional Newton High Water Level Alarm, the
Newton Dialer, as well as connections to whole house alarm and monitoring systems.
The control panel uses a probe set that monitors the water level and informs the panel of:
• High water level - Pump is started
• Low water level - Pump is stopped
• Alarm level - Panel Alarm sounds
A typical system is shown below:
* There is only one 230 VAC power supply. Connection is either directly from mains AC or from Inverter AC.
ENCLOSURE
The Newton NP400LLPS panel is housed in 225 mm wide x 145 mm deep x 315 mm high ABS plastic enclosure
with 6 knockouts for tting plastic cable glands, ready for the following cables:
Main power, 1 x Probe Set, 1 x pumps and 1 x Dialer or BMS. 2 knockouts will not be used. If optional Alarm is
tted, use one of the two spare knockouts.
Parts:
• 1 x Panel
• 1 x NP400PP Puddle Pump
• 1 x Probe Set
The enclosure is xed to the wall using xings that are suitable for the weight of the unit and your wall type. The
face plate is attached to the back box with the supplied screws. A ribbon cable connects the face plate display to
the main PCB.
Newton
SP1
Panel
Probe
Set Pump Dialer
PA5 - (Option)
BMS
(Option)
Power
Inverter
(Option)*
Grid mains
power supply
230V AC 13A*
Battery
Battery
OPTIONAL
FURTHER
BATTERIES
Alarm
(Option)

Call us for more information on +44 (0)1732 360095
5
PANEL HIGHLIGHTS
• ABS enclosure rated at IP55
• Connection to external sounders or Building Management Systems (BMS)
• Connection to Newton Dialer for warnings received by text or voice message
• Pump motors protected by fuses
• Thermal relay overload protection
• Indicator lights for power, running and thermal trip
CONNECTION NOTES
Ensure that the grid mains connection is not connected until all the connections are complete and the panel face
plate is tted and locked.
The Probe Set has three coloured insulated wires inside the outer insulation – brown, green and white.
The pump has three coloured insulated wires inside the outer insulation: brown - Live, blue - Neutral, and green
& yellow - Earth
Connection to the terminal block of the panel for the Probe Set and the Pump is conrmed on pages 6 & 7.
Over-current trimmer is set by default to 9 A. Set the amps on the trimmers to the nominal current of the pump
(written on the pump) x 1.3. For example, if nominal current of the pump is 7 A, set the trimmer to 9 A. If on testing,
the panel trips the pumps, try setting to the next trimmer up, which for a 7 A pump, would be 12 A.
DISPLAY AND CONTROLS INFORMATION
The panel face is tted with a single button for operation of one pump:
AUT – 0 – MAN
AUT relates to automatic mode (where oats operate the pumps) – this is default mode and has to be chosen by
continuously for standard operations.
0 – the panel is switched off.
MAN – the panel is in manual mode where pressing and holding the MAN buttons operates pumps. This is used
for testing the pumps after wiring up, troubleshooting and for manual operating of the pumps in case of oats
failure.
Green LED light indicates that the panel is turned on. For normal operation, there must be green LEDs showing.
If the pump is overloaded, the pump will be disabled and will not operate. A red LED will show on the front face.
The reason for failure must be investigated and the panel reset by switching it off and on again.
PROBES
Right hand Probe is ‘Common’ - This must be in the water at all
times
Centre Probe is ‘Max’ and denoted the starting level. This can
be adjusted by cutting to the height from the oor you wish
the pump to operate.
Left hand Probe is ‘Min’ and denotes the stop level. This can be cut
to the height you wish the pump to stop operating.
Cut the probes carefully with sharp snips.
INTRODUCTION, FEATURES, ENCLOSURE & CONNECTIONS PANEL HIGHLIGHTS & CONNECTIONS

6
For more information, visit us online www.newtonwaterproong.co.uk
CONNECTION TO GRID MAINS
ELECTRICAL CONNECTION OF CONTROL PANEL
INSTALLATION WARNINGS:
THIS CONTROL PANEL MUST ONLY BE INSTALLED BY TRAINED ENGINEERS.
BEFORE COMMENCING INSTALLATION, ISOLATE YOUR MAINS ELECTRIC SUPPLY.
This product should be installed in accordance with the relevant sections of the building regulations code and the
current edition of the IEE Wiring Regulations (BS 7671: Requirements for electrical installations) and appropriate
statutory regulations.
As of April 2004, new installations in the UK should be wired using the EU harmonised colours for the supply
conductors. NEW COLOURS: BROWN = Live, BLUE = Neutral, YELLOW / GREEN = Earth. This installation MUST be
earthed.
This control panel is IP55 rated.
Warning: it is important to read and understand the Control Panel instructions
The panel has been designed to be wall mounted. When the unit is recessed into the wall, the routing of all
cables is also within the wall, making a neater installation than if the unit is wall mounted. Cable entry is via the
knock-outs to the bottom and side of the panel, and glands are supplied for recessed mounting.
For ease of maintenance in changing pumps, it is recommended to always use 50 mm conduit for the high-
voltage pump cable, and a separate 50 mm conduit for the low-voltage Probe Set cable.
NOTES:
Please note that low-voltage rated cables cannot be run in the same conduit as high-voltage (230V AC) cables.
The Panel must be earthed.
If the water level is above the alarm probe on rst powering up the panel, the alarm may sound.
CONNECTIONS
Power supply – 230V AC suitably rated to operate the pump from a locally fused spur, preferably from its own
feed off the consumer board.
• Probe Set Brown Wire (Common) - Terminal COM (7)
• Probe Set Green Wire (Min) - Terminal MIN (8)
• Probe Set White Wire (Max) - Terminal Max (9)
• Pump Brown Wire (Live) – Terminal U1 (14)
• Pump Blue Wire (Neutral) – Terminal N (15)
• Pump Green & Yellow Wire (Earth) – Terminal PE (17)
• Alarm oat (Option) – Terminal 1 & 2 (No polarity)
• Dialer (Option) – Terminal USCITA ALLARME 11 & 12 (No polarity)
CONNECTION TO NEWTON DIALER – PA5
The Newton Dialer - PA5 can receive a signal from the panel allowing notice of the alarm condition to be
received as a voice message or text message to mobile phones. Up to 8 separate numbers can receive the voice
or text message.
The terminals for the connection to the Dialer are at the bottom of the inside circuit board of the panel and are
marked USCITA ALLARME with normally closed – common – normally open terminals (NC – C – NA).
Use normal two core bell wire and make a connection with one of the two coloured wires between the NO
(Normally Open) terminal of the Alarm and Trigger Input 1 of the Dialer, with the other wire connecting the
C (Common) terminal of the Alarm, with the OV Trigger Input of the Dialer. The Dialer needs a separate power
supply (12V power pack PA7 or battery connection kit - PA6 if the battery backup system is used within the
pumping system).
CONNECTION DIAGRAM

Call us for more information on +44 (0)1732 360095
7
CONNECTION TO GRID MAINS
CONNECTION WIRING DIAGRAM
PROBE SET (Low-voltage)
PUMP MAINS
OUTPUT 230V AC
NEWTON DIALER
(Option)
ALARM
(Option)
SWITCH
2 T1
4 T2
6 T3
2 T1
4 T2
6 T3
From
Grid
Mains
N
L
E
Input 1
0V
CONNECTION DIAGRAM
1
2
3
4
5
6
7
8
9
10
11
12
13
14
15
16
17
18
19
20
Link terminal 3
to terminal 4
Link terminal 5
to terminal 6

Newton Waterproong Systems Is A Trading Name Of
John Newton & Company Ltd.
Newton House, 17-20 Sovereign Way
Tonbridge, Kent TN9 1RH
T: +44 (0)1732 360095
E: tech@newtonwaterproong.co.uk
W: www.newtonwaterproong.co.uk
94/3010
“As part of our policy of continuous product improvement we reserve the right to change our specifications at any time”
®
INDICATES THAT THE MAIN POWER IS ON (GREEN LIGHT)
INDICATES THAT THE ALARM LEVEL IS ON (RED LIGHT)
INDICATES THAT THE MOTOR IS RUNNING (GREEN LIGHT)
CONTEMPORARY LIGHTING INDICATES THAT THE OVERLOAD
PROTECTION IS ON (RED LIGHTS)
INDICATES THAT THE CLICSON THERMAL PROTECTION IS ON (RED LIGHT)
KEEPING IT SWITCHED, THE MOTOR STARTS, EVERY ALARM IS BY-PASSED.
WHEN IT IS RELEASED, THE MOTOR IS DISCONNECTED
PUSH TO DISCONNECT THE MOTOR AND RESET THE ACTIVE PROTECTIONS
WHEN PUSHED, THE AUTOMATIC MODE IS ACTIVATED WHICH IS INDICATED BY
THE GREEN LED; THE BOARD IS READY TO RECEIVE SIGNALS FROM THE FLOAT
SWITCHES OR PRESSURE SWITCHES
This manual suits for next models
1
Table of contents
Other Newton Waterproofing Water Pump manuals
Popular Water Pump manuals by other brands

SPX
SPX S2045 instruction manual

Lowara
Lowara SVI Series Installation and operating instructions

Wilo
Wilo MHIE 2G Installation and operating instructions

Pentair
Pentair Flotec FP14KVX Use and maintenance manual

Giant
Giant P480 Operating instructions/ repair and service manual

BUSCH
BUSCH COBRA BC 0600 F Installation and maintenance instructions

Wilo
Wilo Economy Installation and operating instructions

Profi-pumpe
Profi-pumpe INVERT-TECH2 operating instructions

AGROPLAST
AGROPLAST P-100 user manual

BUSCH
BUSCH RH 0003 B instruction manual

AMT
AMT 5771-95 Specifications information and repair parts manual

Grundfos
Grundfos HS Installation and operating instructions