Getting Started Guide
This document explains how to install, configure, test, and use the PXIe-6593. You
can program the PXIe-6593 with the following soware options.
■ FlexRIO driver soware
■NI LabVIEW Instrument Design Libraries for FlexRIO (instrument design
libraries)
Note Before you begin, install and configure your chassis and controller.
Note Adapter modules are not installable or interchangeable on the
PXIe-6593.
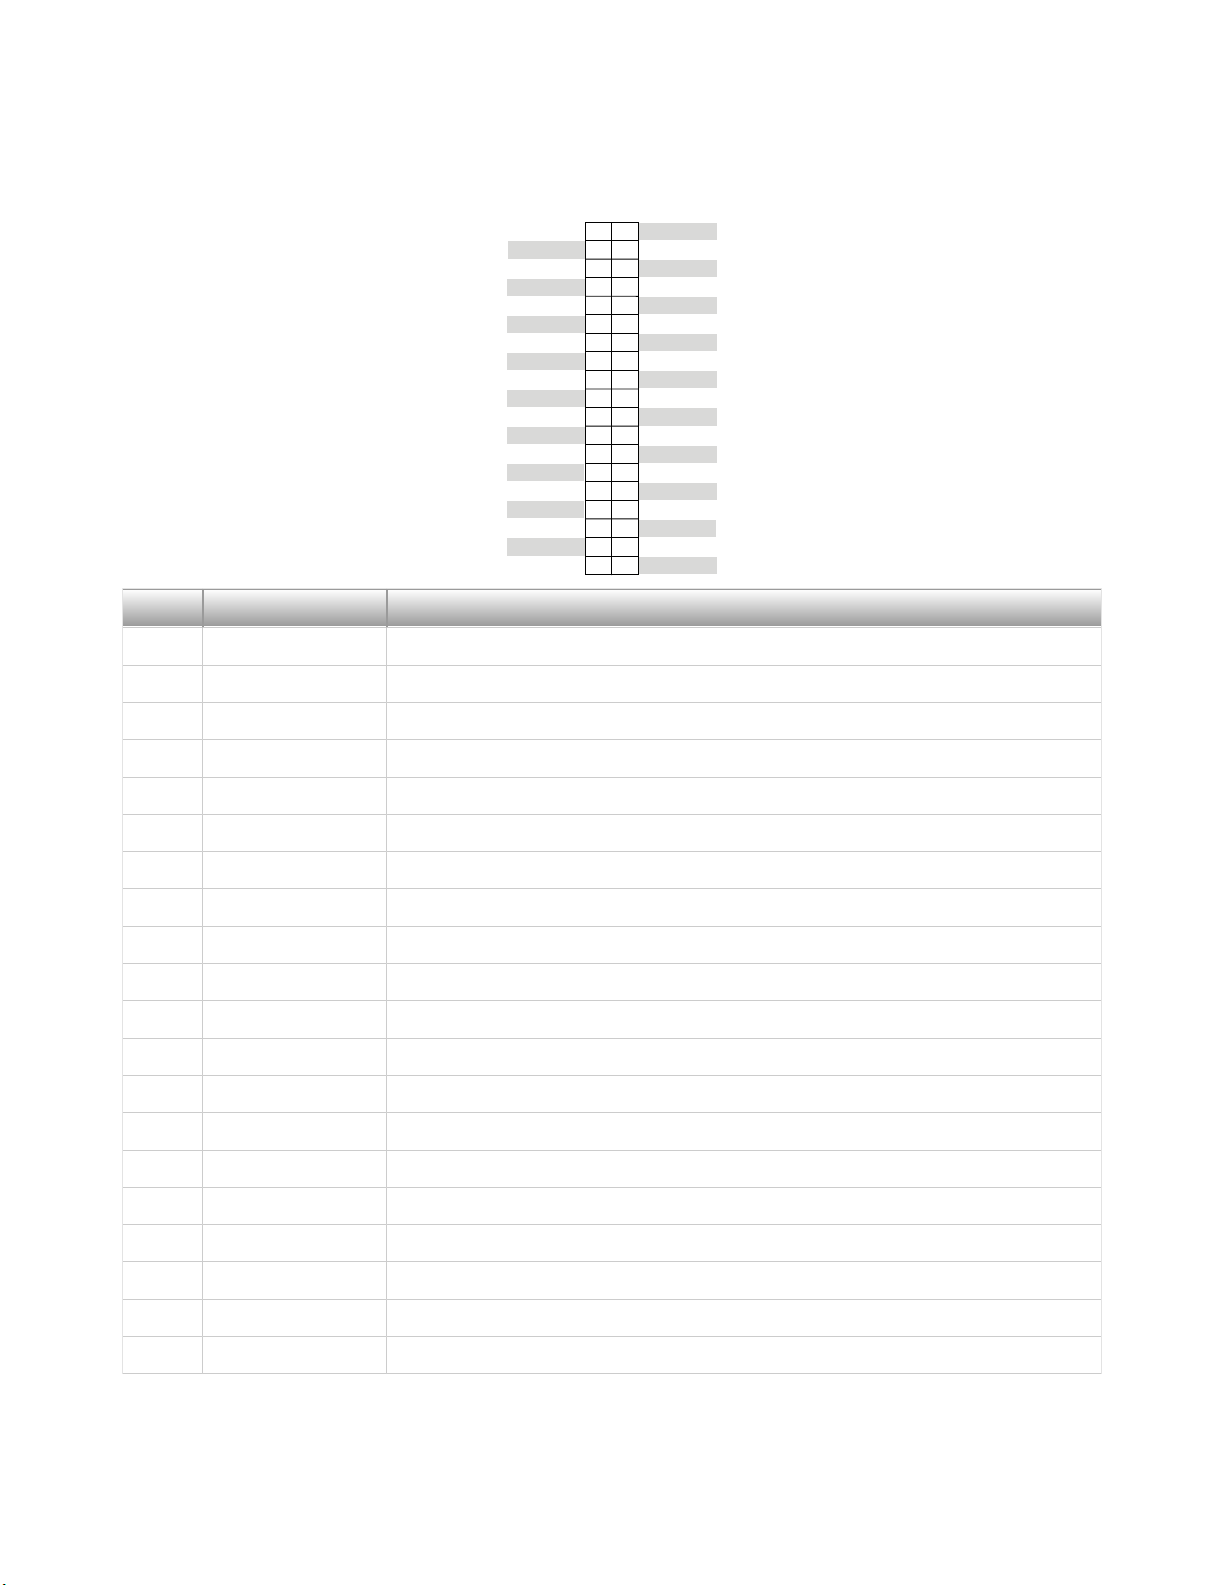
FlexRIO Documentation and Resources
Document/Resource Location Description
PXIe-6593 Getting
Started Guide (this
document)
Available at ni.com/
manuals.
Contains installation instructions and
basic programming instructions for your
PXIe-6593.
PXIe-6593 Specifications Available at ni.com/
manuals.
Contains specifications for your
PXIe-6593.
PXIe-6593 Safety,
Environmental, and
Regulatory Information
Available at ni.com/
manuals.
Contains important safety,
environmental, and regulatory
information for your PXIe-6593.
LabVIEW FPGA Module
Help
Embedded in LabVIEW
Help and at ni.com/
manuals.
Contains information about the basic
functionality of the LabVIEW FPGA
Module.
FlexRIO Help Available at ni.com/
manuals.
Contains information about the FPGA
module front panel connectors and I/O,
programming instructions, and I/O
component-level IP (CLIP).
LabVIEW Examples Available in NI Example
Finder. In LabVIEW, click
Help » Find Examples »
Contains examples of how to run FPGA
VIs and Host VIs on your FlexRIO devices.
© National Instruments 3
PXIe-6593 Getting Started