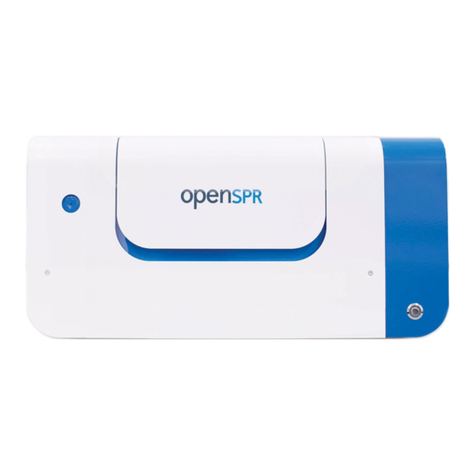
Nicoya OpenSPR User manual

NICOYA LIFESCIENCES
1-CHANNEL OPERATION MANUAL V4.1.01

2
OpenSPR 1-Channel Operation Manual V4.1.01
Table of Contents
SAFETY AND PREPARATION FOR USE ............................................................................................. 4
1GETTING STARTED .................................................................................................................. 7
1.1 Initial Equipment Setup.................................................................................................... 7
1.1.1 Before any steps are taken ....................................................................................... 7
1.1.2 Standard Equipment Supplies................................................................................... 7
1.1.3 Setting up the OpenSPR............................................................................................ 8
1.1.4 Connecting and Turning on the OpenSPR............................................................... 10
1.2 OpenSPR Software Setup............................................................................................... 11
1.2.1 Minimum Computer Requirements........................................................................ 11
1.2.2 Installing OpenSPR Software .................................................................................. 11
1.3 TraceDrawer Software Setup......................................................................................... 12
1.3.1 Installing TraceDrawer............................................................................................ 12
1.3.2 TraceDrawer License Activation ............................................................................. 12
2STANDARD OPERATING PROCEDURES ................................................................................. 14
2.1 Preparation for your Experiment................................................................................... 14
2.1.1 Required Items........................................................................................................ 14
2.1.2 Fluidic Setup............................................................................................................ 14
2.1.3 Optical Setup........................................................................................................... 16
2.2 Beginning a Test ............................................................................................................. 17
2.3 Instrument Setup ........................................................................................................... 18
2.3.1 Naming your Running Buffers................................................................................. 19
2.3.2 Step 1: Fluidic Priming ............................................................................................ 20
2.3.3 Step 2: Optical References...................................................................................... 23
2.4 Sensor Setup................................................................................................................... 27
2.4.1 Step 3: Install Sensor Chip ...................................................................................... 27
2.4.2 Step 4: Bubble Removal and Prevention ................................................................ 33
2.5 Running an Experiment.................................................................................................. 35
2.5.1 Test Name ............................................................................................................... 35
2.5.2 Experiment Data Interface and Data Acquisition ................................................... 35
2.5.3 Changing the Running Buffer.................................................................................. 37

3
OpenSPR 1-Channel Operation Manual V4.1.01
2.5.4 Flow Rate Controls.................................................................................................. 38
2.5.5 Injections................................................................................................................. 39
2.5.6 Ligand Immobilization Wizard ................................................................................ 43
2.5.7 Graph Settings......................................................................................................... 46
2.5.8 Advanced Controls.................................................................................................. 48
2.6 Shutdown Procedures.................................................................................................... 49
2.6.1 Ending a Test........................................................................................................... 49
2.6.2 Standby Mode......................................................................................................... 50
2.6.3 Instrument Shutdown............................................................................................. 51
2.7 Data Output Files............................................................................................................ 54
3MAINTENANCE AND CLEANING............................................................................................ 55
3.1 Preparation of Reagents ................................................................................................ 55
3.2 Standby Mode ................................................................................................................ 55
3.3 Instrument Shutdown .................................................................................................... 55
3.4 Recommended Cleaning ................................................................................................ 56
3.4.1 Regular Cleaning ..................................................................................................... 56
3.4.2 Advanced Cleaning.................................................................................................. 57
4SYSTEM DETAILS ................................................................................................................... 59
4.1 OpenSPR Hardware........................................................................................................ 59

4
OpenSPR 1-Channel Operation Manual V4.1.01
SAFETY AND PREPARATION FOR USE
Line Voltage
The OpenSPR™ operates using a UL certified Class 2 power supply with an input of 100-240 V,
~50-60 Hz and 2.25 A maximum. Only use the power supply provided with your instrument.
Operate Only with Covers in Place
To avoid personal injury, do not remove the product covers or panels. Do not operate the product
without all covers and panels in place.
Serviceable Parts
The OpenSPR™ does not include any user serviceable parts inside. Refer service to Nicoya
Lifesciences Inc.
Additional Safety Notes
This unit has been thoroughly tested using standard biological buffer solutions such as Tris, PBS,
and Citrate buffer at neutral pH. Solutions at pH 2 to pH 12 have also been tested and can be
used in the system. Always evaluate the safety of the materials being used in the system before
proceeding and utilize all appropriate and recommended safety precautions associated with the
materials.
The sample holder docking system contains motorized moving parts. Do not operate the docking
system while the unit lid is open.
Do not stare into the LED as the bright light can damage the eye. Use appropriate safety eye
protection.
Handle Sensor Chips inside of a fume hood with appropriate exhaust ventilation. Wear personal
protection equipment such as a laboratory coat, gloves, and safety glasses. In case of insufficient
ventilation, wear suitable respiratory equipment. Sensor Chips contain colloidal gold particles
which should not be inhaled, ingested, or contacted in any way.
This system is not water proof. Avoid actions which may result in liquid being spilled onto any
part of the system.
Always turn off the power to system when not in use or in standby mode.
It is recommended that the system be connected to a surge protected power Outlet.

5
OpenSPR 1-Channel Operation Manual V4.1.01
Follow the recommended operating conditions below.
Operating Conditions
The following are the recommended operating conditions of the OpenSPR instrument and should
be followed for safety and performance purposes.
1. Read and follow all instructions provided.
2. For indoor use only.
3. For research use only.
4. Ensure proper ventilation while in use.
5. Do not operate unattended.
6. OpenSPR is not waterproof –do not spill liquids onto it and be very careful of leaks.
7. Do not operate the system in the presence of strong magnetic fields.
8. Do not operate the motorized sensor stage with the lid of the OpenSPR open. The lid must
be closed during operation. Caution: the motorized stage presents a pinch hazard.
9. Dust may interfere with the instrumentation, it is recommended that compressed air be
used to remove any dust that may accumulate in the system after completing tests and
that the unit is stored with a closed lid.
10. Handle Sensor Chips with tweezers and while
wearing gloves [Figure 0.1.1] and other
appropriate personal protection equipment. If
skin contact with the Sensor Chip occurs, rinse
exposed area thoroughly with soap and water.
11. Carefully inspect tubing and connections prior to
testing.
12. It is the responsibility of the user to ensure the
safety and appropriateness of the chemicals,
materials, and fluids being used in the OpenSPR.
13. Treat sensors as hazardous waste after use and follow all local, state/provincial, and
federal regulations. Contact a licensed waste disposal specialist for proper disposal.
14. Do not remove the cover of the OpenSPR. Contact Nicoya Lifesciences Inc. if there is an
issue with the instrument and a customer success scientist will assist you.
15. Do not remove or open the electronics compartment. Contact Nicoya Lifesciences Inc. if
there is an electrical problem and a customer success scientist will assist you.
Figure 0.1.1 - Handle chips with gloves and
tweezers

6
OpenSPR 1-Channel Operation Manual V4.1.01
16. Ensure tubing Outlets are fed into an appropriate waste container before turning on the
pump.
17. Turn off the OpenSPR immediately if a leak is detected.
18. Only use blunt-end injection tips in the OpenSPR. Using sharp needle tips will damage the
injection port, and replacement will be at the user’s expense.
This information is based on our present knowledge. However, this does not constitute a
guarantee for any specific product features and shall not establish a legally valid contractual
relationship. Users should make independent decisions regarding completeness of the
information based on all sources available. Nicoya Lifesciences Inc. shall not be held liable for any
damage resulting from handling, contacting, or using this product.

7
OpenSPR 1-Channel Operation Manual V4.1.01
1GETTING STARTED
1.1 Initial Equipment Setup
1.1.1 Before any steps are taken
Prior to setting up your OpenSPR, ensure your laboratory space is setup with the below
requirements:
•A clean and level lab bench with enough space to fit both the OpenSPR and laptop
computer (3.5 ft or 1 m of bench space is recommended)
•2x power outlets that meet the required power specifications: 100-240V 50-60Hz, 2.25A
max. Surge protected power outlets are recommended.
1.1.2 Standard Equipment Supplies
The OpenSPR Starter Pack will come equipped with the following supplies:
Table 1 OpenSPR Starter Pack supplies.
Quantity
Item
1
OpenSPR instrument
1
OpenSPR power cable
1
USB A-B cable
1
Laptop computer with installed OpenSPR software
1
USB drive containing software set-up files and other relevant documentation
4
250 mL glass bottles (3x containing tubing connector with ferrule, 1x without
tubing connector)
1
Pair of tweezers
1
Hand air pump
1
Pack of Standard Sensors
1
Package of 10 disposable syringes (1 mL)
1
Package of 10 disposable blunt-end injection tips

8
OpenSPR 1-Channel Operation Manual V4.1.01
1
Gastight glass syringe (250 µL)
1
Training Kit
1
Declogging Kit
1
Screwdriver (for servicing)
1.1.3 Setting up the OpenSPR
1. Remove the OpenSPR Instrument from the box, and place on a clean, level surface.
2. Remove the Power Cable and USB Cable from the bottle tray of the instrument (right-
hand side) and remove all additional packaging tape present on the instrument.
3. Remove the twist-ties from the tubes within the bottle tray.
4. Unpack the glass bottles from the Accessory Box and remove all tape and stickers from
the lid and fittings.
5. Locate the 250 mL glass bottle that does not contain the tube fitting (without the black
attachment on top). This will be your Waste Bottle (tip: it is good practice to label this
bottle accordingly). Find the 3 outlet tubes located in a bundle at the back of the bottle
tray. They will be labelled “Sample Waste”, “Outlet Waste”, and “Pump Waste”. Place all
3 tubes through the openings in the bottle cap, then place bottle at the back of the bottle
tray [Figure 1.1].
Figure 1.1 Waste bottle installed in the OpenSPR with 3 outlet tubes.
6. Locate the 3 remaining 250 mL glass bottles. Fill one of the bottles with 250 mL of filtered
DI water (use a 0.2 µm filter) or MilliQ water, and label accordingly. The remaining 2
bottles will be used for your running buffers (leave these empty until use, but still proceed
with the setup).

9
OpenSPR 1-Channel Operation Manual V4.1.01
7. The 3 inlet tubes will be inserted into Buffer Bottles 1, 2 and DI Water, respectively, from
front to back of the instrument. The tubes are labelled accordingly. Keep the bottles
outside of the instrument while inserting the tubes.
8. To insert the tubes, loosen the black fitting by turning it counter-clockwise [Figure 1.2-
Left]. Note that there is a translucent ferrule beneath the black fitting. Once the fitting is
loosened, feed the tube through the fitting into the bottle, until the tube touches the
bottom [Figure 1.2 –Right]. When the tube is in the final position, gently tighten the fitting
clockwise until the tube is secured into place (do not over tighten).
Figure 1.2 Left: Loosen the fitting by turning it counter-clockwise before inserting the tube. Right: Inlet tubes properly installed
with the end of the tubes touching the bottom of the bottles.
Note: if buffer bottles 1 and 2 are not going to be used immediately, it is recommended to store
the tubes within the empty bottles to prevent dust from entering the fluidic system.
9. Insert the bottles into the tray by tilting the bottle such that the base of the bottle fits
into the tray first, followed by the top [Figure 1.3].
Figure 1.3 Left: Insert the bottles into the tray base-first and tilted. Right: Proper positioning of all bottles installed in the
OpenSPR.

10
OpenSPR 1-Channel Operation Manual V4.1.01
1.1.4 Connecting and Turning on the OpenSPR
If a computer was provided with your instrument, it will have the OpenSPR software
already preinstalled. If a computer was not provided with your instrument, install the
Nicoya Lifesciences software per the directions provided in Section 1.2.
Plug the power cable into the back of the OpenSPR instrument [Figure 1.4] and connect
to the recommended power outlet.
Figure 1.4 USB and power cable ports on the back of the OpenSPR.
Plug one end of the USB Cable into the back of the OpenSPR [Figure 1.4: USB port for
computer connection] and connect the other to the computer.
Power on the OpenSPR using the button located on the front-right panel. Ensure the blue
light around the instrument’s power button turns on.
Prior to using your OpenSPR for the first time after unpacking, contact your Customer
Success Scientist to schedule a remote hands-on training session.

11
OpenSPR 1-Channel Operation Manual V4.1.01
1.2 OpenSPR Software Setup
1.2.1 Minimum Computer Requirements
Below are the minimum required computer specifications to be able to run the OpenSPR
software:
Table 2 Minimum required specifications for OpenSPR software.
Operating System
Windows 10, 64-bit
Communication
USB 2.0 or 3.0
Microsoft .NET Framework
4.0
Memory
4 GB RAM
CPU
Dual Core
If you purchased a laptop with your OpenSPR, it will already be setup with the OpenSPR software
and TraceDrawer Analysis Software, you are all set to go! Skip down to Activation of TraceDrawer
Analysis software section.
If you did not purchase a laptop with your OpenSPR, the USB drive in the Accessories Box will
contain the installer for both the OpenSPR and TraceDrawer software.
1.2.2 Installing OpenSPR Software
1. Ensure that the computer meets the specifications listed in Section 1.2.1. It is highly
recommended the computer has access to internet to enable software updates.
2. Perform all Windows software updates before proceeding (this may require a few
computer restarts).
3. Connect the OpenSPR to the computer via the USB cables, and power on the instrument.
4. Transfer the OpenSPR-4.0.XXXX.XXXXX-windows-installer.exe file (from the USB drive or
downloaded from our website) into an accessible folder onto the computer. Double click
this file to run it.
5. The OpenSPR Software Setup Wizard will open [Figure 1.5]. Follow the prompts in this
wizard to complete the installation of the software and drivers. It is recommended to use
the default settings and application file location for installation.

12
OpenSPR 1-Channel Operation Manual V4.1.01
Figure 1.5 OpenSPR software setup wizard.
Once the installation wizard finishes, you will find a shortcut to the program called
“OpenSPR” on the desktop.
Restart your computer after the installation is complete.
Important: Ensure that the computer sleep settings are set to never. If the computer falls
asleep during an experiment, the software will lose communication with the instrument, and
the software must be restarted.
1.3 TraceDrawer Software Setup
Setup of the TraceDrawer analysis software is only applicable if a TraceDrawer license key was
purchased.
1.3.1 Installing TraceDrawer
Copy the TraceDrawer_1.8_RidgeviewSetup.exe file from the USB stick onto the
computer.
Run the installer and follow the prompts to complete the installation.
1.3.2 TraceDrawer License Activation
Locate your TraceDrawer License Key. A print-out containing your license key is provided
within the folder of the OpenSPR Accessories box.
Run the TraceDrawer program from the desktop shortcut.
Click “Add Legacy License Key” in the window prompt.

13
OpenSPR 1-Channel Operation Manual V4.1.01
Figure 1.6 TraceDrawer license key management window. Select "Load Legacy License Key" only.
Insert your license key with the format <LTV-XXXXXXXX> (note the brackets are apart of
the key and need to be input as well).
Click “Close” in the window prompt. TraceDrawer will restart with your license key
activated.
The TraceDrawer software will now be ready to use and will display the home screen
[Figure 1.7]. For details on how to perform data analysis using TraceDrawer, please refer
to the TraceDrawer Data Analysis Handbook.
Tip: It is recommended to create a local file on your computer containing this license key. When
Windows Updates occur, you may be prompted to re-enter the TraceDrawer license key.
Figure 1.7 TraceDrawer home screen once activated with license key.

14
OpenSPR 1-Channel Operation Manual V4.1.01
2STANDARD OPERATING PROCEDURES
2.1 Preparation for your Experiment
2.1.1 Required Items
The following materials are required to run a test on the OpenSPR:
•OpenSPR instrument with corresponding power and USB cables
•Computer with installed OpenSPR software
•4x 250 mL glass buffer bottles (or equivalent)
•Tweezers
•Lint-fee wipes
•Syringes with blunt-end tips installed
•Blank Chip
•OpenSPR Sensor Chip *see optical setup considerations in section below
•Deionized (DI) water, filtered (0.2 µm filter)
•Running buffer, filtered (0.2 µm filter) and degassed
•Solution of 80% isopropanol (v/v in water)
•Relevant Personal Protective Equipment
2.1.2 Fluidic Setup
Prior to starting your experiment, the fluidic setup must be in place for proper function of the
OpenSPR. This includes having the Waste Bottle, DI Water Bottle, and Buffer Bottles filled to the
proper levels with tubes installed correctly. Details for each bottle and tubing setup are provided
below.
Waste Bottle: 250 mL square glass bottle (or equivalent) that does not contain the tube fitting.
•Ensure the Waste Bottle is empty and labelled appropriately as waste.
•Secure the cap onto the bottle.
•Insert all 3 outlet tubes into the holes located on the top of the waste bottle. The outlet
tubes are the bundle of 3 protruding from the very back of the bottle tray.
•Place the Waste Bottle containing the 3 outlet tubes at the back of the Bottle tray, as
shown in [Figure 2.1].

15
OpenSPR 1-Channel Operation Manual V4.1.01
Figure 2.1 Empty waste bottle installed in the OpenSPR containing 3 outlet tubes.
DI Water Bottle: 250 mL square glass bottle containing a tube fitting
•Fill this bottle with 250 mL of filtered (0.2 µm filter) deionized water.
•Secure the cap onto the bottle.
•Loosen the fitting, and place the 3rd inlet tube into the bottle, such that the tube is just
touching the bottom of the bottle.
•Gently tighten the fitting on the tube such that it is secured into place.
•Place the bottle onto the tray of the OpenSPR next to the Waste Bottle [Figure 2.2].
Buffer Bottle 1 and 2: 250 mL square glass bottles containing a tube fitting
•Prepare at least 100-250 mL of each running buffer for your experiment*
•Filter (using a 0.2 µm filter) and degass the running buffers prior to use.
•Fill the appropriate bottles with the running buffer to a maximum level of 250 mL.
•Secure the cap onto the bottle.
•Loosen the fitting and place the 1st and or 2nd inlet tube into appropriate buffer bottle,
such that the tube is just touching the bottom of the bottle.
•Gently tighten the fitting on the tube such that it is secured into place.
•Place the bottles onto the tray of the OpenSPR [Figure 2.2].

16
OpenSPR 1-Channel Operation Manual V4.1.01
Figure 2.2 Left: Insert the bottles into the tray base-first and tilted. Right: Proper positioning of all bottles installed in the
OpenSPR.
*Notes:
•For most experiments, only one running buffer may be required. If this is the case, it is
recommended to prepare the buffer in the Bottle 1 Position. The inlet tube for Bottle 2
may be left in an empty bottle to prevent dust accumulation.
•It is recommended to keep at least 50 mL of each running buffer in a separate container
to use to rinse the injection port during your experiment.
2.1.3 Optical Setup
The 1-Channel OpenSPR comes pre-installed with a Cool Light LED for analysis using any standard
OpenSPR Sensor Chips (red sensor spot) [Figure 2.3]. The 1-Channel OpenSPR is not compatible
with Nicoya’s High Sensitivity Sensors as a different optical setup is required. For use of the High
Sensitivity Sensors upgrade packages are available –please contact a Customer Success scientist
for more details.
Figure 2.3 OpenSPR Standard Sensor.

17
OpenSPR 1-Channel Operation Manual V4.1.01
2.2 Beginning a Test
Prior to beginning a test for the first time after receiving and unpacking your OpenSPR Instrument,
ensure you complete a hands-on training with a Customer Success Scientist at Nicoya Lifesciences.
Verify the fluidic setup is complete (Section 2.1.2).
Ensure the USB is connected to both the OpenSPR and computer running the OpenSPR
software, and that the instrument is connected to an appropriate power source.
Power on the OpenSPR using the Power Button on the front of the instrument [Figure
2.4]. The blue lights of the OpenSPR should turn on, and the instrument will initialize.
Figure 2.4 Location of power button on the OpenSPR.
Run the OpenSPR software program by double-clicking on the desktop icon named
“OpenSPR” [Figure 2.5].
Figure 2.5 OpenSPR software desktop shortcut.
Upon opening the software, the communication connection to the OpenSPR instrument
will attempt to be established. It may take several seconds for the connection to
complete. During this time, the progress bar will be active [Figure 2.6]. Do not disconnect
or power off the OpenSPR during this time.

18
OpenSPR 1-Channel Operation Manual V4.1.01
Figure 2.6 OpenSPR home screen with hardware connection in progress.
Once the connection is complete the Start button will be active.
If the communication connection is not able to be established, an error message will
appear in red. If this happens, unplug the USB connection to the computer, power cycle
the OpenSPR, then re-establish the USB connection. If the software is still unable to
connect, restart the software.
Tip: to power off the OpenSPR, hold the power button down for 10 seconds until the power LED
turns off
Click “Start” to enter the software. The software will walk you through the Instrument
Setup, and Sensor Setup procedures prior to collecting your data –see sections below for
details.
2.3 Instrument Setup
When entering the OpenSPR Software, you will begin on the Instrument Setup Screen [Figure
2.7]. This screen will allow you to indicate your running buffers used for your test, prime the
fluidics of the OpenSPR, as well as setup optical references. Full details for each of these
procedures are provided in the sections below.

19
OpenSPR 1-Channel Operation Manual V4.1.01
Figure 2.7 Instrument setup screen.
2.3.1 Naming your Running Buffers
It is convenient to log the different types of running buffers to be used in your test. You can do
so by selecting the “edit” icon next to the Running Buffer title in the Fluidic Priming section [Figure
2.8].
Figure 2.8 Edit button located in the Fluidic Priming section. This allows the user to input the different buffer solutions used in
the test.
Clicking this icon will open a new window which will allow you to input the names of the running
buffers in both Bottle 1 and Bottle 2 [Figure 2.9]. You will also be given the option to input the
names of the running buffer during the Priming process as well (Section 2.3.2). Note that the DI
Water and Waste bottle designations cannot be changed.

20
OpenSPR 1-Channel Operation Manual V4.1.01
Figure 2.9 Option to label your running buffers.
The completion of this step is not required for running a test but is recommended for your
experimental records.
2.3.2 Step 1: Fluidic Priming
Priming of the OpenSPR will fill the pumps and tubing with the running buffer to be used for the
test.
It is necessary to perform priming in the below scenarios:
1) Initial use of the instrument from purchase
2) If the instrument is being used for the first time after a full shutdown
3) If you would like to use a new running buffer for your test
4) If you are going to be starting with a running buffer in an alternate bottle position
If you are running a test with the running buffer already present in the system, using the same
bottle position and if no air has been introduced into the inlet tubing, then you do not need to
perform the priming procedure. In this scenario, you can leave the fluidic priming as incomplete
to move forwards with your test setup.
To prime the instrument with a new running buffer, click the “Prime Process Start” button [Figure
2.10] and follow the on-screen prompts.
Other manuals for OpenSPR
1
Table of contents
Other Nicoya Laboratory Equipment manuals
Popular Laboratory Equipment manuals by other brands

Barnstead
Barnstead EASYpure RO 742 Series manual
Hermle
Hermle Z 366 K user manual
Steinberg Systems
Steinberg Systems SBS-LBM-200 user manual
Biohit
Biohit Proline 710520 instruction manual

AGROJECT
AGROJECT AGROJECT user manual

Teledyne Cetac Technologies
Teledyne Cetac Technologies Oils 7400 Series installation guide
