m
o
Quick Menu
WB White Balance (Matching Image Colors with Colors as
Seen with the Naked Eye)
Rotate the mode dial to P,S,A, M,[] or NJ_-) WB(Quick menu dial) ([_)72) -_ Whitebalance
The color of light reflected from an object varies with the color of the light source.
The human brain is able to adapt to changes in the color of the light source, with
the result that white objects appear white whether seen in the shade, direct
sunlight, or under incandescent lighting. Digital cameras can mimic: this
adiustment of the human eye by processing images according to the color of the
light source. This is known as "white balance." For natural coloration, choose a
white balance setting that matches the light source before shooting.
Although the default setting, Auto (normal), can be used under most types of
lighting, you can apply the white balance setting suited to a particular light source
to achieve more accurate results.
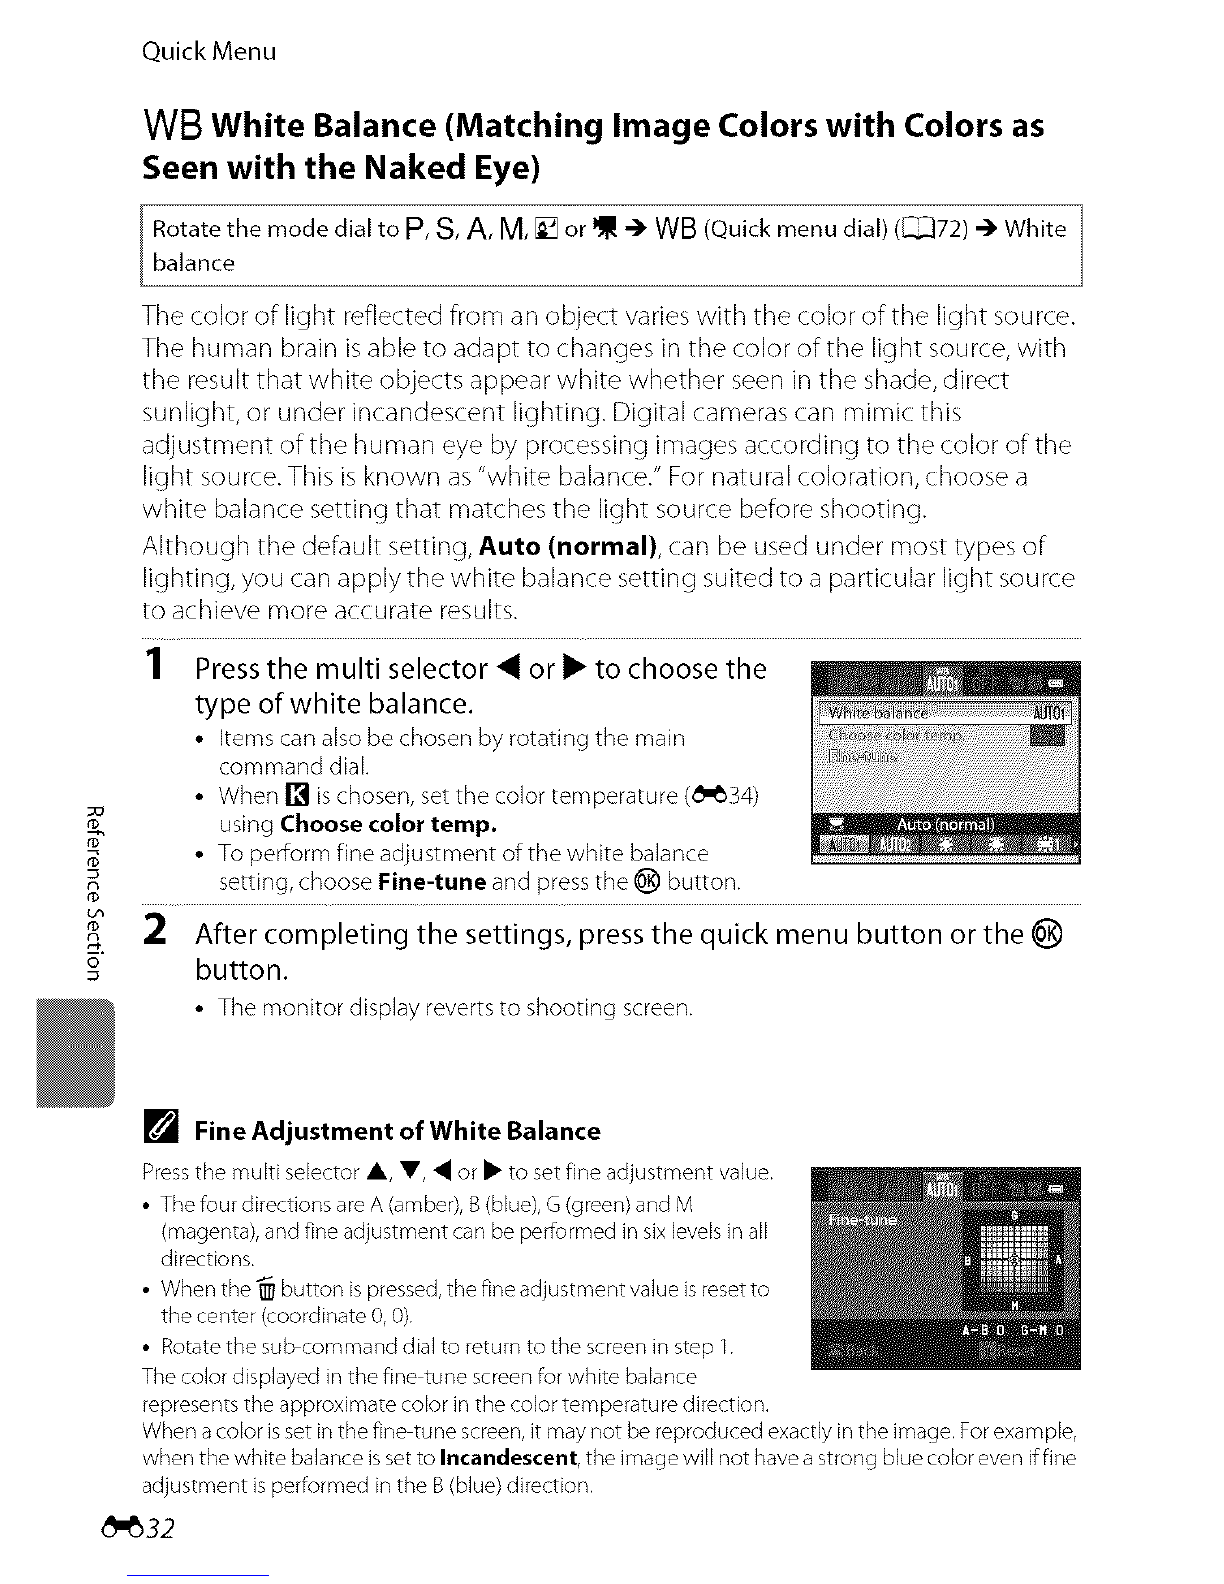
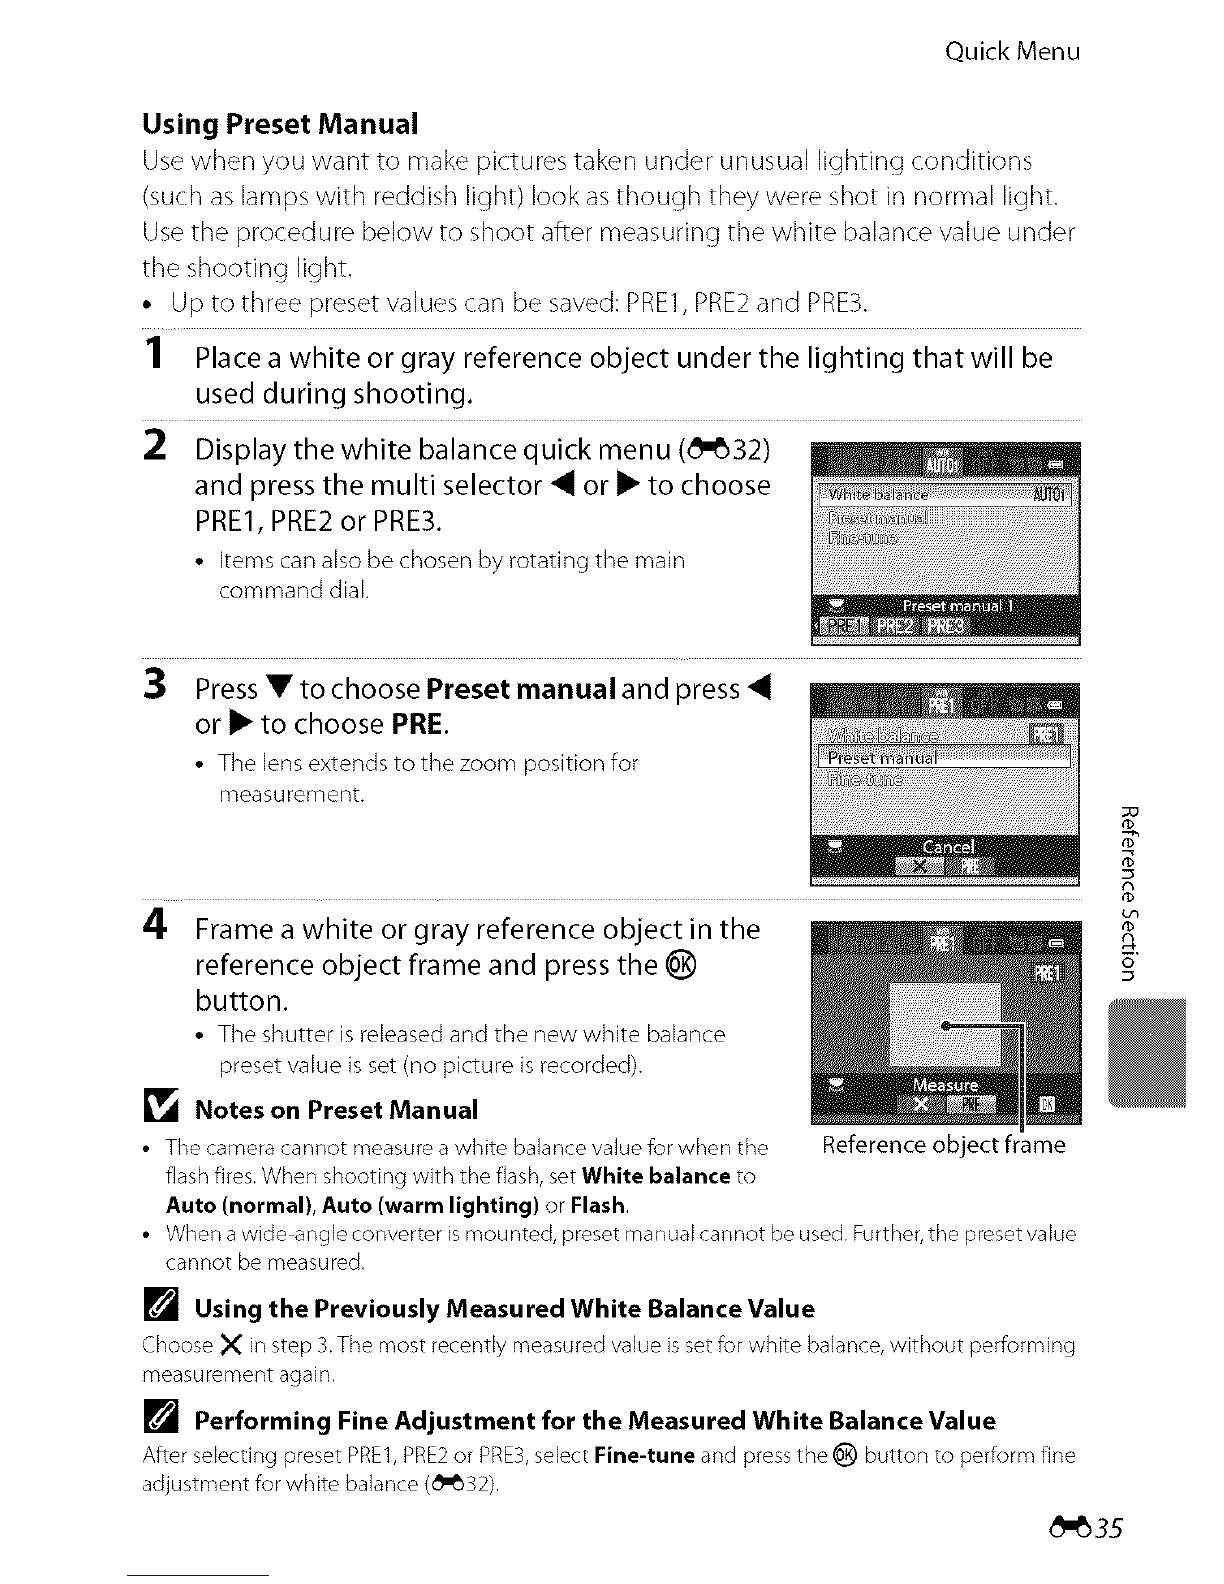
1 Press the multi selector _ or i_ to choose the
type of white balance.
• Items can also be chosen by rotating the main
command dial.
• When [] is chosen, set the color temperature (_'_34)
using Choose color temp.
• To perform fine adjustment of the white balance
setting, choose Fine-tune and press the _) button.
2After completing the settings, press the quick menu button or the _)
button.
• The monitor display reverts to shooting screen.
[] Fine Adjustment of White Balance
Pressthe multi selector A, V, • or • to setfine adjustment value.
• The four directions are A (amber), B(blue),G (green) and M
(magenta),and fine adjustment can be performed in six levelsin all
directions.
• When the -_ button is pressed,the fine adjustment value is resetto
the center (_oordinate 0,0).
• Rotate the sub command dial to return to the screen in step 1.
Thecolor displayed in the fine tune screenfor white balance
represents the approximate color in the color temperatu redirection.
When a color isset in the fine tune screen, it may not be reproduced exactly in the image. Forexample,
when the white balance issetto Incandescent, the image will not havea strong blue color even iffine
adjustment isperformed in the B(blue) direction.
_-B32