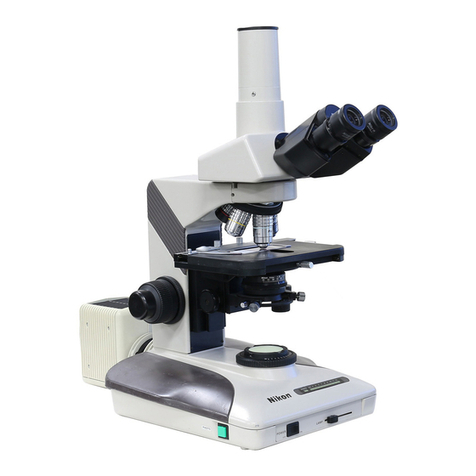
Nikon Eclipse Ti TIFT 1454 User manual

Manual: TIRF Microscope
Ee-1454
Martijn de Gruiter Erasmus OIC 1
Source: NIKON
Total Internal Reflection Fluorescence microscope
Nikon Eclipse Ti
Principal:
•Laser is pointed at an angle at specimen
•Due to this angle the laser will totally reflect
on glass/medium interface and creates an evanescent wave above the glass
•Thickness of wave is around 200nm, but decays exponentially
•Possible to only excite fluorophores in membrane, without background signal of the cytoplasm
Benefits:
•Extreme low background signal
•Perfect for membrane studies
•CCD Camera attached will provide in fast imaging
Contact
•Martijn de Gruiter Be-343 tel. 31105
•Gert-Jan Kremers Be-346 tel. 43578

Manual: TIRF Microscope
Ee-1454
Martijn de Gruiter Erasmus OIC 2

Manual: TIRF Microscope
Ee-1454
Martijn de Gruiter Erasmus OIC 3
Start system
•Turn on the power by the power socket (on the floor under the table)
•Switch the mercury lamp on and then ignite it.
oIf not needed don’t turn the mercury lamp on
oThe unit on the shelf closest to the door
•Turn on all devices with a button on the shelf and the table.
oCamera and laser box are automatically enabled
•Next turn on the device with a key: Laser control panel
•Start the computer and start the program Metamorph.
oSelect suited user account.
Live Cell imaging:
•When imaging at 37oC:
•The heating device to maintain your cells uses water.
ofill reservoir with demineralized water up to level of CO2 tube
•Allow the system to warm up for 15-30 minutes
•Settings for the heating unit are paper on the wall, choose your settings
oGeneral settings for cells on a coverslip:
otop heater 40.5 ° C
obath heater 38.5 ° C
ostage heater 38.5 ° C
olens heater 37 ° C
•Ensure that the cells are grown on a glass coverslip
•Place the slide in the metal ring, tighten firmly but not too hard because it will break the
glass
•Add 1-2 ml of the medium from the appropriate well. There is a convex surface
•Move with a paper towel around the edge of the coverslip from below with a little pressure,
if no medium leaks from the ring your seal is good.
•Wipe clean the underside of the slide with ethanol to prevent contamination of the
objective and microscope

Manual: TIRF Microscope
Ee-1454
Martijn de Gruiter Erasmus OIC 4
Finding focus
•Put the objective in the lowest position using button A
oLowest position is ~500 um
•Choose the objective with the right magnification
•Put a little drop emersion oil on the lens
oOnly if it’s an oil emersion objective
•Place the metal ring in the middle of the heating chamber
oSecure with the metal clips
•Centre you cells above the objective with the joystick
oButton on top of joystick will change speed, S (slow) or F
(fast)
•Turn button C until the oil is in contact with the coverslip
•In MetaMorphs Taskbar choose “transmission to eyes” to
illuminate the cells with the halogen lamp
•With button D you can use the fine adjustment control knob
ocourse, fine or extra fine
•Look through the eyepiece and bring cells in focus.
oThe display of the microscope shows the height of the objective
•Finding appropriate fluorescence cells can be done with the mercury lamp
oChoose the illumination settings for your fluorophore in the Taskbar in Metamorph
oIncrease or decrease brightness by changing the ND filters
oND 4, 8, 10 will block intensity, the can be combined, use minimal intensity to reduce
bleaching of your fluorophore
•When your sample is in focus you can focus the beam of the laser if necessary, for detailed
explanation ask a designated OIC member
•To change coverslips, bring objective down with lowest button A. Bring objective back to
previous height with upper button A
Perfect Focus System (PFS)
•If focus is found a LED (E) will turn orange and/or you will hear a beep
oFocus can be kept using the Perfect Focus system
oPress the green blinking button E
•The focus of the PFS is adjustable with a module as shown opposite
•The turntable navigate the lens up and down as shown and with the blue button toggles
between fine (pressed) and coarse
•Focusing with perfect focus should be viewed through the camera
The buttons FGH give the direction of the output signal:
F: eyepiece G: camera left QuantEM:512SC H: camera port right
D
C
B
A
E
F
G H
Manual: TIRF Microscope
Ee-1454
Martijn de Gruiter Erasmus OIC 5
Metamorph - Taskbar
•On startup your personal taskbar is loaded
•Metamorph functions can be accessed easily from a
Taskbar and an
Acquire window
•You can restore illumination settings with the
button: "Restore OIC settings"
•Open the Acquire window with Acquire
•Access Acquisition modes with: MDA & Stream
•Select preferred illumination settings
oLeft side: lasers for camera,
oright side: mercury lamp or transmission to
eyepiece
•Open FRAP or laser console
Metamorph - Acquire window
Sidebar left:
•Exposure time
oMinimum interval time at full chip is 90ms, quad chip is 50ms
oExposure time can be lower than interval time
•Full Chip, Quad Chip, Use Active Region
oUse full chip, middle quadrant, or region selected by ROI
•Live bin & bin
oCombine pixels to increase readout speed
oUse only for live viewing or real recording
oNormal state = 1
•Start Live/Stop Live
oStart/stop live mode
Acquire images
•To acquire live mode press "Acquire" button
•Separate images can be recorded as separate images or in stack

Manual: TIRF Microscope
Ee-1454
Martijn de Gruiter Erasmus OIC 6
Tab: Display:
•Auto scale option
oEnable Auto scale or change custom auto scale
oFull bit-range is saved to file, this is only for visualization
in the software
•Visualize saturated pixels
Tab Acquire:
•Be sure to set the Illumination choice to
“Current shutter”
Tab Special:
•Gain options:
•10 MHz (EM gain), gain3 3x is standard setting
•Control gain between 0 and 1000
•Use "Frames To Avg" option to average images / or use
longer exposure time
Live image window
•Magnifying glass
•Display image in other LUT
oGrayscale, Color by wavelength
•Histogram of intensities
oManual scaling can be done with the orange arrows
•Auto scaling options
oBest fit range, 8/12/14/16 bit
oAuto scale on/off
oScale within region

Manual: TIRF Microscope
Ee-1454
Martijn de Gruiter Erasmus OIC 7
Streaming imaging
Open the Stream Acquisition window with the button in
the taskbar
•Start recording with Acquire button
•Check if chosen configuration is ok
Tab Acquire:
•Acquisition modes:
oRAM save later to hard disk
oHD choose name and location to save
Save as on file or separate TIF files
•Enter the desired number of frames
•Select “Initial illumination”: Current Shutter
Tab Camera Parameters:
•Recording options:
oAverage frames
oNumber of frames to skip, during acquisition
oDon’t show recording (faster when exposure time <
minimal interval time)
•Camera readout default options should be:
oCamera state: HALT
oShutter mode: OPEN PRE SEQUENCE
oClear mode: CLEAR PRE SEQUENCE
Multi-Dimensional Acquisition (MDA)
Combine multiple tasks: z-stack, time-lapse,
streaming, multiple positions, multiple
wavelengths, use of journals.
•Open the MDA window using Taskbar
•Select acquisition mode(s) in Main
•Continue with the tabs shown left:
•Saving: select filename and folder
•Select illumination settings
•… options for acquisition modes
•When setup is done press acquire
•Save or load settings of experiment setup,
with Save/Load State buttons
•Live mode can be started from MDA window

Manual: TIRF Microscope
Ee-1454
Martijn de Gruiter Erasmus OIC 8
MDA: Time lapse imaging
•Activate the time-lapse option in MDA’s main window
•Set the desired interval and time
•Choose the desired illumination settings in the wavelength tab
oOr multiple when the option multiple wavelengths are selected
•Start recording by clicking on Acquire
Shut down system
•For live cell imaging:
oRemove Tokai Hit incubator from the stage and place it on the table
oClose the Tokai Hit incubator with a plastic well
•Clean objective carefully
oRemove oil with lens paper:
oHold lens paper tight between your fingers and wipe over objective
oClean lens with 2-propanol on your lens paper
•Cover stage with lens paper box
•Save data to OIC network storage (O:\ drive)
oTo collect the data from your own pc, connect to network storage drive via the address:
\\oic-station\oic
user: guest, password: guest
oWhen the hard disk of the microscopes pc gets full, data will be deleted
oYou are responsible for your own data, the networkdrive is only for transport
•If you are the last user of the day
•Shut down all devices
oShut down mercury lamp as last
oCamera power is switched at the adapter box at the floor
•Switch off the power socket located at the floor
Contact
•Martijn de Gruiter Be-343 tel. 31105
•Gert-Jan Kremers Be-346 tel. 43578

Manual: TIRF Microscope
Ee-1454
Martijn de Gruiter Erasmus OIC 9
FRAP on the Fly Calibration
Before you can use FRAP the laser must be calibrated
•Find an empty piece of glass without cells/fluorescence
•Set the exposure time around 100 - 200ms
•Open ILAS2 with icon
•Open calibration tab and put the power of selected laser to 100% (in ILAS2 window)
•Activate the laser [G] and press “ Show Live”
•Place laser in upper left corner by moving the red cross, press [H]
•Repeat for lower right corner
oIf the spot isn’t visible or too big and bright change power and/or exposure time
oview is rotated, so move laser in other direction
okeep in mind to move red cross into left and right corners of the calibration screen
•Calibrate with button [i]
•To check if your calibration was successful open “ on the fly” tab
•Change time to 3000
•Increase the power of your laser and press “ Show Live”
•Click in the image and check if laser pulse in at the position of your mouse pointer
Troubleshooting - FRAP
FRAP calibration error
•Notification: Calibration canceled (exceeded 15 bits)
Possible errors
•Emitting fluorophore or auto fluorescence
oEnsure that the area of the slide really empty
•Too much laser power or exposure time
oReduce laser power in the ILAS2 window and/or exposure time in Acquire window
Gi
H
K
J
78
This manual suits for next models
1
Table of contents
Other Nikon Microscope manuals

Nikon
Nikon A1+ User manual

Nikon
Nikon Eclipse TS100 User manual

Nikon
Nikon ECLIPSE Ei User manual

Nikon
Nikon 50i User manual

Nikon
Nikon Ee1078 User manual

Nikon
Nikon 50i User manual

Nikon
Nikon SMZ645 User manual

Nikon
Nikon eclipse Ti-U/B User manual

Nikon
Nikon Eclipse E400 POL User manual

Nikon
Nikon Eclipse L200A User manual

Nikon
Nikon Epiphot 300 User manual

Nikon
Nikon E800 User manual

Nikon
Nikon A1R Series Service manual

Nikon
Nikon SMZ-10 Operating instructions

Nikon
Nikon eclipse E200 User manual

Nikon
Nikon A1 User manual

Nikon
Nikon Eclipse L200 User manual

Nikon
Nikon SMZ25 User manual

Nikon
Nikon SMZ-U Manual

Nikon
Nikon Eclipse L150 User manual