NIMBL XLR8 User manual

#nimblnation
rev. 20.2
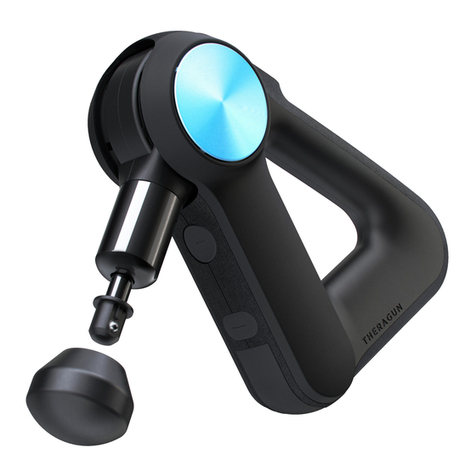
NIMBL XLR8 Percussion Massage Therapy Gun
Welcome to NIMBL Nation
Welcome to your new best friend, the NIMBL XLR8 Percussion Massage
Gun. The content inside this case is your pathway to feeling great,
performing great and minimizing or alleviating pain. We are thankful for
your purchase of the NIMBL XLR8 and hope you take advantage of all the
tools we at NIMBL have put together for you.
Visit www.joinnimbl.com to access videos and other content from our
amazing fitness educators, learn tips for your targeted needs and to
submit a review.
Our social media channels provide updates, strategies and real-world
examples to get you and your body back to top form. Tag us at
#NIMBLnation on your channels and follow ours—we love to share
your success.
Follow us on social media: joinNIMBL
WELCOME to NIMBL NATION!
—Pete, Josh, Jeremy and Tom
2

rev. 20.2
Plate
Chest, abdominals,
low back,
Gun & Accessories
• 1 Carrying case
• 1 NIMBL XLR8 Gun
• 6 Attachment Heads
• 1 Charger and Cable
• 1 Carrying Pouch
Attachment Heads
Usage recommendations are for general guidance. You may find a different
attachment works best for your specific need.
Please be cautious around bony structures to avoid pain and potential injury.
Do not change attachments while
power is on and do not to twist or turn
the attachment head to remove it as it
may damage the unit or attachment.
When installing or exchanging
attachment heads, simply pull the
attachment straight out and push the
new attachment straight in. You will
know the attachment head is secure
when you can’t push it in any further
3
Thumb
Shin Bone muscles,
forearm, glutes, feet,
palms, upper shoulders,
Apollo
A NIMBL exclusive
Areas around bony
structures, hips, chest,
mid back, ankle
Point
Glutes, piriformis (deep
gluteal muscle), quads,
more dense tissue
Ball
General use, upper
shoulders, quads,
hamstrings, biceps,
Y
Forearms, foot, shin
muscles (inside and
outside muscles of
the shin bone)

NIMBL XLR8 Percussion Massage Therapy Gun
Controls
Consult your doctor or medical professional before using the NIMBL XLR8.
or any massage/percussion/vibration tool. In addition, if you have any of
the following conditions, please discuss with your doctor prior to using
this or any massage/vibration tool:
• If you have skin disorders
• Neuropathy
• Retinal damage
• Pacemaker
• Recent surgery
4
Note these additional precautions when using the NIMBL XLR8:
Do not use the XLR8 on the front portion of your neck, on your head
or near your genitalia. Do not put fingers, hair or any part of the
body, in or near the telescopic rod of the XLR8 as this could cause
injury to you and damage to your XLR8.
• Pregnant
• Migraines
• Disc protrusion
• Spinal inflammation
• Diabetes or complications from diabetes
• If you have any clotting or bleeding disorders
• If you bruise easily
• If you recently had surgery, as percussion increases blood flow and may have
an adverse effect of open sores or stitched areas
• If you have nerve disorders, MS, epilepsy, or other nervous system disorders
Battery Charge
Indicator
Power Button
Percussion Speed
Indicator Lights Battery Power
Indicator Lights
-Decrease Button
+Increase Button
Precautions

rev. 20.2
Overview / Getting Started
5
Charging: Before first using your XLR8, please plug in and fully charge your
XLR8. Blinking green battery power indicator lights on your device and a red
light on the plug indicate that your device is charging.
When charging is complete, your device power indicator will show steady
green lights up to the 100% mark and your plug will show a steady green light.
The battery charge indicator will light when your XLR8 needs to be recharged.
With an average daily use of 30 minutes, your XLR8 battery charge should last
for 7-10 days. Charging time for a fully drained battery is typically 3-4 hours.
PLEASE DO NOT ATTEMPT TO USE WHILE CHARGING.
Turn On XLR8: Press the power button to turn on the device —the speed
indicator lights will show the starting (lowest) speed of 20Hz.
Turn Off XLR8: To turn off the devices, press the power button again and all
light indicators (battery power, speed) will go out
Percussion Speed Controls: Your XLR8 enables you to increase and decrrease
percussion speeds to six different settings. To increase the speed, press the +
button and to decrease the speed press the – button.
Cleaning
• DO NOT SUBMERGE YOUR XLR8 IN ANY FLUID
• DO NOT GET THE UPPER PORTION OF THE XLR8 WET
• DO NOT USE ANY CHEMICAL CLEANERS ON YOUR XLR8
• XLR8 handle and gun: wipe down with light soap and damp cloth
• Thumb, Plate, Y, Point, Apollo: general use cleaning wipes or soap and water
• Ball: water only
• Make sure attachment heads are fully dry before inserting them into the
XLR8 gun
• Be careful not to puncture attachment heads
General Care
• Do not use any attachments other than the ones included with your NIMBL
XRL8, and use only as instructed by NIMBL
• Do not run the battery all the way to empty
• Store in a cool dry place
• Do not use for longer than 15 continual minutes in one session to avoid
damage to the motor

NIMBL XLR8 Percussion Massage Therapy Gun
Usage Tips & Suggestions
First Use
If you are new to percussive or massage tools, let's do a test run:
1. Sit comfortably in a chair with your knees bent and your feet flat on
the floor
2. Insert the Ball head attachment
3. Turn the XLR8 on and push the “+” twice to 40 Hz (indicated on the
left side)
4. Start by gently applying the ball head to the middle of your quad
(upper front part of your leg)
5. Move up and down floating the Ball on the surface of your leg
6. Be cautious to not hit any bony structures, including the knee cap
7. Don’t press too firmly, and notice how it feels
8. This should feel good and like a massage
9. If there is any discomfort, move the speed up or down until you find a
comfortable, feel good experience.
10.If at any point you feel “unusual” pain, discontinue use. If in doubt,
check with your physician or medical professional
can support you and get you on your way to a NIMBL life
Pressure
Applying pressure onto the muscles and tissue of your body can be
intense. Our recommendation is to start with minimal pressure and
increase the pressure as your body adjusts.This is an individual
experience and should be decided individually.
• At faster speeds float the head across the tissue
• At slower speeds and for more dense tissue areas, greater pressure
may be applied
• TIP: Let feel be your guide as pain shuts down tissue communication.
When increasing pressure, do so gradually, increasing incrementally
each day.
6
Caution: Do not apply excessive pressure when
using the XLR8 as your device may shut down.
Use percussion speed controls to adjust pressure.

rev. 20.2
7
Usage Time
• Pre-workout or pre-activity percuss in the range of 15-45 seconds to
activate tissue for movement preparation
• During your Workout or if you just need a quick pick me up, percuss in
the range of 10-20 seconds as a “muscle wake up” inside the workout
or activity
• For Post workout or activity and pain management percuss the areas
up to 2 minutes and no longer to create blood flow, breakdown
adhesions/fibrotic tissue and stimulate the body’s natural healing
process.
• Do not use continuously for more than 15 minutes.
• TIP: start with less time and increase as your experience and
understanding increases
General Performance Tips
• Breathe: Oxygen is key to tissue response and breath is key to
recovery and a good percussive session. Slow, deep belly breaths are
essential to recovery as it allows the brain (nervous system) to relax,
which enhances the efficacy of the XLR8.
• Muscle Tension: Use your XLR8 to help loosen tight muscles and to
regenerate tissue pathways. For example: start with your leg straight
and begin to percuss your quad (front top of your leg). While
percussing, bend your knee.
• Hydrate: Proper hydration is important to overall health and to muscle
recovery.
Device Control
If the attachment head jumps or bounces off of the muscle while
percussing, simply change the angle of the attachment head and/or
change the speed.
Stubborn Areas
When working on a particularly stubborn area, decrease the speed of
the XLR8 to 20-30 Hz and percuss around, not directly on the area.
Then, with soft pressure, increase the speed up to 50 Hz or faster and
percuss the area.

NIMBL XLR8 Percussion Massage Therapy Gun
Warranty
This product's battery, motor, and controller are guaranteed for one year.
This product’s warranty is rendered null and void in the following
situations:
• Damage of the device and/or accessories caused by man-made
incorrect operation or transportation.
• Disassembly and/or repair of the device without authorization.
• Improper operation counter to the instructions in this manual.
• Damage of the device and/or accessories caused by exceeding the
design parameters of this product.
• Damage of the device and/or accessories caused by improper storage
or maintenance.
• Damage of the device caused by submersion in water or other liquids.
• Failure to provide proof of purchase date.
• Other improper use, storage or handling of the device and/or
attachments.
USE LIABILITY DISCLAIMER
The user of this product agrees to use at their own risk and takes full
responsibility and to hold NIMBL, it’s officers, employees and agents
harmless of any and all liability. NIMBL Inc. is not liable for any damage or
loss caused by the incorrect use of this equipment. The user of this
product shall consult with a licensed medical professional prior to any use
and will contact appropriate medical professionals if they experience
unusual pain or symptoms.
Please read the instruction manual carefully before using this equipment,
and use this equipment correctly in accordance with the instructions.
8
rev. 21.2
© 2021 NIMBL, Inc.
Table of contents

