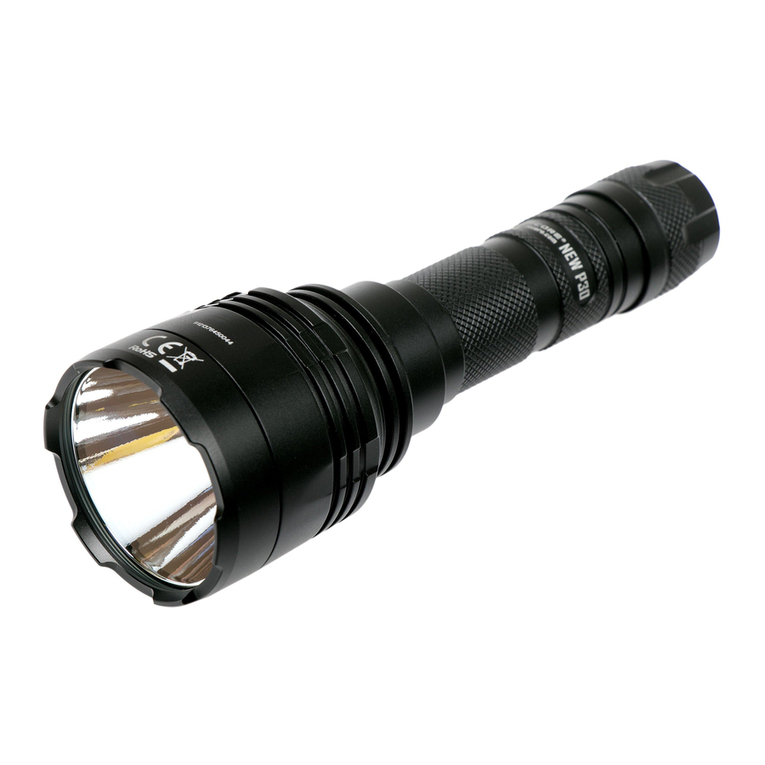
E4K
• Powered by a 21700 Battery
• Ultra High Performance
• Patented Power Indicator
Next Generation 21700
Compact EDC Flashlight
(English) E4K (Deutsch) E4K
All NITECORE®products are warranted for quality. Any DOA / defective product can
be exchanged for a replacement through a local distributor/dealer within 15 days
of purchase. After that, all defective / malfunctioning NITECORE®products can be
repaired free of charge within 60 months from the date of purchase. Beyond 60
months, a limited warranty applies, covering the cost of labor and maintenance, but
not the cost of accessories or replacement parts.
The warranty will be nullied if
1. the product(s) is/are broken down, reconstructed and/or modied by unauthorized
parties;
2. the product(s) is/are damaged due to improper use; (e.g. reversed polarity
installation)
3. the product(s) is/are damaged due to battery leakage.
For the latest information on NITECORE
®
products and services, please contact a local
NITECORE
®
※ All images, text and statements specied herein this user manual are for reference
purpose only. Should any discrepancy occur between this manual and information
specied on www.nitecore.com, Sysmax Innovations Co., Ltd. reserves the rights to
interpret and amend the content of this document at any time without prior notice.
Warranty Service
SYSMAX Innovations Co., Ltd.
TEL: +86-20-83862000
FAX: +86-20-83882723
Web: www.nitecore.com
Address:Rm2601-06,CentralTower,No.5XiancunRoad,
TianheDistrict,Guangzhou,510623,Guangdong,China
Please find us on facebook : NITECORE Flashlight
Thanks for purchasing NITECORE!
E08014K20
Made in China
Features
Specications
Accessories
Battery Options
Technical Data
Battery Installation
• Utilizes 4 x CREE XP-L2 V6 LEDs with a max output of 4,400 lumens
• An optical system combined with crystal coating and “Precision Digital Optics Technology” (PDOT)
• Maximum peak beam intensity of 11,100cd and maximum throw of 211 meters
• Highly ecient constant current circuit provides a stable output for up to 700 hours
• One side switch specially designed for outdoor applications controls 5 brightness levels and 3
special modes
• STROBE Mode uses randomly changing frequencies for stronger dizzying eects
• A power indicator beneath the side switch indicates the remaining battery power
(Patent No. ZL201220057767.4)
• The power indicator can display the battery voltage (±0.1V)
• NITECORE 21700 rechargeable Li-ion battery (NL2150HPR 5,000mAh) included
• Incorporated Advanced Temperature Regulation (ATR) module (Patent No. ZL201510534543.6)
• Electronic reverse polarity protection
• Optical lenses with double-sided scratch resistant coating
• Constructed from aero grade aluminum alloy
• HA III military grade hard-anodized nish
• Waterproof in accordance with IP68 (2 meters submersible)
• Impact resistant to 1 meter
• Tail stand capability
Length: 117.56mm (4.63”)
Head Diameter: 28.6mm (1.13”)
Tube Diameter: 25.8mm (1.02”)
Tail Diameter: 28.1mm (1.11”)
Weight: 80g (2.82oz)
NITECORE 21700 Rechargeable Li-ion
Battery (NL2150HPR 5,000mAh), USB-C
Charging Cable, Clip, Lanyard, Spare
O-ring, Holster, CR123 Battery Magazine
Type Nominal Voltage Compatibility
NITECORE NL2150HPR 5,000mAh 21700 3.6V Y (Recommended)
21700 Rechargeable Li-ion Battery
(Output Over 15A) 21700 3.6V/3.7V Y (Recommended)
Primary Lithium Battery CR123 3V Y (Compatible)
Rechargeable Li-ion Battery RCR123 3.6V/3.7V Y (Compatible)
21700 Rechargeable Li-ion Battery
(Output Below 15A) 21700 3.6V/3.7V N (Incompatible)
18650 Rechargeable Li-ion Battery 18650 3.6V/3.7V N (Incompatible)
FL1
STANDARD
TURBO HIGH MID LOW ULTRALOW STROBE SOS BEACON
4,400
Lumens 1,050
Lumens 320
Lumens 50
Lumens 2
Lumens 4,400
Lumens 4,400
Lumens 4,400
Lumens
*30min 3h 15min 7h 30min 45h 700h ─ ─ ─
211m 105m 57m 21m 3m ─ ─ ─
11,100cd 2,800cd 810cd 110cd 3cd ─ ─ ─
1m (Impact Resistance)
IP68, 2m (Waterproof and Submersible)
Note: The stated data is measured in accordance with the international ashlight testing standards
ANSI/PLATO FL 1-2019, using 1 x 21700 Li-ion battery (5,000mAh) under laboratory conditions.
The data may vary in real world use due to dierent battery usage or environmental conditions.
* The runtime for TURBO mode is tested without the temperature regulation.
* TURBO Availability: The TURBO level is only accessible when using a 21700 rechargeable Li-ion
battery with an output over 15A. It is inaccessible when using CR123/RCR123 batteries.
Operating Instructions
Battery Installation
Insert the battery(s) as illustrated and screw to tighten the tail cap.
Note: After the battery insertion, the power indicator beneath the switch will ash to indicate the
battery voltage. Please refer to the “Power Indication” section of this manual for more details.
Warnings:
1. Ensure the battery(s) is/are inserted with the positive end towards the head. The product will not
work if the battery(s) is/are incorrectly inserted.
2. Please use the battery magazine when using 2 x CR123 batteries to avoid battery rattling and to
ensure a stable contact.
3. DO NOT direct the beam to the naked eyes.
4. When the power level is low, please stop using the product and recharge the battery as soon as
possible to prevent damage to the battery.
5. When the product is kept in a backpack or left unused for prolonged time, please remove all
batteries to prevent accidental activation or battery leakage.
6. DO NOT submerge the light into any liquid when it is hot. Doing so may cause irreparable
damage to the light due to the dierence of air pressure inside and outside of the tube.
On / O
On: When the light is o, press and hold the Power Button for approx. 1 second to turn it on.
O: When the light is on, short press the Power Button to turn it o.
Brightness Levels
When the light is o, keep holding the Power Button after turning on the ashlight to cycle through
the following brightness levels: ULTRALOW – LOW – MID – HIGH – TURBO. Release to select the
desired brightness level. (This access has mode memory. When reactivated, the ashlight will
automatically access the previous memorized brightness level.)
Direct Access to ULTRALOW
When the light is o, double press the Power Button to directly access ULTRALOW.
Momentary Access to TURBO
When the light is on, press and hold the Power Button to momentarily access TURBO. Release to
returned to the previous brightness level.
Special Modes (STROBE / SOS / BEACON)
• When the light is on, triple press the Power Button to access the STROBE Mode.
• When the STROBE Mode is on, long press the Power Button each time to cycle through the
following special modes: SOS – BEACON – STROBE.
• When one of the special modes is on, short press the Power Button to exit special modes and
turn o the light.
User Mode Selection
The E4K provides 2 user modes including Daily Mode and Tactical Mode for dierent users and
situations.
• Daily Mode (Default Setting): When the light is o, triple press the Power Button to directly
access TURBO.
• Tactical Mode: When the light is o, triple press the Power Button to directly access STROBE.
To select a desired user mode:
1. Ensure the light is turned o.
2. Loosen the tail cap.
3. Keep holding the Power Button while simultaneously tightening the tail cap.
4. Once the tail cap has been tightened, the LEDs will indicate a user mode selected by ashing
once for Daily Mode or ashing twice for Tactical Mode.
Power Indication
• When the battery is inserted, the power indicator beneath the switch will ash to show the
battery voltage (±0.1V). For example, when the battery voltage is at 4.2V, the power indicator
will ash 4 times followed by a 1.5-second pause and 2 more ashes. Dierent voltages
represent the corresponding remaining battery power levels:
1×21700 battery
2×CR123 batteries
Note: When using two CR123/RCR123 in series, the indicator will show the average voltage
between the two batteries.
• When the light is o, short press the Power Button and the power indicator will ash to indicate
the remaining power:
1. Flashing three times indicates that the power is above 50%;
2. Flashing twice indicates that the power is below 50%;
3. Flashing once indicates that the power is below 10%.
ATR (Advanced Temperature Regulation)
The integrated ATR technology regulates the output of the E4K according to the working condition
and ambient environment to maintain the optimal performance.
Changing Batteries
The batteries should be replaced when the output appears to be dim or the ashlight becomes
unresponsive due to low power.
Maintenance
Every 6 months, threads should be wiped with a clean cloth followed by a thin coating of silicon-
based lubricant.
3.5V 3.7V 3.9V 4.2V
Low power Full power
Bedienungsanleitung
Einsetzen des/der Akku(s)
Setzen Sie die Akkus wie abgebildet ein und schrauben Sie die Heckklappe fest.
Hinweis: Nach dem Einlegen der Akkus blinkt die Betriebsanzeige unter dem Schalter, um die
Batteriespannung anzuzeigen. Für weitere Details lesen sie bitte den Abschnitt "Leistungsanzeige"
in diesem Handbuch.
WARNUNG:
1. Vergewissern Sie sich, dass die Batterie(n) mit dem positiven Pol zum Kopf hineingesetzt wird
(werden). Das Produkt funktioniert nicht, wenn die Batterie(n) falsch eingelegt ist/sind.
2. Bitte verwenden Sie bei Verwendung von 2 x CR123 Batterien das Batteriemagazin, um ein
Klappern der Batterien zu vermeiden und einen stabilen Kontakt zu gewährleisten.
3. Richten Sie den Strahl NICHT auf bloße Augen.
4. Wenn der Strompegel niedrig ist, stellen Sie bitte die Benutzung des Produkts ein und laden Sie
den Akku so schnell wie möglich auf, um Schäden am Akku zu vermeiden.
5. Wenn das Gerät in einem Rucksack aufbewahrt oder für längere Zeit nicht benutzt wird,
entfernen Sie bitte alle Batterien/Akkus, um eine versehentliche Aktivierung oder ein Auslaufen
der Batterien/Akkus zu vermeiden.
6. Tauchen Sie die Lampe NICHT in kalte Flüssigkeiten, wenn sie heiß ist. Dies kann zu irreparablen
Schäden an der Lampe aufgrund des Luftdruckunterschieds innerhalb und außerhalb des
Gehäuses führen.
Ein-/Ausschalten
Einschalten: Drücken Sie den Schalter und halten Sie ihn für ca. 1 Sek, um die E4K einzuschalten.
Ausschalten: Drücken Sie den Schalter kurz, um die E4K einzuschalten.
Helligkeitsstufen
Wenn das Licht ausgeschaltet ist, halten Sie nach dem Einschalten der Taschenlampe den
Schalter gedrückt, um nacheinander, fortlaufend durch die folgenden Helligkeitsstufen zu
schalten: "ULTRALOW" - "LOW" - "MID" - "HIGH" - "TURBO". Lassen Sie den Schalter los, wenn
die gewünschte Helligkeitsstufe leuchtet. (Dieser Zugri hat einen Mode-Speicher. Bei erneuter
Aktivierung greift die Taschenlampe automatisch auf die zuvor gespeicherte Helligkeitsstufe zu).
Direkter Zugang zu "ULTRALOW"
Wenn das Licht ausgeschaltet ist, drücken Sie zweimal die Ein-Taste, um direkt auf "ULTRALOW"
zuzugreifen.
Momentaner Zugang zu "TURBO"
Wenn das Licht eingeschaltet ist, drücken und halten Sie die Ein-Taste, um kurzzeitig auf "TURBO"
zuzugreifen. Lassen Sie los, um zur vorherigen Helligkeitsstufe zurückzukehren.
Sonder-Modi (STROBE / BEACON / SOS)
• Wenn das Licht eingeschaltet ist, drücken Sie drei Mal auf die Ein/Aus-Taste, um in den STROBE-
Mode zu gelangen.
• Wenn der STROBE-Mode eingeschaltet ist, drücken Sie lange auf den Ein/Aus-Schalter, um durch
die folgenden Spezialmodi zu schalten: "SOS" - "BEACON"" - "STROBE".
• Wenn ein Spezial-Mode eingeschaltet ist, drücken Sie kurz auf den Ein/Aus-Schalter, um die
Spezial-Modi zu verlassen und die Lampe auszuschalten.
Auswahl des Benutzermode
Die E4K bietet 2 Benutzermodi, einschließlich des Standard-Mode und des taktischen Modes für
verschiedene Benutzer und
Situationen.
• Standard-Mode (Standardeinstellung): Wenn das Licht ausgeschaltet ist, drücken Sie drei Mal auf
die Ein/Aus-Taste, um direkt auf "TURBO" zuzugreifen.
• Taktischer Mode: Wenn das Licht ausgeschaltet ist, drücken Sie drei Mal auf die Ein/Aus-Taste,
um direkt auf "STROBE" zuzugreifen.
So wählen Sie den gewünschten Benutzer-Mode:
1. Stellen Sie sicher, dass das Licht ausgeschaltet ist.
2. Lösen Sie die Heckkappe.
3. Halten Sie den Einschaltknopf gedrückt und ziehen Sie gleichzeitig die Heckkappe fest.
4. Sobald die Heckkappe fest angezogen ist, zeigen die LEDs einen ausgewählten Benutzer-Mode
an, in dem sie einmal für den Standard-Mode oder zweimal für den taktischen Mode blinken.
Leistungsanzeige
• Wenn die Batterie/der Akku eingelegt ist, blinkt die Leistungsanzeige unter dem Schalter, um
die Batteriespannung (± 0,1V) anzuzeigen. Wenn die Batteriespannung beispielsweise 4,2V
beträgt, blinkt die LED 4 Mal, gefolgt von einer 1,5-Sekunden-Pause und 2 weiteren Blinken.
Unterschiedliche Spannungen stellen die entsprechenden Batterie-Restleistungen dar:
1×21700 battery
2×CR123 batteries
Hinweis: Wenn Sie zwei CR123 / RCR123 in Reihe verwenden, zeigt die Anzeige die
durchschnittliche Spannung der beiden Batterien an.
• Wenn das Licht ausgeschaltet ist, drücken Sie kurz auf die Ein/Aus-Taste und die Betriebsanzeige
blinkt, um die verbleibende Leistung anzuzeigen:
1. Dreimaliges Blinken zeigt an, dass die Leistung über 50% liegt.
2. Zweimaliges Blinken zeigt an, dass die Leistung unter 50% liegt.
3 Einmaliges Blinken zeigt an, dass die Leistung unter 10% liegt.
ATR Technologie
Die erweiterte Temperaturregelung (ATR-Technologie) ermöglicht der E4K dynamisch angepasste
Ausgangsleistungen, entsprechend ihrer Gehäusetemperatur. Dies verhindert Schäden durch
Überhitzung und verlängert die Lebensdauer der E4K.
Batteriewechsel / Auaden der Akkus
Die Batterien sollten ausgetauscht oder aufgeladen werden, wenn der Lichtkegel dunkel erscheint
oder die Taschenlampe nicht mehr reagiert.
Wartung
Alle 6 Monate sollte das Gewinde mit einem sauberen Tuch abgewischt und anschließend mit einer
dünnen Schicht Silikonfett
geschmiert werden.
3.5V 3.7V 3.9V 4.2V
Low power Full power
(Francais)
E4K
Instructions
Installation des batteries
Insérer la ou les batteries comme indiqué et verrouiller le capuchon.
Note: Après mise en place des piles, l’indicateur lumineux clignote pour indiquer le voltage. Voir la
section « Batterie » de ce mode d’emploi pour plus de détails.
Avertissements:
1. Insérer les batteries correctement. La lampe ne fonctionnera pas si les batteries ne sont pas
correctement insérées
2. Utilizer le magasin pour l’utilisation de 2 x CR123 pour éviter les vibrations de la batterie et
assurer un contact stable
3. Ne pas Exposer à l’oeil nu.
4. Lorsque le niveau de puissance est faible, veuillez cesser d'utiliser le produit et recharger la
batterie dès que possible pour éviter d'endommager la batterie
5. Lorsque le produit est conservé dans un sac à dos ou laissé inutilisé pendant une période
prolongée, veuillez retirer toutes les piles pour éviter une activation accidentelle ou une fuite des
piles.
6. NE PAS plonger la lampe dans un liquide lorsqu’elle est chaude. Cela pourrait causer des
dommages irréparables en raison de la diérence de pression d'air à l'intérieur et à l'extérieur du
tube.
On / O
On: Maintenir enfoncé l’interrupteur pendant env. 1 seconde pour allumer.
OFF: Appuyez brièvement sur l’interrupteur pour éteindre.
Niveaux de luminosité
Lorsque la lampe est éteinte, maintenir appuyé l’interrupteur pour naviguer entre les modes:
ULTRALOW – LOW – MID – HIGH – TURBO. Relâcher lorsque vous êtes arrive au niveau désiré. (La
lampe possède une fonction mémoire qui permet de revenir directement au dernier mode utilisé
quand elle est réallumée.)
Accès direct à ULTRALOW
Lorsque la lampe est éteinte, appuyer 2 fois rapidement sur l’interrupteur pour accèder directement
à ULTRALOW.
Accès momentané au mode TURBO
Lorsque la lampe est allumée, maintenir appuyé l’interrupteur pour accéder au mode turbo.
Relâcher pour revenir au niveau precedent.
Modes spéciaux (STROBE / SOS / Balise)
• Quand la lampe est allumée, appuyer 3 fois sur l’interrupteur pour accéder au mode Strobe.
• Dans le mode STROBE, rester appuyé sur l’interrupteur pour naviguer entre : SOS – Balise –
STROBE.
• Appuyer rapidement sur l’interrutpeur pour éteindre la lampe.
Sélection du mode
La lampe E4K propose 2 modes d’utilisation : Quotidien ou tactique :
• Mode quotidien (par défaut): Quand la lampe est éteinte, appuyer 3 fois sur l’interrupteur pour
accéder au mode Turbo.
• Mode Tactique : Quand la lampe est éteinte, appuyer 3 fois sur l’interrupteur pour accéder au
mode STROBE.
Pour choisir un mode d’utilisation :
1. Eteindre la lampe.
2. Déverrouiller le capuchon.
3. Rester appuyé sur l’interrupteur tout en verrouillant le capuchon.
4. Une fois le capuchon verrouillé, la led clignotera 1 fois pour le mode Quotidient et 2 fois pour le
mode Tactique..
Indication de la puissance
• Lorsque la batterie est insérée, le voyant d'alimentation sous l'interrupteur clignote pour indiquer
la tension de la batterie (±0.1V). Par exemple, lorsque la tension de la batterie est à 4,2 V,
l'indicateur d'alimentation clignote 4 fois, suivi d'une pause de 1,5 seconde et de 2 clignotements
supplémentaires. Diérentes tensions représentent les niveaux de puissance de batterie restants
correspondants:
1×21700 battery
2×CR123 batteries
Note: Lorsque vous utilisez deux CR123 / RCR123 en série, l'indicateur achera la tension
moyenne entre les deux batteries.
• Lorsque la lampe est éteinte, appuyez brièvement sur le l’interrupteur et le voyant clignote pour
indiquer la puissance restante:
Il clignote 3 fois si le niveau de batterie est supérieur à 50% ; 2 fois s’il est inférieur à 50% et
une fois si la batterie est faible.
ATR (Régulation de température)
Le système avancé de régulation de la température, permet à la lampe d’ajuster de façon
dynamique son niveau d’éclairage en fonction de sa température interne pour maintenir des
performances optimales.
Remplacement des batteries
Si la lampe devient faible ou ne répond plus aux réglages, cela signie également que les batteries/
piles doivent être remplacées ou rechargées.
Maintenance
Tous les six mois, le letage doit être essuyé avec un chion propre et recouvert d’un lubriant à
base de silicone.
3.5V 3.7V 3.9V 4.2V
Low power Full power
