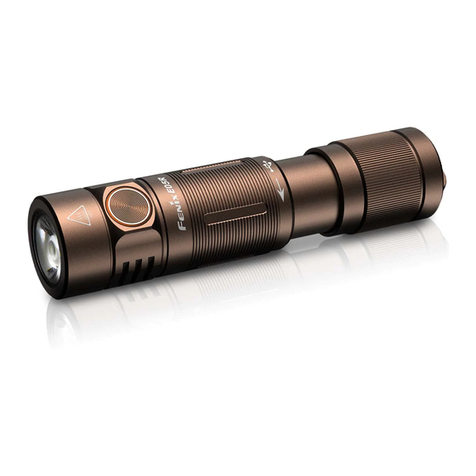
TQC P5 Series User manual

Part Number . ...... ...... ...... ...... ...... ...... ......Page 1
Specifications ...... ...... ...... ...... ...... ...... ......Page 2
Main Features...... ...... ...... ...... ...... ...... ......Page 3
Operating Instructions. . . . . . . . . . . . . . . . . . . . . . . . . . . . . . . . . . . . Page 4
How To Charge ..... ...... ...... ...... ...... ...... ......Page 5
Maintenance. ...... ...... ...... ...... ...... ...... ......Page 6
Warnings.... ...... ...... ...... ...... ...... ...... ......Page 7
Environmental Notice . . . . . . . . . . . . . . . . . . . . . . . . . . . . . . . . . . . . Page 8
Warranty Card...... ...... ...... ...... ...... ...... ......Page 9
Multiple Modes:
Waterproofness:
IC Control:
Unique Switch:
Light Source:
Light Output:
Runtime:
Effective Range:
Construction Material:
Battery Type:
Accessories:
Adjustable beam patterns, 100% Brightness - 50% Brightness - OFF
IPX7, dusttightness, weatherproof ness & waterproofness
Digitally managed to optimize output power and heat
Tailcap multiple-function E-Switch
State-of-the-art Power-LED*
250 / 120* Lumens
3.0 / 6.0* hours on HIGH
100 - 300m
CNC machined and hard-anodized aerospace-grade aluminum
1×18650 rechargeable Li-ion battery (3.7V, 2500mAh)
AC/DC switch-power charger, DC vehicle charger, charger barrel, batter y
compartment, holster and lanyard.
*Using optional ultra high-output power-LED assembly (Cree / Nichia / Os ram / Seoul, etc).
Page 2
Page 3
Page 1
PART NUMBER
SPECIFICATIONS
MAIN FEATURES
OPERATING INSTRUCTIONS
300m
Tail cap E- Switc h
POWER-LED FLASHLIGHT
User Manual
SERIES
P5
Weight (w/t battery; g)
Dimensions (cm)
Model Type
L14.7xH3.7xB2.1
P5R-18650
135
Power ed
By
Front
Back
Page 4
Battery Installation
Unscrew the flashlight (torchlight) tailcap by counter-clockwise rotation and gently insert a fully-charged
18650 Li-ion battery into the flashl ight with the positive end of the battery facing forwards, Replace the tailcap
and rotate it clockwise until it's in a tight position.
Zo om Out
Zo om In
Beam Pattern Adjustment
Hold the flashli ght body and push the head part to adjust the beam
pattern from flood (or wide) beam to spot (or focused) beam. The
flashlight delivers the narrowest & brightest circular beam pattern and
the longest shooting-distance when the head part is retracted the
furthest away from the flashlight body. The circular beam diameter
becomes the biggest when the head part is drawn the closest to the
flashlight body.
100% Brightne ss: Fully depre ss tailcap push button to "clic k-on" position to a ctivate 100% Br ightness.
50% Brightnes s: In the 100% Brig htness mode, ha lf depress tail cap pushbutton on ce to set 50% Brigh tness. Half dep ress
tailcap pushb utton again to re cover 100% Brightness. Either 10 0% or 50% Brightn ess mode can be rec ycled by sequen tial
half-depressing.
OFF: Fully depress t ailcap pushbu tton to "click- off" positi on to switch off the flashli ght.
1.
2.
3.
Multiple-Mode Settings

Page 6
Page 7
The flashlight produces substantial heat during operation. Do not leave
activated flashlight unattended. Do not place activated flashlight against
combustible material or materials that could be damaged by heat. Do not hold
bezel or lens of activated flashlight against any portion of human body. Keep
away from children. Ensure that the flashlight cannot be turned on when stored
or being transported. If the flashlight is activated while in case or other
containers, it could overheat and cause damage to surrounding materials.
Rechargeable or primary batteries can explode or cause burns if disassembled,
shorted, exposed to water, fire or high temperature. Do not place loose batteries
in a pocket, purse, or other containers containing metal objects, mix with used or
other battery types, or store with hazardous or combustible materials. Remove
the battery from the flashlight and store them in a cool, dry, clean & ventilated
place, if left unused for a prolonged period. Follow applicable laws and
regulations for disposal.
Page 8
Page 5
Page 9
TQC warrants its products to be free from defects in materials and workmanship
for one year. During this period, TQC will repair or replace, at its option and
without charge, any product or part which is found to be defective under normal
use and service. Such repair or replacement shall be the purchaser's sole and
exclusive remedy under this warranty. This warranty does not apply to any
products or parts which have been subject to modification, misuse, negligence,
accident, improper maintenance or repair by anyone other than TQC. Damage
from batteries is not covered. This warranty is void if any failure or defect is due
to severe mishandling or abuse.
There is no other express warranty. TQC hereby declaims any and all implied
warranties, including but not limited to fitness for a particular purpose. TQC
shall not be liable for any incident, consequential or special damages arising out
of, or in connection with, product use or performance.
WARNINGS
WARRANTY CARD
The flashlight is provided with a rechargeable Li-ion battery, which does not contain any
harmful heavy metals. Nevertheless, in the interest of protecting the environment,
please do not dispose of the flashlight in the household waste at the end of its useful life.
Disposal can take place at approved recycling or disposing locations in accordance with
local regulations.
ENVIRONMENTAL NOTICE
At least twice yearly, clean threads and O-rings with clean cloth and apply a thin coat of
silicone-based greese or lubricant to both. If the flashlight is used in wet environment,
lubricate O-rings frequently to maintain watertight seal. Whenever the flashlight
becomes dirty, or after exposure to salt water, it should be cleaned by rinsing with fresh
water or mild soap and water and then be wiped dry with a soft cloth. The illumination
optical lens may be cleaned using a soft cloth with water, alcohol or general purpose
window cleaner.
MAINTENANCE
HOW TO CHARGE
Rotate the Charger Cover counter-clockwise to reveal the DC
Jack of the flashlight.
Insert the AC switch-power Charger Powercord to the DC Jack
of the flashlight.
Connect the AC switch-power charger (or DC vehicle charger)
plug to a 100-240VAC (50/60Hz) power source (or 12-24VDC
vehicle power).
The LED indicator of the charger will illuminate in RED color
indicating that charging is in progress. The charging time is
typically less than 3 hours for a full charge. When the charging
is completed, the LED indicator will automatically turn to
GREEN color. After a full charge, the charger will automatically
hold the charging voltage to an ideal value to avoid over-
charging the battery.
After a full charge, rotate the Charger Cover clockwise to
completely cover the DC Jack.
1.
2.
3.
5.
HOW TO CHARGE
Make sure the rechargeable battery to be inserted into the
Charger Barrel, with the positive end of the battery facing
upwards, and rotate the tailcap clockwise a few turns to engage
complete seal.
Insert the AC switch-power (or DC vehicle charger) Charger
Powercord to the DC Jack of the Charger Barrel.
Connect the AC switch-power charger (or DC vehicle charger)
plug to a 100-240VAC (50/60Hz) power source (or 12-24VDC
vehicle power).
The LED indicator of the charger will illuminate in RED color
indicating that charging is in progress. The charging time is
typically less than 3 hours for a full charge. When the charging
is completed, the LED indicator will automatically turn to
GREEN color. After a full charge, the charger will automatically
hold the charging voltage to an ideal value to avoid over-
charging the battery.
1.
2.
3.
4.
- Independent Charge
- Easy Plug & Charge
Charger Powerc ord
Charger Cover
DC Jack
4.
Visit www.tqc.eu for more products.
Charger Power cord
Charger Barre l
This manual suits for next models
1
Table of contents
Other TQC Flashlight manuals
