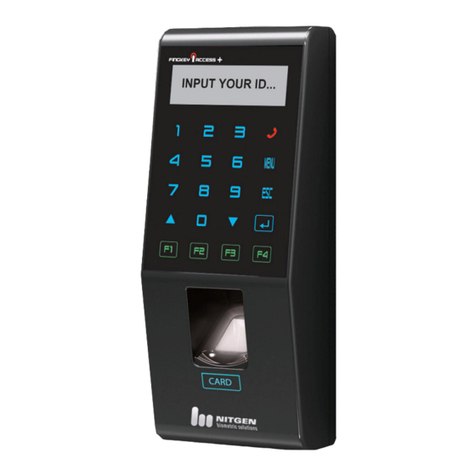
Nitgen eNBioAccess-T1 User manual

Fingerprint Access Controller
eNBioAccess-T1
User Guide

2
©Copyright 2013, NITGEN Co., Ltd. All rights reserved. `
This manual may not be reproduced, either wholly or in part, without prior
permission.
Product spec is subject to change without notice for improvement of fuction.
NITGEN&COMPANY, NITGEN Logo are trademarks of NITGEN Co., Ltd.
Other names or trademarks are registered trademarks of the owners.
Customer Support Center
Tel: 02.6488.3232
Fax: 02.6488.3099
Email: customer@nitgen.com

`
3
Table of Contents
CHAPTER 1 BEFORE STARTING
..................................................... 4
1.1
I
NTRODUCTION
..............................................................................................5
1.2
C
OMPONENTS
...............................................................................................6
1.3
N
AME OF EACH PART
.....................................................................................7
1.4
C
ONFIGURATION OF EXTERNAL CABLE
...............................................................8
1.4
LED
SIGNALS
................................................................................................9
1.5
B
UZZER SOUNDS
............................................................................................9
CHAPTER 2 SYSTEM CONFIGURATION
......................................... 10
2.1
N
ETWORK MODE
.........................................................................................11
2.2
I
NDEPENDENT
M
ODE
...................................................................................12
CHAPTER 3 HOW TO USE
.......................................................... 13
CHAPTER 4 ATTACHMENT
......................................................... 17
4.2
T
ROUBLESHOOTING
......................................................................................19
4.3
P
RODUCT
S
PECIFICATIONS
.............................................................................22

4
Chapter 1 Before
Starting
1.1 Introduction
1.2 Components
1.3 LED Signals
1.4 Buzzer Sounds

`
5
1.1 Introduction
Access control system eNBioAccess-T1 of Nitgen is a superior
system which organically integrated core technologies such as
fingerprint verification algorithm, optical sensor, embedded design
technology and software application technology which are well
acknowledged throughout the world of Nitgen.
The terminals which have separately been operated are designed by
considering operation efficiency of integrated monitoring and
systematic managing at remote place through network.
Up-to-date
Biometrics Tech
Eronomic
Design
Simple
Management
S/W

6
1.2 Components
The following shows the components of eNBioAccess-T1. For the
details of product installation, please refer to installation guide. If
any of components is missing, please contact Customer Support
Team.
terminal
Fixing bracket
Adapter
POWER CABLE
Screws for terminal bracket
Screws for bracket
software CD

`
7
1.3 Name of each part
<Front>
No.
Name
Description
1
LED
Section to display various terminal information
2
Fingerprint input
section
Section to input fingerprint for fingerprint verification
3
Card input section
Section to touch card for card verification
(1) LED
(2) Fingerprint input section
(3) Card input section

8
1.4 Configuration of external cable
※Configuration of external connection cable

`
9
1.4 LED signals
●
Error
Red
OFF: normal
ON: ON for 1 second if verification fails
blinker: blinker at the interval of 1 second if
the cover is open
●
Success
ful
Green
ON: ON for 2 second if verification is
successful
●
Status
Blue
blinker: Waiting for input of card or
fingerprint
ON: normal
1.5 Buzzer sounds
Beep
Finger is
pressed or card
is touched
Card is read.
Fingerprint input is finished and
user can take finger OFF.
Beep, beep
Verification is
failed
Verification is failed or user
input is wrong
Long
Beeping
Waiting for
Input
Waiting for input of fingerprint
or card
Short
Beeping
Verification is
successful
verification is successful

10
Chapter 2 System
Configuration
2.1 Network Mode
2.2 Independent Mode

`
11
2.1 Network mode
This mode is to control/manage by connecting the terminals to
Access Manager Pro.
Figure2.1 Network configuration
TCP/IP
Server PC
Client PC
Network Mode

12
2.2 Independent Mode
This mode is to independently control/manage without connecting
terminal(s) through network.
Figure2.2 Terminal Configuration
Independent Mode

`
13
Chapter 3 How
to Use
3.1 Network Setting

14
3.1 How to Set Network
3.1.1 Default setting at factory
- DHCP mode: Not used
- Terminal ID: 0
- Server IP: 192.168.0.171
- Terminal IP: 192.168.0.2
- Subnet Mask: 255.255.255.0
- Gateway: 192.168.0.1
3.1.2 Searching terminal in Access Manager Pro.
Execute ‘Terminal Search’in terminal management menu of Access
Manager Pro to set terminal IP.

`
15
Click ‘Search’button in the screen above to display terminals not
registered at Access Manager Pro as shown below.
Click “…” button to display detail setting screen as shown above.

16
To modify terminal ID and Network setting, check terminal to be set
first, input value to be changed, and click “Modify ID”or “Modify IP”
button to modify the value of the relevant terminal.
Set terminal ID, Terminal Network item and click Connection Request
button on the bottom to display terminal as not registered status in
Access Manager Pro screen and to complete the setting.

`
17
Chapter 4
Attachment
4.1 How to Input Fingerprint
4.2 Troubleshooting
4.3 Product Specification

18
4.1 How to input fingerprint
To prevent verification error, input fingerprint observing the
followings for registration and verification of user fingerprint.
①Maximize input area and evenly press the finger. Supposing
that it is 0% when finger is pressed with no force and it is
100% when finger is pressed with max force, softly press it
with about 70~80% of force.
②Place core of fingerprint at the center. In general, core of
fingerprint is in the same line with semicircular part of nail.
Hence, place semicircular part of nail at the center of
fingerprint input window while inputting fingerprint.

`
19
4.2 Troubleshooting
<Time for fingerprint verification is too long or verification
failed>
1. If the server is used as business use or personal when terminal is
in network mode and operating with 1:N (server) verification
type, it may take long for verification and verification rate can be
reduced due to server load. It is recommended that a dedicated
server is set up.
2. Check for a scar on a finger or foreign material on the sensor. In
case of foreign material, wipe it away. If scar is big, contact the
administrator to reregister another fingerprint.
3. If state of fingerprint is not good, lower personal security level in
user information and try 1:1 verification.
4. If the RF card which is registered with ID of the relevant user is
verified, existence of a user will be checked when verification is
failed. Check whether the relevant user is registered.
<Fingerprint input continues failure>
If state of fingerprint is dry or wet, sometimes normal input is
difficult because fingerprint image point is not reached. If it is wet,
wipe it with something like dry towel. If it is dry, breathe on the
finger or put some oil and try again.
<RF card verification continues failure>
1. Check if the card type is same with the card type which is set in
‘Information management terminal management terminal
information terminal setting RF card type’of “Access
Manager Pro.”.

20
<network is disconnected>
1. Check whether terminal is registered in ‘Information
management of “Access Manager Pro.” terminal
management’.
2. In case of terminal which is not registered, check the setting of
the relevant terminal in ‘Information management terminal
management terminal search -> search ‘…’’ of “Access
Manager Pro.”.
①Check server IP to which “Access Manager Pro.”is installed.
②Check whether terminal ID is correctly set.
③In case of no using of DHCP, check the related information.
<Verification is successful but the door won’t open>
1. Check for time at which access is limited by time zone.
<User registration continues failure>
The product is set to network mode as default value. If network link
is not normal in network mode, user registration is impossible.
Check the state of network link.
<System is unstable or not working>
1. Select terminal in ‘Terminal management’of “Access Manager
Pro.” and click “terminal restart”in the right button menu to restart
terminal.
Other manuals for eNBioAccess-T1
1
Table of contents
Other Nitgen Gateway manuals
Popular Gateway manuals by other brands

Elvaco
Elvaco CMe3100 user manual
ITS Telecom
ITS Telecom CGW-T4 Installation and programming manual
Juniper
Juniper SRX300 Series How to set up
eWON
eWON eWON500 user guide

Avaya
Avaya ClearOne Converge Pro VH20 Application notes
Unique Lighting Systems
Unique Lighting Systems SMRT Logic LPLUS Quick reference & setup guide
