Nitto DURA SI600 User manual

THERMAL PRINTER
I N S T R U C T I O N M A N U A L


PREFACE
I
PREFACE
We appreciate your using (Nitto)’s DURA PRINTER SI600.
“DURA PRINTER SI600” is a high quality thermal transfer label printer with excellent workability and durability,
which can print transmissions and/or others clearly and quickly.
This manual explains how to manage and maintain the DURA PRINTER SI600, maintaining it in optimum condition
for as long a period as possible. Please read through this “Instruction Manual” before use.
Please store the manual carefully when not in use.
The DURA PRINTER SI600 can be used in either of the following two ways.
1) After a Windows printer driver has been installed on a PC.
After the DURA PRINTER SI600 printer driver is installed on a PC, printing can be carried out via any Windows
application capable of printing image data.
For driver installation and setup procedures, refer to the “DURA PRINTER SI600 Printer Driver Instruction
Manual” on the accompanying CD.
Label printing software for FA, “Label Studio”, is available and makes label printing easier.
2) By transmitting exclusive commands (character data) from a PC or other devices to the printer and using fonts and
barcodes stored in the printer’s memory.
For information on the commands, refer to the “DURA PRINTER SI600 Command Reference Manual” on the
accompanying CD; for information on the interface required when issuing the commands, refer to the “DURA
PRINTER SI600 Interface Manual”. It is necessary for proper printing that the operator familiarize himself/herself
with the commands before transmitting these to the printer.
Duplication of this manual without permission is not allowed.
Difference between the product and the contents in this manual may result from improvement and/or other
modification of the product.
The contents in this manual may be subject to future change without notice.
This manual is created with assurance of perfection, but if anything about the contents appears to be incorrect
or if you have any suggestion, please feel free to contact us.
Microsoft® and Windows® are either registered trademarks or trademarks of Microsoft Corporation in the U.S.
and/or other countries.
Acrobat Reader and Adobe are the trademarks of Adobe Systems Incorporated.
“QR Code” is the registered trademark of DENSO Corporation. “PDF417” is the registered trademark of Symbol
Technologies, Inc.
“Maxi Code” is the registered trademark of United Parcel Service, Inc. “Data Matrix” is the registered trademark
of ID Matrix.

PREFACE
II
IMPORTANT INFORMATION
This product has potential dangers. Please install, operate and maintain/examine
the product in accordance with the instructions in this manual.
If you do not
follow the instructions, or if any harm or injury occurs caused by
carelessness, misuse/unpermitted modification or other action, NITTO DENK
O takes
no responsibility.
In the industrial device industry, as new materials, processing methods as well as acceleration of the
mechanical devices, more and more potential dangers show up. These dangers could not be predicted
under all circumstances. Moreover, “things that cannot be done” and “things that mustn’t be done” exist
in large amount, which is not possibly to be all listed in this manual. If it is NOT indicated in the
manual as “things that can be done”, please regard it as “things that cannot be done”. During the
installation, operation and/or maintenance/examination of this product, please give full consideration to
not only those points written in this manual and/or indicated on the main part of the product, but also
general safety measures.
A blade used to cut label off is set in the optional Cutter Unit. If you put your finger tips close to this
part, pinching or cutoff injuries will happen. When you fasten or remove the Cutter Unit, please set the
power switch as OFF.
In order to prevent potential trouble or malfunction, please keep regular maintenance.
Refer to “4.1 Cleaning the Interior of the Printer” described in chapter 4 of the manual.
The copyright of this manual belongs to NITTO DENKO and NITTO DENKO keeps all rights. Please
do not duplicate or publicize any picture and/or technical data without a previous written consent from
NITTO DENKO.
If you have any question about this manual or you need more detailed information, please go to the shop
you purchased this product or our customer window for enquiry and bring with you the type (model)
and serial number indicated on the plate, and please do not proceed with your operation before you ask
your questions and receive the answer.
This equipment has been tested and found to comply with the limits for a Class B digital
device, pursuant to Part 15 of the FCC Rules. These limits are designed to provide
reasonable protection against harmful interference in a residential installation. This
equipment generates, uses and can radiate radio frequency energy and, if not installed and
used in accordance with the instructions, may cause harmful interference to radio
communications. However, there is no guarantee that interference will not occur in a
particular installation. If this equipment does cause harmful interference to radio or
television reception, which can be determined by turning the equipment off and on, the user
is encouraged to try to correct the interference by one or more of the following measures:
Reorient or relocate the receiving antenna.
Increase the separation between the equipment and receiver.
Connect the equipment into an outlet on a circuit different from that to which the
receiver is connected.
Consult the dealer or an experienced radio/TV technician for help.

PREFACE
III
WARRANTY LIMITATIONS
NITTO DENKO Corporation is responsible for repair and/or replacement of product in
accordance with following conditions, provided that the purchased material or finished product
has defect acknowledged by NITTO DENKO.
• If the reason for inappropriateness is obviously the defect in the design/manufacture of the
delivered product or the harm occurred during manufacture and/or on the way of
transportation, the relevant part(s) is (are) provided or repaired free of charge.
• If the reason for inappropriateness is force majeure or product not delivered by us, such
circumstances are excluded;
• If the reason for inappropriate is not clear, solution to the problem shall be decided on the
basis of agreement.
The company shall not be responsible for direct or indirect malfunctions or expenses incurred
arising from use of the product supplied.
We assume no liability with regard to problems such as a system shutdown, or expenses
incurred as a result of misuse or mishandling of the machine.
The warranty period shall last for a period of 6 months from the date of delivery.
PREFACE
IV
ALERT SYMBOLS AND MEANINGS
The symbols used in this manual are categorized into 2 classes according to the degree of danger and the scale of the
assumed accident. Please understand the meaning of the symbols listed below and abide by the instructions in this
manual or on the warning sheet pasted on the main part of this product.
Symbols
Meaning
Used under very dangerous situation when death or serious injury will be suffered if not avoided.
Used under dangerous situation when the machine/device will be harmed or when minor injury or
impairment at intermediate level will be suffered, if not avoided.
Used to promote special attention and to convey emphasized information.
Used to provide reference information in operation.
Used to indicate reference page in operation.

PREFACE
V
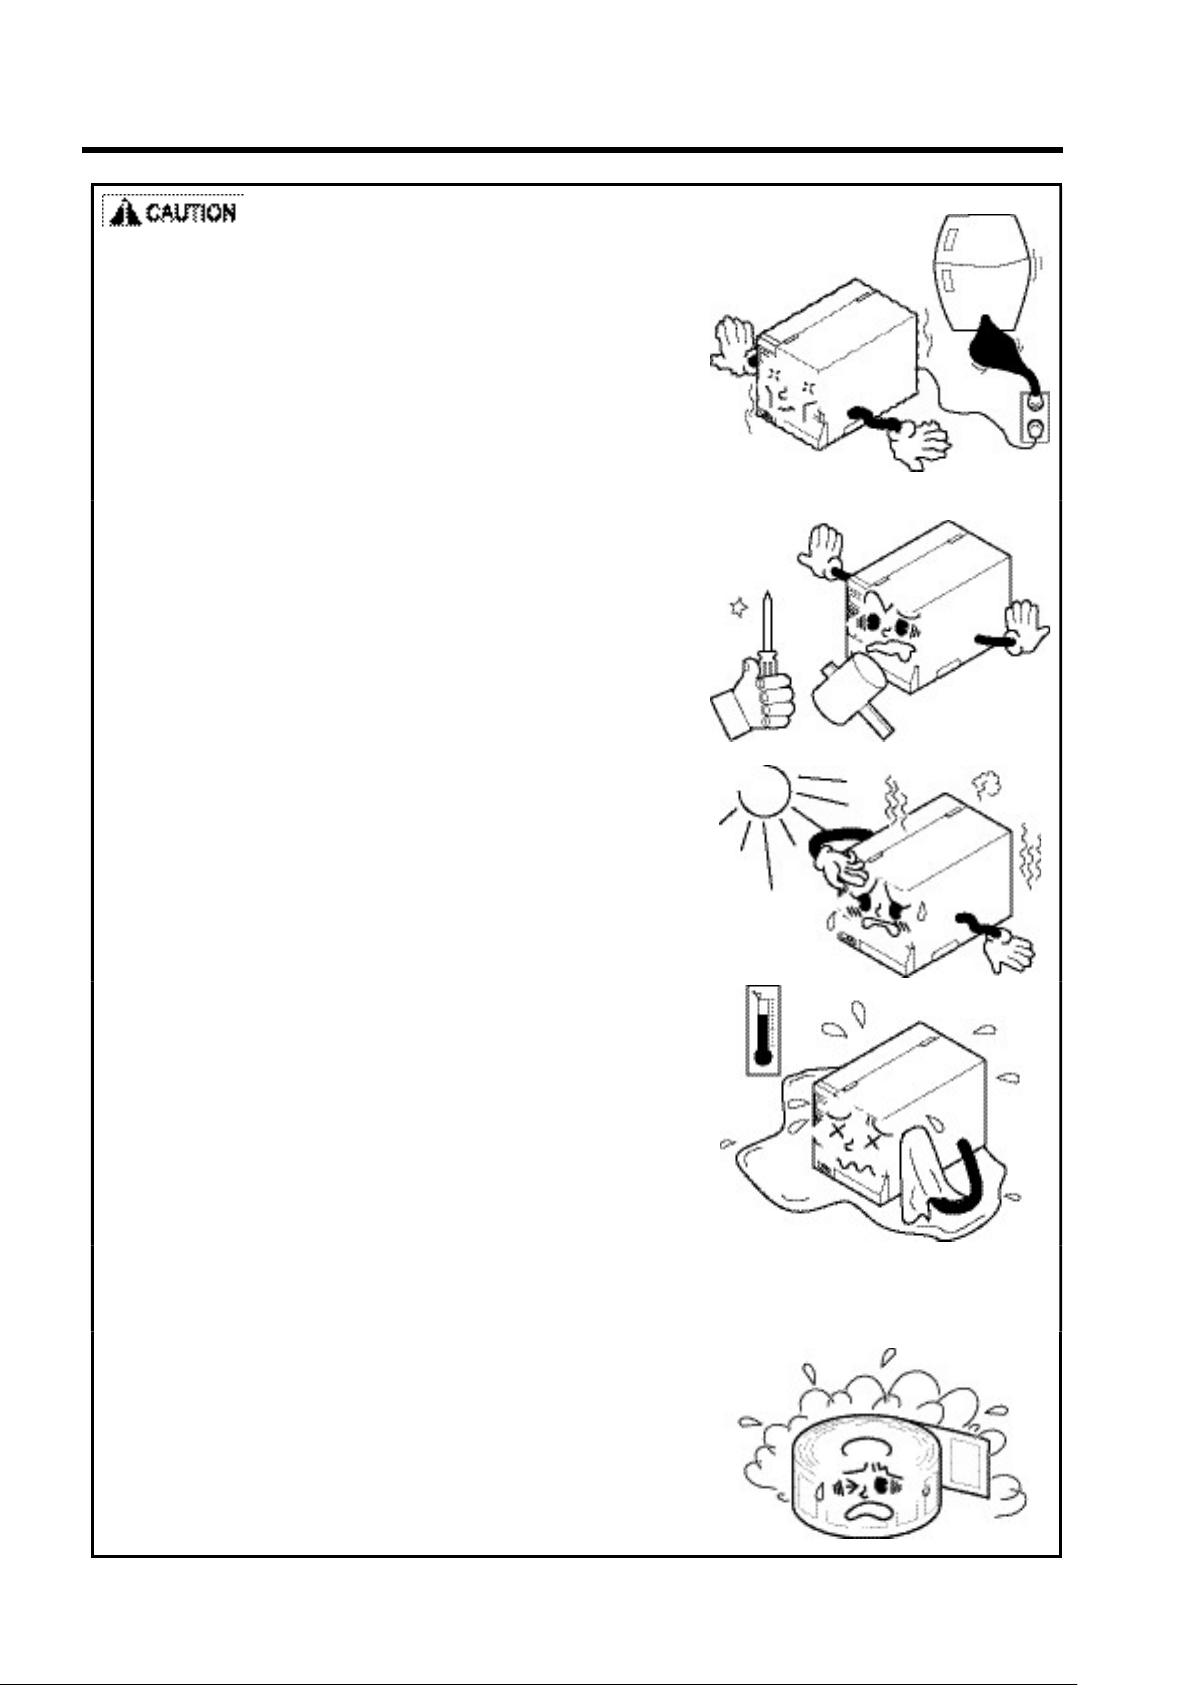
PRECAUTIONS WHEN USING THE PRINTER
For safe handling of this machine, some of the important points must be explained and obeyed.
• Please keep the machine in a place
without vibration and set it horizontally
level plane for use.
If not set in a place without vibration and horizontally
stable, clear printing cannot be produced.
In addition, if the main part falls down injury and
malfunction will also happen.
• Please make sure that power source is
AC 100V - AC 240V.
If power source other than AC 100V – AC 240V is
used, it will cause fire accident.
• Please use the power cord provided in
your package as accessory.
• Please be sure that the main part,
terminals and other parts are not wet.
Parts carrying water will cause fire accident or
malfunction.
• Please do not unplug the power cord
from socket outlet with wet hand(s).
Such action will cause electric shock and/or short
circuit.
• Please do not modify the socket outlet or
power cord.
It will cause fire accident and/or electric shock.

PREFACE
VI
• When installing the options, please unplug
the power plug.
• Please do not hold the side cover when
moving the printer main part.
If the main part fell down, the side cover will be opened
and injury and malfunction would happen.
Please close the side cover and hold the bottom of the
printer main part to move it.
• Please be careful when opening and/or
closing the side cover.
Put your hands in the opening/closing area will cause injury.
And, when opening the side cover please open the cover
completely until the upper surface of the cover adheres to
the printer main part; when closing it, please hold the
handle and close it slowly.
If you release your hands when it is still open in the midway
or in the course of opening and/or closing, the cover will
fall and will cause injury or malfunction.
• Please be careful when opening and/or
closing the thermal head and/or the press-
down area.
Placing your fingers and/or hands in the area where the thermal
head is tuned to move up and down will cause injury.
Moreover, when opening the presser, please confirm that the
presser is completely opened and fastened with magnet.
When closing it, please hold the handle and close it slowly.
If you release your hands when it is still open in the midway
or in the course of opening and/or closing, the presser will fall
and will cause injury or malfunction.
• When the thermal head is hot, please don’t
touch it.
• Please don’t touch the driving parts such as
the platen roller during printing or feeding
in/out paper.
PREFACE
VII
• Please supply electricity from power
source that has less fluctuation of
voltage.
Please do not supply electricity from the same power
source or nearby power source which provide
electricity to large electronic products that consume
large quantity of electricity, like heater, refrigerator,
crane, etc.
Improper operation will cause malfunction.
• This is a precision instrument. Please
avoid sudden shock.
Please do not disassemble it. Disassembly will cause
malfunction.
• When transporting or moving the printer
main part, please remove label and
thermal transfer ribbon.
• Please do not use it in places where it is
exposed to direct rays of the sun for a
long time.
It will cause malfunction.
• Please do not use it in places where
temperature and humidity is high.
It will cause malfunction.
• Please choose the label and thermal
transfer ribbon that are made by Nitto
Den
ko.
• Please do not keep the label and
thermal transfer ribbon in places where
temperature and humidity is high.
It will cause error.
PREFACE
VIII
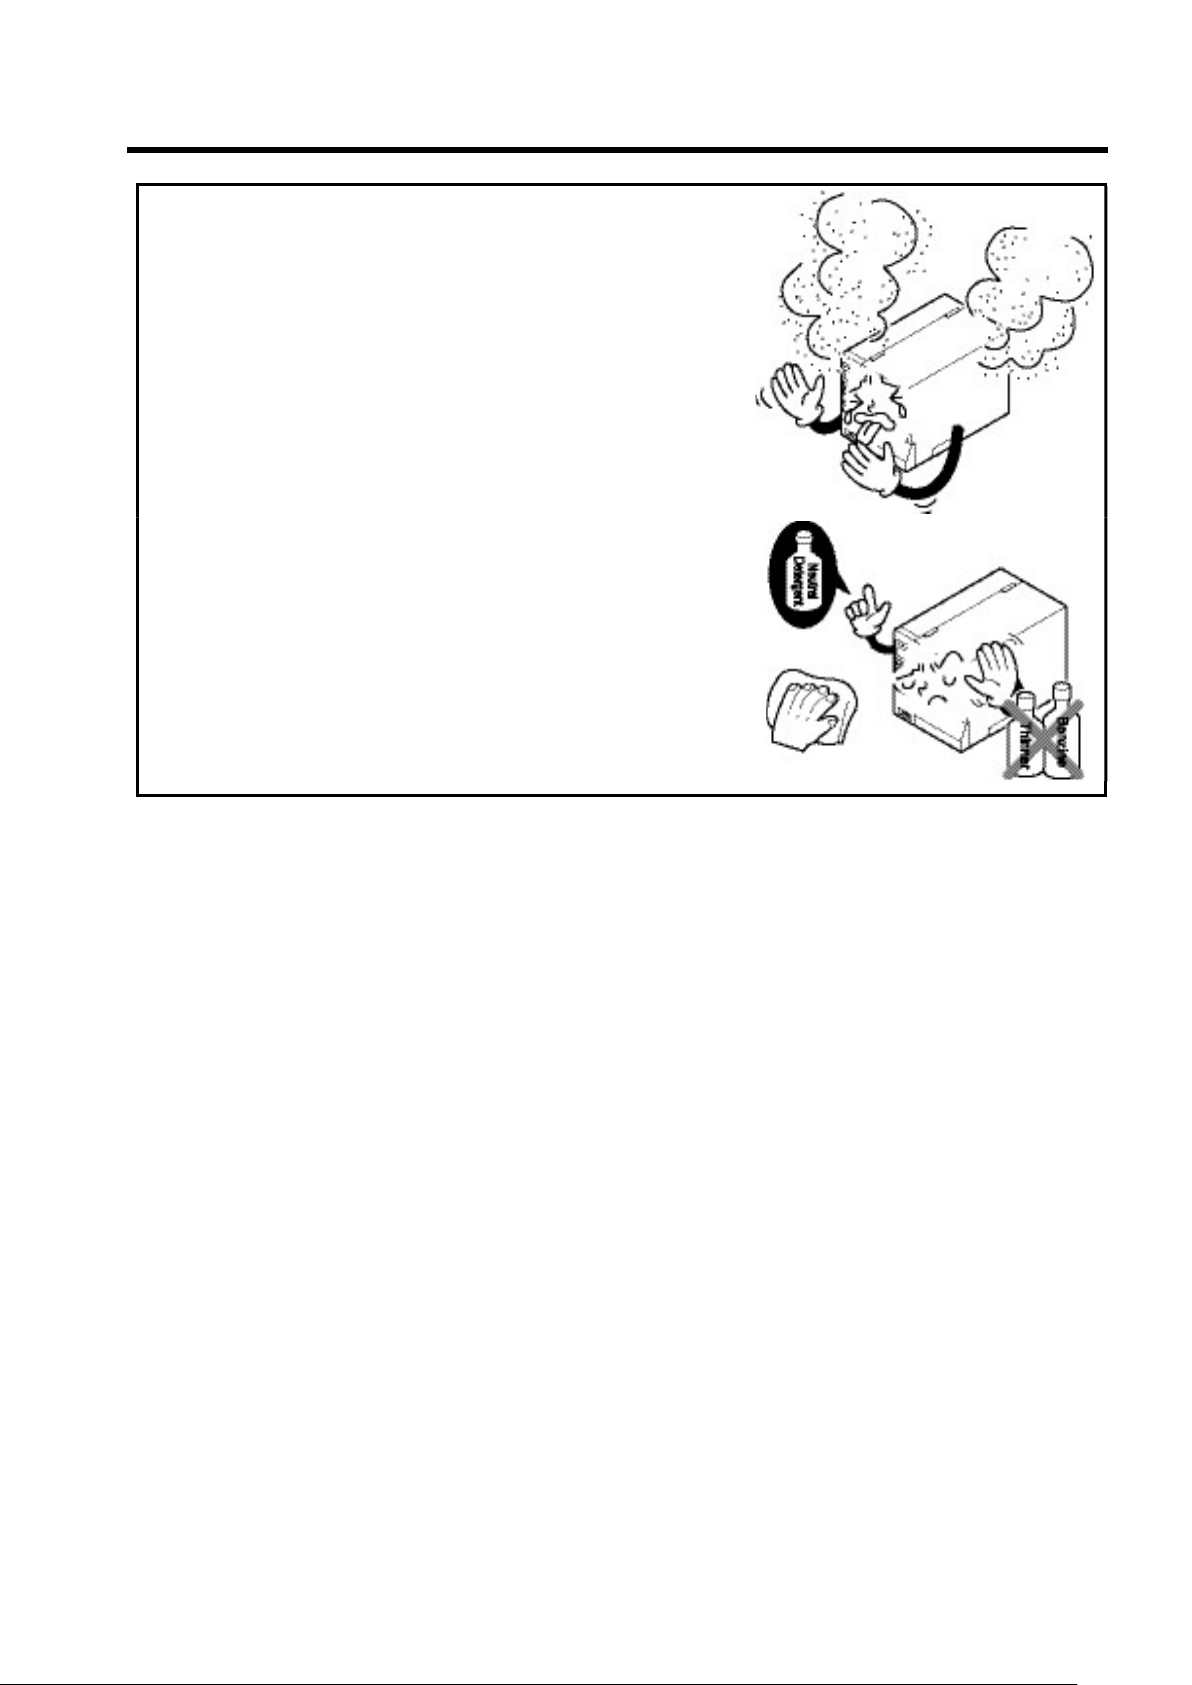
• Please do not use it in dusty places.
Accumulated dust will cause unclear printing. It not
only causes malfunction, but also will shorten service
life of the printer.
• For maintenance of the printer main part,
please wipe it with a soft dry cloth and
neutral detergent.
Using of thinner and/or others will cause deformation
and/or malfunction. Please never use such substances.

PREFACE
IX
ABOUT THE MANUAL
In this manual, each page is divided into sections, as follows:
Procedure layout
(1) Describes cautionary remarks, notes, and reference
pages on the left-hand side of each page.
(2) Explains a particular procedure.
(3) Follow the operation procedures to show LCD
messages or illustration.

PREFACE
X
TABLE OF CONTENTS
PREFACE ..................................................................................................... I
IMPORTANT INFORMATION ..................................................................... II
WARRANTY LIMITATIONS ........................................................................ III
ALERT SYMBOLS AND MEANINGS ........................................................ IV
PRECAUTIONS WHEN USING THE PRINTER ........................................ V
ABOUT THE MANUAL ............................................................................... IX
TABLE OF CONTENTS .............................................................................. X
Chapter 1 BEFORE OPERATION ........................................... 1-1
1.1 Names and Functions of the Components ...................................... 1-2
Front View ........................................................................................ 1-2
Rear View ......................................................................................... 1-3
Operating Panel ............................................................................... 1-4
1.2 Checking the Supplied Items/Consumables/Optional Units ............ 1-5
1.2.1 Checking the Supplied Items ............................................. 1-5
1.2.2 Consumables ..................................................................... 1-5
1.2.3 Optional Unit ...................................................................... 1-6
1.3 Installation Procedure ...................................................................... 1-7
1.3.1 Connecting Cables ............................................................ 1-7
1.3.2 Turning on the Power ........................................................ 1-9
1.3.3 Turning off the Power ........................................................ 1-9
1.4 Installing the Thermal Transfer Ribbon .......................................... 1-10
1.4.1 Installing the Thermal Transfer Ribbon ........................... 1-10
1.5 Installing the Label Roll .................................................................. 1-14
1.5.1 Installing the Label Roll ................................................... 1-14

PREFACE
XI
Chapter 2 BASIC OPERATIONS ............................................ 2-1
2.1 Before Starting Work ........................................................................ 2-2
2.1.1 Checks Before Operation .................................................. 2-2
2.2 Online and Offline ............................................................................ 2-3
2.2.1 Operating in Online Mode ................................................. 2-4
Switching to Online Mode ................................................... 2-4
2.2.2 Operating in Offline Mode ................................................. 2-5
Switching to Offline Mode ................................................... 2-6
Locating the Uptake Point of the Label Roll ....................... 2-6
Re-Print a Label .................................................................. 2-6
Delete the Received Data................................................... 2-7
Change Print Configuration (Label No.) ............................. 2-7
Adjust the Home Position of Label ..................................... 2-8
Adjust Tear off Position/Cutter Position/Dispenser Position
... 2-9
Adjust Print Darkness ....................................................... 2-10
Stand-Alone Printing ......................................................... 2-11
Chapter 3 SETUP PROCEDURE ........................................... 3-1
3.1 Setting Mode .................................................................................... 3-4
3.1.1 Type of Setting Mode ........................................................ 3-4
3.1.2 Selection of Setting Mode ................................................. 3-5
3.1.3 Menu Flow of Setting Mode .............................................. 3-6
3.2 Operations under LABEL SET Mode ............................................... 3-7
3.2.1 Register New Print Configuration ...................................... 3-8
3.2.2 Edit Print Configuration ..................................................... 3-9
Setting Menu for Print Configuration ................................ 3-10
3.2.3 Delete Print Configuration ................................................ 3-11
3.3 Various Settings of Print Configuration .......................................... 3-12
Using Label with Backing Paper ....................................... 3-12
Using Label with I-Mark .................................................... 3-12
Using Continuous Paper ................................................... 3-13
3.3.1 Printing Mode Settings .................................................... 3-14
3.3.2 Setting of Cutter Position................................................. 3-15
3.3.3 Setting of Dispenser Position .......................................... 3-16
3.3.4 Setting of Dispenser Time ............................................... 3-17
3.3.5 Setting of Tear off Position .............................................. 3-18
3.3.6 Setting of Home Position ................................................. 3-19
3.3.7 Setting of Print Method .................................................... 3-20
3.3.8 Setting of Label Size ....................................................... 3-21
Set Label Width. ............................................................... 3-21
Set Label Length .............................................................. 3-22
Set Label Pitch ................................................................. 3-23
Enable/Disable Auto Length Measure .............................. 3-23
3.3.9 Setting of Pitch Sensor .................................................... 3-24

PREFACE
XII
3.3.10 Adjustment of GAP Sensor/I-Mark Sensor ...................... 3-25
Auto Adjustment of Pitch Sensor.......................................3-26
Manual Adjustment of Pitch Sensor ..................................3-27
3.3.11 Setting of Detect Position ................................................ 3-28
3.3.12 Setting of Print Speed ...................................................... 3-29
3.3.13 Setting of Print Darkness ................................................. 3-30
3.3.14 Adjustment of Platen Roller ............................................. 3-31
3.3.15 Print Setting of QR Code ................................................. 3-32
3.3.16 Setting of Continuous Paper ........................................... 3-33
Selection of Print Media ....................................................3-34
Setting of Gap between Page ...........................................3-35
3.3.17 Adjustment of Printing Position ....................................... 3-35
Setting of Printing Position (Width) ...................................3-36
Setting of Printing Position (Length) ..................................3-36
3.3.18 Setting of Print Configuration .......................................... 3-37
3.3.19 Setting of Tear Off Time ................................................... 3-38
3.3.20 Setting of Print by Pulse Division .................................... 3-39
3.3.21 Label and Ribbon Combination ....................................... 3-40
3.3.22 Label Skip ........................................................................ 3-41
3.4 Operations under Advanced Mode ................................................ 3-42
3.4.1 Confirmation of Printer Information ................................. 3-43
3.4.2 Setting of the Backfeed of Cutting ................................... 3-43
3.4.3 Setting of JIS Code .......................................................... 3-44
3.4.4 Setting of Zero Slash ....................................................... 3-45
3.4.5 Setting of Kanji Font ........................................................ 3-46
3.4.6 Adjustment of Print Darkness .......................................... 3-47
3.4.7 Setting of Head Check ..................................................... 3-48
3.4.8 Setting of Auto Online ...................................................... 3-49
3.4.9 Setting of Auto Online Feed ............................................ 3-50
3.4.10 Setting of Reprint on Error ............................................... 3-51
3.4.11 Setting of Printed Log ...................................................... 3-52
3.4.12 Setting of Stand-Alone..................................................... 3-53
3.4.13 Setting of Human Readable ............................................ 3-54
3.4.14 Setting of External Signal ................................................ 3-55
3.4.15 Confirmation of Total Counter .......................................... 3-55
3.4.16 Confirmation of Head Counter ......................................... 3-56
3.4.17 Confirmation of Platen Counter ....................................... 3-56
3.4.18 Confirmation of Cutter Counter ....................................... 3-56
3.4.19 Setting of Coordinates Adjustment .................................. 3-57
3.4.20 Default Setting ................................................................. 3-58
3.4.21 Adjustment of LCD Brightness ........................................ 3-59
3.4.22 Setting of End Label Processing ..................................... 3-60
3.4.23 Setting of Buzzer Sound .................................................. 3-61
3.4.24 Setting of Display Language ........................................... 3-62

PREFACE
XIII
3.4.25 Registration of Password ................................................ 3-63
3.4.26 Setting of Key Lock ......................................................... 3-64
3.5 Operations under Interface Mode .................................................. 3-65
3.5.1 Setting of Protocol ........................................................... 3-65
3.5.2 Communication Settings of LAN ..................................... 3-66
3.5.3 Communication Settings of RS-232C ............................. 3-67
3.5.4 Confirmation of Communication Settings of RS-232C .... 3-68
3.6 Operations under Test Print Mode ................................................. 3-69
3.6.1 Printing of Settings .......................................................... 3-69
3.6.2 Printing of Barcode .......................................................... 3-70
3.6.3 Printing of Head Rank ..................................................... 3-71
3.6.4 Printing of Font ................................................................ 3-72
3.6.5 Printing of Check Pattern ................................................ 3-72
3.6.6 Printing of CF Card Content ............................................ 3-73
3.7 Operations under Dump Mode ...................................................... 3-74
3.7.1 Implementation of Online Dump ...................................... 3-74
Printing of Printing Instruction .......................................... 3-74
Saving of Printing Instruction ............................................ 3-75
3.7.2 Implementation of Dump after Data Receiving ............... 3-76
Printing of Printing Instruction .......................................... 3-76
Saving of Printing Instruction ............................................ 3-77
3.8 Operations under Sensor Check Mode ......................................... 3-78
3.8.1 Confirmation of Gap Sensor/I-Mark Sensor .................... 3-79
3.8.2 Confirmation of Head Up Sensor .................................... 3-80
3.8.3 Confirmation of Feed Roller Sensor ................................ 3-81
3.8.4 Confirmation of Ribbon Sensor ....................................... 3-82
3.8.5 Confirmation of Dumper Sensor ...................................... 3-83
3.8.6 Confirmation of Head Temperature ................................. 3-84
3.8.7 Confirmation of Inside Printer Temperature .................... 3-84
3.8.8 Confirmation of Dispenser Sensor .................................. 3-85
3.8.9 Confirmation of External Signal (Input) ........................... 3-86
3.8.10 Confirmation of External Signal (Output) ........................ 3-87
3.8.11 Confirmation of End Tape Sensor ................................... 3-88
3.9 Operations under Version Up Mode .............................................. 3-89
3.9.1 Online Version Up ........................................................... 3-89
3.9.2 Version Up through CF Card ........................................... 3-90
Chapter 4 MAINTENANCE ..................................................... 4-1
4.1 Cleaning the Interior of the Printer ................................................... 4-2
4.2 Replacing the Thermal Head ........................................................... 4-8
4.3 Replacement of Platen Roller ........................................................ 4-12

PREFACE
XIV
Chapter 5
INSTALLING AND REMOVING THE OPTIONAL UNIT
... 5-1
5.1 Installing and Removing the Interface ............................................. 5-2
5.2 Installation and Removal of CF Card Slot ........................................ 5-4
5.3 Installing and Removing the Cutter Unit .......................................... 5-5
5.3.1 Passing the Label Roll through Cutter Unit ....................... 5-7
5.4 Installing and Removing the Peeling Unit ........................................ 5-8
5.4.1 Passing the Label Roll through the Dispenser Unit ........ 5-10
Chapter 6 APPENDIX ............................................................. 6-1
6.1 Troubleshooting ................................................................................ 6-2
6.2 Specifications ................................................................................... 6-4
6.3 List of Default Settings ..................................................................... 6-5

BEFORE OPERATION
1
-
1
Chapter 1
BEFORE OPERATION
Here is an introductory explanation of the printer. For a better understanding and
correct use of this printer, please refer to this part too.
1.1 Names and Functions of the Components ........... 1-2
Front View .....................................................................1-2
Rear View ......................................................................1-3
Operating Panel .............................................................1-4
1.2 Checking the Supplied Items/Consumables/
Optional Units ........................................................ 1-5
1.2.1 Checking the Supplied Items ..............................1-5
1.2.2 Consumables ......................................................1-5
1.2.3 Optional Unit .......................................................1-6
1.3 Installation Procedure ............................................ 1-7
1.3.1 Connecting Cables .............................................1-7
1.3.2 Turning on the Power ..........................................1-9
1.3.3 Turning off the Power ..........................................1-9
1.4 Installing the Thermal Transfer Ribbon ................ 1-10
1.4.1 Installing the Thermal Transfer Ribbon ............. 1-10
1.5 Installing the Label Roll ....................................... 1-14
1.5.1 Installing the Label Roll ..................................... 1-14

BEFORE OPERATION
1
-
2
1.1 Names and Functions of the Components
The names of the parts together with their functions are explained.
Explanation in this manual is given using the following names. Please remember these names and read next pages.
Front View

BEFORE OPERATION
1
-
3
Rear View
BEFORE OPERATION
1
-
4
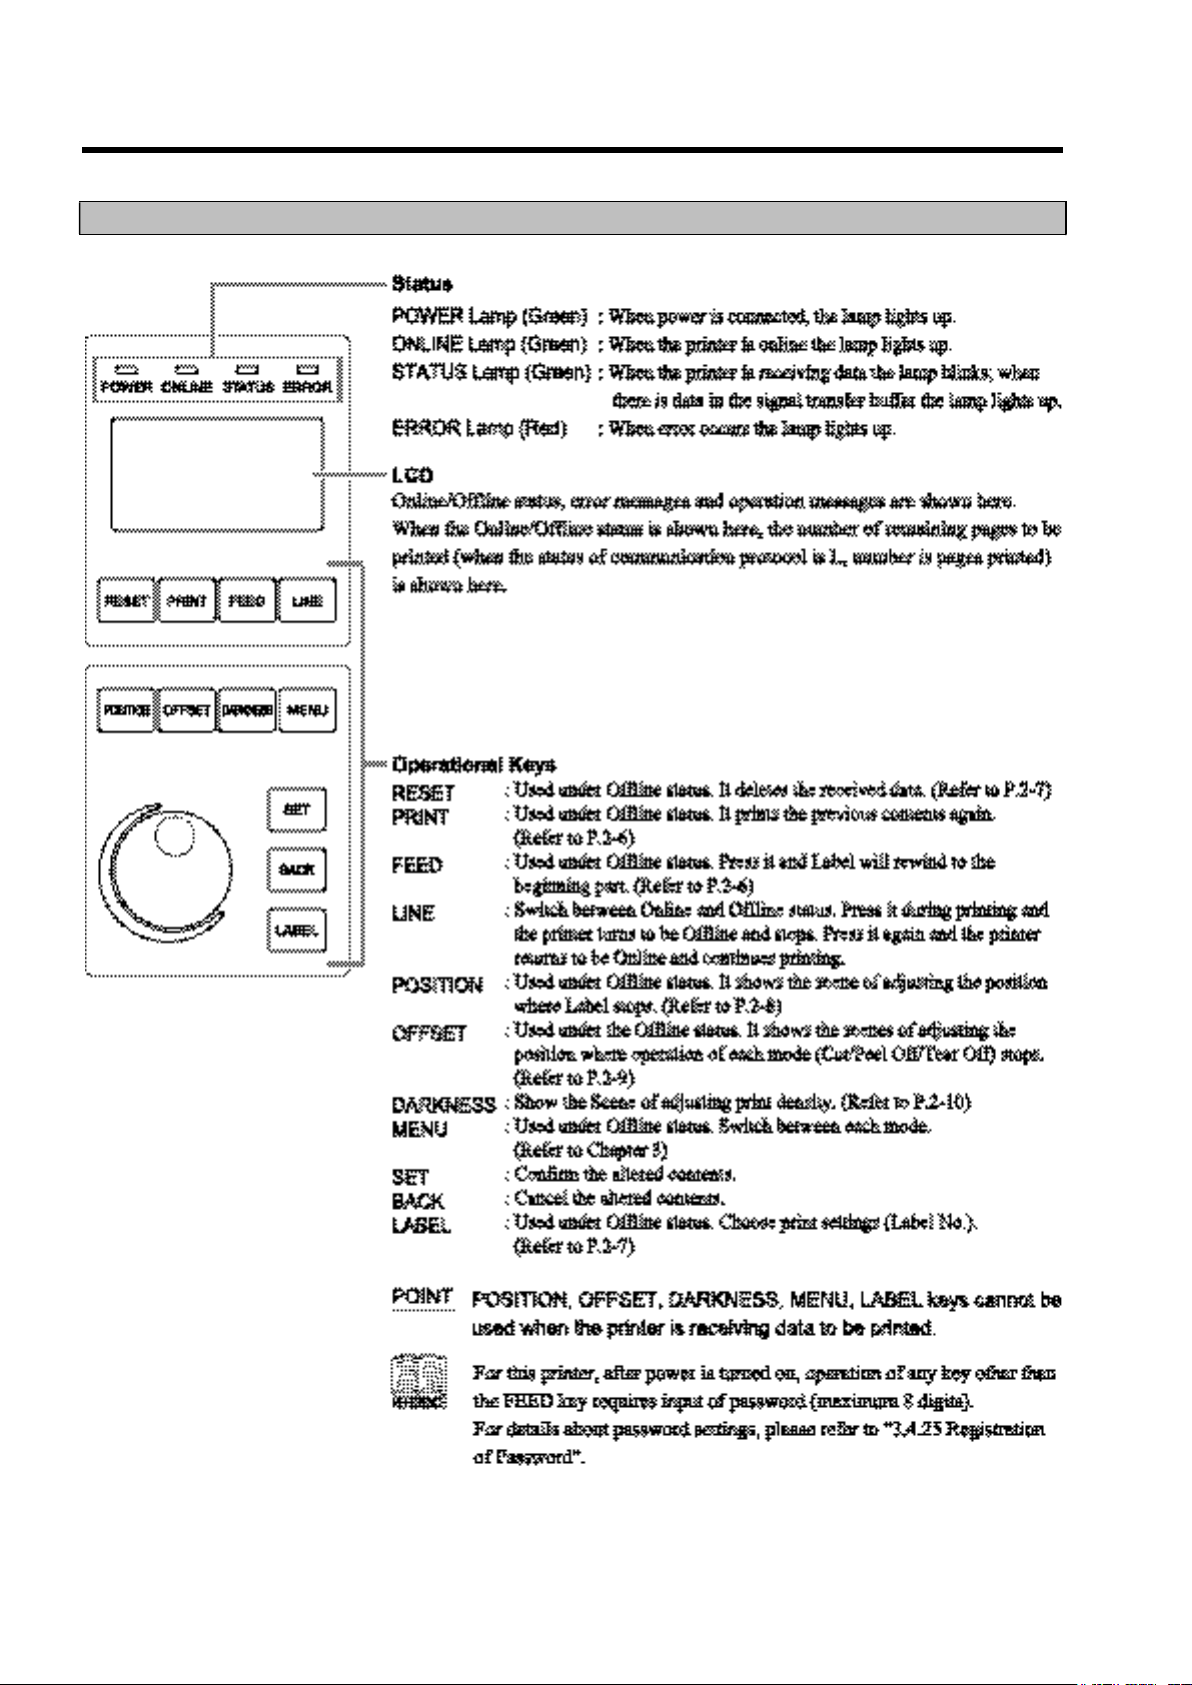
Operating Panel
Table of contents
Other Nitto Printer manuals


