NKE Hub'O User manual

HUB’O:
GETTING STARTED

Hub’O: Getting started
All Rights Reserved –nke Watteco® Hub’O: Description of the exchanges with the Server
Page 2of 14
NOTICE
Nke Watteco reserves the right to make changes to specifications and product descriptions or to
discontinue any product or service without notice. Except as provided in Nke Watteco's Standard
Terms and Conditions of Sale for products, Nke Watteco makes no warranty, representation or
guarantee regarding the suitability of its products for any particular application nor does Nke
Watteco assume any liability arising out of the application or use of any product and specifically
disclaims any and all liability, including consequential or incidental damages.
Certain applications using semiconductor products may involve potential risks of death, personal
injury or severe property or environmental damage. Nke Watteco products are not designed,
authorized or warranted to be suitable for use in life saving or life support devices or systems.
Inclusion of Nke Watteco products in such applications is understood to be fully at the Customer's
risk.
In order to minimize risks associated with the customer's application, adequate design and operating
safeguards must be provided by the customer to minimize inherent or procedural hazards.
Nke Watteco assumes no liability for applications assistance or customer product design. Nke
Watteco does not warrant or represent that any license, either express or implied, is granted under
any patent right, copyright, mask work right, or other intellectual property right of Nke Watteco
covering or relating to any combination, machine or process in which such semiconductor products
or services might be or are used. Nke Watteco's publication of information regarding any third
party's products or services does not constitute Nke Watteco's approval, warranty and endorsement
thereof.
Resale of Nke Watteco's products with statements of functionality different from or beyond the
parameters stated by Nke Watteco for that product as defined by Nke Watteco's unique part
number, voids all express and any implied warranties for that product, is considered by Nke Watteco
to be an unfair and deceptive business practice and Nke Watteco is not responsible nor liable for any
such use.
Embedded software is based on Nke Watteco proprietary drivers and applicative code and operates
on the Contiki kernel from the SICS (Swedish Institute of Computer Science).
http://www.nke-watteco.com/
© nke Watteco. All Rights Reserved

Hub’O: Getting started
All Rights Reserved –nke Watteco® Hub’O: Description of the exchanges with the Server
Page 3of 14
DOCUMENT HISTORY
Date
Revision
Modification Description
April 2018
1.0
Creation
November 2018
1.1
Add some more details in the Hardware Set-up
February 2019
2.0
Modification to use the tool Make-cfg (new version)
July 2019
2.1
Since FW 02.04 :
HUB’O can be configured and monitored through an
embedded WEB server

Hub’O: Getting started
All Rights Reserved –nke Watteco® Hub’O: Description of the exchanges with the Server
Page 4of 14
CONTENTS
1Introduction.......................................................................................................................... 5
2Hardware Set-Up .................................................................................................................. 6
3First configuration................................................................................................................. 9
3.1 Configuration through embeded HUB’O WebServer .............................................................................................. 9
3.2 Configurtion through USB stick file transfer ......................................................................................................... 10
3.2.1 Configuration file creation................................................................................................................................ 10
3.2.2 Signature file creation ...................................................................................................................................... 10
3.2.3 Upload on Hub’O.............................................................................................................................................. 11
3.2.4 Other files USB upload...................................................................................................................................... 11
4Connection to the network.................................................................................................. 12
5Exchanges with the distant server ....................................................................................... 12
6Installing Hub’O with end-devices on site ............................................................................ 13
6.1 Installation ............................................................................................................................................................ 13
6.2 First end-device configuration .............................................................................................................................. 14
Hub’O: Getting started
All Rights Reserved –nke Watteco® Hub’O: Description of the exchanges with the Server
Page 5of 14
1INTRODUCTION
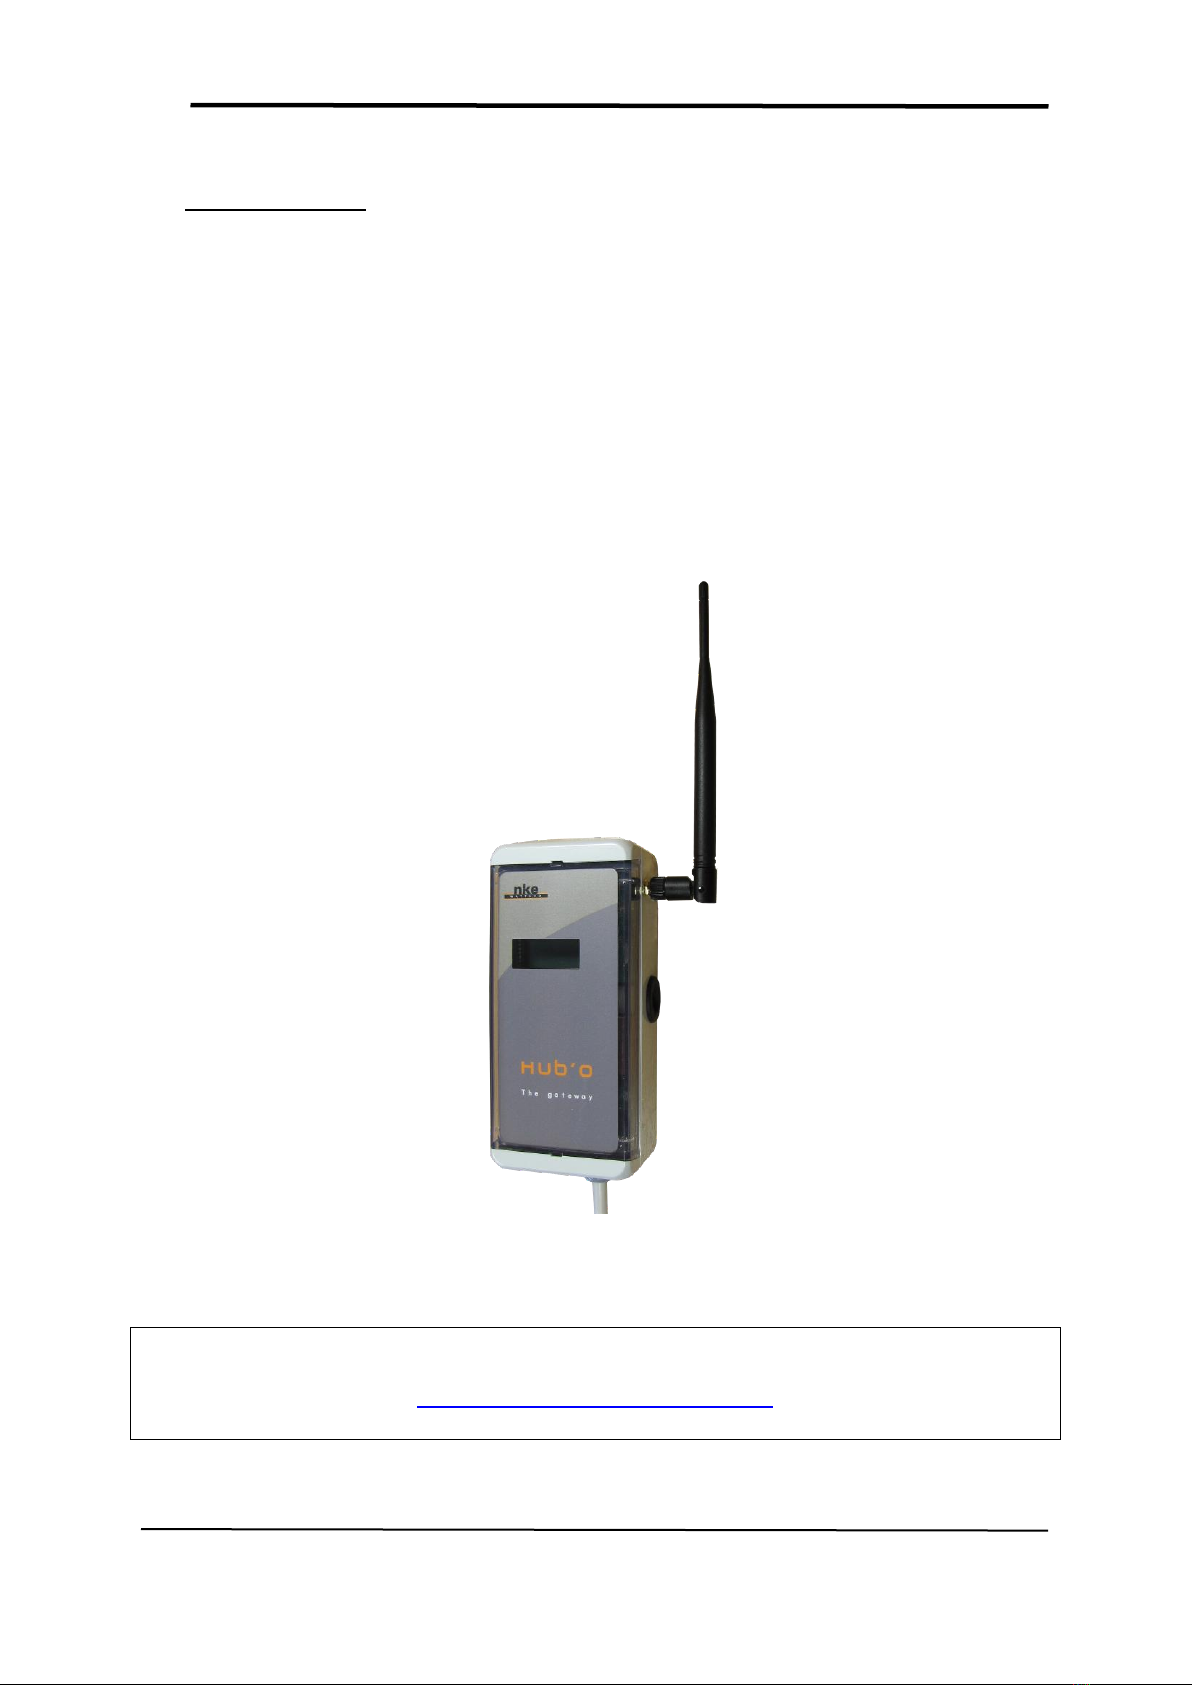
Hub’O is the first private LoRaWAN network gateway designed by nke Watteco. Hub’O works in
partnership with a distant server hosted or communicating with the applicative back-end of our
client.
Now that you have received your gateway, you will be able to create your own LoRaWAN network
and start working with it. This document is here to help you in the installation and the first
configuration of Hub’O.
A last paragraph will describe how to correctly install on site a Hub’O gateway and LoRaWAN end-
devices paired to it. It will be seen that thanks to its LCD screen, the installer can double check that
the LoRaWAN end-devices are correctly paired to Hub’O and correctly communicates with it.
All the documentation about HUBO’s usage can be downloaded at following address.
http://support.nke-watteco.com/hubo/
FIGURE 1 - HUB'O GATEWAY
Hub’O: Getting started
All Rights Reserved –nke Watteco® Hub’O: Description of the exchanges with the Server
Page 6of 14
2HARDWARE SET-UP
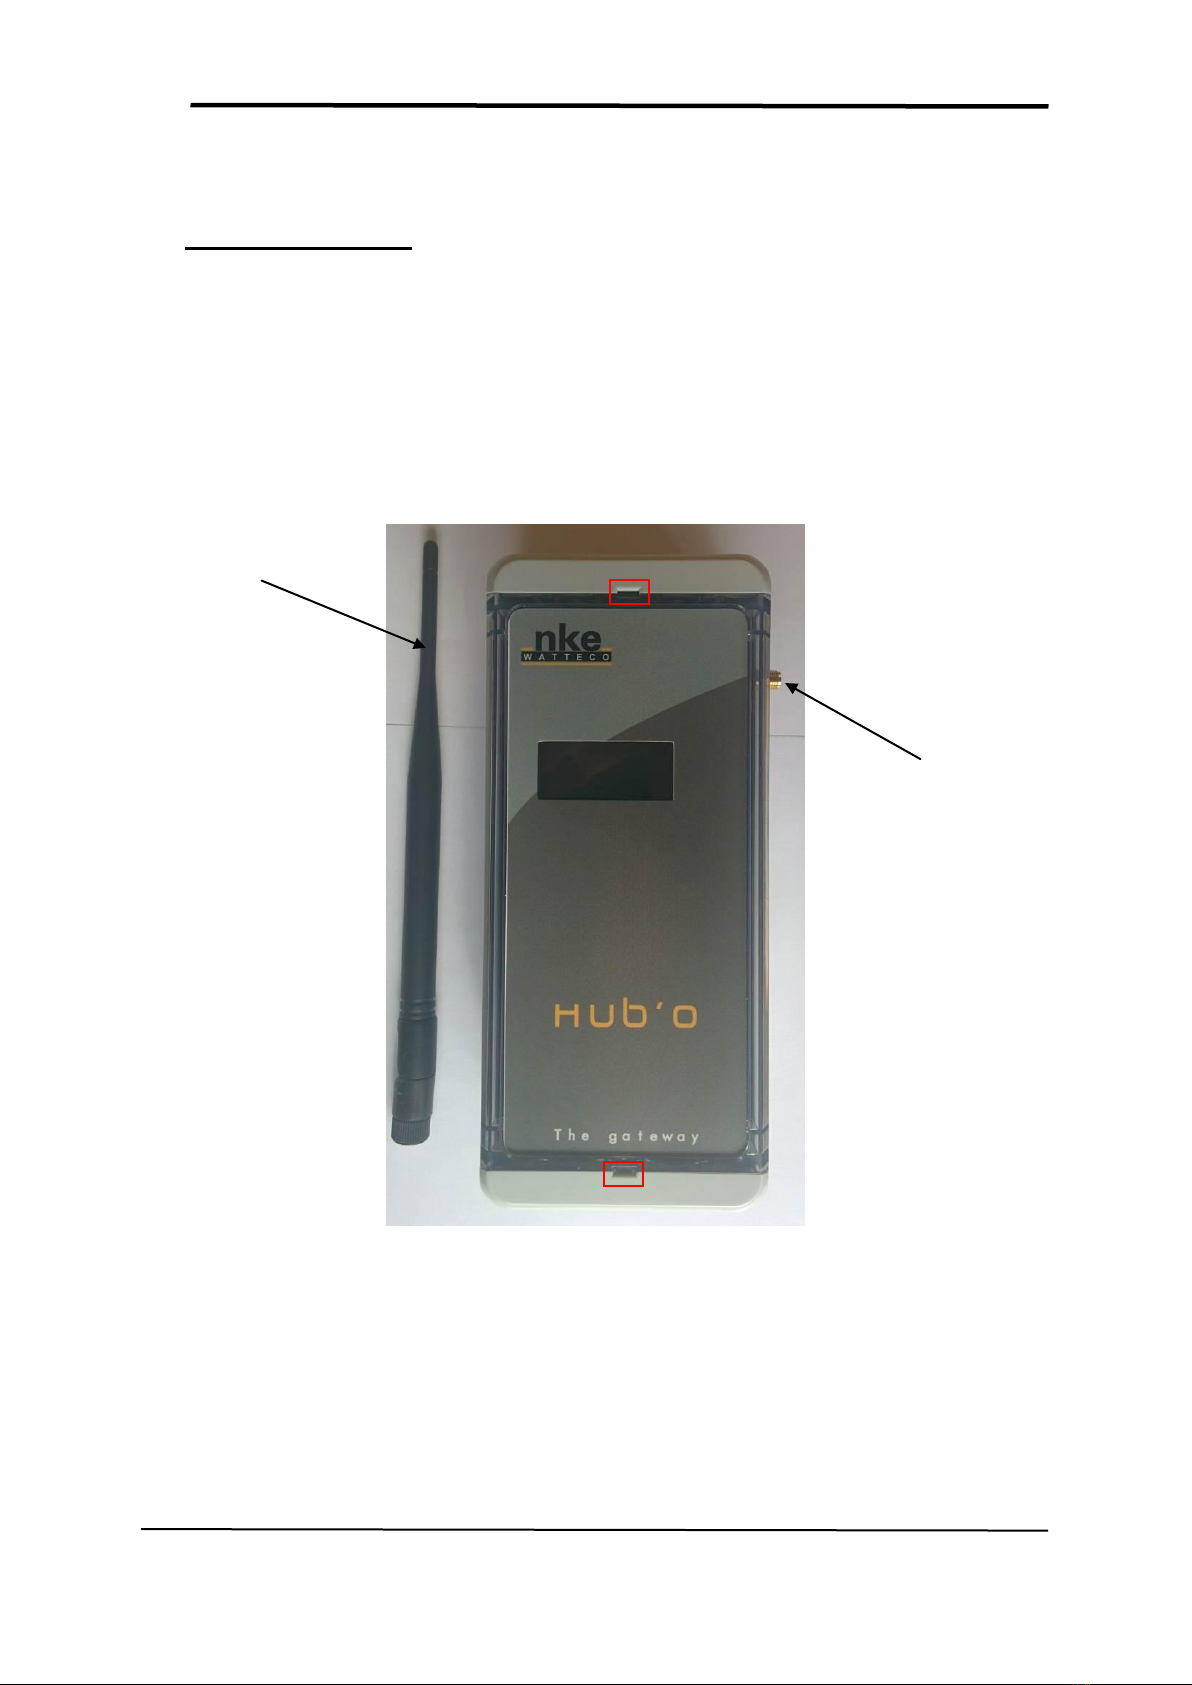
When the LoRaWAN gateway is shipped, a power supply cable is mounted. However, the LoRaWAN
antenna is not, in order to not be damaged during the journey.
Thus, the first thing to do is to mount the LoRaWAN antenna on the SMA connector (located at the
Hub’O right side). Once the antenna correctly mounted, it can be feld to the top to get what can be
seen on Figure 1.
When shipped, Hub’O already contains a 9V disposable battery. This battery is used to correctly
shutdown the gateway in case of pwer cut.
To open casing, it is recommended to use a flathead screwdriver to “do lever” on one of the red
squared area on Figure 2.
On the Figure 3 can be seen the space provided for the 9V disposable battery, please be careful to
respect the polarity.
SMA connector
LoRaWAN Antenna
FIGURE 2 - LORAWAN GATEWAY AT RECEPTION

Hub’O: Getting started
All Rights Reserved –nke Watteco® Hub’O: Description of the exchanges with the Server
Page 7of 14
Now, your Hub’O is ready to be switched “ON”.
The gateway is delivered with a power supply cable that can be connected directly to a 230
VAC/50Hz power supply. The mounted cable do not have a plug on it, thus the phase wire and the
neutral wire can be directly cable to a 230 VAC/50Hz power supply, in an electrical board for
example. If Hub’O needs to be connected to a socket, a plug needs to be added at the end of the
mounted cable.
CAUTION: If the device is connected to the mains power source, harmful voltage will be present
on all wires during operation.
Connect or unconnect the device after MAKING SURE TO HAVE SWITCHED OFF MAINS POWER
FROM ALL WIRES (disconnecting a single wire e.g. from a manual switch is NOT sufficient).
9V Disposable Battery
spot
LCD screen
User button
Ethernet/3G switch
Ethernet connector
USB slots
SIM slot
Hole for
fastening screw
Hole for
fastening screw
Hole for
fastening screw
Connector for
external 8-18VDC
power supply
Connector for
230VAC/50Hz
power supply
FIGURE 3 - INSIDE THE HUB'O GATEWAY
Hole for
fastening screw

Hub’O: Getting started
All Rights Reserved –nke Watteco® Hub’O: Description of the exchanges with the Server
Page 8of 14
An external VDC power supply can be used if a 230 VAC power source is not available. This power
source needs to be between 8 and 18 VDC. No cable is mounted on the VDC connector, to be used a
cable needs to be added.
If an Ethernet network is used, Hub’O needs to be cabled to the network with a classic RJ45 ethernet
cable.
Hub’O can be fixed against a wall or on any surface thanks to the holes for fastening scews inside the
casing (cf. Figure 3). For a maximum radio range, Hub’O needs to be fixed with the positioning that
can be seen on Figure 1 or 4.
Here below, can be seen the dimensions of the Hub’O product.
180 mm
80 mm
60 mm
40 mm
350 mm
FIGURE 4 - HUB'O DIMENSIONS
Hub’O: Getting started
All Rights Reserved –nke Watteco® Hub’O: Description of the exchanges with the Server
Page 9of 14
3FIRST CONFIGURATION
The next step in the Hub’O installation is to correctly configure it. In order to do that, a configuration
file can be filled with the right parameters and can be uploaded on the Hub’O Gateway thanks to one
of its USB slot (cf. Figure 3).
Here below, can be seen the steps to correctly create a configuration file and upload it to the Hub’O
gateway.
3.1 CONFIGURATION THROUGH EMBEDED HUB’O WEBSERVER
Form version 2.04 of Hub’O Firmware, an embeded WebServer allows reading and writing the 3 main
configuration objects: GENERAL CONFIGURATION, ALLOWED END-DEVICES LIST, and MODBUS
PARAMETERS.
HUB’O Webserver can be used through Ethernet Local Area Network. Using factory configuration of
Hub’O, it will try to connect through a DHCP server on your LAN. You can set it to static with specific
address through USB File Transfer with “general configuration file (c_01_xxxx.json)” (Cf §3.2).
In any case, you can find current HUB’O IPv4 address (x.x.x.x), on the sixth screen of HUB’O LCD
screen, thanks to successive press on button on the right of the screen. Then the URL to type is
http://x.x.x.x . You will have to connect with following credentials:
-user / 1234 : Allows read and write of configurations

Hub’O: Getting started
All Rights Reserved –nke Watteco® Hub’O: Description of the exchanges with the Server
Page 10 of 14
3.2 CONFIGURTION THROUGH USB STICK FILE TRANSFER
3.2.1 CONFIGURATION FILE CREATION
Hub’O configuration file is a .json file, interpreted by the gateway to set its differents parameters.
In this configuration file, the gateway can be configured to use DHCP or a fixed IP address, the 2G/3G
parameters can be set if needed, the SNTP server address can be set, and, of course, all the
parameters used by the application: the distant server address, the data directory to upload file, the
configuration directory to get the files, the data upload period, etc.
In order to have an exhaustive description of this file and how to complete it, please see the
document named “Hub'O_Server_Exchanges_Description_X_X.pdf”, on paragraph §5.2 Hub’O
Configuration file.
Once your configuration file created, you can rename it as follow: c_010_0000.json.
3.2.2 SIGNATURE FILE CREATION
For security reasons, to upload a new configuration file on Hub’O gateway, it is necessary to generate
a signature file first. Indeed, Hub’O will check for this signature file before taking into account the
configuration file.
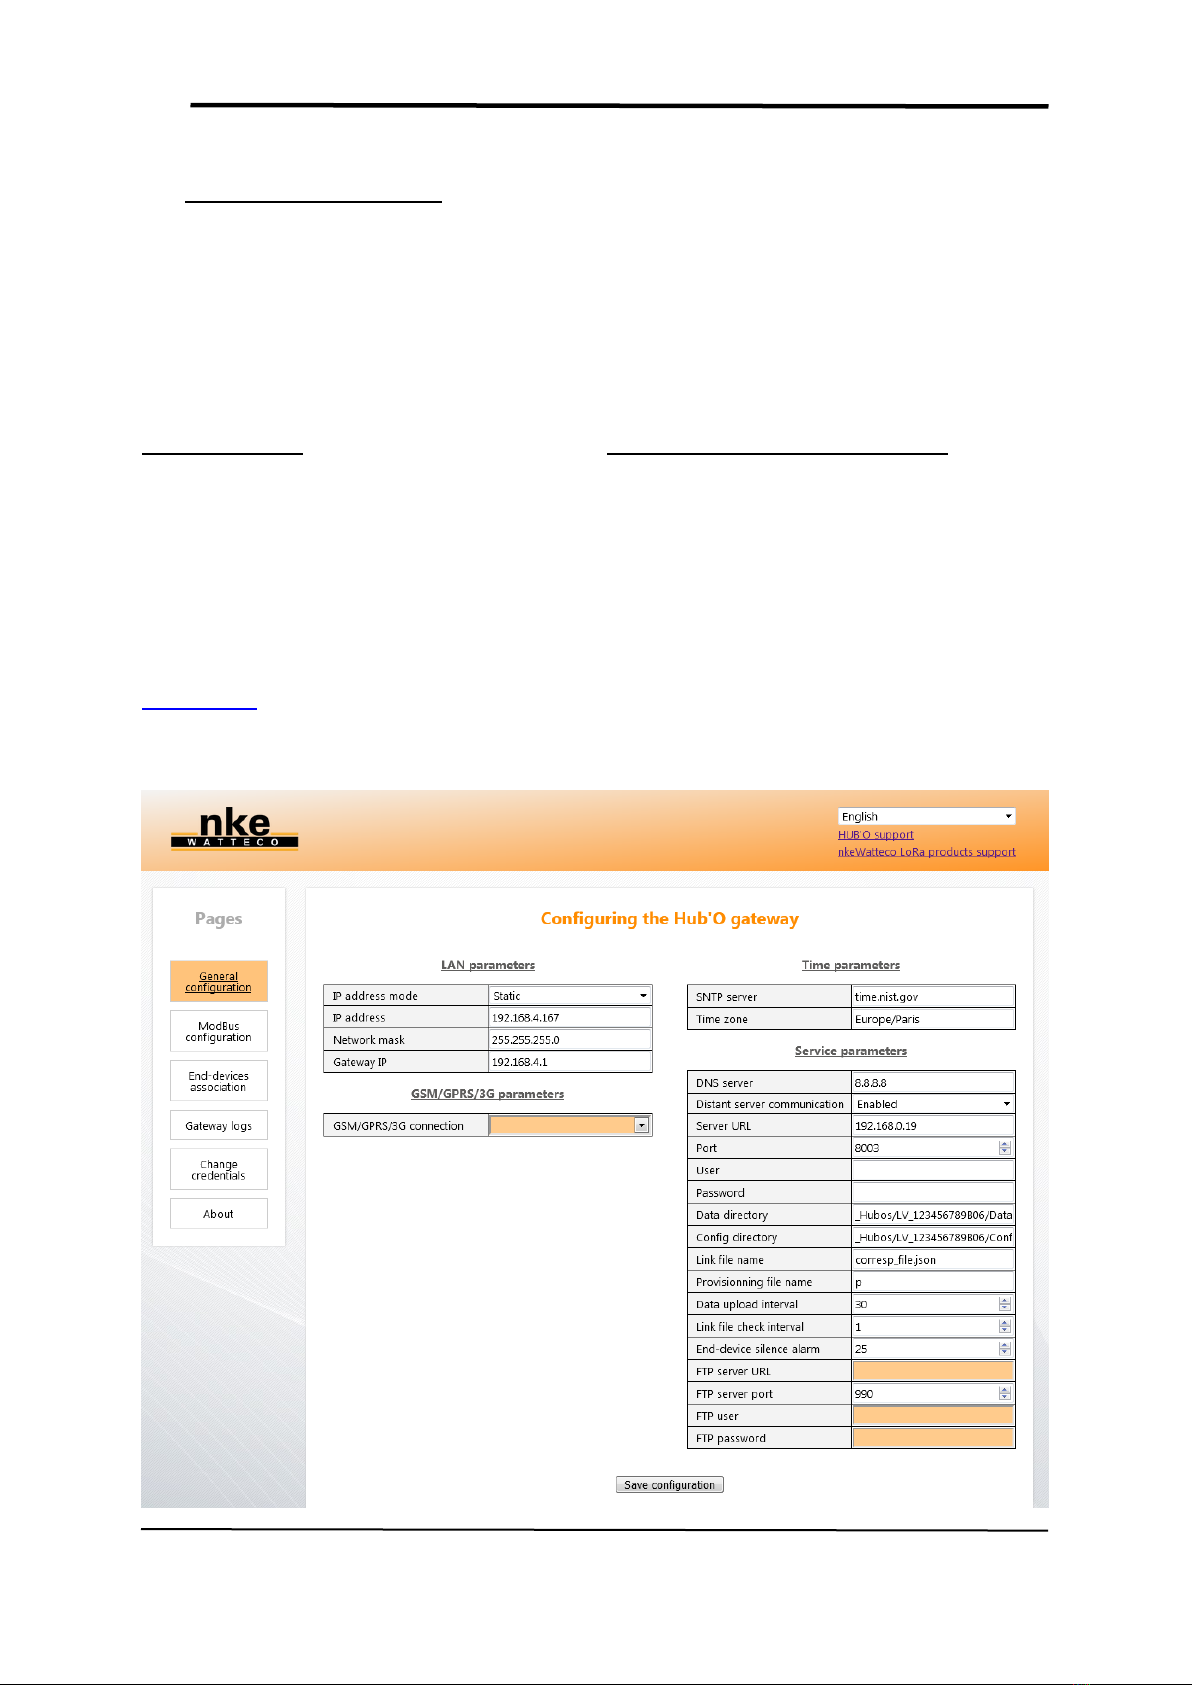
To generate this signature, please use the “make-manifest” tools in command line. This tool is
available in the repertory “exe_win32” inside the make-cfg zip file.
The command line to use is the following:
If everything went well, a new file named “c_010.manifest” should appear in the same directory as
make-manifest.exe and c_010_0000.json.
FIGURE 5 - CREATING THE SIGNATURE FILE
Hub’O: Getting started
All Rights Reserved –nke Watteco® Hub’O: Description of the exchanges with the Server
Page 11 of 14
3.2.3 UPLOAD ON HUB’O
To upload the new configuration on the gateway, copy the configuration file “c_010_0000.json” and
its signature “c_010.manifest” on the root of a USB stick.
Then plug the USB stick on one of the Hub’O USB slots. Wait approximately 15 seconds and then take
back the USB stick, Hub’O is now configured as you wanted.
3.2.4 OTHER FILES USB UPLOAD
From the firmware version 02.00, it is possible to upload through USB two other kind of files: the
ModBus configuration file and the allowed end-devices list. In order to have an exhaustive
description of these files and how to complete it, please see the document named
“Hub'O_Server_Exchanges_Description_X_X.pdf”.
3.2.4.1 MODBUS CONFIGURATION FILE
Filename to give to the ModBus configuration file before creating the signature file:
c_modbus_010_0000.json.
Command line to use to create the signature file:
Afterwards, both of the files (c_modbus_010_0000.json and c_modbus_010.manifest) needs to be
copied at the root of the USB stick.
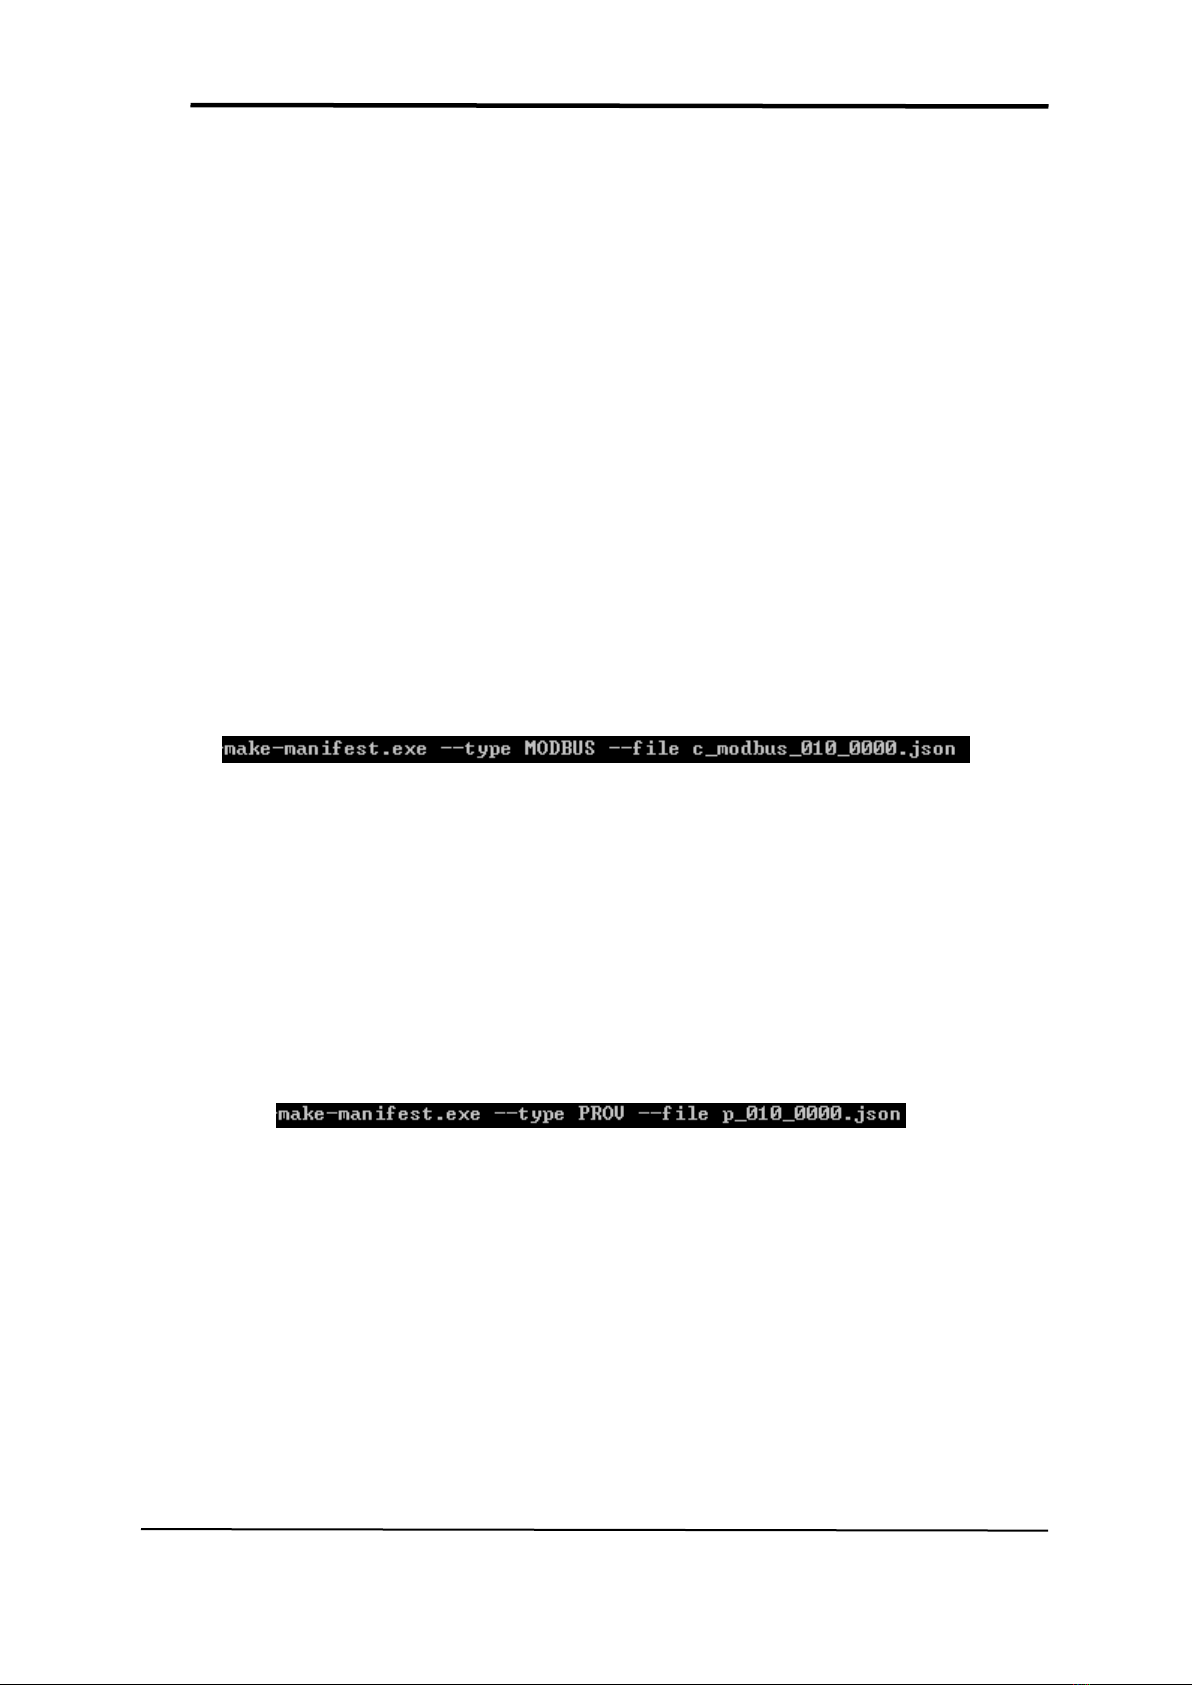
3.2.4.2 ALLOWED END-DEVICES LIST
Filename to give to the allowed end-devices list file before creating the signature file:
p_010_0000.json.
Command line to use to create the signature file:
Afterwards, both of the files (c_modbus_010_0000.json and c_modbus_010.manifest) needs to be
copied at the root of the USB stick.
FIGURE 6 - CREATING THE SIGNATURE FILE FOR THE MODBUS CONFIGURATION
FIGURE 7 - CREATING THE SIGNATURE FILE FOR THE MODBUS CONFIGURATION

Hub’O: Getting started
All Rights Reserved –nke Watteco® Hub’O: Description of the exchanges with the Server
Page 12 of 14
4CONNECTION TO THE NETWORK
Once Hub’O correctly configured, it can be connected physically to the Ethernet or 2G/3G network.
Thus, you can connect an Ethernet cable to the gateway or you can insert the SIM card on the
available slot, if it is not already done.
Check that the Ethernet/3G switch is at the right position for what you need. This switch can be seen
on the Figure 3, at the right of the LCD screen and under the user button.
Afterwards, Hub’O is correctly configured and can start its exchanges with the distant server.
5EXCHANGES WITH THE DISTANT SERVER
In order to have a complete understanding on how Hub’O exchanges with the distant server and
what these exchanges are for, please read the document named:
“Hub'O_Server_Exchanges_Description_X_X.pdf”

Hub’O: Getting started
All Rights Reserved –nke Watteco® Hub’O: Description of the exchanges with the Server
Page 13 of 14
6INSTALLING HUB’O WITH END-DEVICES ON SITE
Once all the steps listed before completed, the distant server can send the list of allowed end-devices
to Hub’O (for more information about this exchange, please read the pdf document explaining that:
“Hub'O_Server_Exchanges_Description_X_X.pdf”).
6.1 INSTALLATION
When the end-devices list is received by Hub’O, the corresponding end-devices can be installed on
site and can be turned on.
Depending on which end-device is used, either a led will flashes or a “bip” will be emitted from the
sensor. The association process will be run between the end-device, Hub’O and the distant server
(for more details, please see “Hub'O_Server_Exchanges_Description_X_X.pdf”).
To have more details about nke Watteco end-devices association status, please see our support
website: http://support.nke-watteco.com/
Once all the end-devices installed on site, a control can be done on Hub’O, thanks to the user menu.
Indeed, Hub’O is able to display the list of all paired end-devices, together with a rating about the RF
link.
To access this list, please press the user button (next to the LCD screen), until the Figure 5 screen
appears.
When this message appears on the screen, press again the user button for more than 1 second.
Then, you will access to the list, starting with the first sensor (an example is given on the figure 6
here below).
FIGURE 7 - END-DEVICE LIST SUBMENU
FIGURE 8 - EXAMPLE OF AN END-DEVICE DISPLAY

Hub’O: Getting started
All Rights Reserved –nke Watteco® Hub’O: Description of the exchanges with the Server
Page 14 of 14
For each end-device, on the first line can be seen the last 4 bytes of the end-device devEUI. On the
second line, can be seen the last RSSI level, converted to a rating on 10.
To go to the next end-device, please press shortly the user button. Each time a press is detected, the
next end-device is displayed. When the last end-device is displayed, on the next press, Hub’O will
loop back to the first one. To get out of the list, please wait for 30 seconds without pressing the
button.
To get more information about Hub’O IHM, please refers to the IHM description document:
-“Description_IHM_Hub_O_VX_X.pdf”
6.2 FIRST END-DEVICE CONFIGURATION
By default, nke Watteco devices are configured to send “unconfirmed” frames to the LoRaWAN
network, in order to be compatible with all the private/public existing networks.
However, inside a LoraWAN network managed by Hub’O, it is strongly adviced to set this
configuration to “confirmed” frames.
In order to do that, the distant server should send an end-device configuration file to Hub’O after
each new association on the network. To configure the end-device to send “confirmed” frames, the
following frame needs to be sent on FPort 125: 1105800400000801.
For more details about end-devices configurations with Hub’O, please see:
“Hub'O_Server_Exchanges_Description_X_X.pdf”
For more details about the frame allowing to configure the type of message send by the nke Watteco
end-devices, please refers to: http://support.nke-watteco.com/lorawan-cluster/#Messagetype
Table of contents
Popular Gateway manuals by other brands


Rose Point
Rose Point nemo installation guide

Planet Networking & Communication
Planet Networking & Communication MH-1000 user manual

Extron electronics
Extron electronics ShareLink 200 N user guide

Commander
Commander MP264DB quick start guide

MSA
MSA MultiGard 5000 instruction manual

Synway
Synway SMG-D Series user manual


