NL Acoustics NL SONIC TESTER SC10 User manual
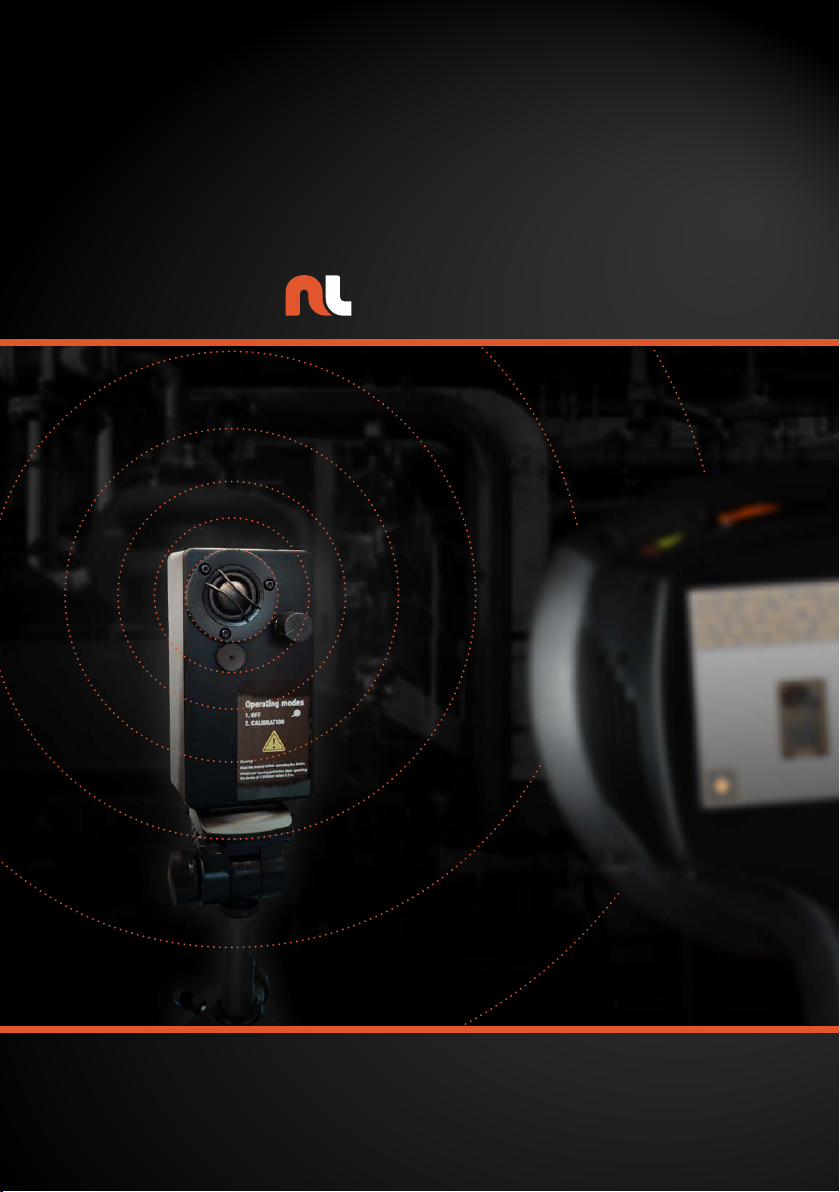
SONIC TESTER SC10
User Manual

Noiseless Acoustics Oy
Sitratie 7
00420 Helsinki, Finland
+358 (0)10 583 3240
www.nlacoustics.com
FI26650896

TABLE OF CONTENTS
Table of Contents 3
Introduction 4
User Safety 4
Specifications 5
Device 5
Disposal of Electronic Waste 5
Markings 5
Mechanical & Environmental 5
Device Parts 6
Getting Started 7
Tripod 7
Startup 7
Shutdown 7
Operating Modes 7
Using the Device for Checking the NL Camera Accuracy 8
NL Sonic Tester and NL Camera Accuracy Check Procedure 8
Checking the Accuracy 9

4
INTRODUCTION
The NL Sonic Tester is an accuracy checker that is used together with the NL Camera. The device produces a
sound signal that is perceived and evaluated by the camera. The perceived dB-level of the signal can be used
to ensure the correct level of the NL Camera’s readings and the condition of the microphone array.
User Safety
The NL Sonic Tester is capable of delivering sound pressure levels that may cause permanent
hearing damage. The user of the device should always use hearing protection when the device
is operated at a distance less than 0.5 m to avoid permanent hearing damage.
!! NOTE: Sound pressure level may exceed 80 dB (A) at a distance less than 0.5 m.
• Follow all instructions. Please note that by using the device you agree to the terms of use. Misuse might
cause hearing damage, device damage or false readings.
• Do not try to repair the device or open the enclosure of the NL Sonic Tester. Do not use a damaged device
or damaged power cords.
• Use only the power supply provided by the NL Camera with the NL Sonic Tester.
• Protect the device and accessories from dirt, dust, impacts, and liquids.
• Do not leave the device plugged in.
5
Specifications
DEVICE
Manufacturer: Noiseless Acoustics Ltd.
Name: NL Sonic Tester SC10
Input Voltage Range: 12 – 18 V
Maximum Input Current: 2 A
Frequency Range: 2 kHz – 40 kHz
Serial Number: See the sticker on the back side of the device (SC10XXXX).
The NL Sonic Tester should be sent for calibration once every two years.
DISPOSAL OF ELECTRONIC WASTE
Electrical and electronic equipment (EEE) contains materials, components and substances
that may be hazardous and present a risk to human health and the environment when
waste electrical and electronic equipment (WEEE) is not handled correctly.
Equipment marked with the crossed-out wheeled bin (above) is electrical and electronic
equipment. The crossed-out wheeled bin symbol indicates that waste electrical and
electronic equipment should not be discarded together with unseparated household
waste but must be collected separately.
For this purpose, all local authorities have established collection schemes under which residents can dispose
of waste electrical and electronic equipment at a recycling centre or other collection points, or WEEE will be
collected directly from households. More detailed information is available from the technical administration
of the relevant local authority.
MARKINGS
An ID-label consisting of the identication data, CE and WEEE markings are on the back side of the NL Sonic
Tester.
MECHANICAL & ENVIRONMENTAL
Size: 150 x 80 x 50 mm
Weight: 285 g
Protection class: IP40

6
Device Parts
FRONT SIDE BACK SIDE
1Loudspeaker
2 IR LED
3Mode switch
4QR plate
5Power LED
6Power socket
1
2
3
5
6
4

7
Getting Started
Accessories needed to get started:
• The NL Sonic Tester SC10
• The NL Camera battery charger (power supply)
•A tripod with quick release mount
TRIPOD
Any tripod that ts the quick release mount (4) can be used. If the tripod provided with the device is used, see
the tripod instruction manual.
STARTUP
Before startup, make sure the device’s switch (3) is in the off position. The leftmost position is the off
position (see the sticker on the front side of the device). Connect the mains cable of the power supply into a
wall socket before connecting the DC barrel connector to the power socket (6) of the device. After connecting
the DC barrel connector, the device will take about 10 seconds to start.
!! NOTE: If the mains cable is plugged into a wall socket AFTER the DC barrel connector is plugged in, the
device will not start up.
SHUTDOWN
Turn the switch (3) to the off position. Remove the DC barrel connector from the power socket (6) and the
device will shut down. Remove the mains cable from the wall socket.
OPERATING MODES
The switch (3) is used to select the operating mode. Operating modes are selected by turning the switch
(3) clockwise from the off position. All available operating modes are listed on the front side of the device.

8
Using the Device for Checking
the NL Camera Accuracy
NL SONIC TESTER AND NL CAMERA ACCURACY CHECK PROCEDURE
1. Power on the NL Camera.
2. Click on the cogwheel icon on the bottom left corner of the screen.
3. Select Advanced settings
4. Tap on the More… button until you can see a Calibration Mode selection available. You may need to tap on
it once, twice or more, depending on your specic camera conguration. If you accidentally miss the page
containing the selection, keep tapping until it appears again.
5. Power on the NL Sonic Tester
6. Mount the device on a tripod. Place the device at least 1.0 meter from any surface. If you are using the
tripod provided with the NL Sonic Tester (or similar low tripod), place it on a table.
7. Select the CALIBRATION mode on the NL Sonic Tester by turning the switch according to the label on the
front side of the device.
8. Tap on the Activate button on the NL Camera screen to activate the calibration mode.
9
CHECKING THE ACCURACY
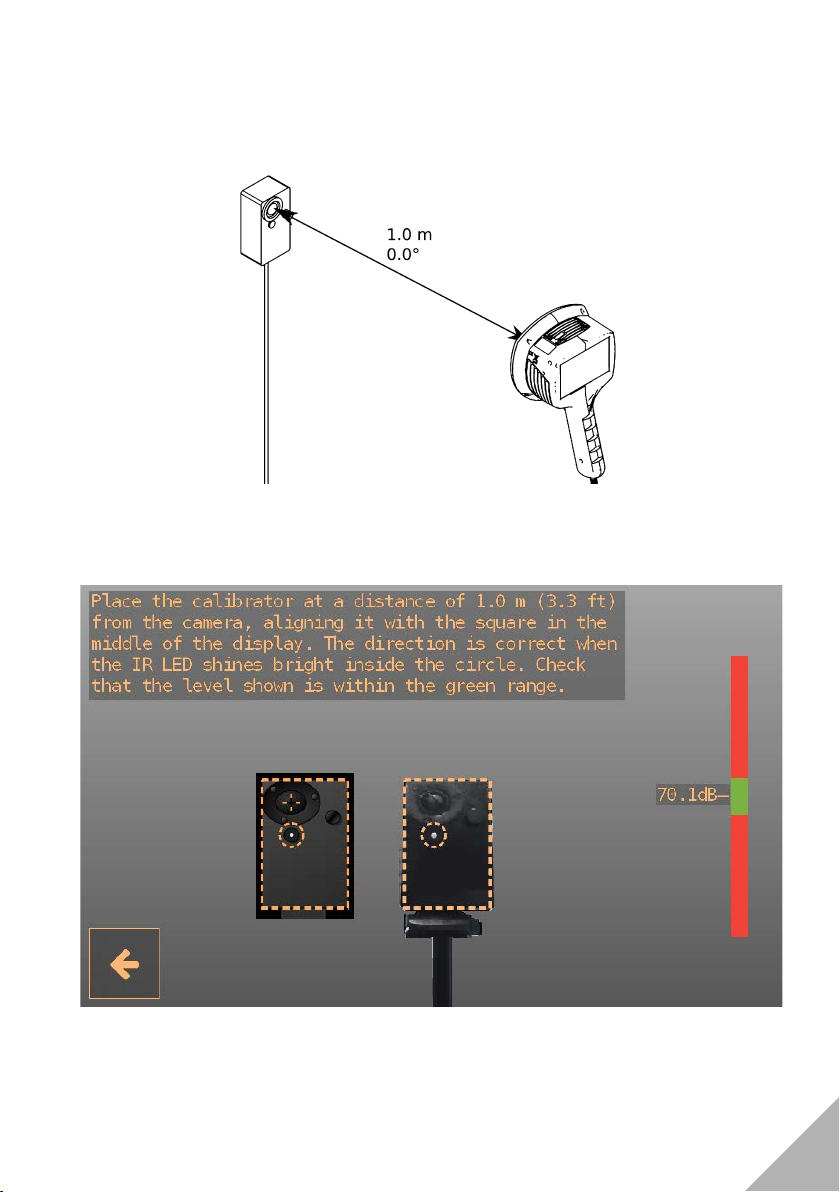
1. Place the camera at a distance of 1.0 m (distance from the front side of the NL Sonic Tester to the front
side of the NL Camera). Make sure that the NL Camera is aligned parallel to the NL Sonic Tester.
2. Align the NL Camera in such a way that the calibrator is exactly within the outline in the middle of the
screen and the IR LED (2) is within the circle and it is illuminated at its brightest. This means that the
calibrator and camera are aligned properly.
3. Observe the dB indicator bar on the right side of the screen. The NL Camera accuracy is correct if the reading
is within the green range. If the reading is in the red range, rst make sure that the NL Camera and NL Sonic
Tester are set up correctly and that the IR LED is at its brightest. If the device still displays incorrect (red)
readings, please contact your distributor.


Table of contents
Other NL Acoustics Test Equipment manuals

Popular Test Equipment manuals by other brands


Redtech
Redtech TRAILERteck T05 user manual

Venmar
Venmar AVS Constructo 1.0 HRV user guide

Test Instrument Solutions
Test Instrument Solutions SafetyPAT operating manual

Hanna Instruments
Hanna Instruments HI 38078 instruction manual

Kistler
Kistler 5495C Series instruction manual

Waygate Technologies
Waygate Technologies DM5E Basic quick start guide

StoneL
StoneL DeviceNet CK464002A manual

Seica
Seica RAPID 220 Site preparation guide

Kingfisher
Kingfisher KI7400 Series Training manual

Kurth Electronic
Kurth Electronic CCTS-03 operating manual

SMART
SMART KANAAD SBT XTREME 3G Series user manual

Agilent Technologies
Agilent Technologies BERT Serial Getting started