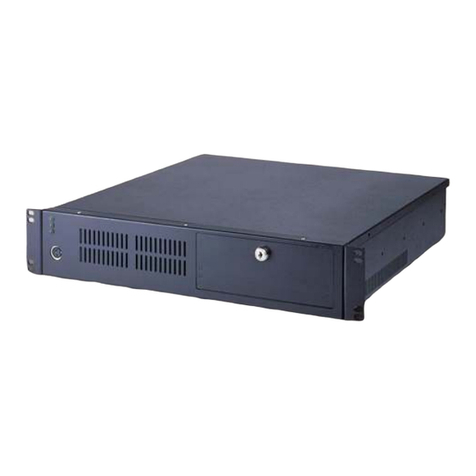
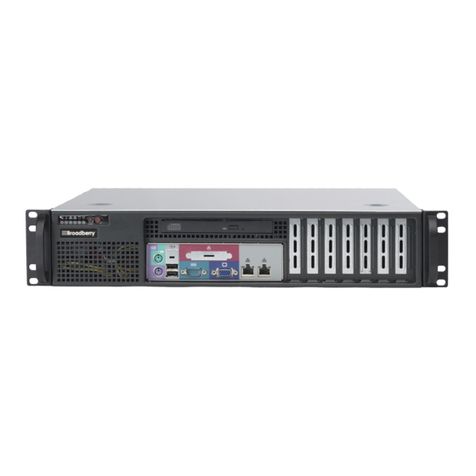
nMedia PRO-LCD-B User manual

HOME THEATER PC CHASSIS
Models: PRO-LCD | PRO-LCD-B | PRO-LCD-S
Quick Installation Guide
(U.S. & Canada Only)
Version 1.0
DISCLAIMER
No warranty or representation, either expressed or implied, is made with respect to the content of this documentation, its quality,
performance, merchantability, or fitness for a particular purpose. Information presented in this documentation has been carefully checked for
reliability; however, no responsibility is assumed for inaccuracies. The information contained in this documentation is subject to change
without notice. In no event will nMedia will be liable for direct, indirect, special, incidental, or consequential damages arising out of the use
or inability to use this product or documentation, even if advised of the possibility of such damages.
TRADEMARKS
All trademarks used in this user guide are the property of their respective owners.
COPYRIGHT
© 2004-2008 by NMEDIA SYSTEM, INC. All rights reserved. No part of this publication may be reproduced, transmitted, transcribed, stored
in a retrieval system, or translated into any language in any form by any means without the written permission of NMEDIA SYSTEM, INC.
TECHNICAL SUPPORT
If a problem arises with your system and no solution can be obtained from this user guide, please contact your place of purchase or local
dealer.
REVISION HISTORY
V 1.0 July, 2008
Introduction
1-1. Key Features
PRO-LCD displays in real-time information of PC hardware, software and multimedia through the LCD windows. For
PC using, it provides mail checking, message alarm. And also it can display various media information related to
Windows XP Media Center Edition 2005 & Media Center Edition of Vista Home Premium and Vista Ultimate
version.
- Multimedia information
Visualization – It displays various pieces of playing information and graphic analyzer with Winamp or Windows Media
Player.
PC sound – It displays a graphic analyzer to accompany the sound.
- System information
It supports displaying hardware and operation information of CPU/ RAM/ HDD in real time. PRO-LCD displays software
information of OS/ Network/ Direct X and also displays various data through MBM (Motherboard Monitoring).
- Facility function
POP3 mail checking - If new mail has arrived, it will be indicated on the display panel.
Message alarm - On the corresponding date, the indicator will display a reminder if the user has an appointment or
obligation by displaying the message or playing sound file.
- Useful function
CG Builder – User can be built a unique own symbol mark or logo with the CG builder.

2 / 40
Hardware Installation Guide
Note:
Internet connection is required for software download to install the product! No driver CD comes
with the package.
There are two versions from this LCD module. If you own our HTPC 1000/2000/5000/6000 HTPC cases, and you wish to
upgrade them with a 20X2 programmable LCD, you should purchase the non-5.25” bay version (OEM version) of the
PRO-LCD.
If you do not own the HTPC cases above, and you have a 5.25” bay available and you want to add the 20X2
programmable LCD, you should purchase the PRO-LCD-B or PRO-LCD-S version that built in a 5.25” bay chassis. B is
the Black aluminum face plate model, and S is the Silver aluminum face plate model.
For the regular PRO-LCD model (OEM version), follow below steps to install:
•Connect USB cable and power cable; put LCD module on a non-static surface; turn on the system. Ensure the
LCD initial screen show up before installation. Turn off the system, continue on the installation
•Remove the (LCD window) black cover tape before you install the LCD module to the panel
•For HTPC 1000 series, card reader module must be removed so that you can put in the module into the panel.
Manually pulling the metal bar may be required to slot in the LCD module
•Install the LCD module with 2 screws. Then, connect cables by following page 4 instruction
Please plan ahead before installing the module, removing the optical drive cage and card reader module do require extra
cares and re-wiring. Remember, you do not need to take off the front panel to install the module; you can simply install it
from the inside of the chassis.
For the 5.25” bay version PRO-LCD-B or PRO-LCD-S model, simply install it to the vacant 5.25” bay slot by securing
it with 2 or 4 screws. Follow your case manual to install the 5.25” device. Then, connect cables by following below
instruction.
The following section of the manual covers all of the connectors, headers and switches, and tells you how to connect
them. Please pay careful attention and read the entire section before attempting to perform the PRO-LCD installation,
in order to gain the necessary information.
① Turn off the PC.
② Connect USB cable as well as the Power cable
③ After turning on the PC, install the Driver downloaded from the below link to your CD ROM or hard drive.
④ Install and run the MHC application to configure the LCD module

3 / 40
Connect to internal USB port
① If the power cables are connected improperly, it might cause a fatal damage to PRO-LCD.
② There are +5V, -Data, +Data and GND USB ports on the device. However, not all motherboards have the same layout.
Refer to your motherboard’s manual before connecting to the internal USB port.
③ USB pin layouts are shown as below. Before installing, refer to your motherboard’s manual.
* Most of motherboard
ASUS, INTEL, IWILL, SOYO, TYAN, ABIT,
AOPEN, UNITEC, MSI, EPOX, SUMA, etc.
* Some of motherboard
GIGABYTE, ECS, AZZA, etc.
Software Installation
Cautions:
1. Pre-Download drivers / application / configuration guide are required.
Please visit below link to download driver, MHC application and configuration user guide.
http://www.nmediapc.com/LCD/download.htm
2. The driver and application software is provided by our OEM partner, V.L. System in Korea. Please also
visit their website for technical support.
http://www.vlsys.co.kr/English/supdown_base.php (L.I.S. MCE Model)
3. For the more effective Graphic EQ’s performance, users have to install Sound card of windows before
installing PRO-LCD software.
On the graphic EQ can control the PC SOUND function that is displayed all kinds of PC sounds as analyzer output
through sound card. To operate normally PC SOUND, it should be indicated proper volume on the UV meter.
If PC SOUND is not operating normally though speaker makes a sound, refer to hereunder;
Setup in the WINDOWS XP
Firstly open the device manager.

4 / 40
First, open the sound, voice and audio devices (WIN2K: Sound and Multimedia) on the control panel, then click system
volume control (WIN2K: Audio-Recording-Volume).
Check “Stereo Mix”.
If you can’t find “Stereo Mix”, select “Option” – “Attribution” and then add or delete the menu of record control.
Setup in the WINDOWS VISTA

5 / 40
1. Sound setting control panel – Get in [Recording] window.
2. Revitalize [ Show Disable Devices] as checking.
3. Displayed ‘Stereo Mix’ lightly.
4. Click [Enable] to show the revitalization of stereo mix by a
right button of mouse.
5. Show up [Properties] of stereo mix window.

6 / 40
6. Revitalize [Level ] window.
7. Setting [stereo mix] value up to 100.
Note: Depending on user’s the type of sound card; it may show a different name instead of “Stereo Mix”.
That is, What U Hear / Mixed Output / Post-Mix / Recording Balance / Loop Back / Stereo Output / Stereo Out /
Sum.
* If detected volume is not indicated on the UV meter though setting is finished,
Turn up the WAVE volume or displayed player’s volume.
When you install the software, we recommend the installation step by step.
Link for Drivers / Application & Instruction
Please visit below link to download driver, MHC application and configuration user guide.
http://www.nmediapc.com/LCD/download.htm
You should follow the below steps in order.
▶For the first time users after installing Windows
STEP 1. Download USB driver & MHC control program to your CD ROM or Hard Drive, or simply select “Open” after

7 / 40
downloading
STEP 2. Install USB driver
STEP 3. Install MHC control program
STEP 4. Re-booting
STEP 5. Open MHC control program to configure the LCD
▶For the users of updating USB driver
STEP 1. Download USB driver
STEP 2. Close the MHC control program
STEP 3. Install USB driver
STEP 4. Re-booting
▶For the users of updating MHC program
STEP 1. Download the newer version MHC
STEP 2.Uninstall the previous version
STEP 4. Install new MHC control program
STEP 5. Re-booting
USB Driver installation
After selecting the ‘USB Driver Install’ button, open the USB driver folder which it’s suitable for user’s Windows then
please be run this. You enable to install the USB driver.
Double click setup.exe file
You may wait for a while until the use driver is installed automatically for 3~5 minutes.
Note : Please wait for a while because you may recognize a computer does not work..
You can see the above window after the installation is finished and after [Enter] key Windows disappear automatically.

8 / 40
M·Play Home Center installation
After installing the application, it displays the
program automatically and a new Windows
interface appears. Select the option “M·Play Home
Center Install” at the right side.
Press “Next’ to continue the installation.

9 / 40
Keep the basic default and press “Next’ to continue the installation.Press the “Install” button and start to install.
Wait for a while during installation.
On the left side question 'To complete
installation,... restart now?' select the 'Yes' and
press the “Finish” button then it will be restarted
system.
Re-booting the system, M∙Play Home Center
operate automatically then it finished the
installation.

10 / 40
M·Play Home Center Guide
All functions of L.I.S MCE can be managed easily from the M·Play Home Center. Because the program has so many
features, it might rather be difficult if you are new to L.I.S MCE. So please go through the guide carefully.
Introduction
To see the extracted menu, move the mouse cursor on M·Play Home Center which is located at the tray on the bottom
right side of the monitor and right click.
The M·Play Home Center features menu will slide up from the M·Play Home Center. We will explain the details of each
option in the section below.
After you click the slide up menu, it displays the select menu. Then you can set the menu at M·Play Home Center.
The part Indicator is composed of visual LCD and the menus concerned. Refer to the following for details;
Help : You can see the M·Play Home Center’s “Help”.
Basic setup : Setting hardware’s device and start/ ending message.
Auto User : This feature can organize and order items according to priority.
Media Center : It displays status of action for Windows XP Media Center Edition.
Media Player : This displays the graphic analyzer screen through the Windows Media Player
plug-in.
Winamp : This feature displays the graphic analyzer through the Winamp plug-in.
PC Sound : “PC Sound” displays a graphic analyzer to accompany with all the sound of PC.
Network Monitor : This indicate status for network traffic in real time.

11 / 40
Message Alarm : Setting the function of alarm.
Digital Time : This displays the current time and date.
Motherboard Monitor : In case of the user who is installed SpeedFan or MBM select the
one.
Real Time Clock : RTC display for watching the CPU's running clock.
CPU/Memory : It displays you the CPU information and resource usage.
OS/System : It shows the system and O/S information.
E-mail Check : The M·Play Home Center will check POP3 mail accounts that the user has
configured.
Note – Please be advised that after altering the settings, you must click ‘Save section’ to save the settings.

12 / 40
M·Play Home Center
You can setup USB/Com port, fonts and languages, and can also change Starting and Ending Messages.
Control Device: It recognizes which model is used automatically, and does not need to change except in special case.
Communication Setup: It recognizes which port is used automatically, does not need to change except in special case.
Program Setup: You can select a desired language and font for the M·PLAY Home Center. When it starts Windows first,
you can also start M·PLAY Home Center and put it at the tray on the bottom right side.
User Message Setup: You can write your own starting/ ending messages.
VFD Brightness: You can set the desired VFD brightness on your OS system. ‘Start’ is the VFD brightness when the PC
is on and ‘End’ is the VFD brightness when the PC is off or in Standby mode & Hibernate mode. (without supporting
LCD model)
Auto user menu is the mode to treat users setting list and ‘plug-in precedence’ automatically. Except to see the specific
information only, we recommend using this Auto user so as to look easy and various information.

13 / 40
Key features of Auto user
Auto sensing display of Windows XP Media Center Edition
; It can indicate the information on the L.I.S MCE by auto sensing performance of Media center.
Auto playing Winamp, Windows Media Player plug-in analyzer
; It can indicate the analyzer on the L.I.S MCE by auto sensing performance of Winamp, Windows Media
Player.
Drawing output list at user’s option
; You can use this to order items according to priority. These items show auto reversing on the L.I.S MCE
screen and you can also control each display per second with this feature.
Press the key 'Add', ‘Add’ window will appear on the screen.

14 / 40
Go to ‘Select items’ and use this to select your desired items.
Adjust interval time (in seconds) of display.
If you want to change items, press the button ‘Modify’. Go to ‘CG builder run’ and use this to select your desired items.
After modifying CG builder, you must click on ‘Save’ to save setting.
Locate the CG build file on the C:\Program Files\M.Play Home Center\CG_File so as to show the LCD display.

15 / 40
'Plug-in Precedence' can set up to display according to priority the graphic analyzer on the L.I.S MCE screen by
automatically sensing when Winamp and Windows Media Player are being used.
In the case of the settings displayed above with “Plug-in Precedence”, if the user is playing Winamp or Windows Media
Player, the graphic analyzer will be displayed. Also, priority has been given to Winamp if it is playing simultaneously
with Windows Media Player.
This media center displays the working of Windows XP Media Center Edition (MCE) on L.I.S MCE. If you select ‘Auto
User Mode’, it can be output related to the information by auto-sensing Media Center performance.
For the information of TV/ DVD/ Video/ Photos/ Online spotlight/ programs, it will be displayed real time on
the menu of Media Center.
On occasion of installing MCE OS by Microsoft, this function will be operated on your system. MCE version
is above MCE 2005.
Auto scrolling Media '$AUTOINFO' Command – This scrolls automatically too long for its sentence title, name & etc to
display.
Display information of background music on playing 'My photo' - When it performs photos slider show, it displays
information of background music on playing.

16 / 40
This (Display type related to the MCE action) can be controlled the item and location by using each menu’s command
at user’s option.
Command
$TIMECG : Current time
$YEAR : Year
$MONTH : Month
$DAY : Day
$DOW : A day of week
$HOUR : Hour
$MIN : Minute
$SEC : Second
$AMPM : A.M, P.M
MediaCenter $TIMECG
Home $AMPM $TIMECG
Support of Windows XP Media Center Edition 2005
» 1. TV
The channels, volume, title of broadcast information and play time.
$TIMECG : Current time
$YEAR : Year
$MONTH : Month
$DAY : Date
$DOW : A day of week
$HOUR : Hour
$MIN : Minute
$SEC : Second
$AMPM : A.M. / P.M.
» 2. DVD
The title, track, play time and volume.
$TITLE - DVD Title
$PLAYMODE - Play mode
$TOTALTIME - Total time of playing media
$PLAYTIME - Current time of playing media
$ENTIME - Remainning time of playing media

17 / 40
$TITLENUM - Title number
$TOTALTRACK - Total track number
$TRACKNUM - Play track number
$PLAYTIMECG - Display time as the large digit CG
$VOL - Sound volume
» 3. Guide
It displays the moving to TV guide menu.
» 4. Music
The titles, file name, play time, audio information, analyzer, and volume.
$AUTOINFO - Auto-display media information
$PLAYTIMECG - Display large CG for play time
$TITLE - Title
$ARTIST - Player or singer
$ALBUM - Album name
$PLAYMODE - Play mode
$TOTALTIME - Total time of playing media
$PLAYTIME - Current time of playing media
$ENTIME - Remainning time of playing media
$TOTALTRACK - Total track number
$TRACKNUM - Play track number
$VOL - Sound volume
» 5. Photos
The file name and turning time for showing the image during the slide show.
$CURRPIC - Display image file name
$TRANTIME - Turnning interval time(sec)
» 6. Videos

18 / 40
The title of video file, file name, play time and volume
$PLAYMODE - Play mode
$TOTALTIME - Total time of playing media
$PLAYTIME - Current time of playing media
$ENTIME - Remainning time of playing media
$TITLE - Title
$PLAYTIMECG - Display large CG for play time
$VOL - Sound volume
» 7. Recording
Data recording about TV, Video, Music
$REC_MEDIANAME - Media name for recording
$REC_TRACKNUMCG - Display large CG for recording track number
$REC_TRACKNUM - Recording track number
» 8. Radio
It displays the menu title moving to radio menu.
D
IOCGCH - Display large CG for radio frequency selected
D
IOCH - Radio frequency selected
A
YMODE - Play mode
L
- Sound volume
» 9. Online Spotlight
Media title, play time, volume and file name through the online.

19 / 40
» 10. Writing Disc
Recording information of CD, DVD
I
TECGPER - Display large CG for recording progress rate
I
TEPER - Recording progress rate
I
TEFORMAT - Recording format
» 11. Record Shows
Play time, title, and volume when is displaying TV recorded.
$PLAYMODE - Play mode
$TOTALTIME - Total time of playing media
$PLAYTIME - Current play time
$ENTIME - Remainning time of playing media
$TITLE - Title
$PLAYTIMECG - Display large CG for play time
$VOL - Sound volume

20 / 40
Through the visualization plug-in for Windows Media Player can display analyzer on the L.I.S MCE screen.
Plug-in can automatically be installed when it installs the M·Play Home Center, just select the WMP_LIS plug-in at the
Media player.
Visualization Plug-in display
: This is for selecting the type of analyzer that you want displayed on the L.I.S MCE screen.
zUser set : User can set the command and some letter on the Display text directly.
zTitle & Info : This is not for analyzer, shows information about the title, channel, bit rate, playing time.
This manual suits for next models
2
Table of contents
Other nMedia Chassis manuals
