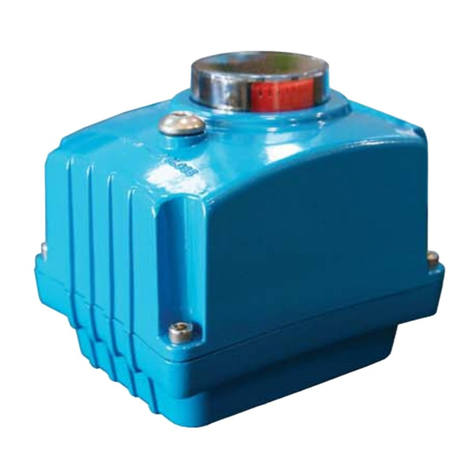
NOAH ACTUATION SA Series User manual


Table of Contents
2noituaC.1
3egarotS.2
4noitacificepSrotautcA.3
5noitacificepSdradnatS.4
5noitacificepSlanoitpO.5
5ecnamrofreP.6
7. Exterior Parts Identification 6
8. Interior Parts Identification 7
9.
Actuator Nameplate information 8
10. Actuator Mounting Flange 8
11. Actuator and Valve Assembly 9
41noitallatsnIrotautcA.21
41gnitteShctiwStimiL.31
51gnitteSrotacidnI.41
51noitcennoCeriW.51
61gniriWcirtcelE.61
71ecnanetniaM.71
18. Warranty Information 17
71gnitoohselbuorT.91
81noisnemiD.02
S
A

2
Electrical shock hazard
To avoid serious personal injury, property damage or death, turn
off all power to the actuator before removing the cover.
Before installation, verify the nameplate information to insure
the correct model number and voltage of the actuator.
Be sure to completely review the actuator manual prior to
operation.
Final limit switch adjustment must be done after mounting the
actuator to the valve. Incorrect adjustment may cause
actuator failure.
The actuator must be properly grounded.
use the grounding lugs provided on the inside or outside of the
actuator body.
To minimize the possible damage caused by condensation, be
sure to energize the heater.
1. Caution
http://www.emico.co.kr
NOAH ACTUATION CO.,LTD.

3
SA SERIES MANUAL
The actuator must be stored in a clean, dry and temperature controlled area. The actuator shall be
stored with the cover installed and with the conduit openings sealed. Storage must be off the floor.
Care must be taken to guard the actuator from condensation during extreme temperature variation.
The heater should be energized as soon as the actuator is installed.
2. Storage
Storage Location Indoor
18℃±5℃
Storage Temperature
Improper storage of the actuator will void the warranty.

4
http://www.emico.co.kr
3-1 The SA-series actuator has been designed for the automation of 90-degree rotating equipment.
The actuator is well suited applications requiring a torque of less than 5kg·m, 9kg·m (50N·m, 90N·m).
Typical applications are ball valves, butterfly valves and dampers.
The 2-watt internal heater helps to minimize condensation due to temperature and humidity
changes.
3. Actuator Specification
3-3 Heater
The mechanical, cam actuated, limit switches are included to accurately calibrate the end of
travel valve position.
The actuator enclosure is made from an anodized aluminum alloy which is also dry powder epoxy
painted to help protect against oxidation.
3-4 Limit Switch
The actuator motor is protected with an embedded, 120℃, thermal protector designed to protect
the motor from overheating.
3-5 Motor
The visual indicator is connected directly to the actuator output shaft. The LED lights illuminate
and give visible indication of the valve position over a far greater distance.
3-6 Indicator
3-2 Environment and Temperature
Temperature 20℃~ 70℃
Water-Proof(Sealing) IP67
NOAH ACTUATION CO.,LTD.

5
SA SERIES MANUAL
4. Standard Specification
5. Optional Specification
6. Performance
C P T
P C U
Current Position Transmiter
Output : DC 4-20mA SA005L / SA009L
SA005L / SA009L
Proportional Control Unit
Input : DC 4-20mA, DC1-5V, DC2-10V
Output : DC 4-20mA
Local Control Unit
SA005L / SA009L
L C U SA005L / SA009L
Stall Protection
Travel Angel
Space Heater
Enclosure Weatherproof Enclosure IP67 Nema 4 and 6
Ambient Temperature -20℃to +70℃120℃/ 1hr
DC12V, DC24V, AC24V
Power Supply AC110 / 220V 50/60Hz
Limit Switches Open / Close + Dry Contact Open / Close
Thermal Protection ( Open 120℃)
90˚±5˚ (Extention : Upto 270˚)
Indicator Dome Type (LED Light Inside)
Manual Operation By L-Wrench (6mm Hexagon)
Self Locking Provided by means of Worm Gearing
5W (110 / 230VAC, 24VDC)
Cable Entries
Two PF 1/2”
Option : M20 Pitch1.5, NPT 1/2”
Lubrication Grease (Shell Gadus S2 V220 2 )
Materials Aluminium Alloy
Surface Treafment Anodizing
External Coating Polyester (TGIC-Free)
P I U Potentiometer 1K Ohm
Model
SA005
SA005L
Output
Torque
Operating Time (90˚) Motor Class (W) Rated Current (A)
1 Phase(AC) DC1 Phase(AC) DC
Duty
Cycle
Number
of
Handle
Turns
Weight
Kg.m N.m in-lb 60Hz 50Hz 24V 110V 220V 24V S2
(min)
S4
(%) kg
5 50 14 17 15 1.8 0.35 0.23 1.8 15 2.8
5 50 14 17 15 1.8 0.35 0.23 1.8 15
6
63.2
SA009
SA009L
9
9
90
90
26 32
26
434
434
782
782 32
12V
11
11
25
25
24V
10
10
22
22
15
15
6
6
6
6
6
6
6
6
6
6
6
6
15
15
15
15
2.1
2.1
0.35
0.35
0.25
0.25
2.1
2.1
12V
1 Phase(AC) DC
24V 110V 220V 24V
12V
3.2
3.2
3.4
3.4
15
15
50
50
30
30
4.5
4.5
2.8
3.2
lb
6.2
7.1
6.2
7.1

6
http://www.emico.co.kr
7. Exterior Parts Identification
7-1 SA005, SA005L / SA009, SA009L
SA005L, SA009L
Top
Cover Bolts
Earth
Cable
entries
▼
▼
Window
▼
Top Cover
▼
Body
▼
Manul
Operation
▼
▼
SA005, SA009
▼
L-Wrench
▼
Base
▼
NOAH ACTUATION CO.,LTD.

7
SA SERIES MANUAL
8. Interior Parts Identification
▼
Indicator
▼
Condenser
Motor
▼
Terminal
▼
▼
Heater
▼
Full Open,Close
LED Lamp
▼
Micro Switch
▼▼
Auxiliary Contact
Open Limit Switch
▼▼
Auxiliary Contact
Close Limit Switch
Open Limit Switch
Close Limit Switch
8-1 SA005, SA005L / SA009, SA009L

8
http://www.emico.co.kr
9. Actuator Nameplate Information.
10. Actuator Mounting Flange
Before Installation or use, verify the nameplate information to insure that you have the correct
model number, voltage and options.
SA-Series Base is manufactured to the ISO 5211 standard.
If the actuator does not fit directly to the valve, drive inserts are available or complete mounting
kits can be manufactured.
Noah ACTUATOR
9-1 ⓐNoah ACTUATOR
Model Number
9-2 ⓑType
Main power supply voltage for the motor.
9-3 ⓒSupply
Torque output.
9-4 ⓓTorque
Motor wattage
9-5 ⓔMotor
A unique serial number is issued for each ACTUATOR.
9-6 ⓕS.N
Options installed will be listed here. For a complete listing of options refer to section
5 Optional Specifications.
9-7 ⓖOP
Do not open when energized.
9-8 ⓗWarning
NOAH ACTUATION CO.,LTD.
Tel: 82-2-806-4263 / Web Site: www.emico.co.kr
9-9 ⓘManufacturer and Contact Info
A
B
C
Option
Base P.C.D
ISO5211 F03 (Ø36 M5TAP DP8)
ISO5211 F05 (Ø50 M6TAP DP10)
ISO5211 F07 (Ø70 M8TAP DP13)
ISO5211 F04 (Ø42 M5TAP)
ⓐ
ⓒ
ⓔ
ⓖ
ⓑ
ⓕ
ⓓ
ⓗ
ⓘ
Drive Insert (Option)
14 DP25
P.C.D A
P.C.D B
P.C.D C
NOAH ACTUATION CO.,LTD.
Do Not Open When Energized
SEOUL KOREA TEL: 82-(2)806-4263 www.emico.co.kr
WARNING
NOAH ACTUATION CO.,LTD
Type
S.N. OP
Torque Motor Supply

9
SA SERIES MANUAL
11. Actuator and Valve Assembly
※If the Valve is supplied by the user, the delivery is available after NOAH ACTUATION mounts the actuator to
the valve and calibrates the limit switch settings.
11-1-1
Confirm that the valve mounting dimensions match the actuator ISO mounting.
Refer to section 10 for more detail.
11-1-2
Remove the manual over ride lever provided on the actuator base, and with power off, close the
actuator clockwise. Also, close the valve that is to be mounted.
11-1 Butterfly Valve Assembly
11-1-3
Apply a light coating of grease to the
valve stem and actuator drive.
Assemble the valve and actuator
together and secure with the proper
bolting.
L-Wrench
Grease
▼
▼
▼

10
http://www.emico.co.kr
11-1-4
Secure the actuator and valve together using
stud bolts and nuts or hex bolts.
Firmly tighten the assembly and confirm that there is
no gap between the actuator and valve.
Overtightening the bolts to close the gap may dam-
age the assembly. Confirm that the valve stem and
mounting bolts are not too long and bottoming out
inside the ACTUATOR body
11-1-5
Using the manual over ride, rotate the
actuator to the open, counter-clockwise,
position and confirm that the valve is rotating
in the same direction.
11-1-6
Remove the top cover and properly set the
open and close limit switches. The auxiliary
switches may be set at this time also.
Refer to section 13 for more detail.
▼
Mount the valve and the actuator
▼
Bolts
▼
Open/Close
Limit Cam Switch
NOAH ACTUATION CO.,LTD.

▼
Stem
▼
Bracket
▼
Grand
▼
Ball Valve
11
SA SERIES MANUAL
※If the Valve is supplied by the user, the delivery is available after NOAH ACTUATION mounts
the actuator to the valve and calibrates the limit switch settings. NOAH ACTUATION can also
provide a complete valve mounting kit if required.
11-2-1
Should a mounting kit be required, proper valve dimen-
sional information must be provided to ensure a proper fit.
11-2-2
In general, when a Mounting kit is designed
For the Ball Valve, a packing gland is installed
to prevent any valve stem leakage and an
adjustable bolt and nut assembly is installed to
tighten the valve stem packing. This will com-
press the stem packing and is adjusted as
required. Caution, over tightening of the pack-
ing gland will increase the torque required to
turn the valve and may cause the actuator
to stall.
Example of a fabricated bracket
11-2 Ball Valve Assembly
Bolt
▼

12
http://www.emico.co.kr
11-2-3
Remove the manual over ride lever provided on the actuator base, and with power off, open the
actuator counter-clockwise. Also, open the valve that is to be mounted.
11-2-4
Apply a light coating of grease to the valve
stem and actuator drive. assemble the valve
and actuator together and secure with
the proper bolting.
L-Wrench
▼
Grease
▼
▼
NOAH ACTUATION CO.,LTD.

13
SA SERIES MANUAL
11-2-5
Secure the actuator and valve together using
stud bolts and nuts or hex bolts.
Firmly tighten the assembly and confirm that
there is no gap between the actuator and
valve. Overtightening the bolts to close the
gap may damage the assembly. Confirm
that the valve stem and mounting bolts are
not too long and bottoming out inside the
actuator body.
11-2-6
Using the manual over ride, rotate the
actuator to the closed, clockwise, position
and confirm that the valve is rotating in
the same direction.
11-2-7
Remove the top cover and properly set the
open and close limit switches. The auxiliary
switches may be set at this time also.
Refer to section 13 for more detail.
▼
Mount the valve
and the actuator
▼
Bolts
▼
Open/Close
Limit Cam
Switch

14
http://www.emico.co.kr
12. Actuator Installation
13. Limit Switch Setting
When installing an actuator, proper clearance around the actuator is required to ensure that
the cover can be removed to allow for maintenance.
13-1-1
With the power off, remove the cover and manually
rotate the ACTUATOR to the closed, clockwise,
position.
13-1-2
Loosen the close cam set screw and rotate the
cam in a clockwise direction to actuate the close
limit switch. Also, the close auxiliary switch cam
can be adjusted at this time too.
13-1-3
Firmly tighten the cam set screws.
13-1-4
To set the open cam switches, repeat the previous instructions except rotate the actuator
to the open, counter-clockwise position and rotate the open cams in the counterclockwise
direction to actuate the open switches.
13-1 Switch cam calibration
AOLS
OLS
ACLS
CLS
Dry Contact Open Limit Switch
Open Limit Switch
Dry Contact Close Limit Switch
Close Limit Switch
Model A(mm)
SA005
SA005L
80
140
SA009
SA009L
80
140 Ground
▼
▼
▼
▼
CLS
ACLS
OLS
AOLS
A
NOAH ACTUATION CO.,LTD.

15
SA SERIES MANUAL
14. Indicator Setting
15. Wire Connection
The position of the valve is indicated by the visual dome indicator.
The two cable entries on the SA-Series actuator are PF1/2". The actuator is sold worldwide,
so there maybe some differences as to the thread and pitch standards. Check with
your supplier to confirm which standard is supplied in your area.
LED lights illuminate to allow for easy visual confirmation of valve position.
※If the position of the indicator is not aligned correctly, an adjustment can be made by simply
loosening the bolt and manually turning the indicator to the proper location, then re-tightening
the bolt.
15-1Standard conduit and conduit seal fittings may be used when installing and wiring the
actuator. to prevent moisture and humidity from entering the actuator, it is highly
recommended that a seal fitting be installed in the actuator cable entry.
After all the conduit and wiring has been completed, then the seal fitting can be sealed
with packing and or a potting material.
15-2Any unused cable entry must remain plugged with the pipe plug provided with the
actuator. Do not remove the remaining plug as it is already sealed.
▼
Window
LED Lamp
Indicator
Bolt
▼
▼
Cable Entry Specifications
Korea, Japan, China
Europe, UK, Australia, NZ
US, Canada
2-PF 1/2”
2-M20 x Pitch1.5
2-NPT 1/2”

16
http://www.emico.co.kr
16. Electric Wiring
16-1 Remove the actuator cover by loosening the four captive cover bolts.
16-2 Confirm that the wiring diagram located in the actuator and the wiring number on the
nameplate match with each other.
16-3 Confirm that the main power and supply described on the nameplate of the actuator
match with each other.
16-4 Connect the wire to the terminal strip
according to the wiring diagram provided.
The SA-Series actuator uses the push type
WAGO brand terminal strip. The push type
strip makes wiring connections easy and
also helps to protect against pipeline
vibration.
16-5 Be sure to properly ground the actuator
by using the grounding lugs provided on
the inside and outside of the actuator body.
16-6 Be sure to wire and energize the heater as shown in the wiring diagram.
16-7 Each actuator must be powered by their own individual relays to prevent voltage feedback
and actuator damage.
16-8 After the wiring is completed in the actuator, use wire ties to group the wires together
and clean up their appearance. Be certain that the wires are secure and away from any
moving parts. Remove any loose debris before replacing the cover.
16-9 When all the work is completed, replace the top cover and secure it using the four cover screws.
16-10 Apply power and do a final check to confirm proper operation.
Main power must only be applied when the top cover is re-installed on the
actuator body. If the main power is on while wiring the actuator,
stop work immediately and turn the power off, only then is it safe to proceed.
Interior/Exterior earth / ground terminal
▼
Wire
Push Terminal
Block
NOAH ACTUATION CO.,LTD.

17
17. Maintenance
18. Warranty Information
The warranty will be void under the following conditions:
18-1 Failure or damage caused by misuse or abuse.
18-2 Failure or damage caused by unauthorized modifications or repairs done to the actuator.
18-3 Failure caused by the unauthorized modification / change or the wiring.
18-4 Failure caused by water entering the actuator due to improper sealing of the cable entries
18-5 Failure caused by improperly set limit switches.
18-6 Failure caused by fire, flood damage or other "Acts of God".
18-7 Failure occurring more than one year after shipment date.
It is recommended that the actuator be cycled every two weeks after purchase.
To minimize the effects of condensation in the actuator, it is recommended that the cable entries to be
sealed at the actuator and that the heater is energized.
19. Trouble shooting
If the actuator fails to function correctly, first check for any mechanical / alignment problems, then check
for any electrical problems. See chart below for more information.
Problem SolutionCause
Manual override not
functioning
LED lights not operating
Manual operation of the
motor behavior is normal
when you do not
Actuator continues to move
even after the cam has
tripped the limit switch.
Gear Failure
Main power failure
Motor/condenser damage
Wiring failure
Terminal board failure Replace terminal board
LED Board failure Replace LED Board
Terminal board failure
Terminal board failure Replace terminal board
Replace terminal board
Confirm unit is properly wired per
wiring diagram
Motor over heated and
thermal protector disengaged
Check frequency of operation or
jammed gears.
Main power check
Replace motor/condenser
Disassemble the actuator and
replace the gear
In addition to the above described mechanical / electrical failures, other causes may be the reason for
a failure based on the site conditions. For more information please contact NOAH ACTUATION for consultation.
For faster service, please have all of the nameplate information available when calling the factory.
SA SERIES MANUAL

20. Dimension
18
http://www.emico.co.kr
SA005, SA009
SA005L, SA009L
Drive Insert (Option)
A: ISO5211 F03 (Φ36 M5TAP DP9)
B: ISO5211 F05 (Φ50 M6TAP DP11)
C: ISO5211 F07 (Φ70 M8TAP DP13)
MANUAL OPERATION
MANUAL OPERATION
170 14 DP25
Base P.C.D
70
127
80
153
170
70
127
140
210
CABLE ENTRIES
2-1/2” PF
CABLE ENTRIES
2-1/2” PF
Drive Insert (Option)
A: ISO5211 F03 (Φ36 M5TAP DP9)
B: ISO5211 F05 (Φ50 M6TAP DP11)
C: ISO5211 F07 (Φ70 M8TAP DP13)
14 DP25
Base P.C.D
NOAH ACTUATION CO.,LTD.
Table of contents
Other NOAH ACTUATION Controllers manuals
