nologo RX1-ONE User manual

RX1-ONE
RX1-ONE_151118_VXX03_IT-GB
Mini ricevitore autoapprendimento,
gestisce codici standard da 12 a 64 bit e rolling HCS©
► COLLEGAMENTO DEL RICEVITORE
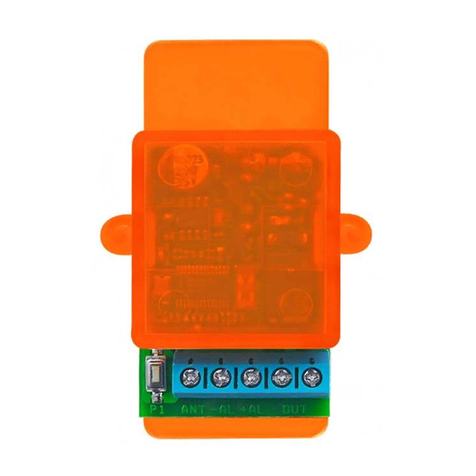
ALIMENTAZIONE (6,7,8). Il ricevitore può essere alimentato da 12 a
24 volt sia in corrente continua che in corrente alternata. Se si utilizza
la corrente continua deve essere rispettata la polarità.
ANTENNA (1 e 2). L’antenna deve essere collegata con il positivo
(anima) sul morsetto n° 1 e il negativo (calza) sul morsetto n° 2. Se
si utilizza solamente un fi lo: 17cm per freq. 433.92 Mhz - 8,5 cm per
freq. 868 Mhz vedi tabella sopra, questo va collegato al morsetto n° 1.
USCITA. L’uscita del contatto relè normalmente aperto si trova sui
morsetti 3 e 4. Si raccomanda di non collegare tali contatti alle alte
tensioni ed assicurarsi che la corrente sul contatto non superi 1
ampère.
► UTILIZZO DEL RICEVITORE
***AL PRIMO UTILIZZO BISOGNA OBBLIGATORIAMENTE
ESEGUIRE IL RESET DELLA MEMORIA ***
ATTENZIONE!! questa operazione cancella tutti i codici presenti
in memoria. E’ necessario eseguire il reset della memoria prima di
apprendere il primo telecomando in modo che non ci siano dei codici
precedentemente appresi e non utilizzati sull’impianto,
procedura di reset:
1. Assicurarsi che l’uscita non sia attivata (contatto relè aperto).
2. Assicurarsi che il ricevitore non sia in apprendimento. Il led rosso
deve essere spento oppure deve emettere solo brevi lampeggi.
3. Tenere premuto il pulsante fi no a che il led rosso non si accende.
4. Attendere che il led rosso ritorni spento oppure lampeggiante.
+ ANTENNA 1
2
3
6
7
8
4
5
- ANTENNA
N.A.
COM.
N.C.
USCITA
24 Vac/dc (+)
12 Vac/dc (+)
0 Vac/dc (-)
+ ANTENNA
+ ANTENNA
1
2
3
6
7
8
4
5
- ANTENNA
- ANTENNA
N.A.
COM.
N.C.
USCITA
24 Vac/dc (+)
12 Vac/dc
(+)
0 Vac/dc (-)
► IMPOSTAZIONE DELLA FREQUENZA
All'accensione il led lampeggia da 1 a 5 volte per indicare la frequenza
attuale, poi il led rimane acceso per 3 secondi durante i quali, premen-
do il pulsante è possibile cambiare la frequenza. Ad ogni pressione del
pulsante il led esegue il numero di lampeggi della nuova frequenza, se
è quella desiderata, attendere lo spegnimento del led. La corrispon-
denza lampeggi led - frequenza è la seguente:
n° lampeggi Frequenza Lungh. antenna
1868 Mhz UE 8.5 cm
2433 Mhz UE 17 cm
3306 Mhz solo extra UE 24 cm
4315 Mhz solo extra UE 24 cm
5330 Mhz solo extra UE 24 cm
GESTIONE DEL TIPO DI CODICI
Questa ricevente è in grado di gestire i codici standard da 12 a 64 bit e i codici
rolling tipo HCS©. Il primo trasmettitore appreso determina il tipo di codice
che la ricevente deve gestire, di conseguenza i trasmettitori successivamente
appresi devono avere lo stesso tipo di codice.
Per i codici rolling è possibile attivare o disattivare il controllo delle chiavi e del
contatore rolling. Quest’ultima funzione permette cosi’ di scegliere il grado di
sicurezza dell’accesso al funzionamento della ricevente.
► ATTIVAZIONE / DISATTIVAZIONE
CONTROLLO ROLLING
Questa procedura serve per attivare o disattivare il controllo delle chiavi e del
contatore rolling per i codici rolling. Se si attiva questo controllo, la ricevente
accetterà solamente i codici rolling con chiave proprietaria (chiave del
produttore) e controllerà il contatore rolling in modo che il trasmettitore non
possa essere copiato.
La procedura è la seguente:
1. Assicurarsi che il ricevitore abbia le uscite disattivate e che non sia in
apprendimento.
2. Premere e rilasciare il pulsante. Il led rosso rimane acceso.
3. Premere e rilasciare il pulsante. Il led rosso lampeggia e rimane acceso.
4. Premere e rilasciare il pulsante. Il led rosso si spegne e rimane spento
se la funzione è stata disattivata, mentre continua ad emettere brevi
lampeggi se la funzione è stata attivata.
APPRENDIMENTO DI UN TRASMETTITORE
Per apprendere un codice di un trasmettitore procedere come segue:
1. Assicurarsi che il ricevitore abbia l’uscita non attivata.
2. Premere e rilasciare il pulsante. Il led rosso rimane acceso.
3. Premere il tasto del trasmettitore entro 5 secondi. Se il codice viene
appreso il led rosso lampeggia velocemente. Se il led rosso lampeggia
lentamente signifi ca che la memoria codici è piena. Se il led rosso non
esegue alcun lampeggio signifi ca che il trasmettitore non è compatibile.
FUNZIONE USCITA PASSO PASSO
L’uscita del ricevitore può essere impostata per il funzionamento passo
passo (sempre attivata o sempre disattivata). Per attivare o disattivare questo
funzionamento è suffi ciente premere il pulsante quando l’uscita è attivata. Se
l’uscita era in funzionamento normale, verrà attivata la funzione passo passo,
mentre se tale funzione era già attiva, l’uscita ritornerà al funzionamento
normale.
CANCELLAZIONE DI UN TRASMETTITORE
Eseguendo la procedura di seguito descritta è possibile cancellare dalla
memoria un singolo trasmettitore.
Procedura di cancellazione:
1. Premere e rilasciare il pulsante P. Il led rosso rimane acceso.
2. Premere il tasto del trasmettitore. Se questo è in memoria, il led rosso
lampeggierà per circa 3 secondi per poi ritornare allo stato normale.
Durante questo tempo premere di nuovo il pulsante P.
24 Vac/dc (+)

► RECEIVER CONNECTION
POWER SUPPLY (6, 7 and 8). The receiver can be powered at 12 or
24 Vac/dc. If you use direct current respect the polarity. (The positive
in the terminal no. 2 or 3).
ANTENNA (1 and 2). The antenna should be connected with positive
side in the terminal no.1 and the negative in the terminal no. 2. If you
use only one cable (17 cm for freq. 433.92 Mhz - 8,5 cm for freq. 868
Mhz - for other frequencies, see table above), this has to be con-
nected to the terminal no. 1.
OUTPUT. The relay output is a normally open contact (see terminals
3 and 4) and normally close contact (see terminals 3 and 5). Please
don’t connect the cable s to high tension and make sure that the
current is not more than 1 Ampère
► USING OF THE RECEIVER
*** IT IS NECESSARY TO RESET THE MEMORY ***
ATTENTION!! this operation cancel all the codes in the memory.
It is necessary to cancel the memory before learning:
1. Make sure that the output has not been activated (the contact of
the relay is open).
2. Make sure that the receiver is not learning. The red led must be
switched off or it fl ashes shortly
3. Keep pressed the button till the red led is lighting.
4. Wait till the red led is switched off or it is fl ashing.
► FREQUENCY SETTING
Turning on the receiver, the L.E.D. fl ashes from once to 5 times to in-
dicate the frequency, then it lit on for 3 seconds and you need to push
the button to change the frequency. Each pressure of the button the
led fl ashes indicating the new frequency, choose one and wait the led
turns off . The related fl ashes-frequency is the following:
CODE MANAGING
The receiver can manage standard codes from 12 up to 64 bits and rolling
codes HCS. The fi rst remote control you learn, determines the type of code
you get in.It is possible to activate or deactivate the rolling code counter. This
is for a safe installation.
► ACTIVATE OR DEACTIVATE
THE ROLLING CODE COUNTER
This operation is necessary to activate or remove the key’s control and the
rolling code counter. If you active this control, the receiver will accept ONLY the
rolling code with owner key (producer key) and will control the rolling counter,
in a way that the tranmitter cannot be copied. The operation is as follow:
1. Make sure that the receiver outputs are removed and are not in learning
2. Press and release the button.The red led is lighting.
3. Press and release the button.The red led is fl ashing and lighting .
4. Press and release the button. The red led is switched off and it turns off
if the rolling code counter is deactivated while it fl ashes constantly or it
fl ashes if the rolling code counter is activated.
MEMORIZATION OF THE REMOTE CONTROL
To learn a code make as follow:
1. Make sure that the receiver output is not activated
2. Push and release the button The red led is lighting
3. Push the transmtter’s button within 5 sec. If the code has been learnt the
red led is fl ashing shortly.
4. If the red led is fl ashing slowly it means that the memory is full. If the red
led is not fl ashing it means that the transmitter is not compatible
STEP-BY-STEP FUNCTION
The output of the receivercan be set up for step-by-step function (activated
or not activated). To activate or deactivate this function it is suffi cient to press
the button when the output is activated. If the output is in standard mode, the
step-by-step function will be activated, if it was in step-by-step mode, it will be
in standard mode.
CANCELLATION OF A SINGLE TRASMITTER
This operation can cancel one single transmitter.
1. Press and release the button. The red led is lighting.
2. Press the transmitter’s button. If it is already learnt, the red led will fl ash
for 3 seconds to change into the standard mode. In this time press the
button again.
RX1-ONE
1 Channel receiver with self-learning,
it manages standard codes from 12 till 64 bit and rolling HCS©
+ ANTENNA 1
2
3
6
7
8
4
5
- ANTENNA
N.O.
COM.
N.C.
RELAY
OUTPUT
24 Vac/dc (+)
12 Vac/dc (+)
0 Vac/dc (-)
n° of fl ashes Frequency Antenna length
1868 Mhz UE 8.5 cm
2433 Mhz UE 17 cm
3306 Mhz only extra UE 24 cm
4315 Mhz only extra UE 24 cm
5330 Mhz only extra UE 24 cm

■ DICHIARAZIONE DI CONFORMITÀ
■ CONFORMITY DECLARATION
■ DÉCLARATION DE CONFORMITÉ
■ KONFORMITÄTSERKLÄRUNG
■ DECLARACIÓN DE CONFORMIDAD
■ NOLOGO S.r.l. dichiara che il seguente apparato RX1-ONE
e’ conforme ai requisiti essenziali delle seguenti norme:
■ NOLOGO S.r.l. declares that the following product RX1-ONE
is conformed to the following norms:
■ NOLOGO S.r.l. déclare que le produit suivant: RX1-ONE est
conforme aux criteres essentiels des normes suivantes’:
■ NOLOGO S.r.l. bestätigt , dass das folgende Produkt:
RX1-ONE folgende gesetzten entspricht:
■ El producto corresponde a las directivas europeas:
EN301 489-1 V1.9.2 EN300 220-2 V2.4.1
EN301 489-3 V1.6.1 EN 60950-1
■ Io sottoscritto amministratore Ernestino Bandera dichiaro che
l’apparato sopra defi nito è stato provato nella confi gurazione
tipica di installazione e soddisfa i requisiti essenziali di protezi-
one delle direttive:
■ Me Ernestino Bandera, declares that the above mentioned
product has been tested in a typical installation and fulfi l the
essential requirements of the laws:
■ Je soussigné,Ernestino Bandera, déclare que l’ appareil ci-
dessus a été testé dans la confi guration typique d’installation et
remplit les critères essentiels de protection des directives:
■ Der Unterzeichner ,Ernestino Bandera, bestätigt dass das
o.g. Gerät in einer typische Installation getestet wurde und den
grundlegenden Anforderungen etnspricht:
■ Es conforme con todas las normas técnicas correspondientes
al producto en el campo de aplicación de las Directivas Comu-
nitarias:
2014/53/UE (RED)
Ernestino Bandera
Busto Arsizio, 20/02/2017
■ Frequenze di trasmissione autorizzate
■ Permitted transmission frequency
■ Fréquence de transmission autorisées
■ Sendefrequenzen autorisiert
■ Frecuencias de emisión
EU 433,92 Mhz
868 Mhz
extra EU 306 Mhz
315 Mhz
330 Mhz
2002/95/EC
EB TECHNOLOGY S.r.l.
Corso Sempione 172/5,
21052 Busto Arsizio VA Italia
posta@ebtechnology.it
www.ebtechnology.it
NOLOGO S.r.l.
Via A. Pacinotti, 44
20020 Villa Cortese MI Italia
tel. +39 0331.430457
fax.+39 0331.432496
www.nologo.info
Alimentazione / Power supply /
Alimentation / Stromversorgung /
Alimentación
Vac
Vdc
12 ÷ 24
12 ÷ 30
Assorbimento / Power absorption /
Consommation / Verbrauch /
Consumo
17 mA 24Vdc
Stand by
Contatto relè di uscita / Output
relay contact / Type de relais /
Typ von Relais / Tipo de relé
max 1A
30Vdc
Temperatura di funzionamento /
Operating temperature /
Température de fonctionnement /
Betriebstemperatur
°C - 20 ÷ + 60
Sensibilità / Sensibility / Sensibilité
/ Empfi ndlichkeit / Sensibilidad dBm ≥ -106
Codici memorizzabili /
Max codes number /
Nombre maximum de codes /
Anzahl der speicherbaren Codes /
Número de códigos memorizables
Max 190
■ CARATTERISTICHE TECNICHE
■ TECHNICAL DATA
■ CARACTÉRISTIQUES TECHNIQUES
■ TECHNISCHE EIGENSCHAFTEN
■ CARACTERISTICAS TÉCNICAS
Table of contents
Languages:
Other nologo Receiver manuals
