Joe had a dream of introducing his vision of mind-body
fitness into every aspect of life, from elementary schools to
military training, and, had he not been so far ahead of his
time, it might have happened. Instead, he taught a small
group of devoted teachers and students, a few of whom
went on to continue the work and keep it alive until the rest
of the world caught up with his revolutionary thinking. Joe
spent many years talking to anyone who would listen about
his work, but did not receive much recognition during his
lifetime.
Joe’s studio was destroyed by fire in 1967 and he died soon
after that from complications of smoke inhalation. His wife
Clara carried on the work until her death in 1977.
Amongst the primary teachers who carried on Joe’s work
after his death was Romana Kryzanowska, a ballet dancer
who worked very closely with Joe and taught at his studio
for many years. She started one of the first teacher training
programs in the country and has trained hundreds of
instructors to teach the work as Joe taught it to her. She
was associated with the Pilates Guild for many years and
taught her Romana’s Pilates training program up until her
death in 2013.
Eve Gentry was a well known modern dancer who worked
with Joe and Clara as a student and teacher for over 20
years before moving to Santa Fe, New Mexico and opening
a studio there. Joe helped to rehabilitate Eve after a radical
mastectomy and helped her to regain the full use of her
arm and torso. Eve died in the late 1990s. Her work is
carried on by Michele Larsson through Core Dynamics.
Ron Fletcher was a Martha Graham dancer who worked
with Joe and Clara very late in their lives. Ron credits Clara
with inspiring him to develop his unique work on the Step
Barrel/Spine Corrector and to open a studio in Los Angeles
on Rodeo Drive. Ron was the first teacher to bring Pilates to
the West Coast and to introduce it to many famous actors
and actresses. His work incorporated a more “dancerly”
style and more complicated choreography into the original
exercises. His work is carried on by the Ron Fletcher
Program of Study and is known as Ron Fletcher Work.
Carola Trier trained with Joe and opened her own studio
in New York where she taught until her death in the late
1990s. Her work is carried on by several senior students
including Jillian Hessel in Los Angeles and Deborah Lessen
in New York.
Kathleen Stanford Grant originally came to Joe with a
knee injury she sustained as a dancer. She was one of only
two students to be certified by Joe to teach Pilates. After
dancing and choreographing for many years she started
teaching at New York University where she taught a Mat
class to the students and ran a small studio until her death
in 2010.
Lolita San Miguel is a well known dancer and
choreographer who was certified by Joe while she was
dancing in New York. She moved to Puerto Rico and
founded the Ballet Concierto de Puerto Rico, one of the
island’s premier dance companies where she incorporated
Pilates into the training program for her dancers. Ms.
San Miguel teaches Pilates workshops nationally and
internationally and has produced several DVDs.
Mary Bowen was a comedian performing in New York when
she first started working with Joe. She now combines
Psyche and Pilates in her current life as a Jungian
psychoanalyst and Pilates instructor at her studio in
Northampton, MA and her office in Killingworth, CT. She
has taken at least one Pilates session a week for close to 50
years and continues to deepen her own understanding of
the balance between mind and body.
Pilates has now become a household word thanks to the
work of all of these first generation teachers and many
others who kept the method alive after the death of Mr.
Pilates. Without them, we would not have the wonderful
exercise system we have today. We are grateful to all of
them.
THE DEVELOPMENT OF
BALANCED BODY EDUCATION
The Balanced Body Pilates instructor training was
developed by Nora St. John, MS. who has been practicing
Pilates since 1981 and teaching since 1989. She originally
trained at St. Francis Memorial Hospital with Patrice
Whiteside and Elizabeth Larkam and has studied the work
with Alan Herdman, Eve Gentry, Michele Larsson, Romana
Kryzanowska, Carola Trier, Kathy Grant, Lolita San Miguel
and Karen Clippinger. Nora has degrees in Biology, Dance
and Traditional Chinese Medicine as well as certifications in
Pilates, Oriental Bodywork and the Franklin Method.
The Balanced Body program combines the full bodied,
athletic aspects of the original work with the refinement
and anatomical understanding of the more contemporary
schools of Pilates. Nora’s background in movement science
provides a strong foundation for the ongoing development
of the Balanced Body Pilates instructor training program.
WHAT IS PILATES?
Pilates is an exercise system developed by Joseph Pilates over 80 years ago. Exercises are performed on a
mat or on specially designed Pilates equipment including the Reformer, the Trapeze Table or Cadillac, the
Wunda chair, the Magic Circle and the Barrels. The Pilates system includes exercises for every part of the
body and applications for every kind of activity. When Pilates first created his method, it was so far ahead of
its time that it did not begin to achieve popular recognition until the first few years of the 21st century. Over
10 million people are now practicing Pilates in the United States and the numbers are growing every year.
WHY IS PILATES SO POPULAR ?
Pilates focuses on engaging the mind and body together
to create exercises that involve the whole person. Every
exercise is performed with attention to the breath, proper
form and efficient movement patterns. Pilates strengthens
the core, improves balance, increases coordination and
decreases stress. The exercises are relatively safe, low
impact and appropriate for anyone from 10 to 100. Pilates
focuses on learning to move better so the benefits are felt
in everyday life.
Pilates is used in fitness centers, private studios,
rehabilitation clinics and hospitals to improve the health
and well being of clients from the recently injured to the
super fit. As more and more people participate, Pilates
continues to grow and evolve to meet the needs of anyone
wanting to improve their ability to move with strength, ease
and grace.
A BRIEF HISTORY OF JOSEPH H. PILATES
AND THE DEVELOPMENT OF CONTROLOGY
Joseph Hubertus Pilates was born in Germany around
1883. He had rheumatic fever, asthma and rickets as
a child and was plagued by a weak respiratory system.
In order to improve his own health he began exploring
ways to strengthen his body and his mind. Early on, Joe
became intrigued by the classical notion of the ideal man
who combined a well trained body with an equally well
trained intellect. In pursuit of this goal he participated in
boxing, fencing, wrestling and gymnastics with his father
and brother. Germany was a fertile ground for these
explorations at the turn of the 20th century with many
ground breaking leaders in movement science, dance and
psychology working there.
Joe was in England touring with a boxer when World War I
broke out. He was held as a resident alien in an internment
camp on the Isle of Man for the duration of the war. While
in the camp he took it upon himself to lead his fellow
detainees in a daily exercise program. According to Joe,
when the influenza epidemic of 1918–1919 broke out, none
of the inmates who followed his regimen got sick.
Joe’s success with his group of inmates brought him to
the attention of the camp leaders and he was given the
job of an orderly at a hospital for wounded soldiers. He
was put in charge of 30 patients and worked with them
every day to exercise whatever they could move. This was
in the days when western medicine was in its infancy and
there were few treatments to offer patients other than
surgery and morphine. Nursing during this time usually
meant extended bed rest which lead to muscular atrophy,
loss of aerobic capacity and a weakened immune system.
Joe’s exercises helped his patients to get better faster and
helped them to fend off the secondary infections that killed
so many people in similar circumstances.
Working as an orderly also led to the development of Joe’s
first piece of exercise equipment. Manually working out 30
patients every day was exhausting so Joe came up with the
idea of attaching springs to the patient’s bed frames and
thus the first Cadillac was born! Now the patients could
exercise themselves under Joe’s supervision.
After Joe was released from the camps and returned to
Germany, he was approached by the “brown shirts” (who
were to become the Nazi party) to train their police force.
Joe didn’t want to have anything to do with them, so he
left Germany on a boat for America and met his soon-to-
be-wife Clara on the passage over. Clara was a nurse who
became a true partner for Joe, working beside him in the
studio everyday and taking care of any clients Joe didn’t
want to work with.
When Joe and Clara arrived in New York in 1926, they
rented a small studio in the same building as the New
York City Ballet on 8th Ave. and started teaching what Joe
named “Contrology.” Joe worked with clients from all walks
of life but he made an especially strong impression on the
dance community working with Ted Shawn, Ruth St. Denis,
George Balanchine and many others who sent their injured
dancers to Joe’s for rehabilitation following injuries.
Joe was an inventor who was always working on developing
new exercise equipment. He designed the Universal
Reformer, the Wunda Chair, the Cadillac, the Ladder Barrel,
the Spine Corrector and many other wonderful inventions
during his lifetime. He made many of the machines himself
and often designed them to fit a particular client. Many of
Joe’s original machines are still working today.
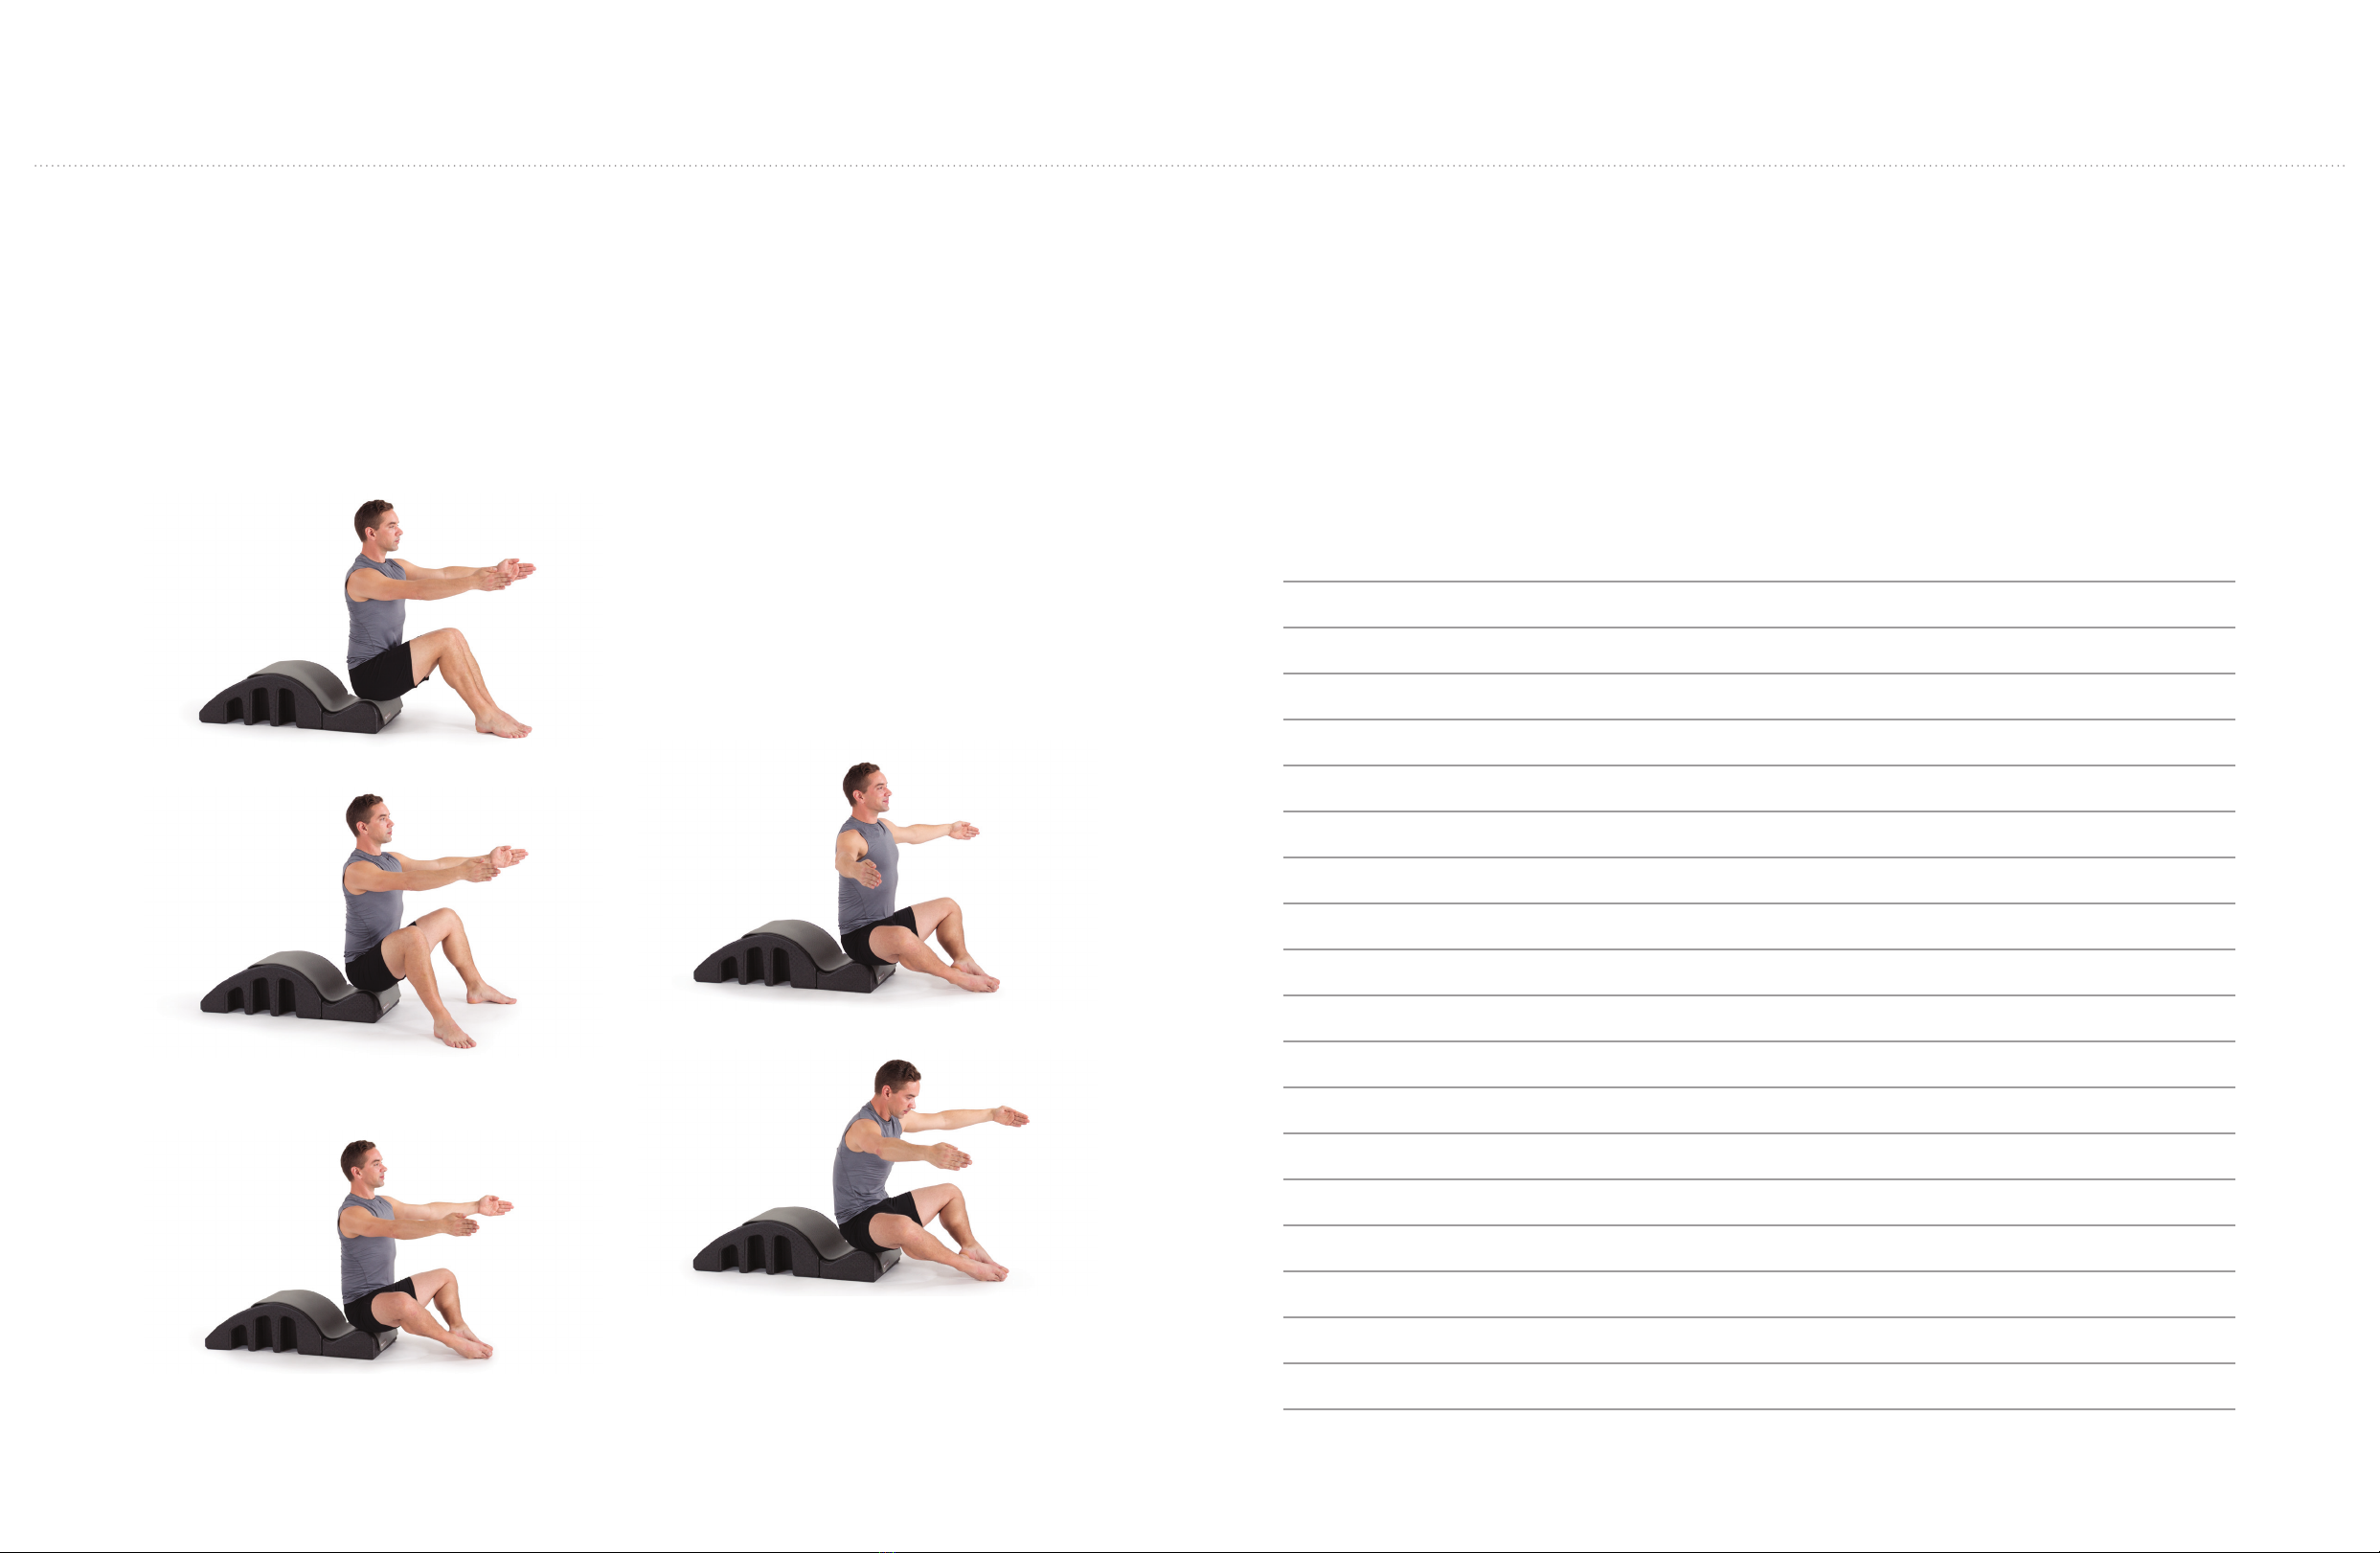
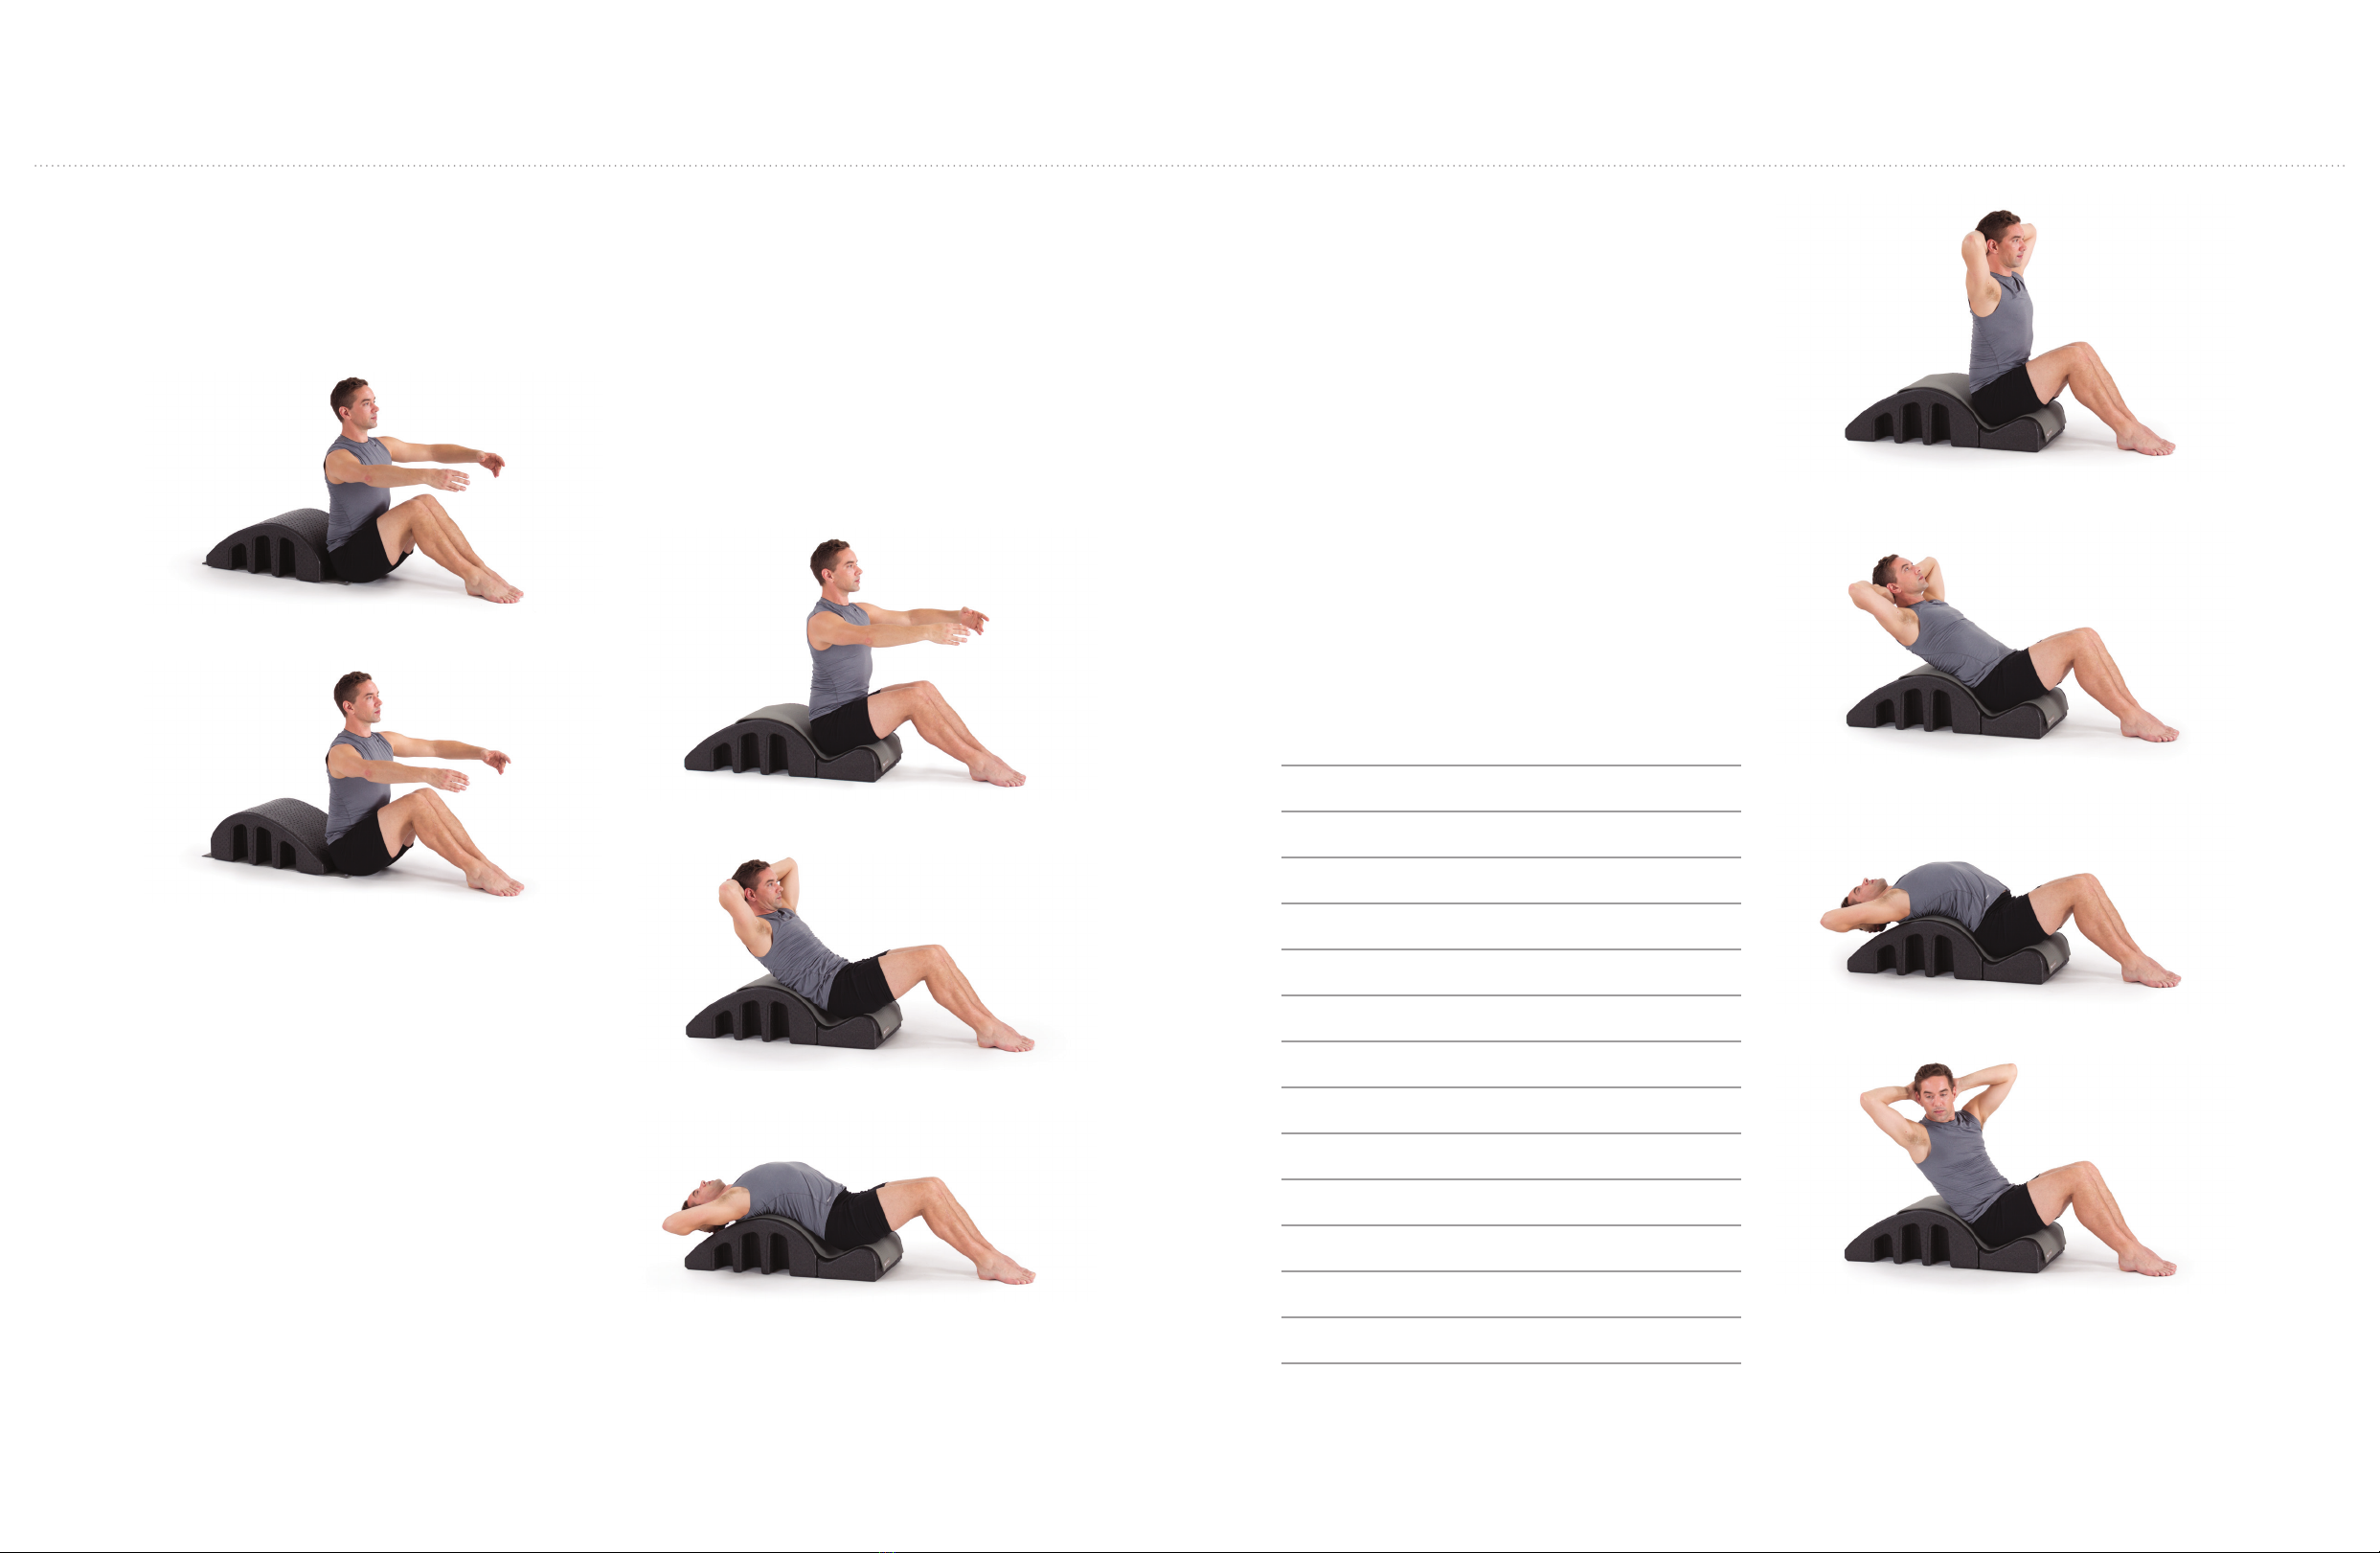
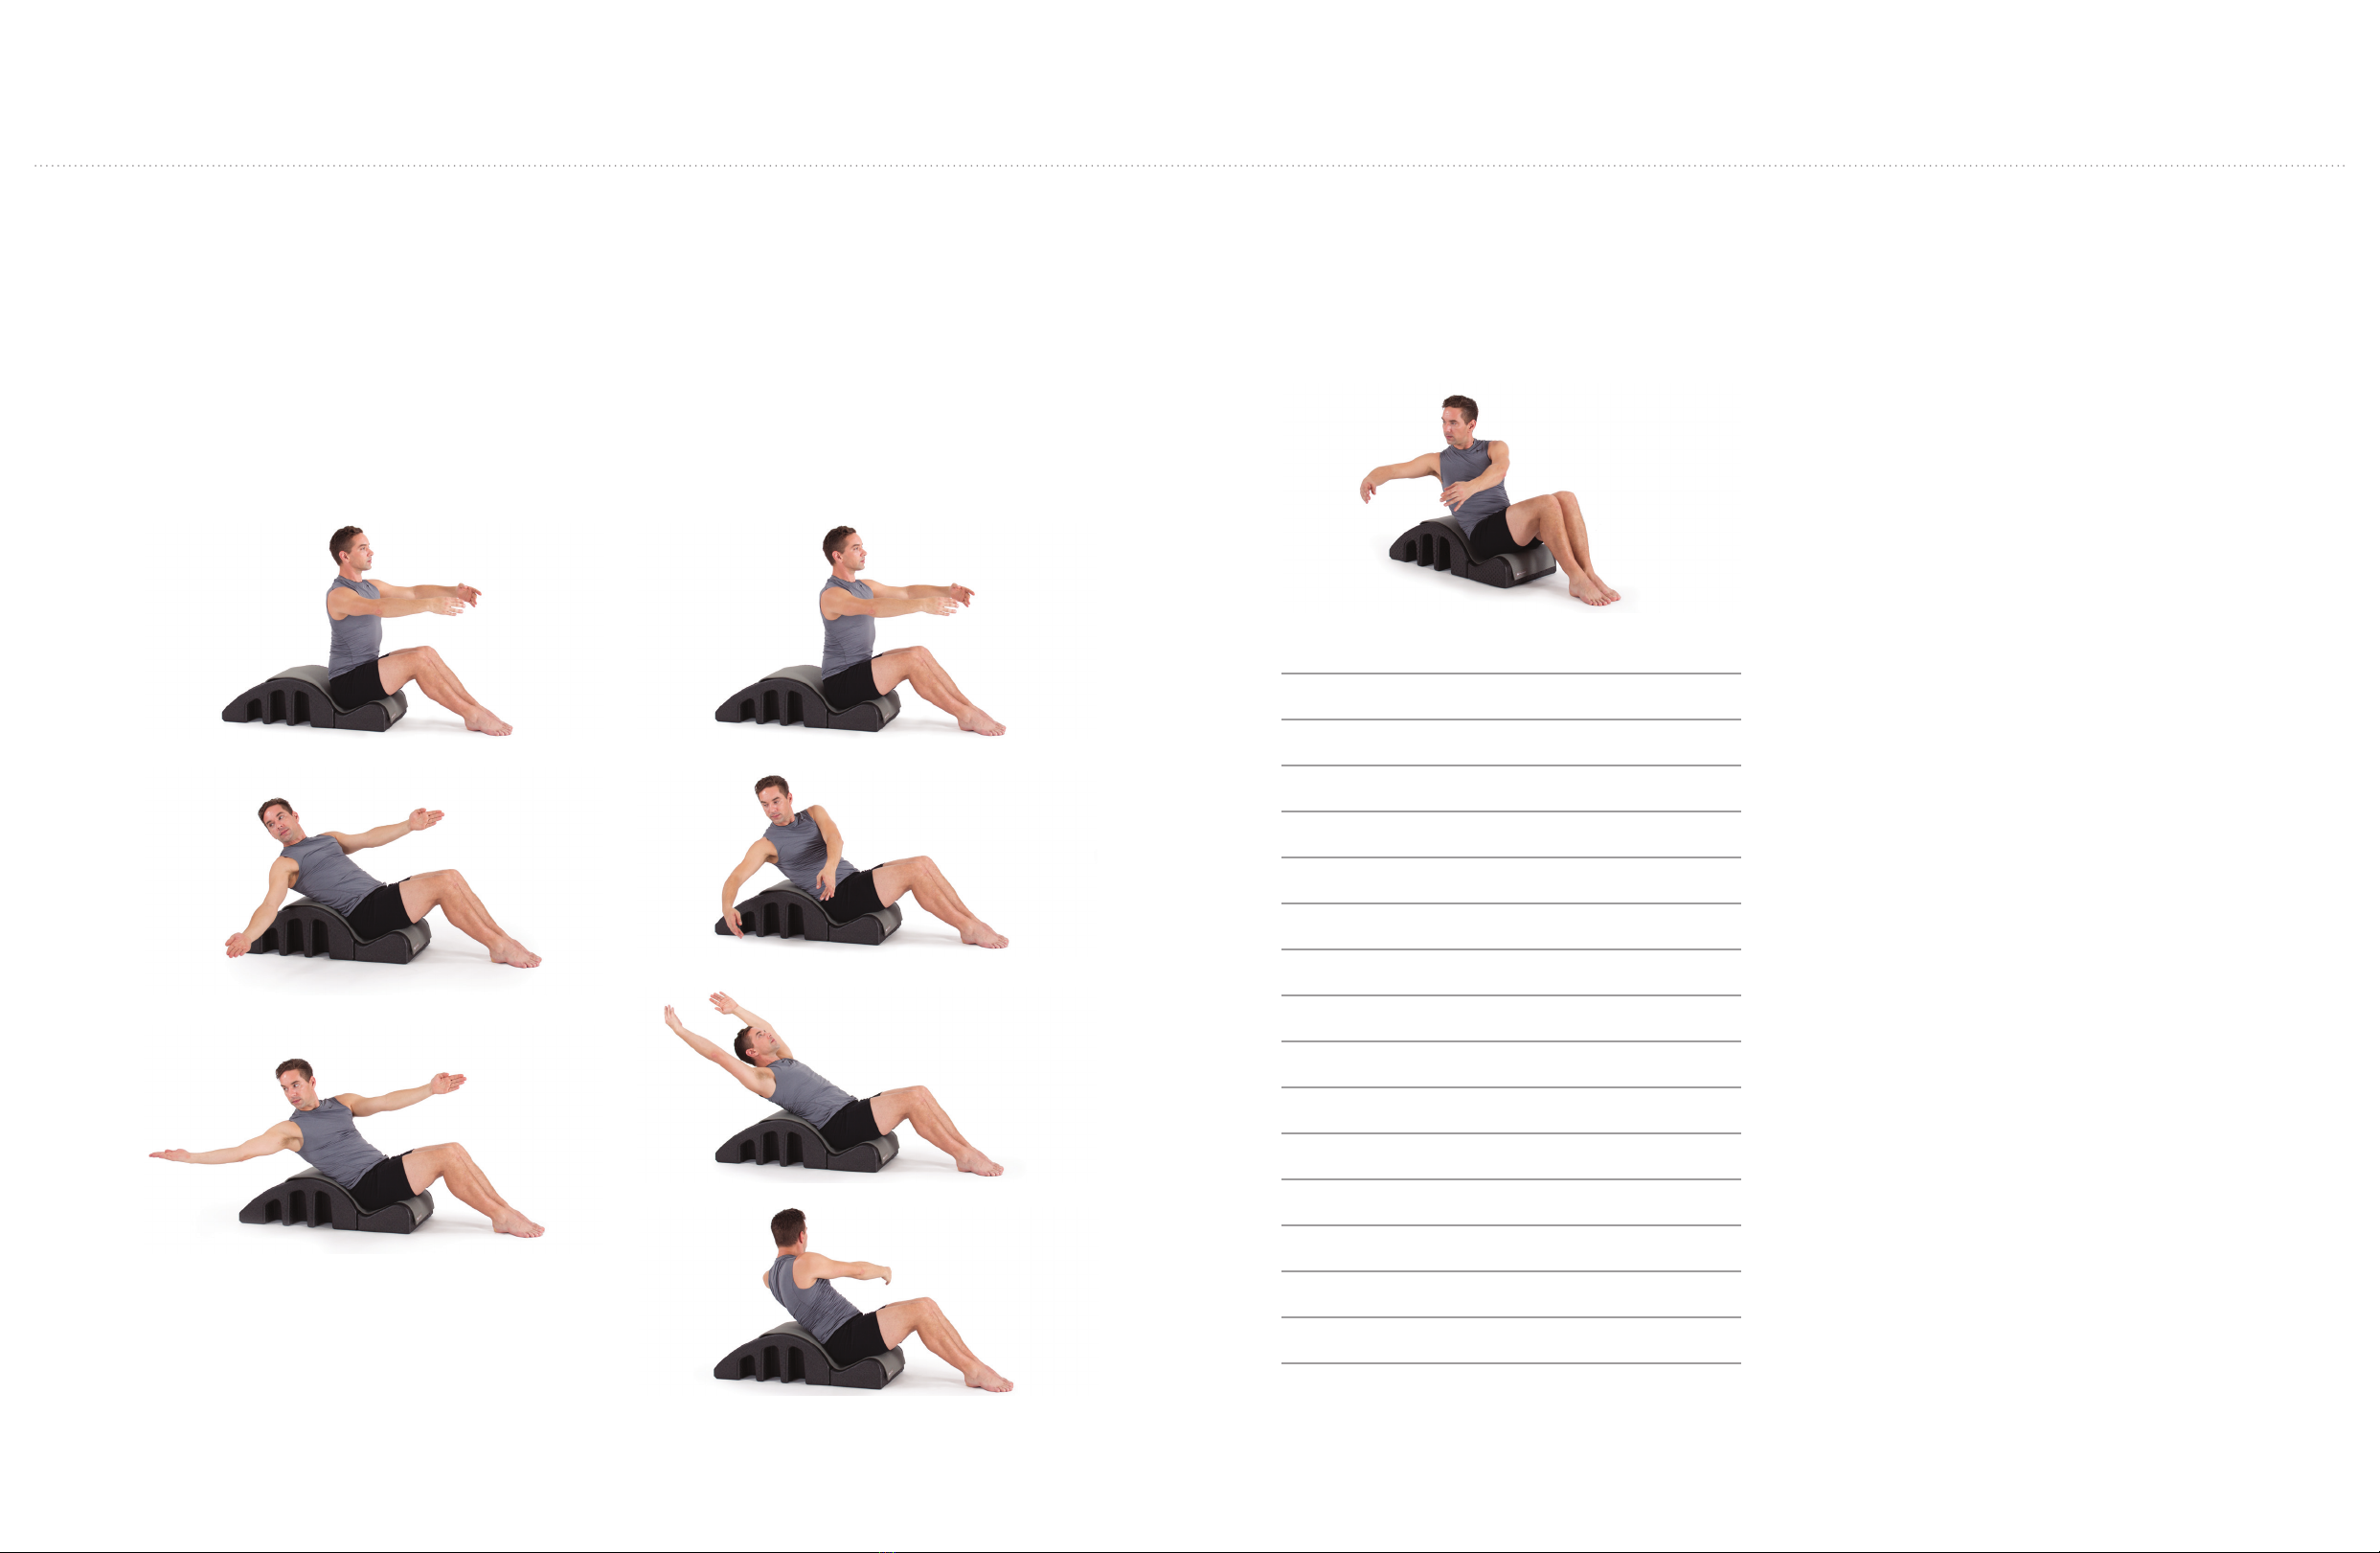
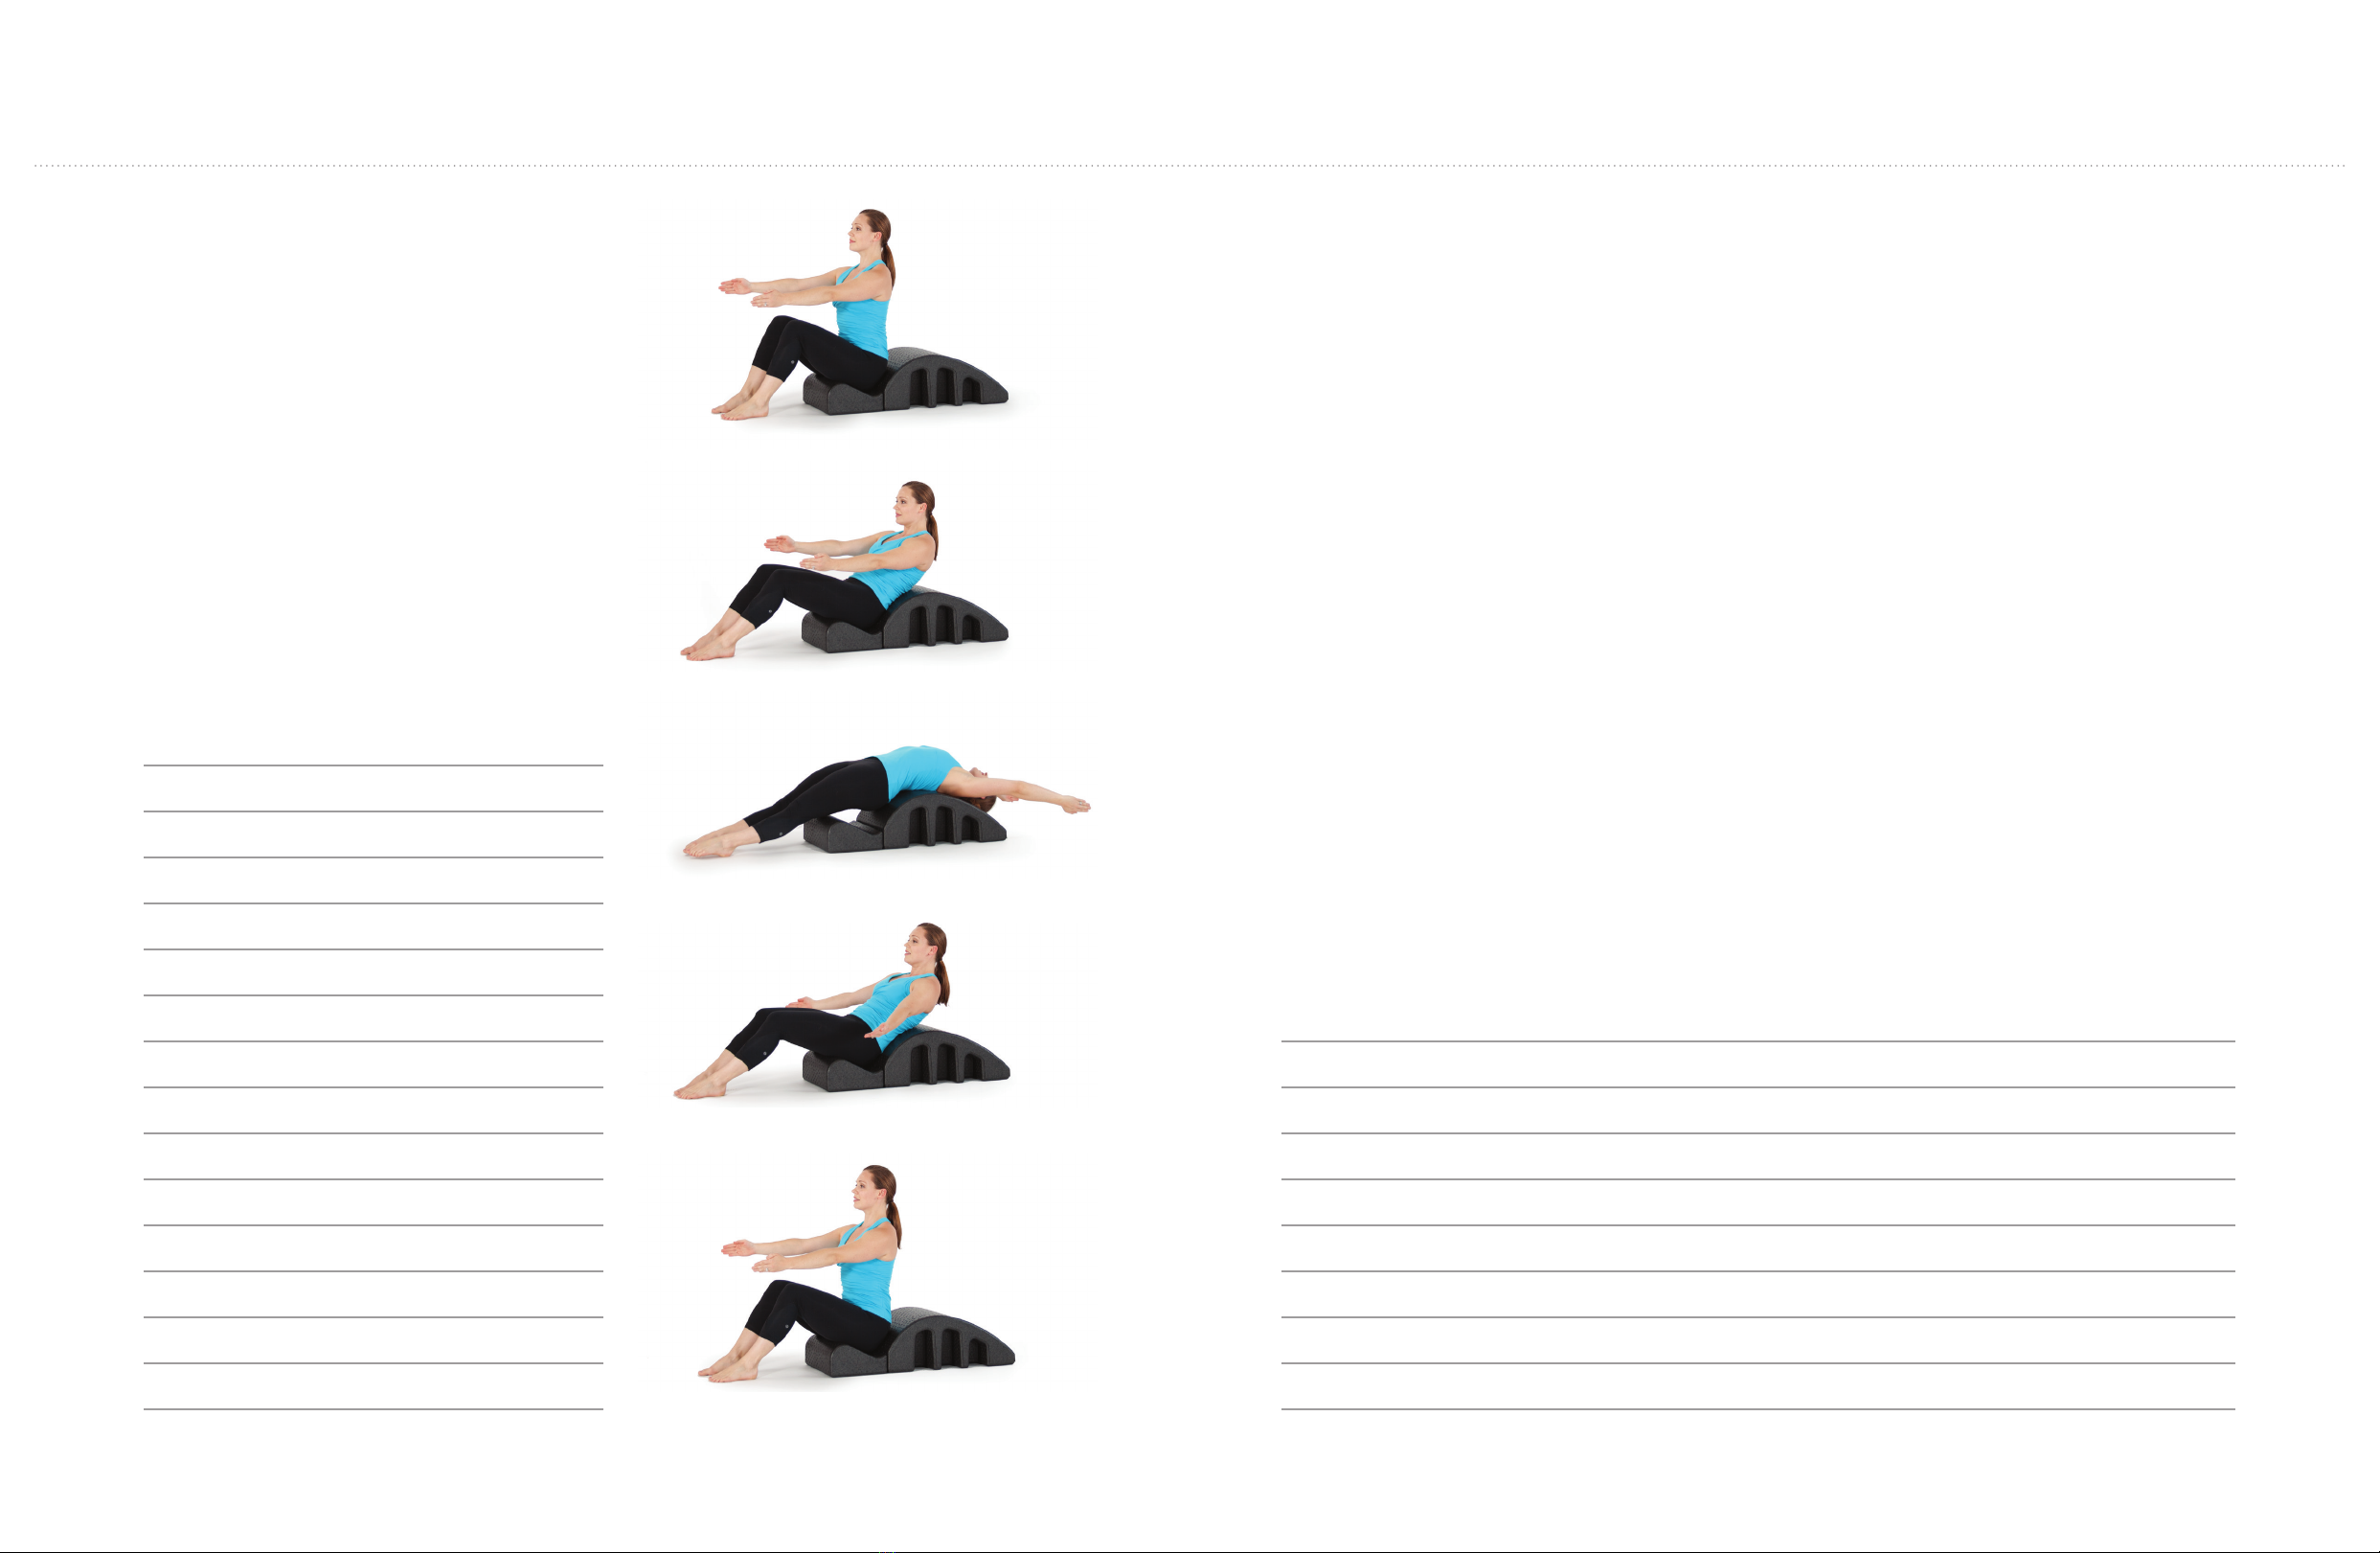
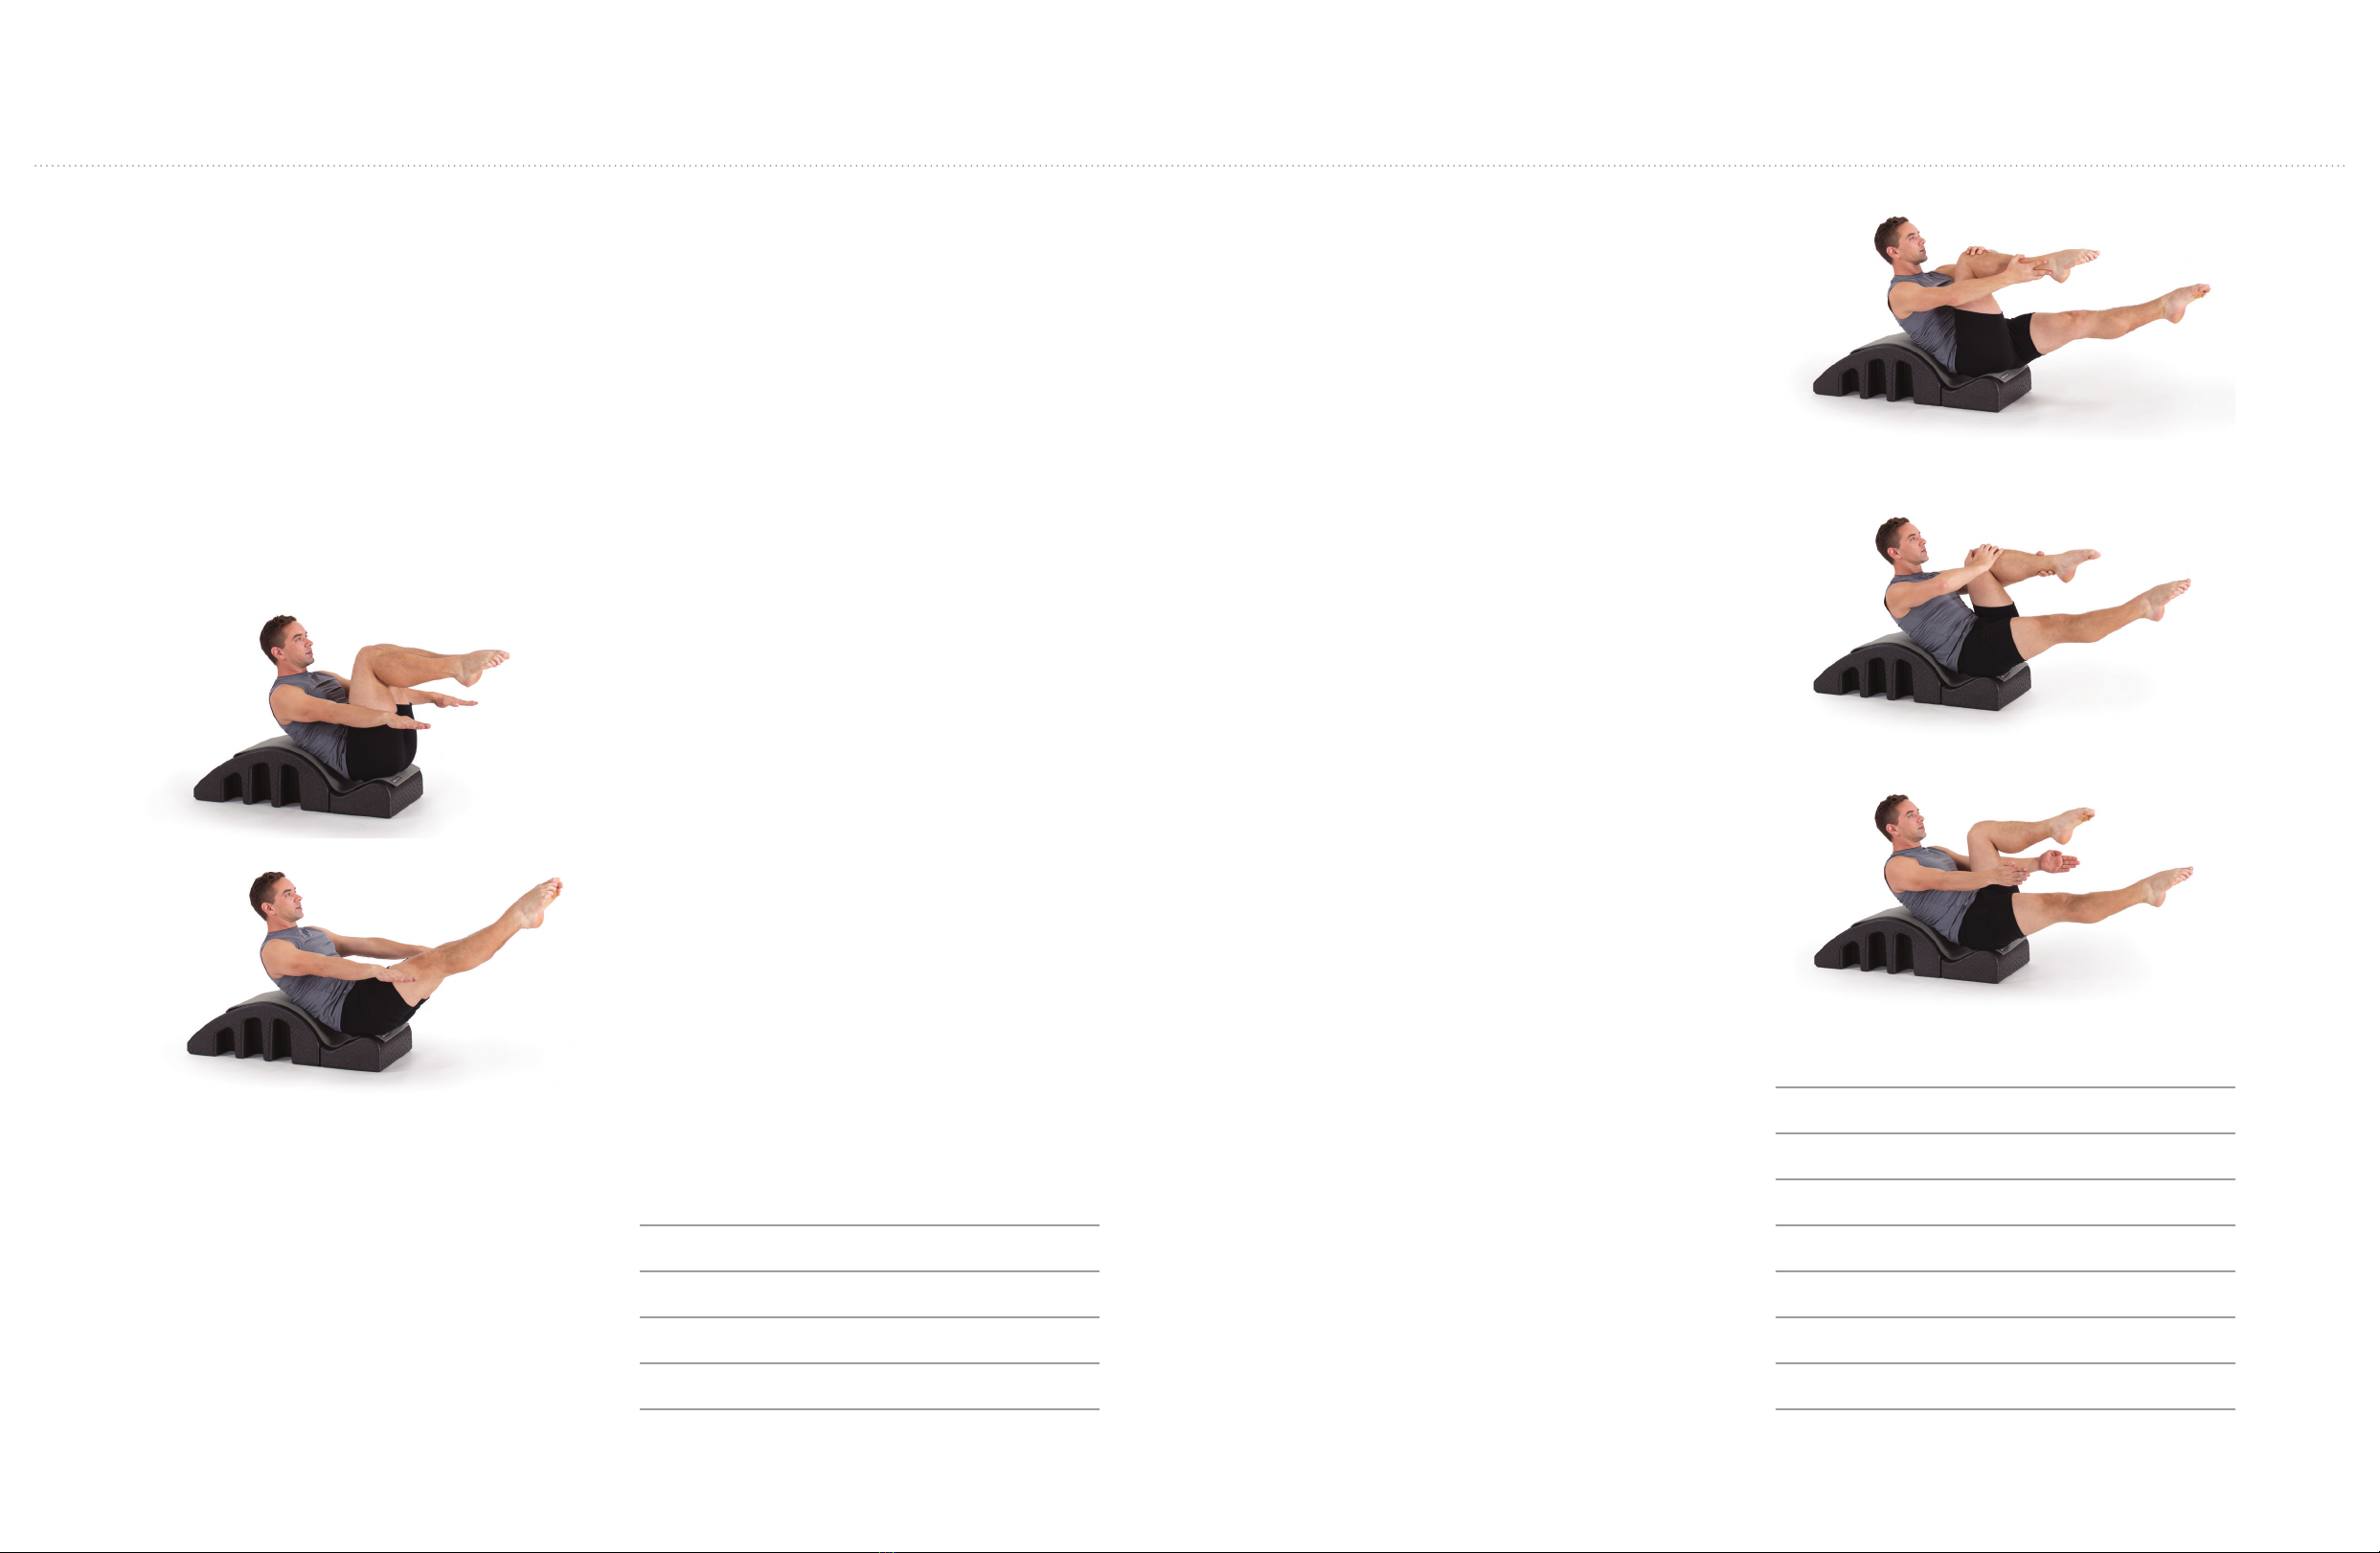
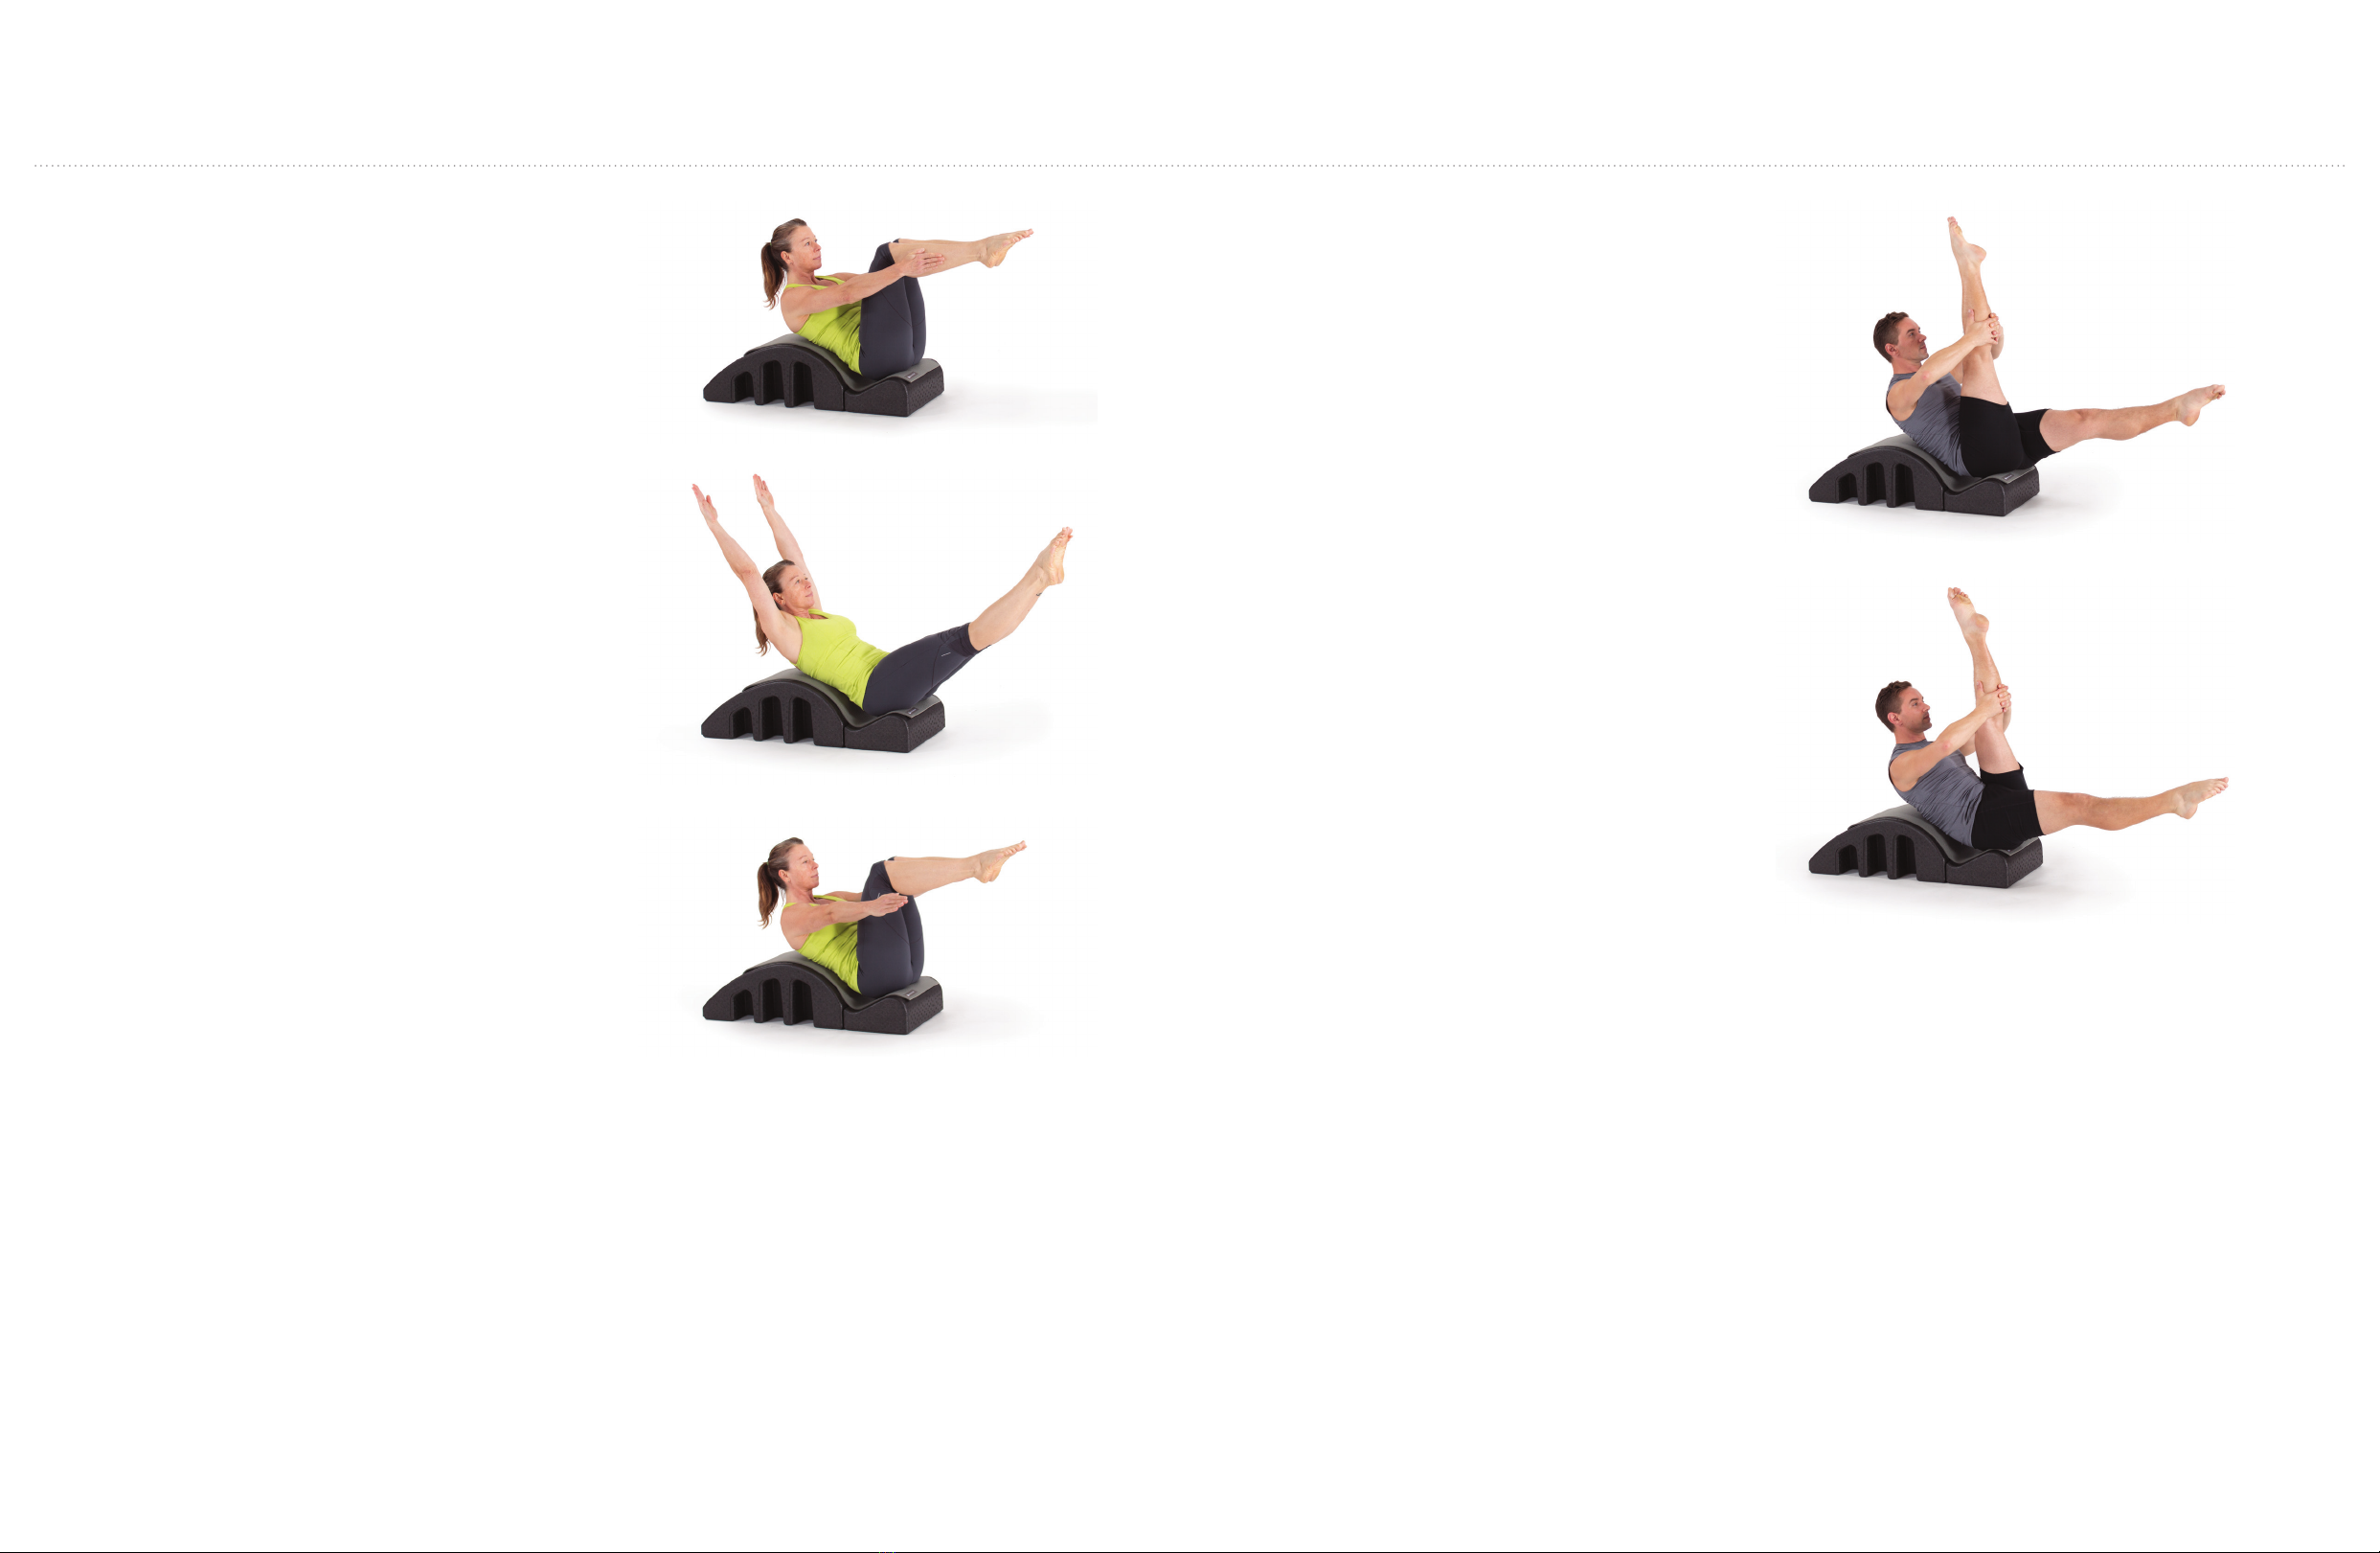
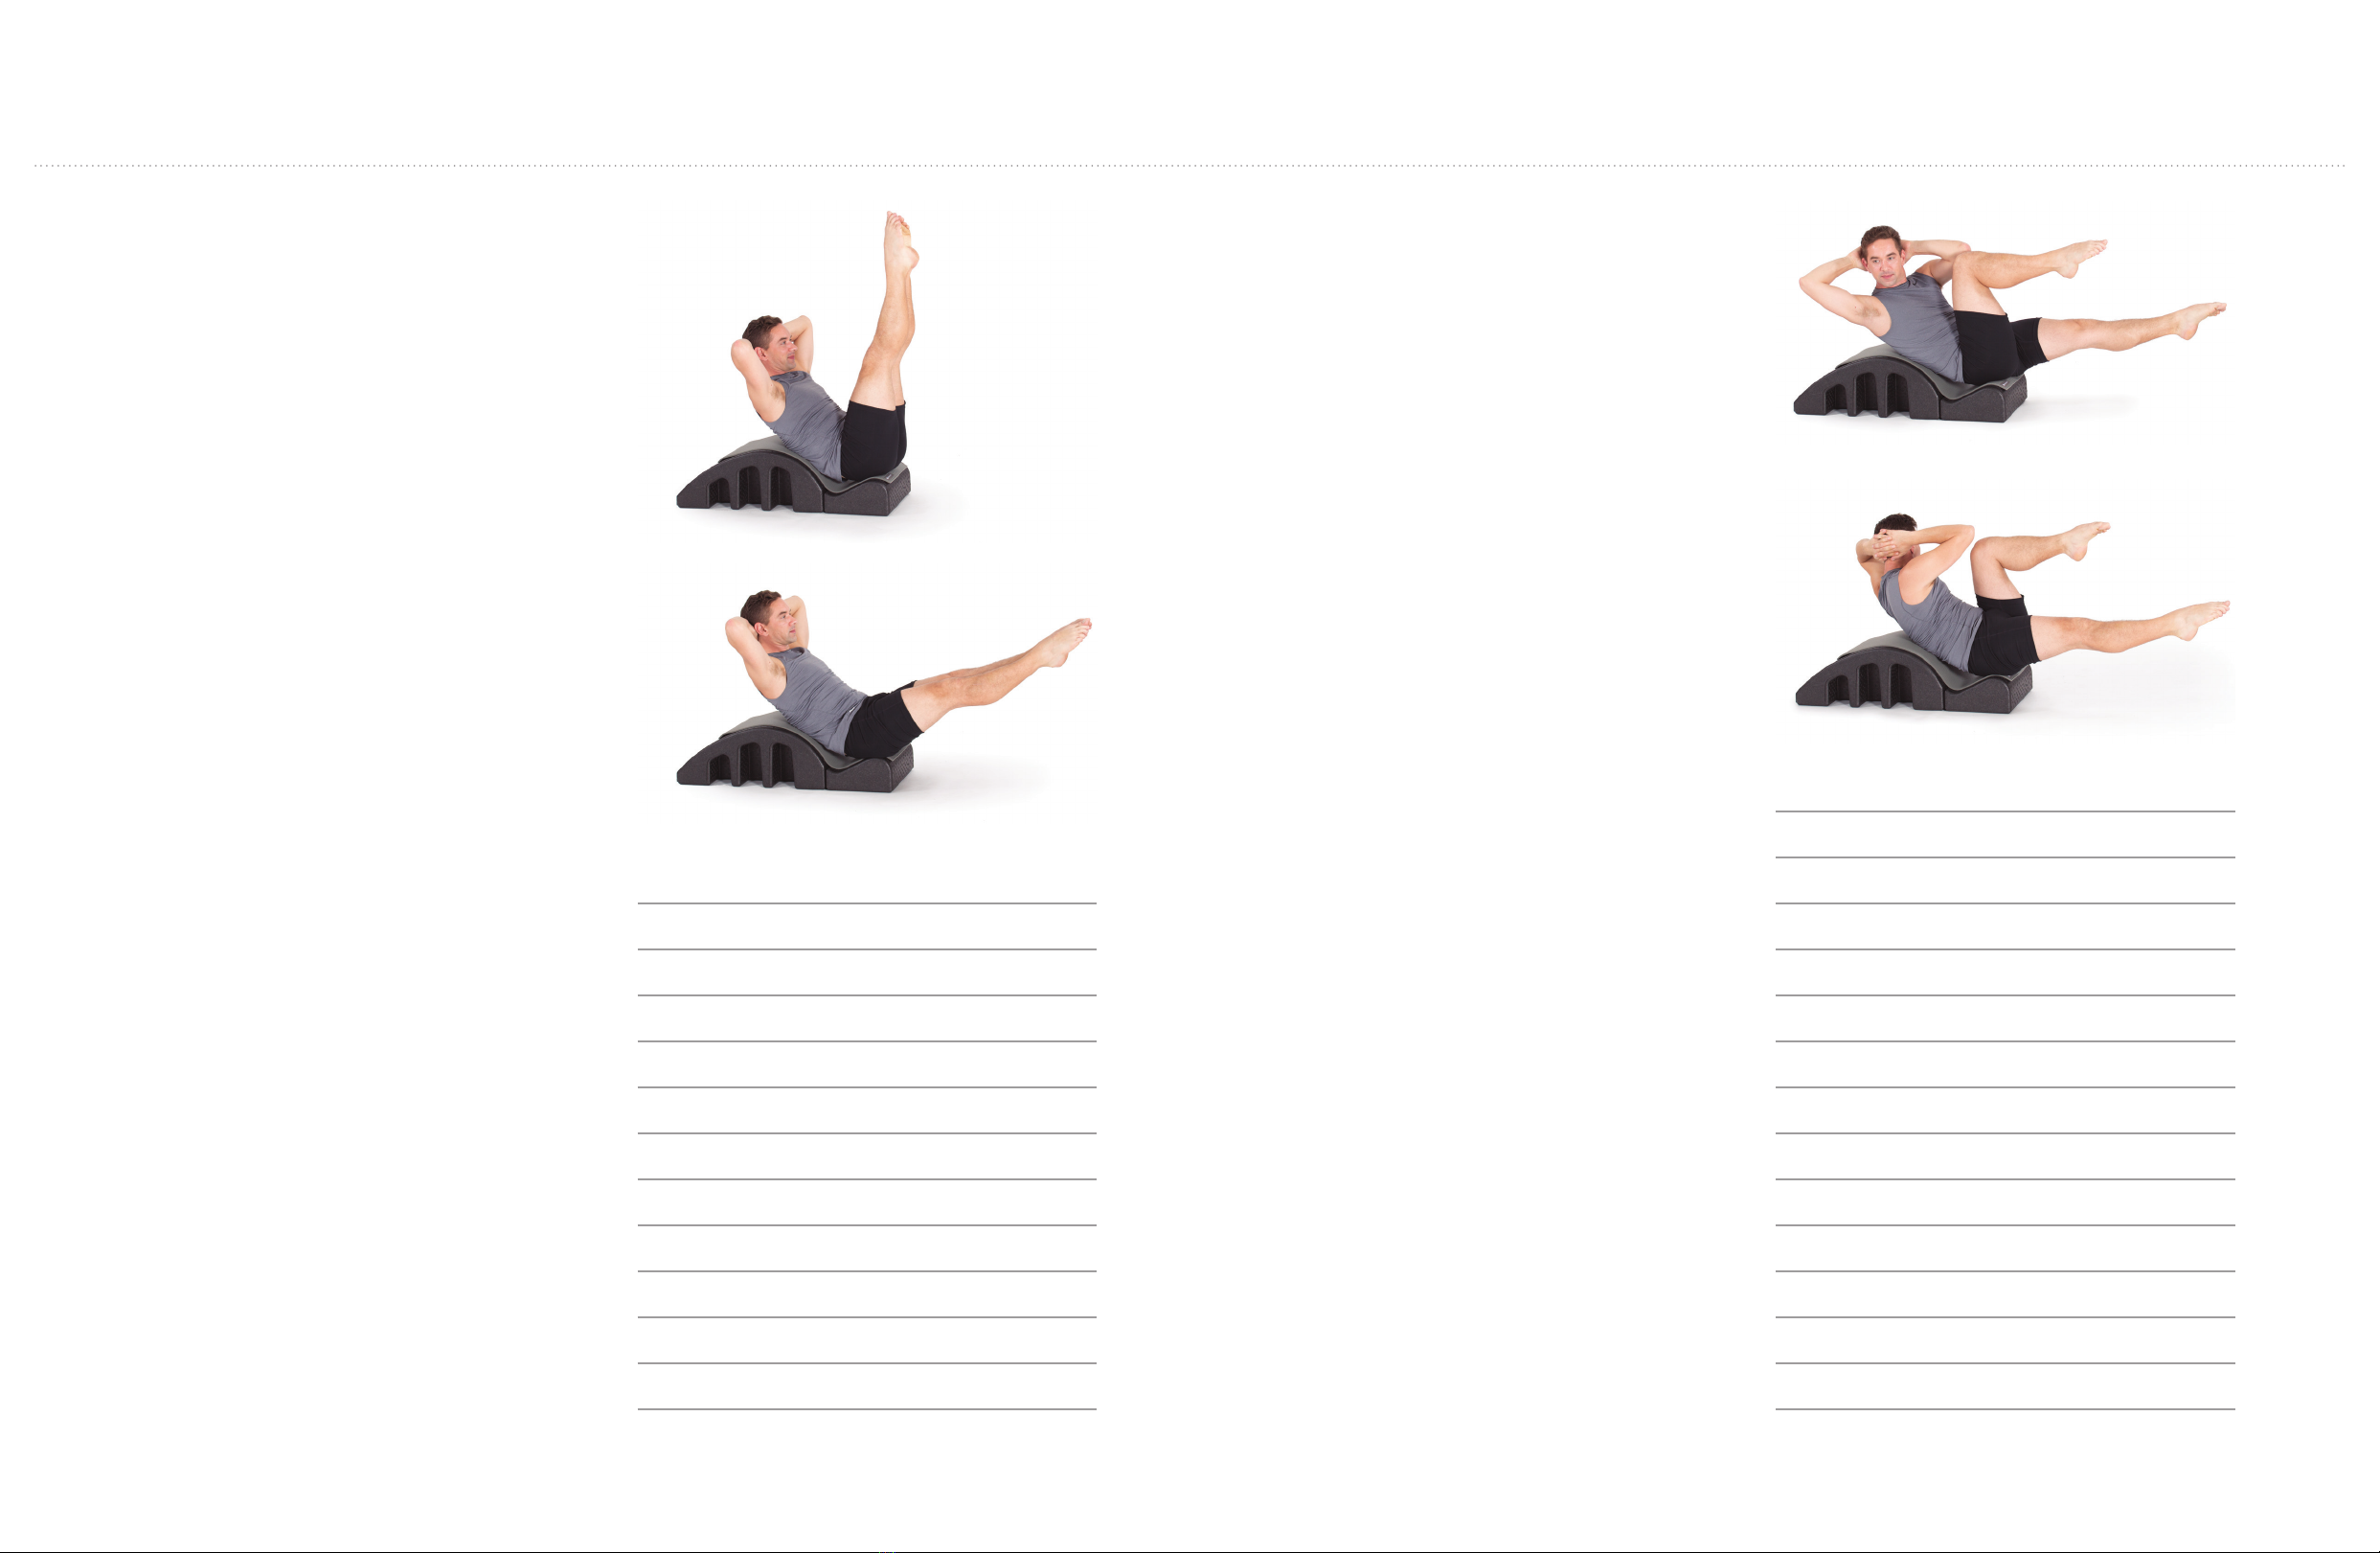
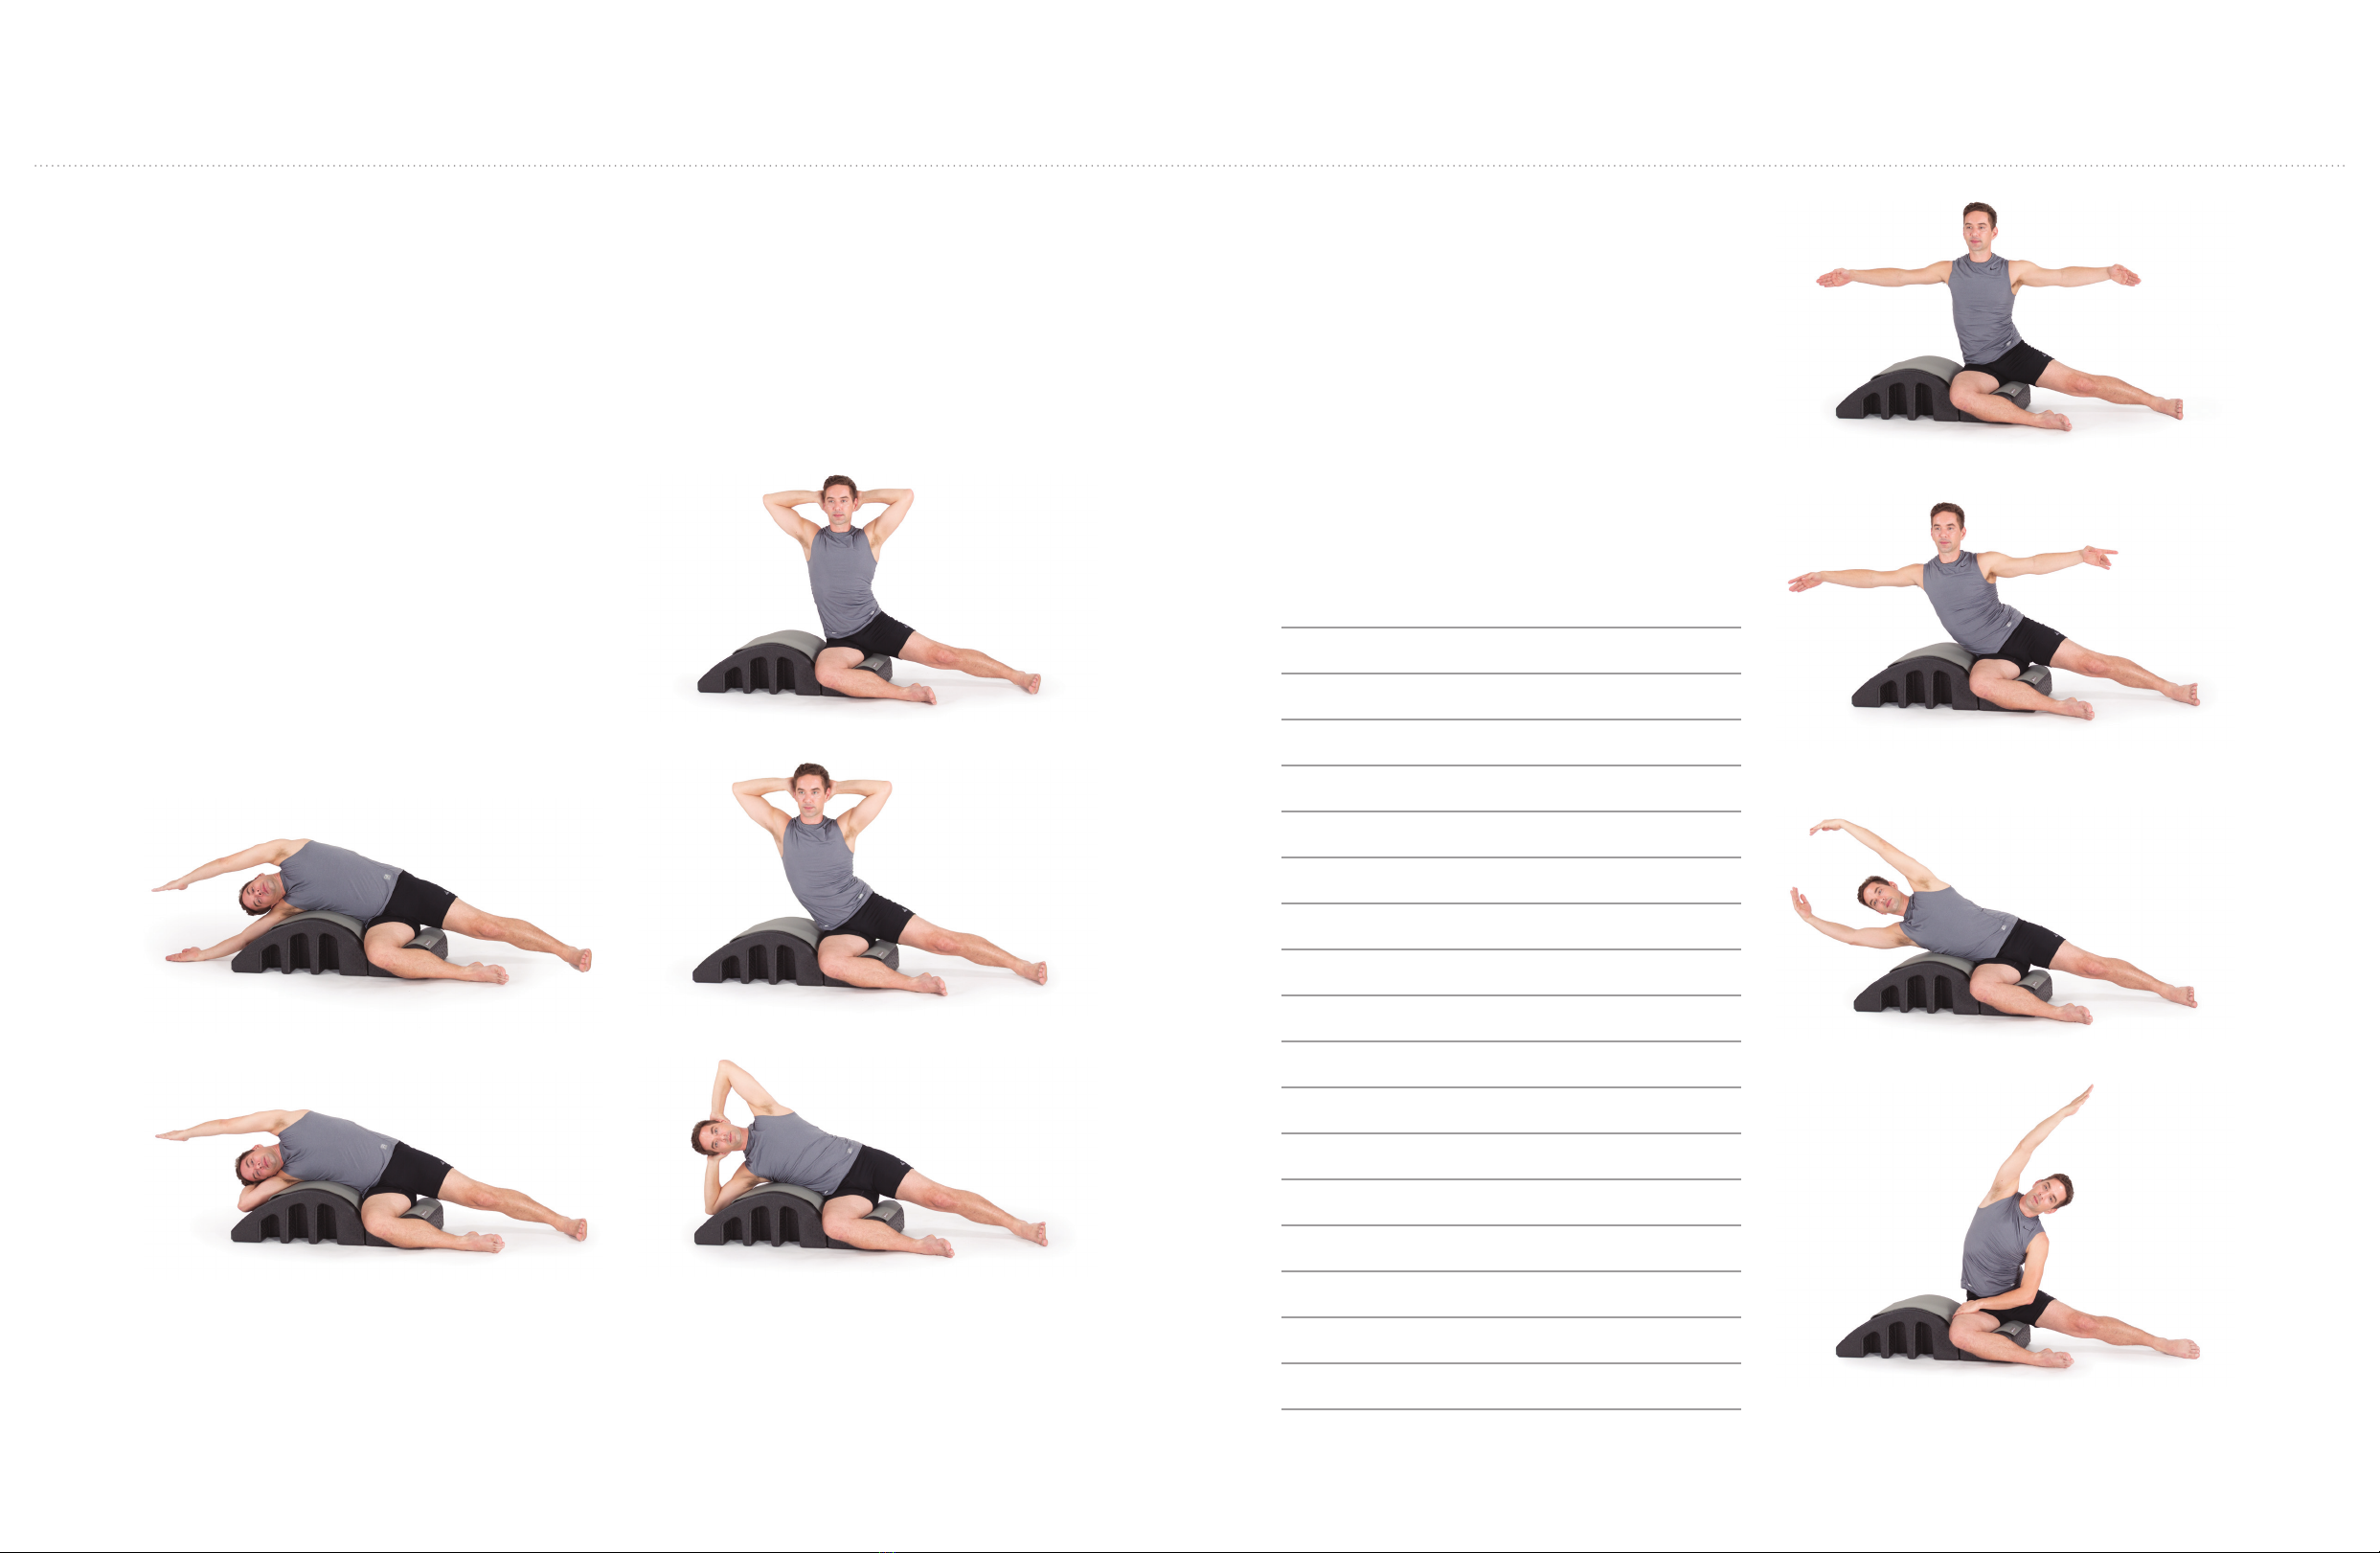
© 2008 Balanced Body Education LLC. All rights reserved. May not be reproduced in whole or in part. 32 PILATES ARC®- A DETAILED GUIDE FOR PRACTICING PILATES