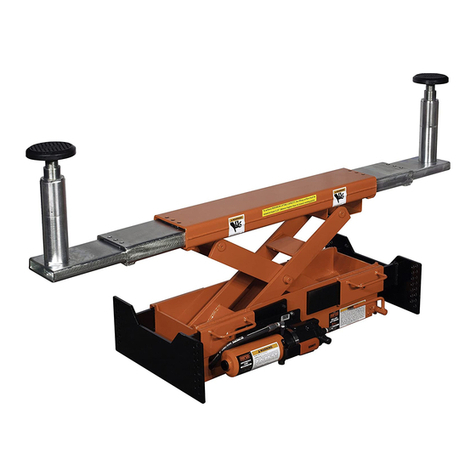
MODELS 86014 4000 LBS. CAPACITY CROSS BEAM (PAIR)
SETUP • OPERATING • MAINTENANCE INSTRUCTIONS
PROFESSIONAL LIFTING EQUIPMENT
®
BEFORE USING THESE CROSS BEAMS, READ THIS
MANUAL COMPLETELY AND THOROUGHLY, UNDERSTAND
ITS OPERATING PROCEDURES, SAFETY WARNINGS AND
MAINTENANCEREQUIREMENTS.FAILURETODOSO COULD
CAUSE ACCIDENTS RESULTING IN SERIOUS OR FATAL
PERSONAL INJURY AND/OR PROPERTY DAMAGE.
The use of cross beams is subject to certain hazards that cannot
be prevented by mechanical means, but only by the exercise of
intelligence, care, and common sense. It is therefore essential to
have owners and personnel involved in the use and operation of
equipment who are careful, competent, trained, and qualied in the
safe operation of the equipment and its proper use. Examples of
hazards are dropping, tipping or slipping of loads caused primarily
by improperly securing loads, overloading and off-balanced loads,
using equipment for a purpose for which it was not designed.
Other hazards such as bending the beams can happen if warning,
installation, setup, operating and maintenance instructions are not
followed.
It is the responsibility of the owner to make sure all personnel read
this manual prior to using these beams. It is also the responsibility
of the device owner to keep this manual intact and in a convenient
location for all to see and read. If the manual is lost or not legible,
contactNorcoIndustries, Inc. for afreereplacement. If the operator
is not uent in English, the product and safety instructions shall be
read to and discussed with the operator in the operator’s native
language by the purchaser/owner or his designee, making sure
that the operator comprehends its contents.
WARRANTY
This product is covered by a Limited Lifetime Warranty. For details
see the back cover of Norco’s product catalog.
IMPORTANT: READ THESE INSTRUCTIONS BEFORE INSTALLING & OPERATING
WARNING
Use these cross beams on the Norco Model 86006 Open• Center Pit Lift only.
Use only for their intended purpose.•
Vehicle lift contact points on the cross beams shall not exceed• four inches (4”) away from the lift pads under any circumstance.
Use the vehicle manufacturer’s recommended lift points only.•
Position the vehicle in relationship to the cross beams so the•
vehicle’s weight is evenly distributed.
Make sure setup is stable and secure before lifting.•
Inspect the cross beams for mechanical tness before using. • Do not use the cross beams if they are cracked, broken, bent
or show signs of damage or excessive wear.
Do not use the cross beams if the locating angles are not• properly installed and secured on the bottom of the beams.
SETUP
Locating angles must be installed on the bottom of both cross1.
beams (see gure 1). Since the distance between lift pads vary
accordingto the differentpitwidths, measure the distance between
the lift pads (see gure 2).
Install the square mounting washers in between the ribs of the2.
extruded cross beams as shown in gure 1.
Place the locating angle where the leg of the angle with holes3.
faces the bottom of the beam and the other leg of the angle faces
inboard towards the center of the beam (see gure 1).
Feed the hex head bolts and washers through the holes in4.
the locating angles until the bolts make contact with the square
mounting washers.
Turn the bolts in a clockwise direction until they thread into the5.
holes in the square mounting washers. Do not tighten as you will
have to slide the angles into position.
Using a square on the side of the cross beam, draw a line6.
across the bottom of the cross bar ribs where the lift pad distance
is measured. The locating angles should be equal distances away
from the ends of the cross beams while maintaining the lift pad
distance.
Align the corners of the locating angles with the lines drawn7.
on the cross beam ribs and tighten the bolts until the lockwashers
collapse at. Do not over-tighten. Install the cross beams on the
lift pads to make sure the locating angles clear the inside of the lift
pads. If they do not line up, loosen the bolts and make the required
adjustments.
Note: Revision letters (A, B, C, D etc.) after model numbers have been omitted as they do not affect the setup,
operating and maintenance instructions of a particular jack unless otherwise noted.
SIDE OF CROSS BEAM
3/8"-16 x 1"
HEX HEAD BOLT
LOCATING
ANGLE
LOCATING
ANGLE CORNER
CROSS
BEAM RIB
SQUARE
MOUNTING
WASHER
3/8" SPLIT MEDIUM
LOCKWASHER
Figure 1


