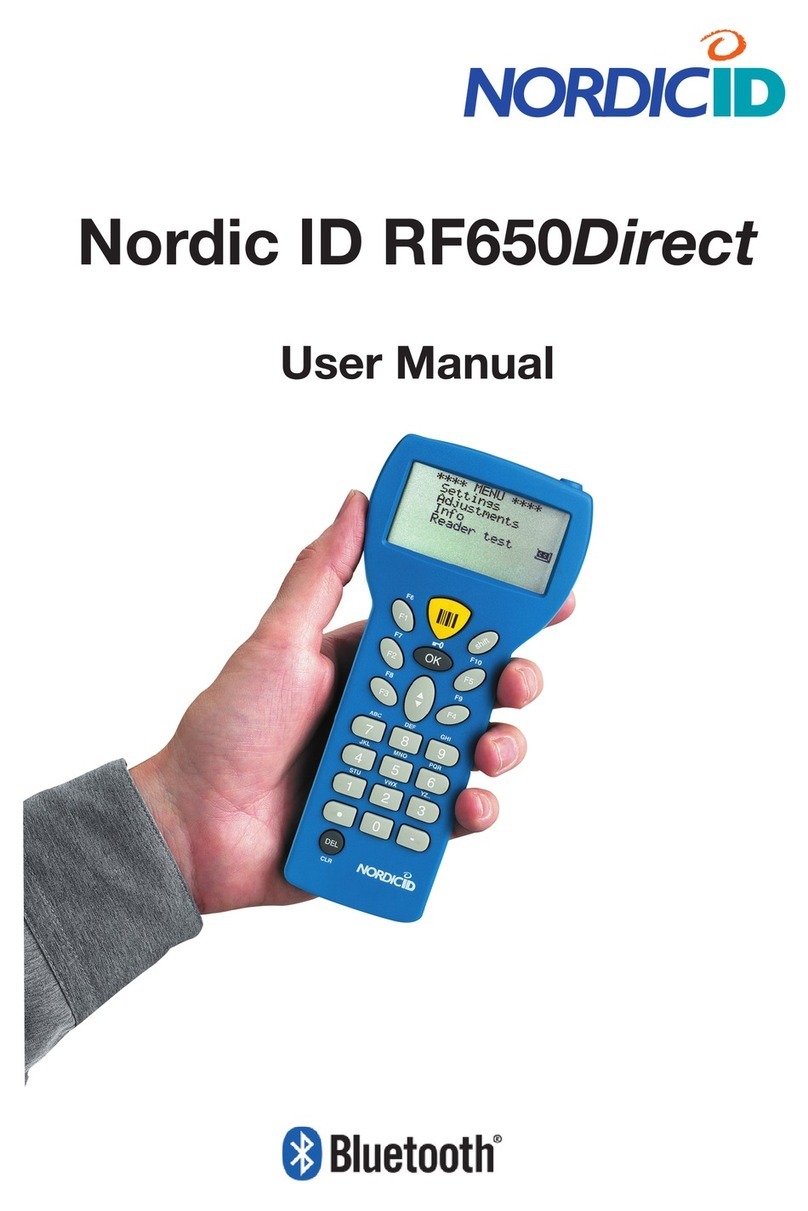
Nordic ID RF601 User manual

Nordic ID
RF601
USER MANUAL


Contents
Copyright 1
Disclaimer 1
Trademarks 1
User safety 1
Medical equipment compatibility 2
EC Declaration on Conformity 2
Document history 2
Warranty and safety warnings 3
1. Using the RF601 for the first time 5
1.1 Unpacking the unit 5
1.2 Installing batteries 5
1.3 The keyboard 6
1.4 Activating the device 6
1.5 Splash screen and initial display 6
2. System 7
2.1 System overview 7
2.2 Principles of Operation 7
2.3 Communication between the Base Station and the Host Computer 7
2.4 Operation of the Hand terminal 8
2.5 Security 8
3. Setting up an example system 9
3.1 Fast Inventory -demo 9
4. RF601 Hand Terminal 11

© 2006 Nordic ID Oy
RF601 User Manual May 2006 Version 1
4
4.1 Activating the device 11
4.2 Display symbols and status messages 11
4.3 Sounds 11
4.4 Key function table 12
4.5 F-Keys 13
5. Input fields 13
5.1 Locked fields (Buttons) 13
5.2 Filling fields with the scanner 13
5.3 Writing text in a field 14
5.4 Writing letters 14
5.5 Removing letters 14
5.6 Moving between fields 14
5.7 Locking the keyboard 14
6. Built-in Menu 14
6.1 Settings 15
6.1.1 RF-settings 15
“WHAT” Behaviour 15
6.2 Adjustments 15
6.3 Info 15
6.4 Laser conf. 16
8. Setting up a RF601 network 17
8.1 Site Survey 17
8.2 Installation of the network 17
9. Using the scanner 17

© 2006 Nordic ID Oy
RF601 User Manual May 2006 Version 1
5
10. Labels 18
11. Desk Top Charger (DTC05) 19
11.1 General information 19
11.2 Equipment needed for using the charger 19
11.3 Connectors 19
11.4 Indicators 19
11.5 Charging the batteries 20
11.6 “Charging Failure” message 20
11.7 Audible signals and the LED indicator on the hand terminal 21
11.8 Technical data 21
12. Troubleshooting 22
13. Maintenance 22
14. Removing device from the use 22
15. Warranty, support and service information 23
15.1 Warranty coverage 23
15.2 Returning the unit for service 23
15.3 Extending the normal warranty 23
16. Application development 24
16.1 Software tools and documents 24
16.2 PLServer, PiccoLink driver ActiveX control 24
17. Accessories 25
18. Technical Support 26
19. Latest information 26

© 2006 Nordic ID Oy
RF601 User Manual May 2006 Version 1
6
APPENDIX A - Troubleshooting 27
APPENDIX B - Introduction to the Laser Engine 28
APPENDIX C - Introduction to the Linear Imager 30
APPENDIX D - Factory default settings of the scan engines 31

© 2006 Nordic ID Oy
RF601 User Manual May 2006 Version 1
1
Copyright
All rights to this manual are owned solely by Nordic ID. All rights reserved. Copying this manual without the written
permission from the manufacturer by printing, copying, recording or by any other means or the full or partial translation
of the manual to any other language including all programming languages using any electrical, mechanical, magnetic,
optical, manual or other methods or devices is forbidden.
Nordic ID reserves the right to change the technical specifications or functions of its products or to discontinue
manufacturing of any of its products without any written announcement and urges customers to ensure that the information
at their disposal is valid.
Disclaimer
Nordic ID products have not been designed, intended nor inspected to be used in any life support related applications
nor as a part of any other critical system and are not granted functional warranty if used in any such applications.
RF601 contains a Class II laser device, which may cause injuries unless safety regulations and instructions are observed.
Nordic ID may not be held responsible for any injuries or damage resulting from use in contradiction with the safety
related instructions stated elsewhere within this manual or which are in contradiction to the general safetylines relating
to Class II laser devices.
Nordic ID urges its customers to arrange proper and adequate user training, which includes safety issues to any personnel
using, programming or otherwise handling RF601 hand terminals.
The sale, transfer and use of Nordic ID RF601 is subject to the then-current Nordic ID General Conditions of Sale and the
then-current Nordic ID End User License Agreement, the then-current referring to the original purchase date.
Trademarks
Nordic ID and Nordic ID logo are all registered trademarks of Nordic ID Oy. Other trademarks are the property of their
corresponding owners.
All terms mentioned in this User Manual that are known to be trademarks or service marks have been appropriately
marked in the list below with either the ©, ® or the ™ symbol.
Nordic ID cannot attest to the accuracy of this information. Use of a term in this User Manual should not be regarded as
affecting the validity of any trademark or copyright.
User safety
CAUTION: In some configurations of the RF601 barcode scanner contains an integrated Class II laser product. Direct eye
contact with the laser beam or with a reflected beam from a shiny surface may cause permanent damage to the eyes. To
avoid risks, please make sure that never look directly to the laser and/or point anybody with the device.

© 2006 Nordic ID Oy
RF601 User Manual May 2006 Version 1
2
Medical equipment compatibility
Medical devices, such as pacemakers, hearing aids etc. are usually manufactured according to the IEC 601-1-2 standard,
which requires that devices must operate properly in an EM (Electromagnetic) field which has a strength of 3V/m over a
frequency band from 26 to 1000 MHz. The RF601 is transmitting at a frequency range of 433.60 to 434.20 MHz, however,
all electric appliances may emit spurious RF-signals at other than specified frequencies.
WARNING: Persons using pacemakers should be aware of the possible risk of interference from any electronic device if
positioned too close to the pacemaker.
EC Declaration on Conformity
Nordic ID hereby declares, that Nordic ID RF601 wireless data collection system has been tested according to the
standards EN 300 200-1 and EN 301 489-3.
The equipment conforms to the essential requirements of the Directive 1999/5/EC.
Document history
March 2006 Draft1
May 2006 Release version

© 2006 Nordic ID Oy
RF601 User Manual May 2006 Version 1
3
Warranty and safety warnings
Please read the following warranty and safety related warnings carefully before using the product.
Nordic ID RF601 is a radio device and should not be used in any environments where radio transmitting may cause any
harm. Typical but not limited to are the following types of environments: environments with explosive materials, liquids
or gases, demolition sites, hospitals and emergency care rooms, airplanes and areas with highly sensitive measurement
instrumentation.
Users with pacemakers are to be instructed about the possible safety hazards posed by radio emitting devices. Placing
any radio emitting device near to pacemakers is not recommended. Consult pacemaker documentation for further safety
regulations and requirements set by manufacturer of the pacemaker in question.
NOTICE: Persons using pacemakers should be aware that RF-emissions from the RF601 may cause unwanted
interference if positioned too close to the pacemaker.
NOTICE: RF601 has not been designed, intended nor inspected to be used in any life support related device or
system related function nor as a part of any other critical system and are granted no functional warranty if they
are used in any such applications.
The use of any radio emitting device in explosive environments and especially near explosives may pose serious
threats.
RF601 models contain a laser barcode reader device. Users are advised to follow general safety procedures relating to
the use of laser devices.
Nordic ID RF601 should not be used in critical systems where continuous operation is required and where the possible
loss of data or unwanted changes to data contents are not acceptable, such as in life support related systems.
Warranty will be void, if the product is used in any way which is in contradiction with the instructions given in this User
Manual, or if the housing of the RF601 has been opened or tampered with.
The devices mentioned in this manual are to be used only according to the instructions described in this manual. Faultless
and safe operation of the devices can be guaranteed only if the transport, storage, operation and handling of the devices
are appropriate. This also applies to the maintenance of the products.
RF601 contains no user serviceable parts inside the actual case apart from the batteries, which may be replaced if
required.
NOTICE: Use only AA-type alkaline batteries or rechargeable batteries type: GB Batteries, Models GP180AAHC,
GP210AAHC and GP230AAHC (GPI International). Do not mix batteries (do not use simultaneously batteries
of different capacity, brand, age or type). Observe correct polarity indicated on the label inside the battery
compartment. Do not attempt to charge alkaline or other non-rechargeable battery types using the Hand Terminal
and the Desk Top Charger or any other charger. When charging batteries inside the terminal use ONLY charger
provided by Nordic ID.
NOTICE: With use of Desk Top Charger and Base Station use only applicable power supplies: JODEN ELECTRON
Co., Ltd, Models: JOD-4101-031, JOD-41B-029, JOD-41U-14A.
WARNING: The batteries must be discarded according to local environmental laws and regulations. The batteries
may contain harmful, dangerous or lethal substances, and may cause injury or loss of life if handled recklessly.
Never dispose the batteries in fire due to a risk of explosion.
Any repair of the RF601 must be done by an authorized service partner of Nordic ID.

© 2006 Nordic ID Oy
RF601 User Manual May 2006 Version 1
4
WARNING: The RF601 Hand Terminal and Desk Top Charger and power supply contain no user serviceable parts.
Opening the cases will void warranty and may cause injury. The Hand Terminal contains batteries, which may be
changed by opening the battery cover.
In some configurations the RF601 contains a Class II laser device which may cause eye injury if the beam is directed
straight or via a shining surface to the eye. The laser beam should never be pointed at the eye or eyes of persons or
animals. Note that mirrors and reflecting surfaces may cause the beam to deflect in harmful ways. Never look directly into
the laser module when the beam is active.
In Accordance with
EN 60825-1 / A2:2001
(IEC 60825-1 Ed.1.2,2001-08)
650 nm laser
max. 1 mW output
ENGLISH SUOMI
LASER LIGHT VAARA LASERSATEILYÄ
DO NOT STARE INTO BEAM ÄLÄ TUIJOTA SÄTEESEEN
CLASS 2 LASER LUOKKA 2 LASER
DEUTSCH SVENSKA
LASERSTRAHLEN VARNING LASERSTÅLNING
NICHT DIREKT IN DEN LASERSTRAHL SCHAUEN STIRRA EJ IN I STRÅLEN LASERPRODUKT DER KLASSE 2
KLASS 2 LASER
DANSK ITALIANO
LASERLYF LUCE LASER
SE IKKE IND I STRÅLEN NON FISSARE IL RAGGIO PRODOTTO
KLASSE 2 LASER AL LASER DI CLASSE 2
FRANÇAIS ESPAÑOL
LUMIERE LASER LUZ LASER
NE PAS REGARDER LE RAYON FIXEMENT NO MIRE FIJAMENTE EL HAZ
PRODUIT LASER DE CLASSE 2 PRODUCTO LASER DE LA CLASE 2
NEDERLANDS NORSK
LASERLICHT IKKE STIRR INN I LYSSTRÅL
NIET IN STRAAL STAREN LASERLYS
KLASSE-2 LASER LASER, KLASSE 2
PORTUGUÊS
LUZ DE LASER NÃO FIXAR O RAIO LUMINOSO
PRODUTO LASER DA CLASSE 2

© 2006 Nordic ID Oy
RF601 User Manual May 2006 Version 1
5
Fig. Installing batteries to the RF601
1. Using the RF601 for the first time
1.1 Unpacking the unit
The RF601 Hand Held Unit packing includes:
• RF601 Hand Held Unit
• Nordic ID User Manual CD and/or book
• Rechargeable batteries (optional)
The Demo-packing includes also:
• Base Station
• 2m Cable between Base Station and Serial port )
• Desk Top charger DTC05
• Configuration cable (831)
Remove the unit from the packing and check that all above is included. Save the packing for possible future purposes.
1.2 Installing batteries
Before using the RF601 install 2 AA-sized alkaline or fully charged rechargeable batteries as shown in the figure 1.
+
+
-
-
++
-
-

© 2006 Nordic ID Oy
RF601 User Manual May 2006 Version 1
6
1.3 The keyboard
RF601 has 22 button keyboard; scan-key, 5 programmable function keys F1-F5, OK, shift and Up-Down movement –key,
12 alpha/numeric keys and a DEL-key.
1.4 Activating the device
The Hand Terminal has no On/Off switch. The Hand Terminal is always (when batteries are powered) ready to function by
pressing any key. When resetting (SHIFT+DEL) or installing batteries the Hand Terminal beeps twice. The Hand Terminal
will resume its standby state 30 seconds (default, configurable to max 254 seconds) after the last function.
1.5 Splash screen and initial display
A splash screen is a displayed immediately after the batteries are installed. This screen is fully configurable to display any
characters on the keymaps.
An initial display will always appear if no fields are defined. This will usually occur when the Hand Terminal is activated
or its RAM is cleared. The initial display includes a heading which can be defined by the user and an input field of max.
18 characters.
Fig. Keyboard of the RF601
Fig. Intial display of the device
Scan -key
Programmable function keys
Up / Down movement -key /
charging led
Alpha / numeric -keys
Del -key
Shift -key
OK -key
Programmable function keys

© 2006 Nordic ID Oy
RF601 User Manual May 2006 Version 1
7
2. System
2.1 System overview
The Nordic ID RF601 Wireless Data Collection System consists of three principal components:
• Nordic ID RF601 Hand Terminal(s)
• Nordic ID RF601 Base Station(s)
• The application software that runs on the Host Computer
This picture (figure 4) illustrates how a Nordic ID RF601 operates. The information will be sent from the handheld terminal
via the base station to the host application. In some configurations the base station includes an ethernet connector which
can be used to connect the base station to the host computer via LAN network.
2.2 Principles of Operation
The Nordic ID RF601 is a Hand Terminal which communicates wireless with PC application software via Nordic ID RF600
Base Station(s). A Base Station can be connected directly to the Host Computer using an RS232C interface, or via
network by using the Ethernet connector (optional feature). The Hand Terminals can send/receive data to/from the Host
Computer using the specific Communication protocol. Data transfer between the system components is always check
summed and acknowledged. This prevents any loss of data.
2.3 Communication between the Base Station and the Host Computer
The Base Station keeps listening the radio channel and the RS232C interface this is in order to check if the Hand Terminals
or the Host Computer have data to send. When the base Station receives data from the Hand Terminal, it verifies the
integrity of the data frame by using CRC check summing; only correct messages are then passed to the RS232C port.
The CRC is not removed from the message so that it can be used to check the hardware link between the Base Station
and the Host Computer.
When the Base Station receives a data from the Host Computer, the CRC checksum is recalculated for the data frame.
Only if the message is correct will it be transmitted to the radio channel.
Fig. Diagram of the communication

© 2006 Nordic ID Oy
RF601 User Manual May 2006 Version 1
8
2.4 Operation of the Hand terminal
The RF601 Hand Terminal is designed to use application specific forms, so called fields in the virtual display. This helps
to make the user interface of the Hand Terminal flexible and easy-to-use. The commands in use to generate, modify, read
and write the forms are described in the document called “RF-series system developers quide”.
When no forms are used, the initial screen of the Hand Terminal prompts an initial display and an input field. This field
can be filled with data from the keyboard or from a scanner. Any text sent by the Host Computer will clear the screen and
show the text that was sent. Any user input (from the keyboard or laser scanner) will clear the text and the initial screen
will be displayed again.
The user starts a transaction by making the entry using the Hand Terminal keyboard or reading a barcode. Then the Hand
Terminal sends this data to the Host Computer (via the Base Station) and waits for a message from the HOST. If it does
not receive a correct (check summed) message within the specified time limit, it will resend the original data as many
times as it has been programmed to do.
Note: When no entry is made on the Hand Terminal by the user, the hand terminal remains in a standby state and will
not be able to receive data from the Host Computer. There are some exceptions to this which will be described in the
RF-series system developers guide.
2.5 Security
RF technology offers a good level of data transfer security. It is necessary that no external part without a proper
authentication is able to access the network with capable device.
Security implementation on the Nordic ID RF601 system is based on three factors
• User authentication
User has to identify him/herself. This may include a password and user name input screen defined by the Host Application
and displayed as the first screen visible to the user trying to connect to the Host Application
• Device authentication
To increase security of the Nordic ID RF600 system, the host application will handle only those hand terminals which
serial number match with the specific list of hand terminals provided by the host application.
The CommID of the Hand Terminal can be used to distinguish between an allowed and rejected Hand Terminal used in
the RF601 network.
• Radio link encryption
By default, the radio link between the RF601 hand terminal and the base station is not secured. Messages sent by the
hand terminal can be read with the base station, which is operating in same channel. Data from the hand terminal input
fields can be read with any terminal program (ex. hyper terminal).
A Message from the HOST to the hand terminal is secured because the base station cannot read another base station
messages.
In cases where encryption is specially needed, can user authorization be used for accessing to the computer system.
Password and user ID information must be secured by encryption.

© 2006 Nordic ID Oy
RF601 User Manual May 2006 Version 1
9
3. Setting up an example system
The example system can be created quite easily with demos available from our website. Download and install
RF6xxDemoPack.exe which is the installation packet of four host demo application for the RF6xx hand held devices.
3.1 Fast Inventory -demo
This is detailed description how to use hand terminal set with the Fast Inventory demo application. The Fast Inventory is
a simple application for collecting data to the specific text file using the RF-series hand terminal.
Equipment needed:
• RF601 hand terminal
• RF601 Base station + Power supply + serial cable
• PC with Windows operating system and serial port (COM)
1. Download and install RF6xxDemoPack.exe to your computer.
2. Connect the serial cable between the PC COM port and the Base station. You need to know COM port number.
3. Plug power supply to the base station. (Green Rx led will be lit)
4. Open Fast Inventory -program from the PC start menu: <START>->Programs->RF6xxDemoPack->Fast Inventory
5. Select correct COM port number from Fast Inventory program “Serial Connection” and press “StartServer” button
to start the application.
6. If successful COM connection, COMx (where the x is the number of COM port) text appears in below the “Nordic ID
RF6xx Driver Control “ text.
7. If text is “CreateFileError”, the COM port might be already used by another program.
8. Put fresh batteries to the hand terminal and press OK or any F-key for transmitting.
9. Fast Inventory application answers by displaying user interface screen on hand terminal.
10. Start using Fast Inventory Application by scanning a barcode. The program will save it to Inventory file, located at
path displayed at Inventory file box.
If terminal does not communicate with the host program:
• Make sure that the hand terminal and the base station are in the same channel. (Factory default is 3)
• Make sure that COM port number is correct. (may vary depending on computer)
When the hand terminal connects first time to the Fast Inventory program, following screen appears to the hand terminal
screen:

© 2006 Nordic ID Oy
RF601 User Manual May 2006 Version 1
10
The hand terminal user can type a count and scan a code of product: After scanning the code with the hand terminal,
data will be transmitted to the host and saved to the specific Inventory file.
Fields are separated by semicolon (;): (code ; count ; date ; hand terminal ID )
f. ex: 023942874102;15;20.9.2004 9:07:55; 1959
The RF6xx Demo applications have several methods for connecting the base stations to the sample application.
• COM port: The most simple way is to connect RF601 base station directly to the demo application by using a PC
COM port. Serial connection can be opened from the demo application by using the “Serial Connection” combo
box:
• TCP/IP server: The base stations can be physically installed to the other computer or network server. The demo
application can “listen” remote base station connections by activating “Start Server” and listening specific port for
incoming connections.
• Serial Server Connection: If the base stations are connected to the LAN by using serial to TCP/IP converters, then
the user can use “Serial Server Connection” for creating connection to the base station. User has to know the TCP/IP
address and the port number of the serial server.
Fig. Fast Inventory -demo

© 2006 Nordic ID Oy
RF601 User Manual May 2006 Version 1
11
4. RF601 Hand Terminal
4.1 Activating the device
The Hand Terminal has no On/Off switch. After installing batteries Hand Terminal is always ready to function by pressing
any key. When resetting (SHIFT+DEL) or installing batteries the Hand Terminal will beep twice. The Hand Terminal will
resume its standby state 30 seconds after the last function and it remembers its last state.
4.2 Display symbols and status messages
Special symbols will be shown on the right side of the display depending on the function:
SHIFTLOCK. This function will be ON or OFF by pressing the shift key,.
TRANSACTION. This sign shows up, when the Hand Terminal is communicating with the HOST.
TRANSACTION FAILURE. This sign shows up, when transaction between the Hand Terminal and the HOST
has failed. This will also be indicated by four beeps.
LASER. This sign shows up, when the laser reader is activated. (yellow laser button)
The status messages are displayed at the bottom of the display. These messages contain information about and the
device and its state. These messages are recognised by the black backround of the text.
4.3 Sounds
Resetting Hand terminal 2 beeps.
Transaction failure 4 beeps
Bad battery condition 3 beeps with different levels
Reception of message At least 1 beep, can be more.
Successful reading of laser scanner 1 beep
Opening keylock 1 long beep
Wrong password 3 fast beeps

© 2006 Nordic ID Oy
RF601 User Manual May 2006 Version 1
12
4.4 Key function table
Table: Key function table
NOTE: The characters depends on the keymap used.
Key
Function with shift key
(shift + key pressed at
the same time ).
Function with
SHIFTLOCK Normal function
Laser ***
External reader or RFID
reader activation, if
available.
The Laser reader will be activated if
allowed by the current input field.
F1 RECEIVER mode ON/
OFF F6 F1
F2 *** F7 F2
F3 *** F8 F3
F4 *** F9 F4
F5 *** F10 F5
OK Keylock ON / OFF Normal function
The cursor will be moved to the next
field and/or the content of the field
sent to the HOST if allowed by the
current field
Arrow
up Scrolls display upward Moves the cursor step
by step to the left.
Displays the previous field of the
form.
Arrow
down
Scrolls display
downward
Moves the cursor step
by step to the right. Displays the next field of the form.
Shift *** SHIFTLOCK OFF SHIFTLOCK ON
7*** ABC abc 7
8*** DEF def 8
9*** GHI ghi 9
4*** JKL jkl 4
5*** MNO mno 5
6*** PQR pqr 6
1*** STU stu 1
2*** VWX vwx 2
3*** YZÅÄÖ yzåäö 3
.*** ↵ : ; ! ? ” # & @ | .
0MENU < > [ ] Ü { } ( ) ü 0
-Backlight (option) Spc + * / % = $ £ ±
½-
DEL Reset Normal function Removes a character from the current
field.

© 2006 Nordic ID Oy
RF601 User Manual May 2006 Version 1
13
4.5 F-Keys
The F-Keys <F1> - <F10> can be programmed with a special configuration program to include recurring strings.
The F-Keys function in two different ways:
• By pressing an F-key, the string of characters is sent to the Host Application. This is the default setting.
Example: When the user presses F1-key, the string “F1” will be sent to the Host Application.
• By pressing an F-Key, a string is printed in the current field. If the length of the string exceeds the length of the field,
the excess characters will be omitted. If the field already contains text, it will be replaced by the new text.
A string of characters in the initial display can be sent to the HOST by pressing the OK button or read with a laser
scanner.
5. Input fields
The Nordic ID RF601 Hand Terminal has a virtual display page of 12 x 20 characters. The actual display size is 8
x 20 characters, thus 2/3 of the virtual page can be viewed at a time. Rows may be scrolled by pressing the keys
accordingly.
Depending on the Host Application, the Host Application can send fields to the Hand Terminal. These fields may be filled
by using the keyboard or the laser scanner. Fields are underlined.
5.1 Locked fields (Buttons)
Fields can generally be filled with text using the keyboard. Locked fields are an exception to this rule. When a locked
field is active, the text in the field is highlighted (black background with white text). The laser scanner cannot be used to
fill a locked field. A locked field functions like a button and the contents of the field can be sent to the Host Application
by pressing the <OK> key.
5.2 Filling fields with the scanner
It is possible to define input fields to have different behaviour when filling an input field with the laser scanner: Typically,
the scanning result goes to the active input field (where the cursor is). Alternatively, if the form has an input field which is
defined as a “DEFAULT_LASER” field, the scanning result is copied into that field regardless of whether it is active or not.
If the field already contains text, it will be replaced by the new text.
1. A field can be filled using the laser scanner and be sent to the HOST immediately Example: typical stock taking
situation.
2. A field can be filled using the laser scanner but not sent to the HOST.Example: the user needs to verify the text
string contents before sending to the Host Application.
3. A field cannot be filled with a laser scanner. Example: the field requires the user to input other information, for
example numbers.

© 2006 Nordic ID Oy
RF601 User Manual May 2006 Version 1
14
5.3 Writing text in a field
An active field is indicated by the cursor. An active field can be filled with text by using the keyboard and/or by using the
laser scanner.
You can move the cursor in the field step-by-step by using the keys if SHIFTLOCK-function is ON (the symbol will be
visible in the right lower part of the display).
5.4 Writing letters
Letters can be written into a field when the SHIFTLOCK is ON (the symbol will be visible in the lower right part of the
display) by pressing the proper number keys (the letters are also printed into the keys). When a key is pressed once the
first printed letter on the key will be generated. When pressed quickly twice the second letter printed on the key will be
generated etc.
Pressing a key for at least 1.2 seconds will change the letter from uppercase to lowercase and vice versa.
5.5 Removing letters
Letters can be removed from a field with the <DEL> key.
Pressing the <DEL> key for at least 0.5 seconds clears the entire field of any text.
5.6 Moving between fields
You can move between the fields by using the <> keys. By pressing the <OK> key, you can move to the next field.
5.7 Locking the keyboard
The keyboard may be locked by pressing the <SHIFT> key and while keeping it pressed by pressing the OK-key (second
function of the <OK> button).
6. Built-in Menu
The settings of the Hand Terminal can be changed through the Menu. The Menu can be activated only if the initial display
is on by pressing the keys SHIFT + 0.
You can move in the Menu by using the <> keys. The desired item is selected by pressing the <OK> key. You can move
backwards in the Menu by selecting the << choice and pressing <OK>.
For changing existing settings values, delete previous value using the <DEL> button. Type in the new value and press
<OK>.
After choosing an item in the Menu, confirm the selection by pressing the <OK> key. Changed setting will be signalled
by a beep.
Table of contents
Other Nordic ID Barcode Reader manuals

