manuals.online logo
Brands
  1. Home
  2. •
  3. Brands
  4. •
  5. Nordpeis
  6. •
  7. Indoor Fireplace
  8. •
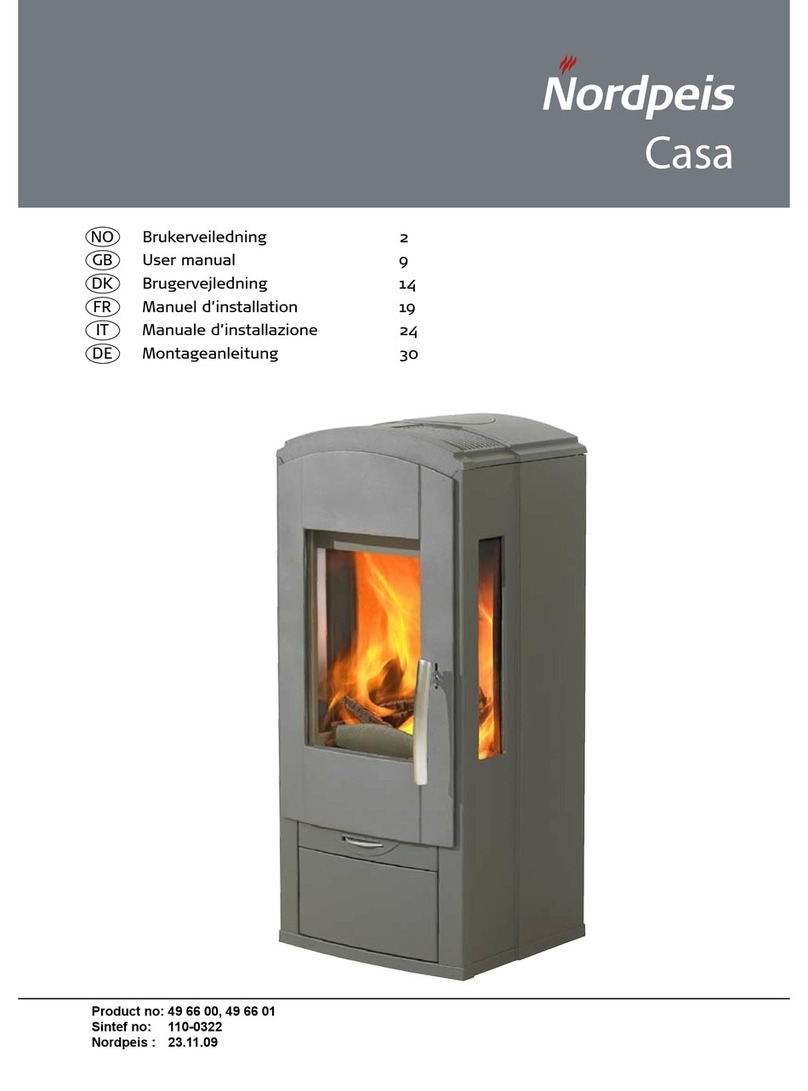
  9. Nordpeis Lisboa User manual

Nordpeis Lisboa User manual

Lisboa
2
GB
Art.no: FP-LIS00-0X0
Test report No: 40 15 3968
Last updated: 14.08.2019
FI
SE
NO Monteringsanvisning
Installation- and user manual
Käyttöohje
Installations- och bruksanvisning
10
17
25
10 GB
INDEX
1. General information 10
Weight 10
Adjustment 10
Floor plate 11
Acrylic glue 11
Minor damage 11
)LQH¿VVXUHV
Painting 11
%HIRUH,QVWDOOLQJDQHZ¿UHSODFH 
Chimney Draught 11
Air Supply 12
Dimensional drawing 12
7HFKQLFDO,QIRUPDWLRQ 
6DIHW\GLVWDQFHV 12
5. Assembly 12
Assembling bracket leg 12
Initial setting the blocker 12
Rear connection 12
Fresh air supply set 13
Surround Assembly 13
Operating Control 13
Removing self-closing door mechanism 13
/LJKWLQJWKH¿UHIRUWKH¿UVWWLPH 
/LJKWLQJD¿UH
0DLQWHQDQFH 
Cleaning and inspection 14
Ashes 14
Thermotte™ Insulating Plates 14
Door and glass 14
Recycling of the ceramic glass 14
8. Warranty 15
$GYLFHRQOLJKWLQJD¿UH 
6RPHDGYLFHLQFDVHRIFRPEXVWLRQSUREOHPV 
1. General information
Weight
7KHKRPHRZQHUPXVWHQVXUHWKDWWKHÀRRUFDQ
withstand the load according to the total weight of the
¿UHSODFH:KHQLQVWDOOLQJWKHSURGXFWRQDÀRDWLQJZRRG
ÀRRUWKHÀRRUERDUGVXQGHUQHDWKWKH¿UHSODFHPXVWEH
UHPRYHGWKLVWRDYRLGWKHWKDWWKHÀRRUERDUGVORFNDQG
crack.
Adjustment
We recommend to stack the surround without glue in
order to adjust the insert prior to perforating the chimney
IRUWKHÀXHFRQQHFWLRQ8VHDVSLULWOHYHOWRHQVXUHWKDW
IMPORTANT SAFETY PRECAUTIONS!
1. Please follow the installation manual when
FRQQHFWLQJ\RXUVWRYH¿UHSODFHWRWKHFKLPQH\
ÀXHSLSH,IFRQQHFWHGGLႇHUHQWO\IURPLQVWUXFWLRQ
SOHDVHFRQVLGHUWKHKHDWUDGLDWLRQIURPWKHÀXH
pipe to the surrounding materials.
2. Before use, please carefully read the user manual
and follow the instructions.
,QWHJUDWHGRUGH¿QHGFRQYHFWLRQRSHQLQJVPD\
never be reduced or partially obstructed. This may
lead to overheating, which again can cause house
¿UHRUVHULRXVGDPDJHWRWKHSURGXFW
8VHRQO\GHVLJQDWHG¿UHVWDUWHUVNever use
JDVROLQHGLHVHORURWKHUOLTXLGVWRVWDUWWKH¿UH
7KLVPD\FDXVHH[SORVLRQV
5. Never use other fuel than natural dry chopped
wood. Briquettes, peat, coke, coal and waste
from construction materials develops far higher
temperatures and emissions than natural wood.
Since your product has been designed for use
with natural wood only, other fuels may damage
the product, chimney and surrounding
constructions.
6. In case of damage to glass or door gasket, all use
of the product must be discontinued until the
damage has been repaired.
)DLOXUHWRIROORZWKHVHSUHFDXWLRQVZLOOOHDYH\RXU
ZDUUDQW\YRLGDQGH[SRVHSHRSOHDQGSURSHUW\WR
danger.
Advise: Even if not required in your area, it is always
ZLVHWRKDYHDTXDOL¿HGVWRYH¿UHSODFH¿WWHUGRWKH
LQVWDOODWLRQRUDWOHDVWWKH¿QDOLQVSHFWLRQEHIRUHXVH
11
GB
the surround is mounted straight. The insert will expand
with heat and for this reason the surround must not rest
on the insert. (Above the insert there must be a gap
RIWRPP/DWHUDOO\WKHUHLVQRQHHGIRUJDSVEXW
between the lower part of the insert and the surround
there must be a gap of at least 2 mm.)
Floor plate
$¿UHSURRIÀRRUSODWHPXVWEHSXWLQIURQWRIWKH¿UHSODFH
LIWKHÀRRULVRIDFRPEXVWLEOHPDWHULDO
$FU\OLFJOXH
7KH¿UHSODFHLVWREHDVVHPEOHGXVLQJDFU\OLFJOXH
Make sure all dust is removed and that the surfaces are
FOHDQ:KHQWKH¿UHSODFHLVDVVHPEOHGXVHWKHVDPH
DF\OLFJOXHIRU¿OOLQJMRLQWV),*=
Minor damage
7KH¿UHSODFHFDQVXVWDLQPLQRUGDPDJHGXULQJ
transport and handling.
7KLVFDQEHUHSDLUHGZLWKDFU\OLFOLJKW¿OOHU)RUSHUIHFW
UHVXOWV\RXFDQ¿OODQGVDQGZLWKDVXLWDEOH¿OOHU0LQRU
GDPDJHDQGXQHYHQVXUIDFHVFDQEH¿OOHG,IWKH
GDPDJHLVGHHSRULQWKHHYHQWRIVLJQL¿FDQWGDPDJH
\RXDUHUHFRPPHQGHGWR¿OOUHSHDWHGO\ZLWKWLOH
DGKHVLYHRUFHPHQWSXWW\WRDYRLGVLQNLQJ6PRRWKRႇ
ZLWKHJDGDPSVSRQJHRUDÀRDW
Fine Fissures
7KHEXLOGLQJPDWHULDODURXQGWKH¿UHSODFHFDQPRYH
In new houses in particular, it is common for building
materials to settle substantially in the early years. In
addition, all concrete elements shrink to a decreasing
extent for up to 15 months.
The result is that small cracks may appear in the
concrete/masonry.
8VHWKH¿UHSODFHIRUDIHZPRQWKV,IFUDFNVDSSHDU
scrape them out with a screwdriver or similar (to provide
PRUHVSDFHIRUDFU\OLFMRLQW¿OOHU9DFXXPWKHVXUIDFHV
to remove any dust.
,QMHFWDFU\OLFMRLQW¿OOHUDQGHYHQLWRXWZLWKDVSDWXODRU
D¿QJHUZHWWHGZLWKVRDS\ZDWHU
The joint can be painted after a couple of days.
Painting
:KHQWKH¿UHSODFHKDVEHHQ¿OOHGVDQGHGDQGWKH
JOXHGMRLQWVDUHGU\WKH¿UHSODFHLVUHDG\WREHSDLQWHG
Use only breathable paint (acrylic) intended for masonry
For your own safety, comply with the assembly instructions. All
safety distances are minimum distances.
Installation of the insert must comply with the rules and
regulations of the country where installed. Nordpeis AS
is not responsible for wrongly assembled inserts.
We accept no liability for typographical errors and changes.
%HIRUH,QVWDOOLQJDQHZ¿UHSODFH
All our products are tested according to the latest
European requirements and also to the Norwegian
standard NS 3058 and NS 3059, which include particle
tests. However, several European countries have local
UHJXODWLRQVIRULQVWDOODWLRQRI¿UHSODFHVZKLFKFKDQJH
regularly. It is the responsibility of the client that these
regulations are complied with in the country/region
ZKHUHWKH¿UHSODFHLVLQVWDOOHG1RUGSHLV$6LVQRW
responsible for incorrect installation.
Important to check
(please note that this list is not exhaustive):
• GLVWDQFHIURP¿UHER[WRFRPEXVWLEOHÀDPPDEOH
materials
• insulation materials/requirements between
¿UHSODFHVXUURXQGDQGEDFNZDOO
• VL]HRIÀRRUSODWHVLQIURQWRI¿UHSODFHLIUHTXLUHG
• ÀXHFRQQHFWLRQEHWZHHQ¿UHER[DQGFKLPQH\
• LQVXODWLRQUHTXLUHPHQWVLIÀXHSDVVHVWKURXJKD
ÀDPPDEOHZDOO
Chimney draft
&RPSDUHGWRROGHUPRGHOVWKHFOHDQEXUQLQJ¿UHSODFHV
RIWRGD\SXWVLJQL¿FDQWO\KLJKHUGHPDQGVRQWKH
FKLPQH\(YHQWKHEHVW¿UHSODFHZLOOQRWZRUNSURSHUO\
if the chimney does not have the right dimensions or
is not in good working order. The draught is mainly
controlled by gas temperature, outside temperature, air
supply as well as the height and inner diameter of the
chimney. The diameter of the chimney should never
EHOHVVWKDQWKDWRIWKHÀXHFKLPQH\FROODUAt nominal
HႇHFWWKHUHVKRXOGEHDQHJDWLYHSUHVVXUHRIWR
Pascal.
The draft increases when:
• The chimney becomes warmer than the outside air
• The active length of the chimney over the hearth
increases
• There is good air supply to the combustion
,WFDQEHGLႈFXOWWRREWDLQWKHULJKWGUDXJKWFRQGLWLRQV
LQFDVHWKHFKLPQH\LVWRRODUJHUHODWLYHWRWKH¿UHSODFH
as the chimney does not heat up well enough. In
such cases you may want to contact professional for
evaluation of possible measures. Draught that is too
strong can be controlled with a damper. If necessary,
contact a chimney sweeper. The product is type
tested and should be connected to a chimney that is
dimensioned for the smoke gas temperature indicated
in the CE declaration. When necessary, contact a
professional in advance
6KDUHGÀXHJDVV\VWHP
$SSOLDQFHFDQEHFRQQHFWHGWRVKDUHGÀXHJDVSLSH
system. In case of simultaneous operation with other
KHDWLQJDSSOLDQFHVWKHUHPXVWEHVXႈFLHQWFRPEXVWLRQ
air provided.
:DUUQLQJ,QFDVHRIWKHDSSOLDQFHFRQQHFWHGWR
VKDUHGÀXHJDVSLSHV\VWHPWKH6HÀ&ORVLQJ'RRU
system must be operational.
12 GB
Air supply
requirements PñK 9-13
)XHOFKDUJH 1.3 kg
Refueling interval 50 min
Opening of the air vent
FRQWURO 33%
Operation Intermittent*
,QWHUPLWWHQWFRPEXVWLRQUHIHUVWRQRUPDOXVHRID¿UHSODFHLHQHZ
wood is inserted when the previous load has burned down to ember
Warning: If the requirements for ventilation are
127FRPSOLHGZLWKWKHFRROLQJDLUÀRZDURXQGWKH
SURGXFWZLOOEHFRQVLGHUDEO\UHGXFHGDQG
WKHSURGXFWFDQRYHUKHDW
7KLVFDQFDXVHD¿UH
6DIHW\GLVWDQFHV
Ensure that the safety distances are complied with
(FIG 2).
When connecting a steel chimney to the top outlet
follow the assembly instructions from the producer.
Ensure to comply with the security distances required
for the steel chimney.
5. Assembly
$VVHPEOLQJRIDEUDFNHWOHJ),*
The insert is delivered with two assembled front legs.
Before you start assembling the surrounding you need
to assemble bracket leg to the insert - see FIG5. The
bracket leg is longer than front legs, it’s advisable to
place under the front legs e.g. a 70 mm wooden block in
order to keep it in upright position.
,QLWLDOVHWWLQJWKHEORFNHU),*
The insert has a blocker to keep insert in position in
use, after it is assembled.
Before assmebling, the blocker have to be checked.
On FIG 6 a blocker screw is shown in correct position.
5HDUFRQQFHFWLRQ),*),*
Insert is delivered with chimney conector positioned on
the insert top. To utilize rear chimney connection - follow
the steps shown on drawings FIG 8-10
6XUURXQGDVVHPEOLQJLQVWUXFWLRQ),*
FIG 11
Clean the place where the room-heater is going to be
located. When rear air supply is used, place the plug
to clog bottom hole in the base element - see FIG 11A
FIG 12
Set the base part against the wall. The safety distances
”X” shall be preserved according to FIG 2. Use balance
tool to to check if the base plate lays evenly. It’s also a
good tip to check straightness of wall along the height of
the appliance to avoid problems during further assembling.
Air supply
A set for fresh air supply is available as accessory.
This will ensure that the air supply to the combustion
FKDPEHULVOHVVDႇHFWHGE\YHQWLODWLRQV\VWHPV
kitchen fans and other factors which can create a
down-draught in the room. In all new construction, we
strongly recommend that it is designed and prepared
for direct supply of outside air. In older houses, the use
of fresh air supply set is also recommended. ,QVXႈFLHQW
air supply can cause down-draught and thereby low
FRPEXVWLRQHႈFLHQF\DQGWKHSUREOHPVWKDWWKLV
HQWDLOVVRRWVWDLQVRQWKHJODVVLQHႈFLHQWXVHRIWKH
wood and a soot deposits in the chimney.
Dimensional drawing
The illustrations indicate the approximate centre height
RIWKHKROHIRUWKHÀXH'LVWRUWLRQVLQÀRRUVDQGZDOOV
PD\LQÀXHQFHWKHGLPHQVLRQV'U\VWDFNWKH¿UHSODFH
without glue for accurate height and positioning of the
ÀXHFKLPQH\FRQQHFWLRQ
7HFKQLFDOLQIRUPDWLRQ
All products Nordpeis have secondary combustion and
are clean burning. The combustion takes place in two
phases: First the wood burns and then the gases from
the fumes are lit by the hot air. This ensures that these
QHZ¿UHSODFHVKDYHPLQLPDOHPLVVLRQVRIVRRWSDUWLFOHV
and un-burnt gases (such as CO) and are thus better
IRUWKHHQYLURQPHQW&OHDQEXUQLQJ¿UHSODFHVUHTXLUH
a small amount of wood in order to obtain a good heat
output. Use exclusively clean and dry wood.
:HLJKWLQFOLQVHUW 209 kg
Material insert Sheet steel
Insert S-18U
6XUIDFHWUHDWPHQWGRRU
doorframe Heat resistant varnish
Fuel Wood logs 30 cm
Operating range 4 kW nominal
(ႈFLHQF\ 82 %
CO % @ 13% O20,07
Draught system Air vent control
Combustion system Secondary combustion (clean
burning)
Flue outlet Top and rear
Flue
Outer Ø 150 mm
*Alternative versions exsists due to
National requirements
Flue gas temperature 262 °C
Warning! Keep the air intakes, supplying
FRPEXVWLRQDLUIUHHIURPEORFNDJH
If the requirements for ventilation are
127FRPSOLHGZLWKWKHSURGXFWFDQRYHUKHDW
7KLVFDQFDXVHD¿UH
Warning!
([WUDFWRUIDQVZKHQRSHUDWLQJLQWKHVDPHURRPRU
VSDFHDVWKHDSSOLDQFHPD\FDXVHSUREOHP
13
GB
FIG 13-14
If product is going to utilize rear chimney connection,
prepare the next element before assembling. Use imple-
ments to cut out a hole for the chimney connector on
the back along the prefabricated groove.
Use acryl to glue a concrete ring to the back of the
element in order to seal chimney connection.
To see the ring placement see also FIG 16.
$WWHQWLRQ0DNHVXUHWRUHPRYHWKHFXWRXWLQWKH
radiation shield, see also FIG 8.
FIG 15-17
Place the element. Make sure the surface is free of any
dust and concrete residues. Use acrylic glue between
the element and concrete base.
FIG 18-19
Assemble metal connectors. Pay attention to which end
of the connentor is placed at the base.
Fasten initially both connectors to the concrete element
by screws with washers.
FIG 20-20a
Prepare the insert - check legs height, check position of
blocker screws.
FIG 21
/LIWWKHLQVHUWLQWRSODFH0DNHVXUHWKHLQVHUWLVOHYHO
with both sides of the bottom elements.
FIG 22
Place the element. Make sure the surface is free of any
dust and concrete residues.
Fasten initially both connectors to the concrete element
by screws with washers.
FIG 23
Check distances and position of the insert in relation
to surrounding parts. Make sure the insert is level with
both sides and front of the bottom and upper elements.
2QFHWKHSRVLWLRQLV¿[HGIDVWHQWKHVFUHZVRIWKHPHWDO
connectors to the concrete elements.
FIG 24
Tighten the screw of the blocker in order to keep insert
in relative position to the surrounding.
FIG 25
Place the grate on its place. Remove internal lid of the
grate when aplliance is going to be connected to top
chimney connection.
FIG 26
2QFHWKH¿UHSODFHLVDVVHPEOHG¿OOWKHMRLQWVZLWK
DFU\OLFDQGHYHQWKHPRXWZLWKDVSRQJHRU¿QJHUDQG
some soapy water, in order to have a clear indentation
between the elements (FIG Z).
)UHVKDLUVXSSO\VHWDFFHVVRU\
3OHDVHQRWH,IWKH¿UHSODFHLVFRQQHFWHGWRDIUHVKDLU
supply set then the surround elements should be pre-
pared for this before assembly of the surround begins.
Fresh air supply can be connected through the base
SODWHERWWRPRUEDFN6HH),*DQG),*/LVERD$LU
2SHUDWLQJFRQWUROIgnition air vent control
As an integrated part of the air vent control, insert
S-18U has an ignition air vent control. By pushing the
air vent control rod all the way back (max opening), the
ignition air vent control will be activated.
See also FIG 4.
$WWHQWLRQ$IWHULJQLWLRQSXOOWKHFRQWUROEDFNWR
normal.
$LUYHQWFRQWURO ),*E
Forward
Backward
Closed
Open
5HPRYLQJWKHVHOIFORVLQJPHFKDQLVP),*
The self closing door mechanism connected to the
stove at the bottom left corner.
Carefully unhook the spring A and remove the small
screw holding the arm B with 5 mm Allen key.
The self closing mechanism is now deactivated.
$WWHQWLRQ,QVRPHFRXQWULHVUHPRYLQJWKHVHOI
FORVLQJPHFKDQLVPLVnot allowed. Make sure you
IROORZWKHORFDOUXOHVDQGUHJXODWLRQVUHJDUGLQJVHOI
FORVLQJGRRUV
/LJKWLQJWKH¿UHIRUWKH¿UVWWLPH
:KHQWKH¿UHSODFHLVDVVHPEOHGDQGDOOLQVWUXFWLRQV
KDYHEHHQREVHUYHGD¿UHFDQEHOLW
Take care when inserting logs into the burn chamber,
in order not to damage the Thermotte plates. Please
note that there might be some humidity in the insulation
SODWHVZKLFKFDQUHVXOWLQDVORZHUEXUQUDWHWKH¿UVWIHZ
WLPHVWKH¿UHSODFHLVXVHG7KLVZLOOEHUHVROYHGRQFH
the humidity has evaporated.
,WLVDGYLVDEOHWRYHQWLODWHWKHURRPZHOOZKHQ¿ULQJ
IRUWKH¿UVWWLPHDVWKHYDUQLVKRQWKH¿UHSODFHPD\
release some smoke or smell. Both the smoke and
smell will disappear and are not hazardous.
Warning!
In order to avoid injuries, please be aware that the
VXUIDIDFHPD\EHFRPHKRWGXULQJRSHUDWLRQDQG
WKDWH[WUDFDUHQHHGWREHWDNHQWRDYRLGVNLQEXUQ
A = ignition air vent

Other manuals for Lisboa

3

This manual suits for next models

1

Other Nordpeis Indoor Fireplace manuals

Nordpeis CC-RON04-1X0 Ronda 160 Soapstone User manual

Nordpeis

Nordpeis CC-RON04-1X0 Ronda 160 Soapstone User manual

Nordpeis FP-ODE00-2X0 User manual

Nordpeis

Nordpeis FP-ODE00-2X0 User manual

Nordpeis Stockholm High User manual

Nordpeis

Nordpeis Stockholm High User manual

Nordpeis SN-ME000-C44 User manual

Nordpeis

Nordpeis SN-ME000-C44 User manual

Nordpeis S-31A User manual

Nordpeis

Nordpeis S-31A User manual

Nordpeis estoril hjorne User manual

Nordpeis

Nordpeis estoril hjorne User manual

Nordpeis Stockholm High User manual

Nordpeis

Nordpeis Stockholm High User manual

Nordpeis Monaco II Low Base User manual

Nordpeis

Nordpeis Monaco II Low Base User manual

Nordpeis FP-CH002-200 User manual

Nordpeis

Nordpeis FP-CH002-200 User manual

Nordpeis N-29U User manual

Nordpeis

Nordpeis N-29U User manual

Nordpeis CC-RIO00-100 Ronda User manual

Nordpeis

Nordpeis CC-RIO00-100 Ronda User manual

Nordpeis Cannes CC-CAN0X-100 User manual

Nordpeis

Nordpeis Cannes CC-CAN0X-100 User manual

Nordpeis N-20 U User manual

Nordpeis

Nordpeis N-20 U User manual

Nordpeis FP-STO00-X00 User manual

Nordpeis

Nordpeis FP-STO00-X00 User manual

Nordpeis Bergen User manual

Nordpeis

Nordpeis Bergen User manual

Nordpeis Geilo User manual

Nordpeis

Nordpeis Geilo User manual

Nordpeis Estoril User manual

Nordpeis

Nordpeis Estoril User manual

Nordpeis Q-23FL - Powerstone User manual

Nordpeis

Nordpeis Q-23FL - Powerstone User manual

Nordpeis Quadro Colorado Exclusive User manual

Nordpeis

Nordpeis Quadro Colorado Exclusive User manual

Nordpeis Casa User manual

Nordpeis

Nordpeis Casa User manual

Nordpeis Ronda User manual

Nordpeis

Nordpeis Ronda User manual

Nordpeis Salzburg R User manual

Nordpeis

Nordpeis Salzburg R User manual

Nordpeis CC-DEN00-00X User manual

Nordpeis

Nordpeis CC-DEN00-00X User manual

Nordpeis Salzburg L Convection User manual

Nordpeis

Nordpeis Salzburg L Convection User manual

Popular Indoor Fireplace manuals by other brands

Napoleon NEFL42CHD-1 manual

Napoleon

Napoleon NEFL42CHD-1 manual

Masport WOOD FIRE installation guide

Masport

Masport WOOD FIRE installation guide

JAYLINE SS280 Installation & operation instructions

JAYLINE

JAYLINE SS280 Installation & operation instructions

Heat-N-Glo SL-32S Installation

Heat-N-Glo

Heat-N-Glo SL-32S Installation

kozy heat Bellingham 52 quick start guide

kozy heat

kozy heat Bellingham 52 quick start guide

Paragon Fires ROOM SEALED INSET LIVE FUEL EFFECT GAS FIRE owner's manual

Paragon Fires

Paragon Fires ROOM SEALED INSET LIVE FUEL EFFECT GAS FIRE owner's manual

Monessen Hearth LCUF32CR-B Installation & owner's manual

Monessen Hearth

Monessen Hearth LCUF32CR-B Installation & owner's manual

PuraFlame Galena owner's manual

PuraFlame

PuraFlame Galena owner's manual

Dimplex Toluca Deluxe instruction manual

Dimplex

Dimplex Toluca Deluxe instruction manual

SEI TENNYSON FA8544AO Assembly instructions

SEI

SEI TENNYSON FA8544AO Assembly instructions

Dru G25 installation manual

Dru

Dru G25 installation manual

Capital fireplaces Designline DL700 Installation and user instructions

Capital fireplaces

Capital fireplaces Designline DL700 Installation and user instructions

IronStrike VINTAGE VINT-DVS-U Installation and operation

IronStrike

IronStrike VINTAGE VINT-DVS-U Installation and operation

ACR Heat HERITAGE N25 Installation and operating instruction manual

ACR Heat

ACR Heat HERITAGE N25 Installation and operating instruction manual

European Home HVF-42 Installation, operation and owner's manual

European Home

European Home HVF-42 Installation, operation and owner's manual

Quadra-Fire MTVERNINSAE-MBK Owner's manual operation & care

Quadra-Fire

Quadra-Fire MTVERNINSAE-MBK Owner's manual operation & care

Harman Home Heating Accentra Insert Installation & operating manual

Harman Home Heating

Harman Home Heating Accentra Insert Installation & operating manual

Trimline Fires Zircon 1024 installation instructions

Trimline Fires

Trimline Fires Zircon 1024 installation instructions

manuals.online logo
manuals.online logoBrands
  • About & Mission
  • Contact us
  • Privacy Policy
  • Terms and Conditions

Copyright 2025 Manuals.Online. All Rights Reserved.