Norfolk Greenhouses BCCPSW1800EXT User manual

Carport Extension
BCCPSW1800EXT / BCCPSW1825EXT
Assembly Instrucons
IMPORTANT
Please read these instrucons thoroughly before starng assembly.
Check all parts are present before assembly, call 020 3011 2040 for replacement parts.
These instrucons should be kept in a safe place for future use.

2Canopy
Introducon
Thank you for your purchase of our Carport Extension, we hope you enjoy.
Please read through these instrucons and familiarise yourself with the construcon
process before you begin.
We operate a programme of connuous product improvement and we reserve the right
to change the specicaon without prior noce, the latest model is supplied.
Although we have taken great care to ensure this kit is complete, occasionally we make
mistakes. There are no robots involved in the producon our products, just regular
people! Please check that you have all of the parts listed before starng the assembly. If
there are any damaged or missing parts, please call us on 020 3011 2040. We will express
any missing parts to you as soon as possible.
Keep these instrucons in a safe place for future use. They can be useful for idenfying
parts when ordering replacements should you suer severe storm damage or vandalism.
We are condent you will get a long life from your product. We oer a 1 year
manufacturers warranty, against manufacturing faults or defects. Sadly we are unable
to cover against storm or weather damage. If you experience any dicules with your
product please call the number above for support.
Contents
Hints, Tips & Safety 3
Parts List 4
Frame Layout 7
Frame Assembly 8
Roof Assembly 12
Guer Assembly 16
Unique Steps 18

3
© Norfolk Greenhouses
Hints, Tips & Safety
Hints and Tips
• All frame parts are idened with the part number, all other parts can be
idened by measuring and comparing to the list of materials in this manual.
• Lay out all your parts in organised groups before commencing assembly.
Cauon
• Two people are required to safely assemble this product.
• Take care and wear safety gloves when working with metal parts as some have
sharp edges.
• Keep children and pets away from the assembly area.
• Keep the area around your work place area clean and dy.
• Take care when handling sharp tools and never carry sharp tools in your pocket.
• Never leave your product unaended or parally built, especially outside on a
windy day.
• You are advised to take care and wear suitable personal protecve equipment
such as safety glasses & gloves where possible.
Tools Required
• Large at-head screwdriver
• 8mm socket, 10mm socket
• Ø6mm masonry drill bit
• Spirit level
• Ladder
• Tape Measure
Maintenance
• It is advised that periodically or aer storms or gales you check all nuts, bolts
and screws, and ghten where necessary.
• Clean using warm soapy water and a non-abrasive cloth.
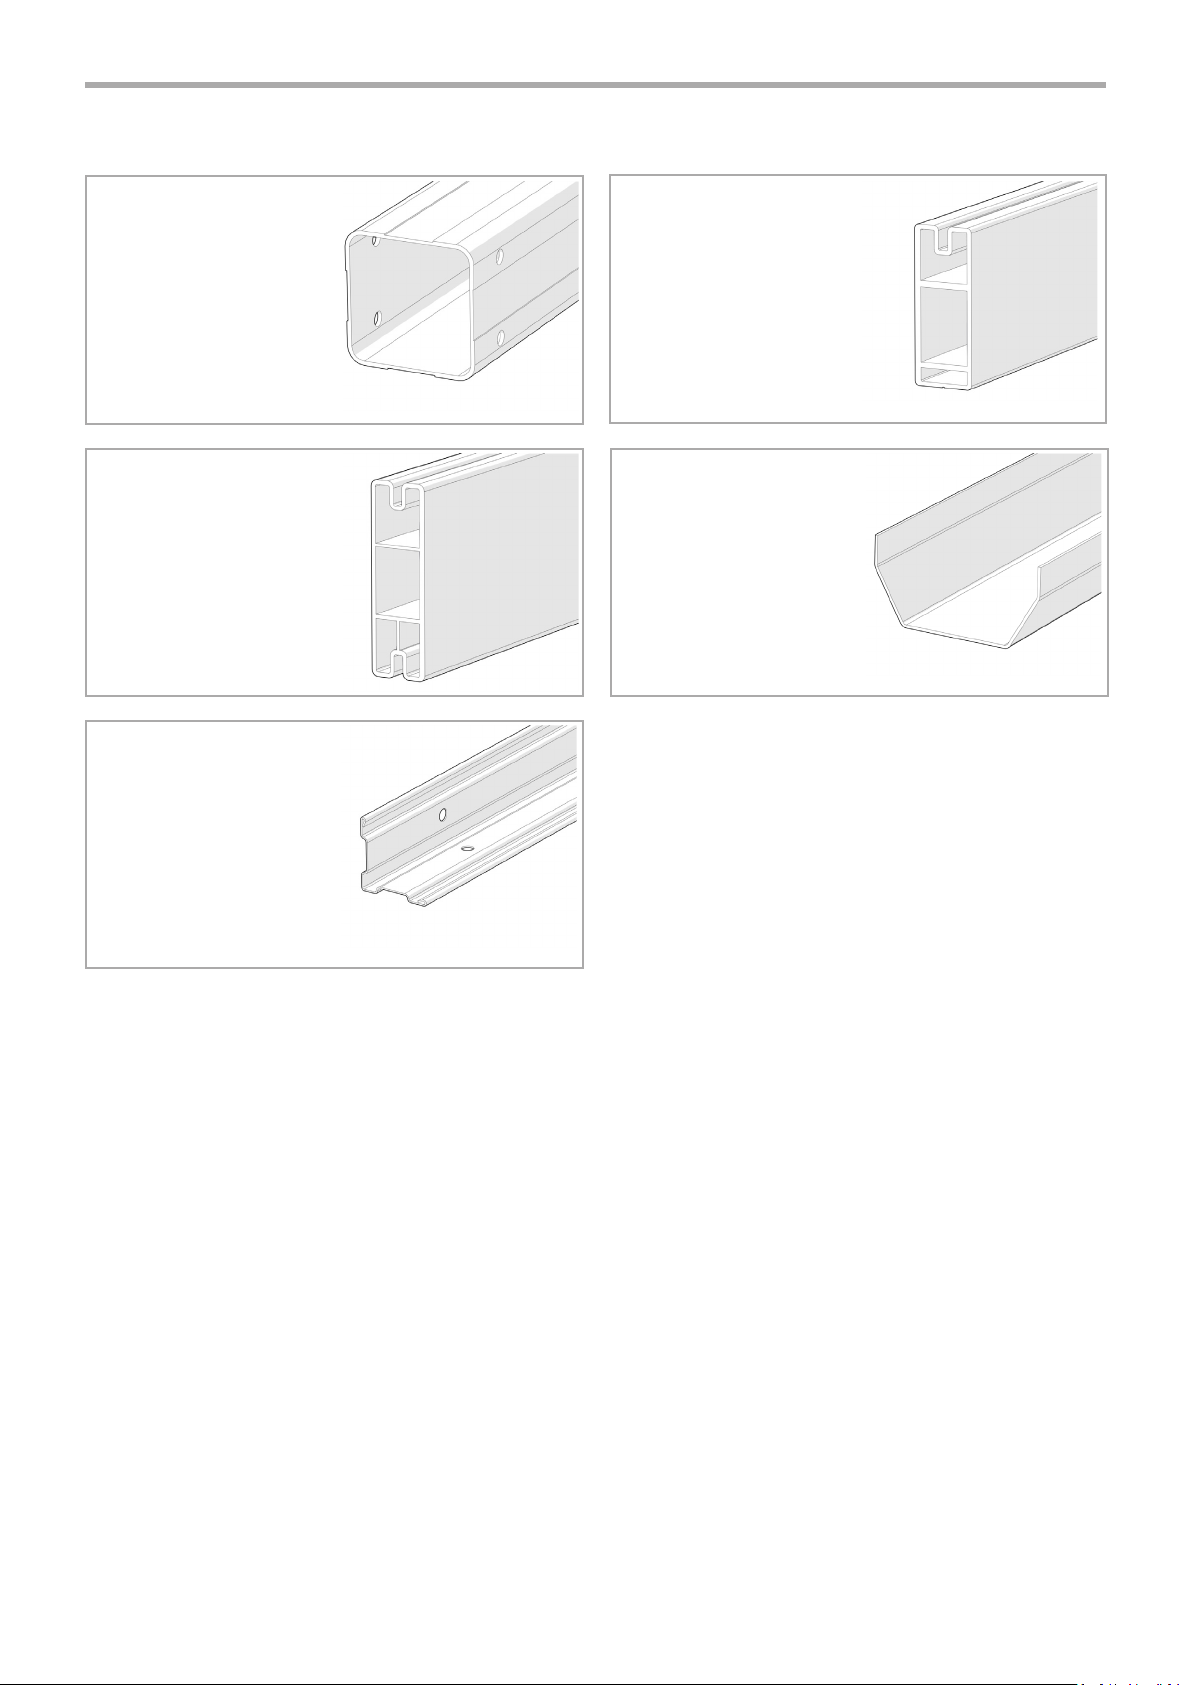
4CanopyParts List
1x LEG
PST1 (2.0m model)
PST3 (2.5m model)
Framework
1x RL18
1x RL17
1x RL17A
2x RL16
1x BM1 1x GUT1900W
1x XL71

5Contact Support on 020 3011 2040
© Norfolk Greenhouses
Roof Sheets
SR6
(1140mm x 1830mm)
2x
2x
SR7
(1140mm x 940mm)

6CanopyParts List
Hardware
WRUS1
WRKS1
2x
1x
HBD
3x
HBDT
2x
NYLOC
26x
STUD30
13x
ST4X34 ST8X5
SC6X32 MM7X60 CP6
17x 10x
39x 3x 1x
CBM6X80
2x

7Contact Support on 020 3011 2040
© Norfolk Greenhouses
Extension Frame Layout
IF BUILDING EXTENSION AS PART OF NEW BUILD -
Follow instrucon manual provided with Carport 3.8m kit unl Step 11, then
switch to this manual and connue from Step 2.
IF BUILDING EXTENSION AS RETROFIT TO EXISTING STRUCTURE -
All instrucons are wrien for extension to the right of the exisng structure, if
extending to the le see UNIQUE STEP A (page 18).
Remove roof sheets on the side of which your extension will adjoining.
Remove all xings for beam which will be replaced by RL18.

8CanopyFrame Assembly
Step 2 - Fix HBD bracket to end of RL17A
Step 1 - Replace RL20 of exisng structure with RL18

9Contact Support on 020 3011 2040
© Norfolk Greenhouses
Step 3 - Fix RL17A to wall level with exisng wall beams
Step 4 - Add CP6 to the LEG then x BM1 between the Leg and RL17A
i
Oer RL17A to the wall and align horizontally using a spirit
level and mark the holes. Drill 3 holes using Ø6mm masonry
drill bit. Fix to wall using provided xings as shown. (If xing
into mber, use appropriate xings - not provided)

10 Canopy
Step 6 - Fasten 2x HBD brackets to BM1 as shown
Step 5 - Fix RL17 as front beam between exisng structure and LEG
Frame Assembly

11Contact Support on 020 3011 2040
© Norfolk Greenhouses
Step 8 - Fix XL71 to underside of BM1. Push t HBP to exposed end of front beam
Step 7 - Aach 2x RL16

12 Canopy
Step 9 - Fix SR6 roof sheet to the front le corner of the roof frame
Roof Assembly
i
Place rst sheet of SR6 in the
front le corner of the roof,
posion so that there is a 50mm
overhang from front beam (see
image right). Apply xings 1 to
4 into front beam RL17, every
3rd corrugaon (see image
below). Move the structure
unl framework is square with
the wall and sheet. Then apply
xings 5 to 7 into BM1, then
nally 8 to 10 into RL16.
ROOFING NOTE: The following roof sheet layout applies to a New Build
structure. If building as part of a retrot to exisng structure, follow the exisng
roof sheet layout.

13Contact Support on 020 3011 2040
© Norfolk Greenhouses
Step 11 - Fix exposed edge of last SR6 sheet to BM1
Step 10 - Fix remaining 5x SR6 sheets
i
Overlay rst 4 SR6 sheets by 3 corrugaons, then overlay last SR6 by 2
corrugaons. Fix with 8x SC6X32 every 3rd corrugaon as shown.
i
Fix using 4x SC6X32 as shown
leaving space at the top of
sheet for SR7 to overlap.

14 Canopy
Step 13 - Fix remaining 5x SR7 sheets
Step 12 - Posion SR7 on top of rst SR6, ght against the wall and x.
Roof Assembly
i
Fix using 9x SC6X32 on
exposed edge and every 3rd
corrugaon as shown.
i
Fix each sheet using 8x SC6X32
every 3rd corrugaon as shown.

15Contact Support on 020 3011 2040
© Norfolk Greenhouses
Step 17 - Fix exposed edge of last SR7 sheet to BM1
i
Fix using 3x SC6X32 as shown .

16 Canopy
Step 18 - Assemble guer and x to front beam of carport
Guer Assembly

17Contact Support on 020 3011 2040
© Norfolk Greenhouses
Step 20 - Anchor feet to the ground
Step 19 - Assemble and x downpipe to LEG
i
Use spirit level to align legs in the
upright posion. Fix to the ground
through holes in steel foot using
appropriate xings (not supplied).

18 CanopyUnique Steps
UNIQUE STEP A - (construcng extension to the le of exisng structure)
Use hand saw to cut 66mm from end of front beam and remove. This will allow
RL17 to pick up on the two end xings. Connue to Step 2, same build method
applies, adapt instrucons to suit le side of structure.

19Contact Support on 020 3011 2040
© Norfolk Greenhouses

Canopy
Norfolk Greenhouses
1 Vincent Avenue
Crownhill Industry
Milton Keynes
MK8 0AB
Tel: 020 3011 2040
E-mail: info@norfolk-greenhouses.co.uk
This manual suits for next models
1
Other Norfolk Greenhouses Greenhouse Kit manuals
Popular Greenhouse Kit manuals by other brands

Vitavia
Vitavia Cassiopeia 9900 Assembly instructions

GardenSkill
GardenSkill POP-UP POLY CAGE Series instructions

Richel
Richel J30604 Assembly instructions and user guide

ACD
ACD Intro Grow DAISY manual

AeroGarden
AeroGarden AeroGarden Extended Season manual

Robinsons
Robinsons Victorian 13 ROLLESTON 3/4 SPAN Porch Dwarf Assembly instructions