L73M, L73C
Installation & Maintenance
Instructions
FILL RESERVOIR MICROFOG LUBRICATORS
Shut off inlet air pressure and reduce pressure in
reservoir to zero. Remove fill plug (2), add oil, and
reinstall fill plug. Do not remove the fill plug when the
reservoir is pressurized, as oil will blow out the fill plug
hole. Micro-fog lubricators can be filled under pressure
only if equipped with the optional quick fill cap (4),
which requires a quick fill connector and oil pump.
ADJUSTMENT
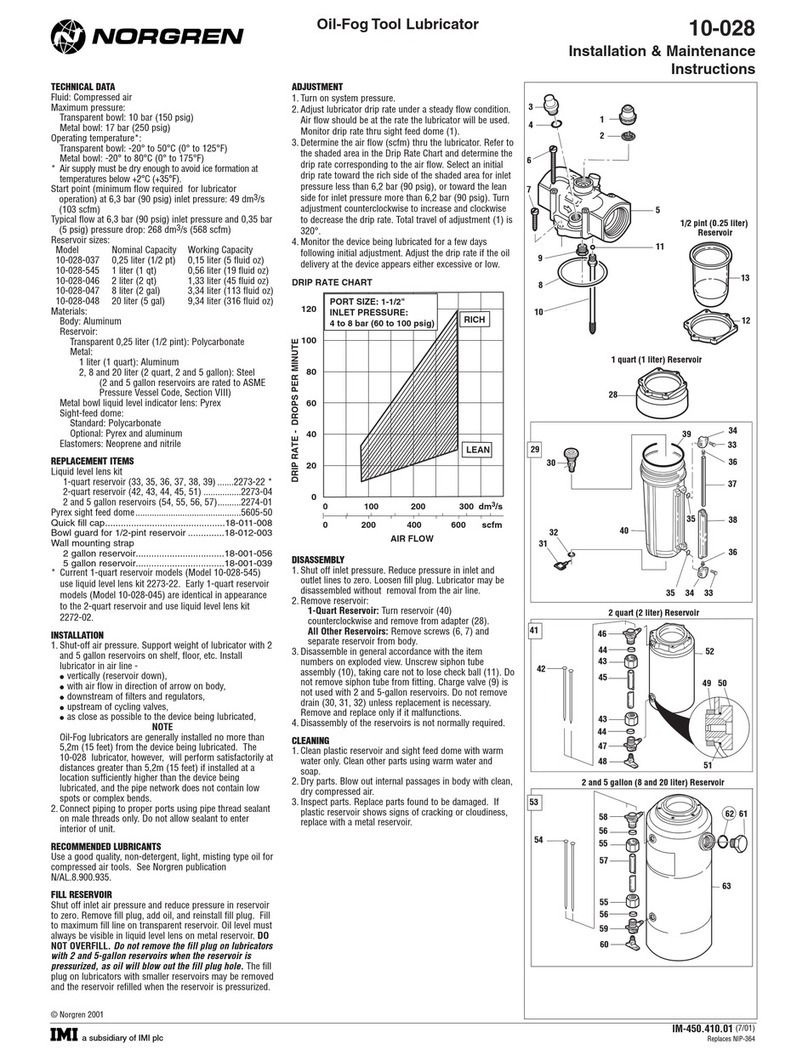
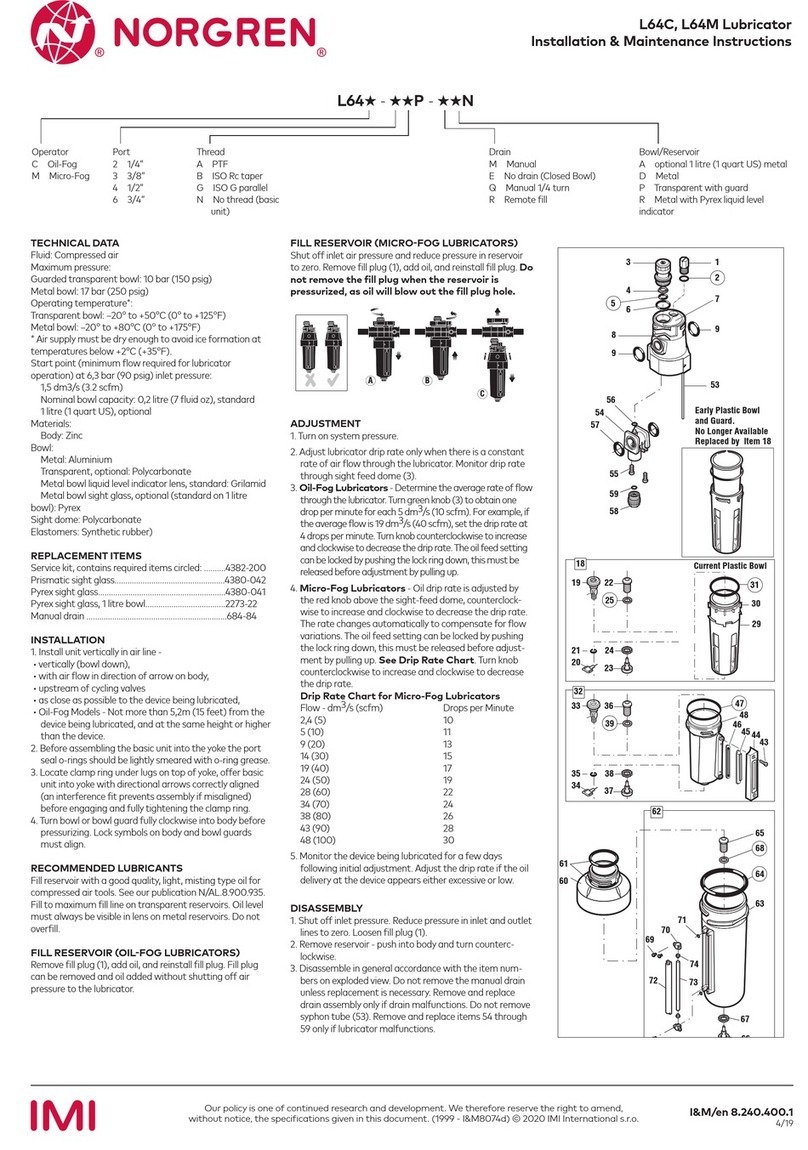
1. Turn on system pressure.
2. Adjust lubricator drip rate only when there is a
constant rate of air flow thru the lubricator. Monitor
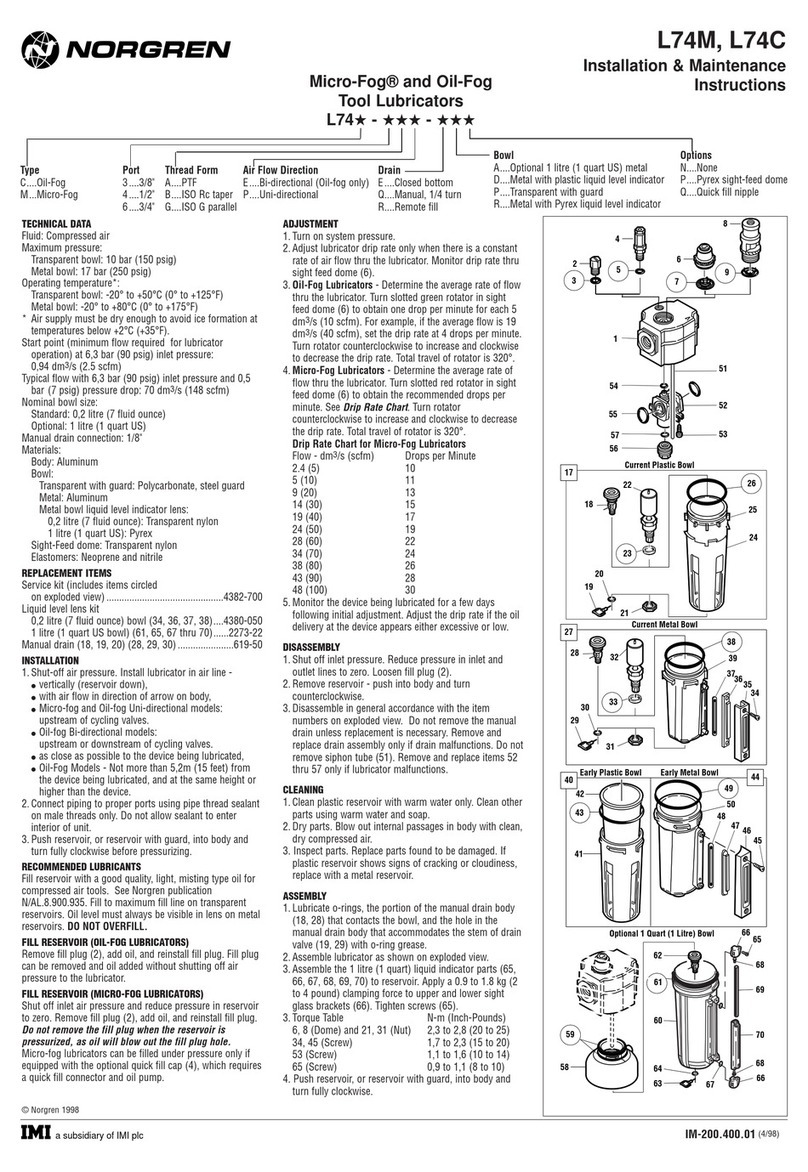
drip rate thru sight feed dome (6).
3. Oil-Fog Lubricators - Determine the average rate of
flow thru the lubricator. Turn slotted green rotator in
sight feed dome (6) to obtain one drop per minute for
each 5 dm3/s (10 scfm). For example, if the average
flow is 19 dm3/s (40 scfm), set the drip rate at 4 drops
per minute. Turn rotator counterclockwise to increase
and clockwise to decrease the drip rate. Total travel of
rotator is 320°.
4. Micro-Fog Lubricators - Determine the average rate of
flow thru the lubricator. Turn slotted red rotator in
sight feed dome (6) to obtain the recommended
drops per minute. See Drip Rate Chart. Turn rotator
counterclockwise to increase and clockwise to
decrease the drip rate. Total travel of rotator is 320°.
Drip Rate Chart for Micro-Fog Lubricators
Flow - dm3/s (scfm) Drops per Minute
2 (5) 3
5 (10) 4
10 (20) 7
15 (30) 9
20 (40) 12
25 (50) 15
5. Monitor the device being lubricated for a few days
following initial adjustment. Adjust the drip rate if the
oil delivery at the device appears either excessive or
low.
DISASSEMBLY
1. Shut off inlet pressure. Reduce pressure in inlet and
outlet lines to zero. Loosen fill plug (2).
2. Remove reservoir - push into body and turn
counterclockwise.
3. Disassemble in general accordance with the item
numbers on exploded view. Do not remove the
manual drain unless replacement is necessary.
Remove and replace drain assembly only if drain
malfunctions. Do not remove siphon tube (49).
Remove and replace items 50 thru 55 only if lubricator
malfunctions. O-ring (55) is only used on Micro-Fog
lubricators.
CLEANING
1. Clean plastic reservoir with warm water only. Clean
other parts using warm water and soap.
2. Dry parts. Blow out internal passages in body with
clean, dry compressed air.
3. Inspect parts. Replace parts found to be damaged. If
plastic reservoir shows signs of cracking or cloudiness,
replace with a metal reservoir.
ASSEMBLY
1. Lubricate o-rings, the portion of the manual drain
body (18, 28, 37) that contacts the bowl, and the hole
in the manual drain body that accommodates the
stem of drain valve (19, 29, 38) with o-ring grease.
2. Assemble lubricator as shown on exploded view.
3. Torque Table N-m (Inch-Pounds)
2 (Fill Plug), 4 (Quick-fill cap) 1,1 to 1,6 (10 to 14)
6, 8 (Dome) 2,3 to 2,8 (20 to 25)
43 (Screw) 1,7 to 3,4 (15 to 30)
50 (Screw) 2,0 to 2,5 (18 to 22)
4. Push reservoir, or reservoir with guard, into body and
turn fully clockwise.
IM-180.400.02 (9/98)
Supersedes 4/98
© Norgren 1998
