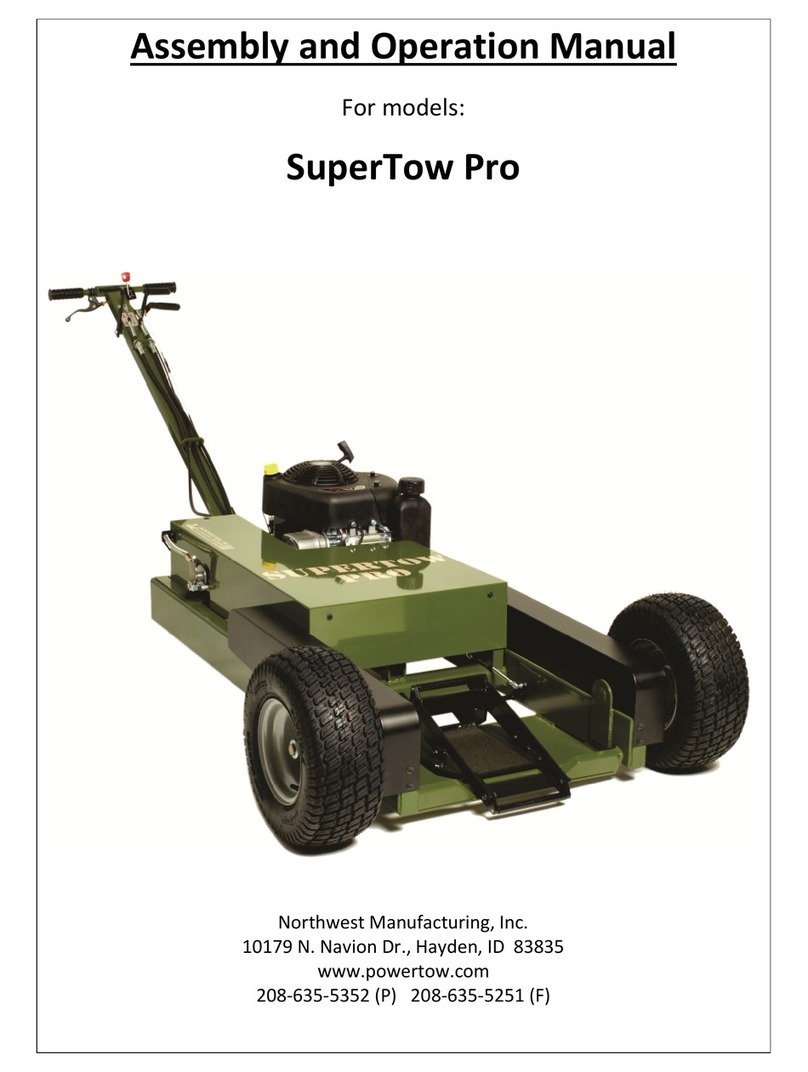
Northwest SUPERTOW PRO User manual

SUPERTOW PRO
2
TABLE OF CONTENTS
Table of Contents 2
Precautions 3
1) Specifications 4
1.1 Weights and Capacity
1.2 Speed of Operation
1.3 Power Specs
1.4 Fuel
1.5 Dimensions
2) User Controls 5
2.1 Brake
2.2 Throttle
2.3 Clutch
2.4 Gear Shift
2.5 Carriage Release
3) Features
3.1 Pull Start 6
3.2 Starter Button
3.3 Battery Charger
3.4 Headlight
3.5 Lazy Susan Carriage 7
3.6 Low Profile Design
4) Assembly 8
4.1 Required Tools
4.2 Uncrating
4.3 Handle Assembly 9
4.4 Attach Control Cables
5) Cautions 11
6) Surface Requirements
7) Initial Startup
8) Familiarization 12
9) First Time Operation with Aircraft
10) Maintenance 14
10.1 Lubrication
10.2 Tires
10.3 Battery
10.4 On-Board Battery Charger
11) Troubleshooting 15
12) Guarantee/Warranty

SUPERTOW PRO
3
Precautions
✓Read through this entire manual before operating.
✓The Supertow 1 is heavy machinery that moves expensive aircraft.
✓Become familiar with Supertow 1 operation before using on aircraft.
✓Be aware of surroundings before and during usage.
✓Use caution whenever operating the Supertow 1.
✓Serious injury or death may result from improper use.
Good Practices
✓Chocking 1 or both aircraft main tires will greatly help loading
✓Never chock the tire you are loading
✓Each aircraft is different; take time familiarize yourself with new aircraft.
✓When not in use for extended periods, leave battery charger plugged in.
✓Periodically check Supertow I tire pressure; proper pressure will improve loading.
✓Proper aircraft tire pressure will improve loading.
If you have questions, please call (208) 635-5352 or email us at
sales@powertow.com
CHECK YOUR ASSEMBLY
PACK CONTENTS!
1- Owner’s Manual (this one)
1- Engine Manual
1- Battery Charger Manual
1- 18oz SAE 30W Engine Oil
1- 1/4 “ Allen Wrench
4- Tie Wraps (one extra)
2- 5/16” x 3” Allen Bolt
1- 5/16” x 3-1/4” Allen Bolt
3- 5/16” Luck Nuts
6- 5/16” Flat Washers
1- Lift Kit
Lift bar
Mounting Hardware
Lift Kit Instructions

SUPERTOW PRO
4
1) SPECIFICATIONS
1.1 Weights and Capacity
•Unit Weight: 285lb
•Total Shipping Weight: 625 lb.
•Towing Capacity: 15,000 pounds max push/pull (2 deg slope)
•Carriage Weight Capacity: 1,200 pounds max
•Carriage Carry Capacity: Up to Tire Size 600x6
1.2 Speed of Operation:
•0-100 fpm
1.3 Power Specs
•System Power: 10.5 Gross Torque 4-Cycle Engine
1.4 Fuel
•E87+ Unleaded Auto Fuel (non-ethanol preferred)
•100LL
1.5 Dimensions

SUPERTOW PRO
5
2) User Controls
2.1 ENGINE START
•Squeeze and hold both buttons to start engine (a single button will not start engine)
•Release after engine starts
•Optionally, the engine may be pull-started
2.2 BRAKE
•Brake handle controls disc brake located on side of transmission.
•Brake tension adjusters are located at each end of cable.
•Avoid braking while clutch is engaged.
2.3 THROTTLE
•Controls speed of tug.
•“STOP” position shuts off engine.
2.4 CLUTCH
•To engage power to wheels, slowly squeeze clutch.
•When shifting into gear, squeeze clutch handle slightly to help engage transmission.
•Clutch tension is adjusted on clutch cable.
2.5 GEAR SHIFT
•Forward –Neutral –5 Speeds of Reverse
•When shifting into gear, squeeze clutch handle slightly to help engage transmission.
•Gear shifting adjusters are located at each end of cable.
2.6 CARRIAGE RELEASE
•Press and hold Carriage Release button to open carriage.
•Release button after carriage opens.

SUPERTOW PRO
6
3) Features
3.1 PULL START
•In case of low battery, the Supertow 1 may be started manually.
3.2 LIGHTING
•LED lights turn on automatically when engine is running
•2 lamps provide light for carriage area
•4 lamps are provided as headlights

SUPERTOW PRO
7
Features (continued)
3.3 SUPERTOW 360 LAZY SUSAN CARRIAGE
•Allows 360 deg. Rotation of tug beneath the aircraft wheel.
•Aircraft tire stays at 0 deg. to aircraft
•Carriage opens by pushing Carriage Release button, closes automatically as aircraft tire
encounters rear of carriage.
•Carriage will not open unless in safe home position.
3.4 LOW PROFILE DESIGN
•After loading, plenty of clearance for low, 5-blade props such as Meridian and TBM.
3.5 CARRIAGE LOCKOUT (optional)
•Prevents carriage from rotating for difficult loading or moves
•Flips easily between lock/unlocked positions
Carriage Lockout Engaged.
(shown on Supertow Striker)

SUPERTOW PRO
8
4) Assembly (best with 2 persons)
4.1 Required Tools
•Heavy Duty Side Cutters or Tin Snips
•#2 Phillips Screw Driver (screw gun is best)
•¼” Allen Wrench
•½” Open-End or Ratchet Wrench
•Hammer or Mallet
•Gasoline (ethanol-free or 100LL is preferred)
4.2 Uncrating (crate screws are marked with paint)
NOTE: Keep crate components intact. Crate may be reused for future shipping
1) Cut Metal Strapping, discard.
2) Remove screws from crate cover, set cover aside.
3) Tap center support brace gently upwards to loosen. Remove and set aside.
4) Remove screws from sides. Begin with
screws holding the 2 remaining support
braces, Set wood aside.
5) Remove screws from ends of crate. Set
wood aside.
6) Cut straps holding handle.
7) Remove protective film from engine and
handle; carefully cut plastic wrap on top of
front tires.

SUPERTOW PRO
9
4.3 Handle Assembly (assemble while still on crate pallet)
•Front side handle bolt is pre-installed; leave in place.
•Slide handle gently into end of bracket
Feed Handle Cable carefully through bracket
•Insert Top Bolts (use included flat washers); tighten fully
•Insert back side bolt (use included washers on each side)
•Tighten side bolts fully
•Connect Handle Cable to Engine Cable
Handle Cable

SUPERTOW PRO
10
4.4 Attach Control Cables (leave green tape on until fully done with these steps)
•Attach throttle body assembly and brake lever
•Attach 3 tabs of lower clutch cable to handle (bottom picture)
•Fasten above cables to handle with 3 tie wraps (bottom picture).
•Attach main push-pull cable, tighten fully
•Attach upper clutch cable to lower clutch cable, hand tighten
•Remove green tape from all cable ends
•Push-pull Cable has a spring-loaded ball catch. Press to open and slip onto handle ball.
•Fully tighten upper and lower clutch cable connection
Clutch Cable
Clutch, Brake, and Throttle
Cables fastened with Tie Wraps
Clutch Cable Tab

SUPERTOW PRO
11
IMPORTANT! READ NEXT SECTION BEFORE OPERATING!
5) Cautions
•The Supertow 1 is heavy machinery. Total weight of the system may exceed 8,000
pounds. Use caution when operating. Make sure you know your surroundings
(obstacles, other aircraft, wing-to-door-clearances, etc.) before operating.
6) Surface Requirements
•The Supertow 1 is intended for use on solid, integrated surfaces such as asphalt or
concrete. Softer surfaces may result in tug becoming stuck.
•Obstructions higher than 1.5” may contact underside of tug.
7) Initial Startup
7.1 Fill Engine With oil
•Use dipstick on oil cap to fill to proper level.
•Failure to add oil voids all warranties.
7.2 Add Gasoline to Gas Tank
7.3 Start Engine
•Set throttle to High
•Squeeze both starter buttons
•After engine starts, reduce throttle to slow.
7.4 Drive from Crate:
•Set long lip of crate end board on edge of pallet to create a ramp. Secure using 2 crate
screws.
•Shift to Forward position
•Slowly squeeze clutch to drive off crate base.
(shown with Supertow Striker)

SUPERTOW PRO
12
8) Familiarization
•Ensure tug is clear of all obstacles and hazards
•Take some time to drive the tug around before loading aircraft
•Practice smooth clutch control.
•Practice smooth braking.
•Come to a complete stop before changing Forward/Reverse directions
•Running tug for a few minutes will break in drive belt
•Belt breaks in fastest when clutch is barely engaged and machine creeps forward
9) First Time Operation with Aircraft
If possible, bring aircraft out to an open, flat area for loading/unloading practice
9.1 Chocking
•Northwest Manufacturing, Inc. recommends chocking at least one of the main tires
when loading aircraft with any tug.
•Never chock the tire that is to be loaded into the carriage.
•When unloading in a hangar or other hazard area, consider placing a chock behind at
least one main wheel before releasing aircraft from the carriage.
9.2 Carriage Alignment
•Ensure front of carriage is aligned to the front of frame before releasing carriage.
9.3 Loading (note: see “chocking” above)
•Push handle to release carriage. Pull handle back to home position.
•Move front of carriage to about 12” from tire.
•With chocks in place, approach nose wheel with the carriage centered to aircraft tire.
•Aircraft load differently; you may have to experiment a bit to find best throttle speed.
Start with a slow throttle speed and push the Supertow I carriage under aircraft tire.
•If the aircraft fails to load, repeat process with a little more throttle.
•When the tire is fully loaded, the rear latches will drop and lock.
•Take a moment to inspect the carriage latches to see they are locked

SUPERTOW PRO
13
9.4 Unloading
•Shift to Reverse
•Pull aircraft slightly backwards to release pressure of aircraft tire on back of carriage.
•Push Carriage Release; carriage will open.
•Slowly apply clutch and back carriage from under aircraft tire.
•If carriage resists dropping, hold Carriage Release handle forward and gently squeeze
clutch at the same time.
9.5 Repeat
•Repeat loading/unloading a few times to become comfortable with operations.
9.6 Moving the Aircraft
•With aircraft tire loaded and carriage latched, pull away from chocks (remove chocks if
you wish to push).
•Always gently squeeze clutch to engage..
•Before changing direction (PUSH/PULL), bring the Supertow I to a complete stop.
•Allow ample time for tug to come to complete stops.
•Use PARKING BRAKE switch position to keep aircraft from creeping.
9.7 Parking
•After putting your plane away, leave it on the tug. Simply swivel the tug to the side to
clear your hangar door. That way, you are already loaded for your next move.
(shown with Supertow Striker)

SUPERTOW PRO
14
10) Maintenance
10.1 Lubrication
•Use general purpose lithium-based, grease lubricants, e.g. Red-i-50042-T (NLGL #2)
•Aerosol Lithium Spray grease is acceptable for lighter applications such as control
cables (e.g. CRC 03080 White Lithium Grease)
Drive Chains: Lubricate with grease as needed
Wheel Bearings: Front wheel and caster hubs are
lubricated via zerk.
Carriage: Lightly grease all joints marked.
Ball Bearings: use spray grease with nozzle tube.
Rotate carriage 360° for full coverage.
•NOTE: Carriage joint bolts are not
fully tightened; this allows free
carriage action.
10.2 Tires
•Best overall operation is at max
pressure (24lb or as listed on tire)
•Tires may be cleaned with Acetone
for better traction
Wipe with saturated cloth and/or scrub with stiff brush
CAUTION: Acetone will harm painted surfaces.
10.3 Battery
•The battery is sealed AGM and requires no user maintenance. Battery health is
maintained by on-board charging system.
•For best battery life, leave charger connected when tug is not in use.
10.4 On-Board Battery Charger
•Input: 120VAC (USA) input
•Output: 12V, 400mA.
•Brand/Model: Schumacher
•Unplug charger before starting engine.
•Charger LEDS
RED (solid): Charging (charge time: up to 3 hours)
RED (flashing): Bad Battery
GREEN: Battery Charged, Maintain Mode.
•If needed, charger will enter desulfination mode (solid RED, duration 1-10 hours)
•For complete charger manual, visit www.powertow.com/support or contact Schumacher
www.batterychargers.com
1-800-621-5485, Monday-Friday 7:00am to 5:00pm CST

SUPERTOW PRO
15
11) Troubleshooting
11.1 Aircraft Fails to Load
•Check Tire Pressure on Tug and Aircraft.
•Check Front Roller for Scratches –if heavily scratched, please call us.
•Check for loose clutch. If the clutch handle can reach the rubber grip, tighten clutch.
•Dust on very slick hangar floors can impede loading. Use a spray bottle to lightly wetten
front tires. This will help traction.
11.2 Failure to Unload
•Make sure aircraft tire is not pressing against back of carriage. Back tug up slightly to
release tire pressure from back of carriage
11.3 Undesired Carriage Rotation When Loading or Moving
•Reload, Center Aircraft Tire in Carriage
•Consider Using Carriage Lockout (optional accessory)
11.4 Aircraft Tire Attempts to Exit Carriage While Moving
•Practice gentle clutch control.
11.5 Tug Slows When Moving Aircraft Up Hills
•Check clutch tension
Your Engine Is Covered For 2 Years by Briggs and Stratton.
Please refer to your local dealer with engine issues.
www.briggsandstratton.com
Check out our Support Tab at powertow.com

SUPERTOW PRO
16
GUARANTEE
All equipment manufactured by Northwest Mfg. Inc. is sold on a satisfaction-guaranteed basis. Within 30 days of
delivery, if you are not satisfied, you may return the unit. You must contact our office to authorize your return and
arrange shipping. Products returned without prior authorization will be rejected and returned.
Returned items must be in new condition and in original packaging. A refund will be authorized upon receipt and
inspection of returned items for the original purchase price, minus any damages (shipping charges are not
refunded).
GENERAL WARRANTY AND CONDITIONS
PowerTow units have a unit warranty, for a period of 2 years.
SuperTow gas powered units have warranty for a period of 2 years.
SuperTow electric powered units have warranty for a period of 1 year.
•Northwest Mfg. Inc.'s warranty is Parts Only
•Warranty covers manufacturing and material defects.
•Northwest Mfg. Inc. Excludes batteries from our warranty.
•Gasoline engines are warranted by Briggs & Stratton for a period of 2 years (90 days for commercial users).
•Northwest Manufacturing does not carry engine parts.
•For engine warranty details, please review your engine manual (provided with owners’ manual)
•For engine service, contact a Briggs & Stratton dealer in your area.
•Visit BriggsAndStratton.com to locate your nearest Briggs & Stratton dealer.
•Damage due to misuse and abuse voids warranty.
•Northwest Mfg. Inc. reserves the right to determine product misuse and abuse.
•Unauthorized third-party attachments/accessories or modifying Northwest Mfg., Inc. equipment, voids all
warranty and claims of responsibility by Northwest Mfg., Inc
•Any damage to tug or aircraft is the responsibility of the operator.
These terms and conditions apply to Domestic Private user orders only.
Commercial customers have the following limitation; Warranty is limited to 90 days.
International orders have the following limitations; Guarantee is not included; Warranty is limited to 90 days.
Thank you for purchasing a Northwest Mfg., Inc. product!
Northwest Manufacturing, Inc.
10179 N. Navion Dr. Hayden, Idaho 83835
(PH) 208-635-5352 (F)208-635-5251
www.powertow.com
PowerTow and SuperTow are registered trademarks of Northwest Mfg., Inc.
Other manuals for SUPERTOW PRO
1
Table of contents
Other Northwest Jack manuals