Nostalgia Electrics Retro Series Quick guide

All products are trademarks of Nostalgia Products LLC.
Worldwide design & utility patented or patents pending.
© 2015 Nostalgia Products LLC.
www.nostalgiaproducts.com
(rev. 01/19/15)

ICM150RETRORED
Retro Series™ Electric Ice Cream Maker
Sorbetière Électrique Retro Series™
Máquina de Helado Eléctrica Retro Series™
Instructions and Recipes
Consignes et Recettes
Instrucciones y Recetas


ENGLISH
2
CONTENTS
IMPORTANT PRECAUTIONS . . . . . . . . . . . . . . . . . . . . . . . . . . . . . 3
IMPORTANT SAFEGUARDS . . . . . . . . . . . . . . . . . . . . . . . . . . . . . 3
INTRODUCTION . . . . . . . . . . . . . . . . . . . . . . . . . . . . . . . . . . . . 4
PARTS & ASSEMBLY . . . . . . . . . . . . . . . . . . . . . . . . . . . . . . . . . . 5
HOW TO OPERATE . . . . . . . . . . . . . . . . . . . . . . . . . . . . . . . . . . 6
HELPFUL TIPS . . . . . . . . . . . . . . . . . . . . . . . . . . . . . . . . . . . . . 7
CLEANING & MAINTENANCE . . . . . . . . . . . . . . . . . . . . . . . . . . . . 8
RECIPES . . . . . . . . . . . . . . . . . . . . . . . . . . . . . . . . . . . . . . . . . 9
RETURNS & WARRANTY . . . . . . . . . . . . . . . . . . . . . . . . . . . . . . . 12
SAFETY
Appliance Specications:
120 Volts, 60 Hz
15 Watts, ETL Approved
THIS PRODUCT IS FOR USE IN 120V AC OUTLET ONLY.
Your safety and the safety of others are very important.
We have provided many important safety messages in this manual and
on your appliance. Always read and obey all safety messages.
This is the safety alert symbol.
This symbol alerts you to potential hazards that
can kill or hurt you and others.
All safety messages will follow the safety alert symbol.
All safety messages will tell you what the potential hazard is, tell you how to reduce the
chance of injury, and tell you what can happen if the instructions are not followed.

ENGLISH
3
IMPORTANT PRECAUTIONS
1. NEVER immerse Lid with Electric Motor in water.
2. NEVER use near water.
3. NEVER use an abrasive sponge or cloth on the unit.
4. NEVER leave unit unattended while in use.
5. NEVER add nuts, candy, fruit or other chunky ingredients to the Freezer Bowl prior
to the churning process. They may prevent ice cream from churning properly.
6. Unplug unit from outlet when not in use and when cleaning.
7. DO NOT operate this appliance with a damaged cord or plug
or in the event the appliance ever malfunctions.
8. DO NOT put in dishwasher.
9. Keep out of reach of children.
10. This appliance is NOT A TOY.
11. This appliance is not intended for use by unsupervised young
children or cognitively challenged individuals.
12. Young children should be supervised while product is in use
to ensure that they do not play with the appliance.
IMPORTANT SAFEGUARDS
When using electrical appliances, basic safety precautions
should always be followed, including:
1. Read all instructions before operating this appliance.
2. To protect against electrical shock do not immerse cord, plug
or any part of this unit in water or other liquids.
3. Close supervision is necessary when any appliance is used by or near children.
4. Unplug from outlet when not in use and before removing parts for cleaning.
5. DO NOT operate any appliance with a damaged cord or plug or if the
appliance has been damaged in any manner. Return the appliance
to the nearest repair shop for examination or repair.
6. The manufacturer does not recommend the use of accessory attachments.
Use of attachments may cause re, electric shock or injury.
7. NEVER operate the unit dry. Always have ice cream mixture
inside of the container while plugged in.
8. DO NOT use hot oil or liquids in the Freezer Bowl. Always chill mixture before churning.
9. Keep hands, hair, clothes and utensils away from moving parts in order to prevent
injury or damage to the unit.
10. DO NOT use outdoors.
11. DO NOT let the cord touch hot surfaces.

ENGLISH
4
12. DO NOT let cord hang over the edge of a table or countertop.
13. DO NOT place on or near a hot gas or electric burner, or in a heated oven.
14. This unit must be on a level surface to operate properly.
15. DO NOT use this appliance for other than its intended use.
16. DO NOT leave unit unattended while in use or when plugged into an outlet.
17. A short power supply cord is provided to reduce the risk resulting
from becoming entangled or tripping over a long cord. The cord is
designed to be stored in the Lid of the unit when not in use.
18. An extension cord can be used if care is exercised in its use.
19. The marked electrical rating of an extension cord should be at least as great as the
electrical rating of the appliance. The extension cord should be attached correctly and
should be arranged so that it does not dangle over the edge of a table or countertop.
20. This appliance has a polarized plug (one blade is wider than the other). To reduce
the risk of electrical shock, this plug is intended to t into a polarized outlet
only one way. If the plug cannot be fully inserted into the socket, it can be re-
inserted in the opposite direction. If this still does not work, please contact a
professional maintenance or repair person. DO NOT repair it by yourself.
21. DO NOT attempt to service this appliance yourself. All maintanence, except
for cleaning, must be performed by a professional repair technician.
22. DO NOT put hands or any foreign objects into this appliance
while it is plugged in and operating.
23. DO NOT touch freezing Freezer Bowl with bare hands. Protect your
hands by wearing oven mitts when touching the frozen Freezer Bowl,
or use the handle that is attached to the Freezer Bowl.
SAVE THESE INSTRUCTIONS!
INTRODUCTION
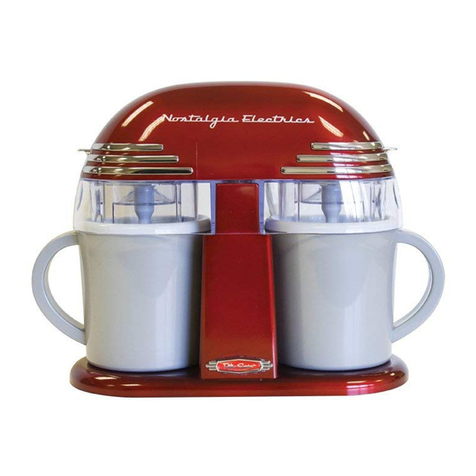
Thank you for purchasing the RETRO SERIES™ ICE CREAM MAKER from Nostalgia™. The
RETRO SERIES™ ICE CREAM MAKER provides a homemade ice cream experience with
modern convenience. Simply freeze the Gel Canister, ll with fresh ingredients and in
about 30 minutes, your delicious ice cream will be ready to serve. No salt or ice is needed!
Add mint, cookie dough, or your favorite candy pieces through the ingredient chute to
customize your ice cream concoction. You can also use this ice cream maker to create
refreshing sorbet and frozen yogurt. Makes about 1.5 quarts of ice cream per batch.
ENGLISH
5
PARTS & ASSEMBLY
Take the RETRO SERIES™ ICE CREAM MAKER out of the box and wash
the Freezer Bowl, Lid and Dasher with warm, soapy water.
DO NOT wash the Electric Motor. Carefully wipe down the Electric Motor with a non-
abrasive cloth or sponge. NEVER immerse the Electric Motor in water. Dry thoroughly.
PARTS
ASSEMBLY
Electric Motor
Freezer Bowl
Dasher
Connecting
Axis
Lid
ON/OFF Switch
Ingredient Chute
STEP 1. Ensure unit is unplugged, then
t the Electric Motor into the Lid. Unit
will click into place when secure.
STEP 2. Fit the Connecting Axis into the
Dasher, then t the Dasher assembly into the
hole on the bottom of the Electric Motor.
STEP 3. Place the Electric Motor/Lid/Dasher
assembly onto the Freezer Bowl and turn
counterclockwise to lock into position.
STEP 4. You can now operate your ELECTRIC ICE
CREAM MAKER by using the ON/OFF Switch.

ENGLISH
6
HOW TO OPERATE
To prepare:
• Chill the Freezer Bowl in freezer for at least 8 hours before
using your RETRO SERIES™ ICE CREAM MAKER.
• Find a stable surface near an electrical outlet before starting. Make sure cord is
away from any water source. It is acceptable to use an extension cored if needed.
• Choose your favorite recipe and prepare ice cream or sorbet mixture
per recipe instructions. Place in refrigerator until ready to use.
1. Take Freezer Bowl from freezer and attach to Electric Motor/Lid/Dasher assembly. Turn
counterclockwise to lock into position.
NOTE: To determine whether the Freezer Bowl is frozen enough to begin making
ice cream, shake the Freezer Bowl slightly after freezing. If you hear liquid
moving inside of Freezer Bowl, the Freezer Bowl needs more time to freeze.
2. Retrieve ice cream or sorbet mixture from the refrigerator. Using the Ingredient Chute, pour
mixture into the Freezer Bowl. When pouring mixture into the Freezer Bowl, always stop at
least 1.5 inches (4 cm) from the top, as the mixture will increase in volume during freezing.
3. Turn on the Electric Motor by ipping switch to "ON" position.
4. Allow the mixture to churn until frozen or desired consistency is reached. This can take 15 to
30 minutes, but some recipes may be ready in less time.
NOTE: Chocolate pieces, cookie dough chunks, nuts, or other candy may be
added through the Ingredient Chute as the mixture starts to freeze.
5. Once ice cream has reached desired consistency, turn o the Electric Motor
by ipping switch to "OFF" position, and unplug Electric Motor.
6. Remove Electric Motor/Lid/Dasher assembly by turning clockwise. Remove
the Dasher and scrape o any excess ice cream with a spatula.
7. Transfer ice cream to a freezer-safe container and freeze,
or serve straight from the Freezer Bowl!
Lid

ENGLISH
7
HELPFUL TIPS
TASTE
Finished ice cream will always taste less sweet than the initial mixture. You
may adjust the amount of sugar in the recipe to suit your taste.
Articial sweeteners may be used in place of sugar. Use
the following measurements for reference:
• 1 packet of sweetener = 2 tsp. of sugar
• 6 packets of sweetener = ¼ cup of sugar
• 8 packets of sweetener = ¹/3 cup of sugar
• 12 packets of sweetener = ½ cup of sugar
TEXTURE
To ensure that ice crystals do not form in ice cream mixture, DO NOT
stop the churning process until the ice cream is ready.
Recipes with high amount of salt can cause the mixture to freeze too
quickly, which can also cause ice crystals to form in the ice cream.
CONSISTENCY
Homemade ice cream generally has a thick, milkshake texture. If you
prefer a thicker or more rm consistency, try one of the following:
• Place ice cream mixture in freezer to harden.
• Recipes that call for alcohol may inhibit the freezing process. Be sure to
add any alcohol during the last few minutes of the freezing cycle.
JAMMING
If the Dasher gets jammed and does not revolve properly, try the following:
• Check to make sure that the Dasher is properly attached to the Connecting Axis,
that cord is plugged into outlet and that the unit is ipped to the "ON" position.
• Ice Cream recipes that include hard ingredients like nuts or chocolate chips
may cause the Dasher to become lodged in the Freezer Bowl. It is best to add
hard ingredients during the last few minutes of the churning process.
• DO NOT stop the churning process until ice cream is nished. Stopping in the middle of
the process can cause the ice cream to harden and restrict the movement of the Dasher.
FREEZING
DO NOT operate the unit longer than required. If the mixture has not yet
achieved the slush consistency or has thawed again after 30 minutes, do
not continue. Possible reasons for mixture not chilling or freezing:
• The Freezer Bowl was not cold enough.
• The mixture was too warm. Make sure that the ingredients that you add are chilled and
not warm, lukewarm or of room temperature before adding to the Freezer Bowl.

ENGLISH
8
CLEANING & MAINTENANCE
1. Make sure the Electric Motor is turned o and the unit is unplugged.
2. Remove Electric Motor/Lid/Dasher by turning clockwise and lifting from Freezer Bowl.
3. Remove Dasher and Connecting Axis, and scrape o any excess ice cream.
4. Wash Freezer Bowl, Dasher, Connecting Axis and Lid using warm, soapy water and dry
thoroughly. DO NOT replace Lid with Electric Motor until the Freezer Bowl is completely dry.
5. Wipe Electric Motor with a soft cloth moistened with mild soap, then dry
thoroughly. NEVER immerse Electric Motor in water or other liquid.
6. DO NOT use harsh or abrasive cleaners.
7. DO NOT use an abrasive sponge, cloth or scouring pad on the unit.
8. DO NOT freeze the Freezer Bowl when it is wet.
9. ONLY wash unit by hand. DO NOT place parts in the dishwasher.

ENGLISH
9
RECIPES
The RETRO SERIES™ ICE CREAM MAKER makes rich, creamy ice
cream anytime! Try these delicious recipes and tips:
• Make sure your ingredients are chilled prior to adding to
Canister, as this makes ice cream making faster.
• For ice cream recipes that require cooking, it is recommended that you cook one
day in advance. The mixture will then have time to cool completely and expand.
VANILLA ICE CREAM
• 1 Cup Whole Milk,
Well Chilled
• ½ Cup Granulated
Sugar
• 1 Egg, beaten
• 1 Cup Heavy Cream,
Well Chilled
• 1-2 Tsp. Pure Vanilla
Extract, to Taste
In a saucepan, cook milk and sugar over medium
heat, stirring occasionally, until just bubbling
around the edges. Then reduce heat to low.
Beat egg in small bowl. Stirring constantly, slowly
pour about 1/2 cup of hot milk mixture into the
beaten egg. Add egg mixture to the remaining hot
milk mixture. Cook over low heat, stirring constantly
until slightly thickened, about 2-3 minutes.
Remove mixture from heat, pour into a bowl and cool
completely in the refrigerator for at least 2 hours.
Once mixture is completely cooled, using a whisk, stir
the whipping cream and vanilla into the mixture.
Turn RETRO SERIES™ ICE CREAM MAKER on, pour
mixture into Freezer Bowl and let churn until desired
consistency is achieved, about 20-30 minutes.
Enjoy immediately, or transfer ice cream to
freezer-safe container and store in freezer.
EASY CHOCOLATE ICE CREAM
• 2/3 Cup Whole
Milk, Well Chilled
• 1/3 Cup Granulated
Sugar
• 5 oz. Semi-Sweet
Chocolate, Broken
into ½ in. Pieces
• 1 1/3 Cups Heavy
Cream, Well Chilled
• ½ Tsp. Pure
Vanilla Extract
In a saucepan, combine milk, sugar and chocolate.
Cook over medium heat, stirring constantly, until just
bubbly around the edges and chocolate is melted.
Transfer to a bowl and cool completely in
the refrigerator for at least 2 hours.
Stir in the heavy cream and vanilla to taste,
and chill for at least 30 minutes.
Turn RETRO SERIES™ ICE CREAM MAKER on, pour
mixture into Freezer Bowl and let churn until desired
consistency is achieved, about 20-30 minutes.
Enjoy immediately, or transfer ice cream to
freezer-safe container and store in freezer.

ENGLISH
10
FRESH STRAWBERRY ICE CREAM
• 1/3 Cup Whole Milk
• 1 1/3 Cups
Heavy Cream
• 1/2 Tsp. Pure
Vanilla Extract
• 2/3 Cup Granulated
Sugar
• 1 1/3 Cup Fresh
Strawberries,
Stemmed and Sliced
• Juice of ½ Lemon
In a small bowl, combine the strawberries with the lemon
juice and ¼ cup of the sugar; stir gently and allow the
strawberries to marinate in the juices for 2 hours.
In a medium bowl, use a hand mixer or a whisk to combine
the milk and remaining granulated sugar until the
sugar is dissolved, about 1 – 2 minutes on low speed.
Stir in the heavy cream, plus the remaining
strawberry juice and vanilla.
Turn RETRO SERIES™ ICE CREAM MAKER on,
pour mixture into Freezer Bowl and let churn
until thickened, about 30 minutes.
Add the sliced strawberries during the
last 5 minutes of churning.
Enjoy immediately, or transfer ice cream to
freezer-safe container and store in freezer.
NOTE: The ice cream will have a“natural”appearance of
very pale pink. If a deeper pink is desired, sparingly add
drops of red food coloring until desired color is achieved.
REFRESHING LEMON SORBET
• ¾ Cup Sugar
• ¾Cup Water,
Well Chilled
• Juice from ½
Medium Orange
• ½ Cup Freshly
Squeezed
Lemon Juice
• ½ Egg White
Combine the sugar and water in a medium saucepan
and stir over low heat until sugar has dissolved.
Bring mixture to a boil and allow to boil for 1
minute. Remove from heat and allow to cool.
Once cooled, add orange and lemon juice to the mixture.
Whisk the egg white until almost sti, and
then stir into the lemon mixture.
Turn RETRO SERIES™ ICE CREAM MAKER on, pour
mixture into Freezer Bowl and let churn until desired
consistency is achieved, about 20-30 minutes.
Enjoy immediately, or transfer sorbet to freezer-
safe container and store in freezer.

ENGLISH
11
CHOCOLATE FROZEN YOGURT
• 1 Cup Whole Milk
• 2 Cups Low Fat
Vanilla Yogurt
• ¼ Cup White,
Granulated Sugar
• 6 oz. Semi-Sweet
Chocolate, Chopped
Combine the milk and chocolate in a blender
or food processor and mix until well blended
and smooth, about 20 – 30 seconds.
Add the yogurt and sugar, mix again
until smooth, about 15 seconds.
Turn RETRO SERIES™ ICE CREAM MAKER on, pour
mixture into Freezer Bowl and let churn until desired
consistency is achieved, about 20-30 minutes.
Enjoy immediately, or transfer frozen yogurt to
freezer-safe container and store in freezer.
CUSTARD BASED VANILLA ICE CREAM
• 2 Egg Yolks
• ¼ Cup Granulated
Sugar
• 7/8 Cup Skim Milk
• 7/8 Cup Thickened
Cream
• Few Drops of
Vanilla Extract
Combine the egg yolks and sugar in a
glass bowl and beat together.
In a saucepan, slowly bring the milk to boiling point,
then pour onto the egg mixture and beat together.
Return the mixture to the pan and stir constantly
until the mixture thickens and forms a lm over
the back of the spoon. IMPORTANT: Do not allow
mixture to boil or the mixture will separate.
Remove mixture from heat and allow to cool. When
cool, stir in the cream and vanilla extract.
Turn RETRO SERIES™ ICE CREAM MAKER on, pour
mixture into Freezer Bowl and let churn until desired
consistency is achieved, about 20-30 minutes.
Enjoy immediately, or transfer ice cream to
freezer-safe container and store in freezer.

ENGLISH
12
RETURNS & WARRANTY
SHOULD YOUR UNIT NOT WORK OR IF DAMAGED WHEN YOU FIRST TAKE IT OUT OF
THE BOX, PLEASE RETURN IT TO THE PLACE OF PURCHASE IMMEDIATELY.
RETRO SERIES™ ICE CREAM MAKER / ICM150RETRORED
Should you have any questions, please contact us via email or at the customer service number listed
below between the hours of 8:00 AM and 5:00 PM, Monday through Friday, Central Standard Time.
Distributed by:
Nostalgia Products LLC
1471 Partnership Dr.
Green Bay, WI 54304-5685
Customer Service
Phone: (920) 347-9122
Web: www.nostalgiaproducts.com
Customer Service Inquiry
To submit a Customer Service inquiry, go to www.nostalgiaproducts.com and ll
out the Customer Service Inquiry form and click the Submit button.
A representative will contact you as soon as possible.
Product Warranty Terms
Nostalgia Products LLC (the“Company”) hereby warrants that for a period of one (1) year from the
date of original purchase, this product will be free of defects in material and workmanship under
normal home use, provided that the product is operated and maintained in accordance with the
operating instructions. As the sole and exclusive remedy under this warranty, the Company will
at its discretion either repair or replace the product found to be defective, or issue a refund on the
product during the warranty period. This warranty is only available to the original retail purchaser of
the product from the date of initial retail purchase, and is only valid with the original sales receipt, as
proof of purchase date is required to obtain warranty benets. All warranty claims must be brought
to the attention of the Company within the warranty period and no later than 30 days of the failure
to perform. This warranty does not cover normal wear or damage caused by shipping, mishandling,
misuse, accident, alteration, improper replacement parts, or other than ordinary household use.
You may be required to return the product (with shipping prepaid by you) for inspection and
evaluation. Return shipping costs are not refundable. The Company is not responsible for returns
damaged or lost in transit. Unless otherwise specically permitted by the operating instructions, this
warranty applies to indoor household use only. In order to obtain service under this warranty, please
contact the Company at the telephone number listed above or by lling out the Customer Service
Inquiry Form located at www.nostalgiaproducts.com. Warranty valid only in USA and Canada.
This warranty is in lieu of all other warranties, expressed or implied, including warranties of
merchantability and tness for a particular purpose, which are hereby excluded to the extent
permitted by law. In no event shall the Company be liable for any indirect, incidental, consequential,
or special damages arising out of or in connection with this product or the use thereof. Some
states, provinces or jurisdictions do not permit the exclusion or limitation of incidental or
consequential damages, so the foregoing exclusion or limitation may not apply to you.
This warranty does not apply to re-manufactured merchandise.
Please read the operating instructions carefully. Failure to comply
with the operating instructions will void this warranty.
For more information, visit us online at www.nostalgiaproducts.com.
Like us on Facebook at www.facebook.com/NostalgiaElectrics.
Follow our boards on Pinterest at www.pinterest.com/nostalgiaelctrx.
Tweet along with us on Twitter at www.twitter.com/NostalgiaElctrx.

13
FRANÇAIS
13
TABLE DES MATIÈRES
IMPORTANTES MESURES DE PRÉCAUTION . . . . . . . . . . . . . . . . . . . 14
IMPORTANTES MISES EN GARDE . . . . . . . . . . . . . . . . . . . . . . . . . 14
INTRODUCTION . . . . . . . . . . . . . . . . . . . . . . . . . . . . . . . . . . . . 15
PIÈCES ET ASSEMBLAGE . . . . . . . . . . . . . . . . . . . . . . . . . . . . . . . 16
MODE DE FONCTIONNEMENT . . . . . . . . . . . . . . . . . . . . . . . . . . . 17
CONSEILS UTILES . . . . . . . . . . . . . . . . . . . . . . . . . . . . . . . . . . . 18
NETTOYAGE ET ENTRETIEN . . . . . . . . . . . . . . . . . . . . . . . . . . . . . 19
RECETTES . . . . . . . . . . . . . . . . . . . . . . . . . . . . . . . . . . . . . . . . 20
RETOURS ET GARANTIE . . . . . . . . . . . . . . . . . . . . . . . . . . . . . . . 23
SÉCURITÉ
Fiche technique de l'appareil :
120 V, 60 Hz
15 W, homologué par ETL
CE PRODUIT DOIT ÊTRE UTILISÉ UNIQUEMENT DANS UNE PRISE DE COURANT DE 120 V CA.
Votre sécurité tout comme celle des autres est importante.
De nombreux messages importants de sécurité se trouvent dans le présent manuel
et sur votre appareil. Toujours lire et respecter toutes les consignes de sécurité.
Ceci est le symbole d'avertissement de sécurité.
Ce symbole avertit des risques potentiels qui présente
un danger pour votre vie et celle des autres.
Tous les messages de sécurité suivront le symbole d'avertissement de sécurité.
Tous les messages de sécurité indiqueront le danger potentiel et la façon de réduire
le risque de blessure et ce qui peut arriver si les consignes ne sont pas suivies.

14
FRANÇAIS
14
IMPORTANTES MESURES DE PRÉCAUTION
1. NE JAMAIS plonger le Couvercle avec le Moteur électrique dans l'eau.
2. NE JAMAIS utiliser près d'une source d'eau.
3. NE JAMAIS utiliser une éponge ou un chion abrasif sur l'appareil.
4. NE JAMAIS laisser l'appareil sans surveillance pendant le fonctionnement.
5. NE JAMAIS ajouter de noix, de bonbons, de fruits ou d'autres morceaux
d'ingrédients dans le Bol isotherme avant le barattage. Ils pourraient
empêcher la crème glacée de baratter correctement.
6. Débrancher la prise de l'appareil lorsqu'il n'est pas utilisé et lors du nettoyage.
7. NE JAMAIS utiliser cet appareil avec un cordon ou une prise
endommagée, ou si l'appareil fonctionne mal.
8. NE PAS le mettre dans le lave-vaisselle.
9. Garder hors de la portée des enfants.
10. Cet appareil n'est PAS UN JOUET.
11. Les enfants laissés sans surveillance et les personnes ayant une
décience cognitive ne devraient jamais utiliser cet appareil.
12. Les jeunes enfants ne devraient pas être laissés sans surveillance pendant que
l'appareil est en fonction et pour s'assurer qu'ils ne jouent pas avec l'appareil.
IMPORTANTES MISES EN GARDE
Des mesures de précaution de base devraient toujours être suivies au
moment de l'utilisation d'un appareil électrique, notamment :
1. Lire toutes les consignes avant d'utiliser l'appareil.
2. Pour éviter de s'électrocuter, ne pas immerger le cordon électrique,
la prise ou l'appareil dans l'eau ou tout autre liquide.
3. Une surveillance étroite des enfants est nécessaire lorsqu'un
appareil électrique quelconque est utilisé à leur proximité.
4. Débrancher l'appareil de la prise électrique lorsqu'il n'est pas utilisé
et au moment de retirer des pièces pour le nettoyer.
5. NE PAS utiliser l'appareil avec un cordon ou une prise endommagée ni si
l'appareil est endommagé de quelque façon que ce soit. Retourner l'appareil
à l'atelier de réparation le plus près pour qu'il soit révisé ou réparé.
6. Le fabricant ne recommande pas l'utilisation d'accessoires. L'utilisation d'accessoires
pourra provoquer un incendie, une électrisation ou une blessure.
7. NE JAMAIS faire fonctionner l'appareil à vide. Toujours avoir le mélange de
crème glacée à l'intérieur du récipient lorsque l'appareil est branché.
8. NE PAS utiliser d'huile chaude ou de liquide dans le Bol isotherme.
Toujours réfrigérer le mélange avant de le baratter.
9. Tenir les mains, les cheveux et les vêtements, ainsi que les ustensiles, éloignés des
pièces mobiles pour réduire le risque de blessure aux personnes ou de dommage à
l'appareil.

15
FRANÇAIS
15
10. NE PAS utiliser à l'extérieur.
11. NE PAS laisser le cordon toucher des surfaces chaudes.
12. NE PAS laisser pendre le cordon d'un bord de table ou du comptoir de cuisine.
13. NE PAS placer sur un brûleur à gaz ou électrique ou à sa proximité, ou dans un four chaud.
14. Cet appareil doit être posé sur une surface plane pour bien fonctionner.
15. NE PAS utiliser cet appareil pour un usage autre que celui auquel il est destiné.
16. NE PAS laisser l'appareil sans surveillance lorsqu'il fonctionne
ou lorsqu'il est branché dans une prise de courant.
17. Un cordon électrique court est fourni pour réduire le risque de s'emmêler
ou de trébucher sur un long cordon. Le cordon est conçu pour être rangé
dans le Couvercle de l'appareil, lorsqu'il n'est pas en fonction.
18. Un cordon prolongateur peut être utilisé si la prudence est de rigueur.
19. La capacité électrique d'une rallonge doit être supérieure ou égale à la puissance
électrique de l'appareil. La rallonge devrait être xée correctement et devrait être
disposée de manière à ne pas pendre sur le bord d'une table ou d'un comptoir.
20. Cet appareil possède une che polarisée (une lame est plus large que l'autre).
Pour réduire le risque de décharge électrique, cette che est conçue pour
s'insérer dans une prise de courant polarisée que dans un sens. Si la che ne
peut pas être complètement insérée dans la prise, elle peut être insérée dans le
sens inverse. Si ceci ne fonctionne toujours pas, veuillez communiquer avec un
technicien professionnel ou un réparateur. NE PAS le réparer soi-même.
21. NE PAS faire l'entretien de cet appareil soi-même. Tout entretien, sauf le
nettoyage, doit être eectué par un technicien professionnel.
22. NE PAS mettre ses mains ou d'autres objets dans cet
appareil lorsqu'il est branché et en fonction.
23. NE PAS toucher le Bol isotherme, les mains nues. Protéger vos mains avec des gants de
cuisine lorsque vous touchez le Bol isotherme, ou utiliser la poignée du Bol isotherme.
CONSERVER CES CONSIGNES!
INTRODUCTION
Merci d'avoir acheté la SORBETIÈRE RETRO SERIES™ de Nostalgia™. CETTE SORBETIÈRE
RETRO SERIES™ vous permet de faire de la crème glacée maison dans un confort moderne.
Simplement faire congeler le Bol isotherme, remplir d'ingrédients frais et dans environ 30
minutes, la crème glacée sera prête à servir. Nul besoin de sel ou de glace! Ajouter menthe,
pâte à biscuits, ou vos bonbons préférés par la Goulotte à ingrédients pour personnaliser
votre préparation de crème glacée. Utiliser également cette sorbetière pour créer des
sorbets rafraîchissants et des yaourts glacés. Donne 1,7 l (1,5 pte) de crème glacée par lot.

16
FRANÇAIS
16
PIÈCES ET ASSEMBLAGE
Sortir votre SORBETIÈRE RETRO SERIES™ de la boîte, laver le Bol isotherme,
le Couvercle et l'Agitateur avec de l'eau chaude savonneuse.
NE PAS laver le moteur électrique. Essuyer le moteur électrique avec un chion non
abrasif ou une éponge. NE JAMAIS plonger le moteur électrique dans l'eau. Bien sécher.
PIÈCES
ASSEMBLAGE
Moteur
électrique
Bol isotherme
Agitateur
Axe de
connexion
Couvercle
Interrupteur
MARCHE/ARRÊT
Goulotte à
ingrédients
ÉTAPE 1. S'assurer que l'appareil est
débranché, ensuite ajuster le Moteur
électrique au Couvercle. L'appareil fera
un déclic, lorsqu'il sera verrouillé.
ÉTAPE 2. Ajuster l'Axe de connexion dans
l'Agitateur, ensuite entrer l'Agitateur assemblé
dans le trou du bas du Moteur électrique.
ÉTAPE 3. Poser le Moteur électrique/
le Couvercle/l'Agitateur sur le Bol
isotherme et le tourner dans le sens
antihoraire pour le verrouiller en place.
ÉTAPE 4. Votre SORBETIÈRE ÉLECTRIQUE est
maintenant prête à être utilisée en actionnant
l'interrupteur MARCHE/ARRÊT (ON/OFF).

17
FRANÇAIS
17
MODE DE FONCTIONNEMENT
Pour préparer :
• Réfrigérer le Bol isotherme dans le congélateur au moins 8 heures
avant d'utiliser votre SORBETIÈRE RETRO SERIES™.
• Trouver une surface plane près d'une prise murale avant le démarrage.
S'assurer que le cordon électrique est éloigné de toute source d'eau.
L'utilisation d'une rallonge est permise, en cas de besoin.
• Choisir votre recette préférée et préparer le mélange de crème glacée ou de
sorbet selon la recette. Mettre dans le réfrigérateur jusqu'au moment de servir.
1. Enlever le Bol isotherme du congélateur et le xer au Moteur électrique/Couvercle/
Agitateur. Tourner dans le sens antihoraire pour le verrouiller en place.
REMARQUE : Pour savoir si le Bol isotherme est susamment réfrigéré avant de
faire de la crème glacée, le secouer légèrement après la congélation. Si le liquide se
déplace à l'intérieur du Bol isotherme, ce dernier n'est pas susamment réfrigéré.
2. Enlever le mélange de crème glacée ou de sorbet du réfrigérateur. En se servant de
la Goulotte à ingrédients, verser le mélange dans le Bol isotherme. Lorsque vous
versez le mélange dans le Bol isotherme, toujours s'arrêter à 4 cm (1,5 po) du haut,
étant donné que le mélange va prendre de l'expansion durant la congélation.
3. Mettre le Moteur électrique en fonction en faisant basculer
l'interrupteur en position“MARCHE”(ON).
4. Laisser le mélange baratté jusqu'à ce qu'il soit gelé ou à la consistance désirée. Cela peut
prendre 15 à 30 minutes, certaines recettes requièrent moins de temps.
REMARQUE : Des morceaux de chocolat, de pâte à biscuits, des noix ou autres bonbons
peuvent être ajoutés par la Goulotte à ingrédients alors que le mélange commence à geler.
5. Dès que la crème glacée a la consistance désirée, éteindre le moteur électrique en
basculant l'interrupteur en position“ARRÊT” (OFF) et débrancher le Moteur électrique.
6. 6. Enlever le Moteur électrique/le Couvercle/l'Agitateur en tournant dans le sens
horaire. Retirer l'Agitateur et racler l'excès de crème glacée avec une spatule.
7. 7. Transférer la crème glacée dans un récipient à congélateur,
puis faire congeler ou servir directement du Bol isotherme!

18
FRANÇAIS
18
CONSEILS UTILES
GOÛT
La crème glacée, une fois terminée, sera toujours moins sucrée que le mélange
initial. Ajuster la quantité de sucre de la recette selon votre goût.
Le sucre peut être remplacé par les édulcorants articiels.
Utiliser les mesures suivantes comme référence :
• un sachet d'édulcorant = 2 cuillères à thé de sucre
• 6 sachets d'édulcorant = 1/4 de tasse de sucre
• 8 sachets d'édulcorant = 1/3 de tasse de sucre
• 12 sachets d'édulcorant = 1/2 de tasse de sucre
TEXTURE
Pour s'assurer que les cristaux de glace ne se forment pas dans le mélange de
crème glacée, NE PAS arrêter le barattage avant que la glace soit prête.
Les recettes avec beaucoup de sel peuvent faire geler le mélange trop rapidement, ce qui
peut également provoquer une formation de cristaux de glace dans la crème glacée.
CONSISTANCE
La crème glacée faite maison a généralement une texture épaisse comme un lait fouetté.
Si vous préférez une consistance plus épaisse ou ferme, essayez un des conseils suivants :
• Mettre le mélange de crème glacée dans le congélateur pour le durcir.
• Des recettes qui nécessitent de l'alcool peuvent empêcher le processus de congélation.
S'assurer d'ajouter l'alcool seulement au dernier moment du cycle de congélation.
BOURRAGE
Si la Palette bourre et ne tourne pas de façon appropriée, essayer ce qui suit :
• S'assurer que l'Agitateur est xé de façon appropriée à l'Axe de connexion, que le cordon
est branché dans la prise de courant et que l'appareil est à la position“MARCHE” (ON).
• Les recettes de crème glacée qui contiennent des ingrédients durs comme les noix
ou les grains de chocolat pourraient coincer l'Agitateur dans le Bol isotherme. Il est
préférable d'ajouter les ingrédients durs lors des dernières minutes de barattage.
• NE PAS interrompre le barattage tant que la crème glacée n'est pas
prête. Arrêter l'appareil au milieu du processus pourrait faire durcir
la crème glacée et restreindre les mouvements de la batte.
GEL
NE PAS faire fonctionner l'appareil plus longtemps que nécessaire. Si le mélange n'a
pas la consistance de purée de glace ou a encore fondu après 30 minutes, arrêter.
Les raisons possibles pourquoi le mélange ne se refroidi pas ou ne gèle pas :
• Le Bol isotherme n'était pas assez froid.
• Le mélange était trop chaud. S'assurer que les ingrédients ajoutés dans le Bol
isotherme soient réfrigérés et non chauds, tièdes ou à la température ambiante.
Other manuals for Retro Series
2
Table of contents
Languages:
Other Nostalgia Electrics Ice Cream Maker manuals

Nostalgia Electrics
Nostalgia Electrics DIC200 RETRORED Quick guide

Nostalgia Electrics
Nostalgia Electrics SCC-200 User manual

Nostalgia Electrics
Nostalgia Electrics DFIM-SERIES User manual

Nostalgia Electrics
Nostalgia Electrics ICMP400 Series Quick guide

Nostalgia Electrics
Nostalgia Electrics FDM100 Quick guide

Nostalgia Electrics
Nostalgia Electrics ICMW400 Quick guide

Nostalgia Electrics
Nostalgia Electrics SCM-502 User manual

Nostalgia Electrics
Nostalgia Electrics ICM-562 User manual

Nostalgia Electrics
Nostalgia Electrics Vintage Series Quick guide

Nostalgia Electrics
Nostalgia Electrics ICMP400WD Quick guide