Installing the Guardrail
Follow these steps below to install the guardrail.
1. Place the guardrail on top of the cabinet.
2. Align all holes of the guardrail with the holes of the cabinet.
3. Secure the guardrail to the cabinet by placing inside corresponding rubber holes.
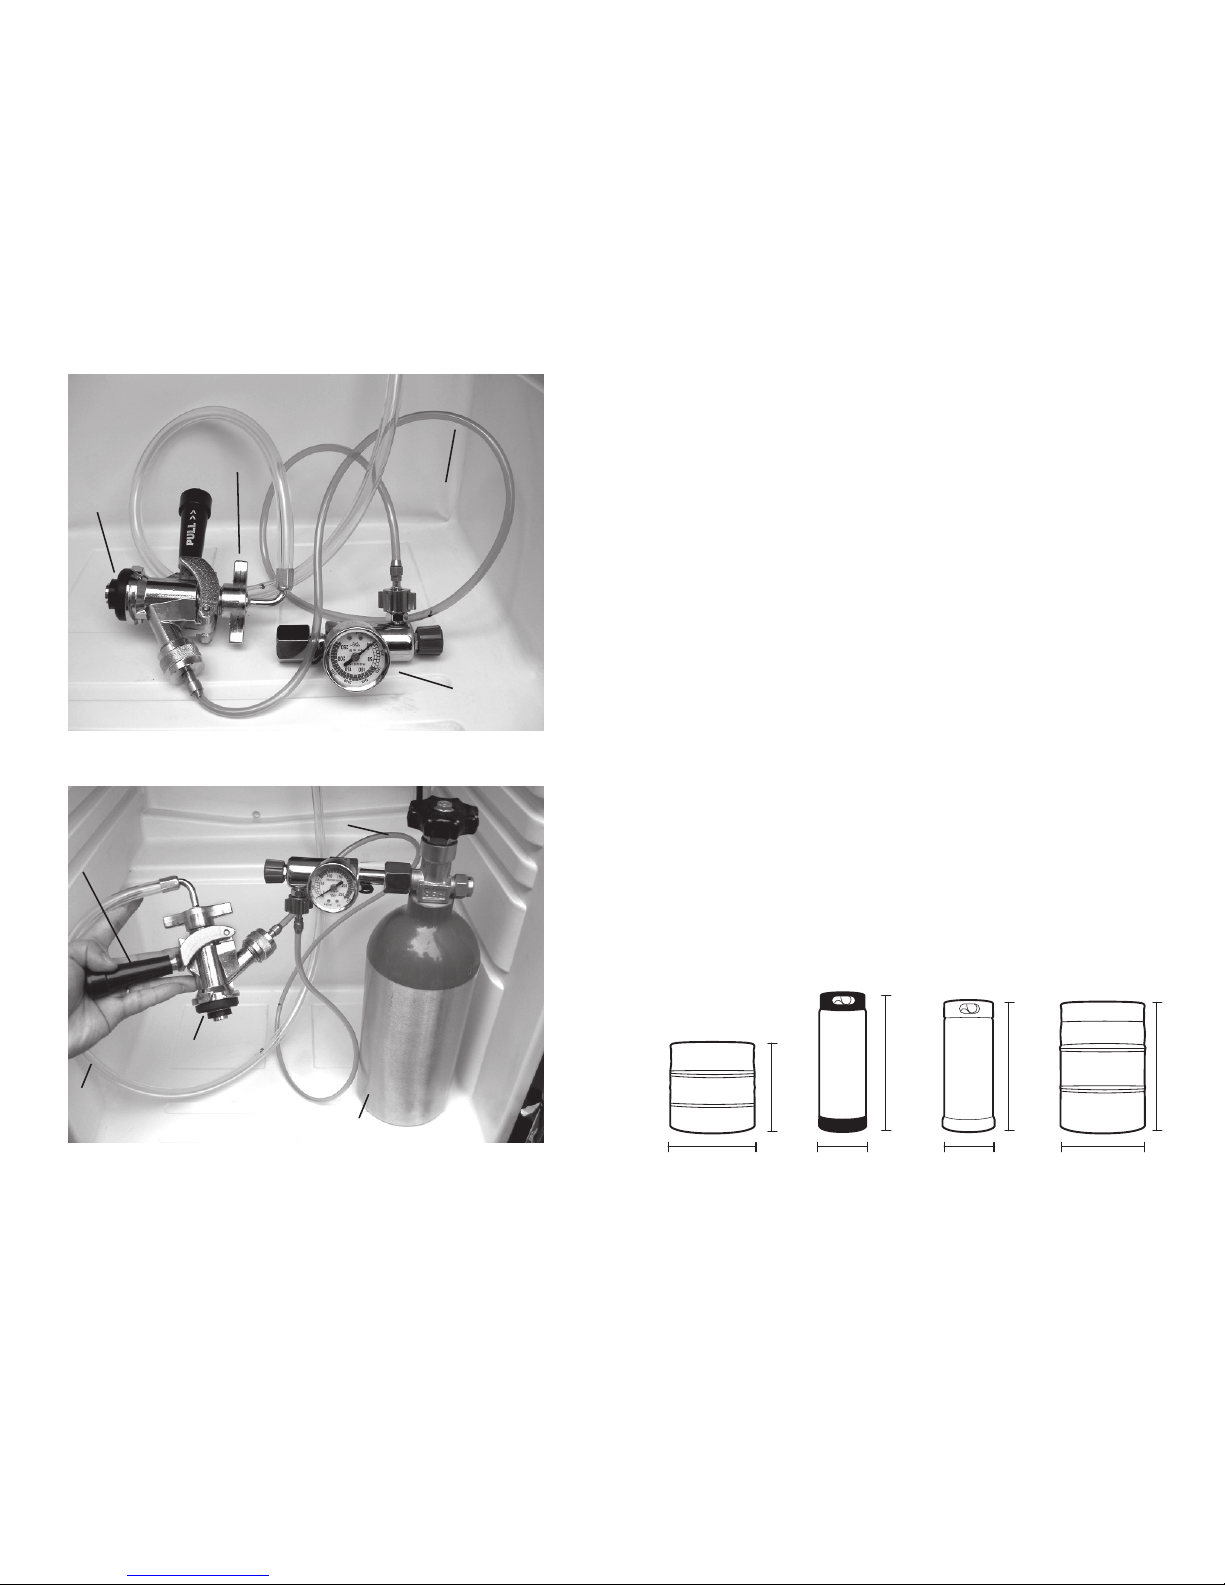
Installing the CO2Regulator and the CO2Cylinder
Follow these steps to safely install the CO2regulator and CO2cylinder.You must read and
understand the following procedures for the CO2cylinders before installation.
NOTE: If all your rubber washers & O-rings
are not pre-installed, please refer to your
parts list (attached).
NOTE: Your CO2cylinder has DOT (USA
Department of Transportation) approval,
however the cylinder has been shipped
empty to avoid any possible accidents during
transportation.Whenyoupurchasetherst
keg of beer, you must also have your CO2
cylinderlledatyourlocalsupplier.(See
page 2, item 9 for suggested locations within
your community.)
1. Install the CO2gas line tube to the
regulator by attaching one end of the
tube to the hose barb connection on the
CO2regulator.
2. Be sure to insert the high pressure
washer (provided with the kit) into the
regulator to cylinder attachment nut. (See Illustration A on page 6)
3. Attach the CO2regulator to the CO2cylinder by screwing the regulator nut onto the
cylinder valve and tightening with an adjustable wrench. (See Illustration B on page 6).
4. Wrap the rubber strap that is attached to the interior of Kegorator unit around the CO2
bottle to secure the bottle in place (as shown above).
5. Position the cylinder so that you would be able to read the numbers on the gauges
and have easy access to shut-off valves.
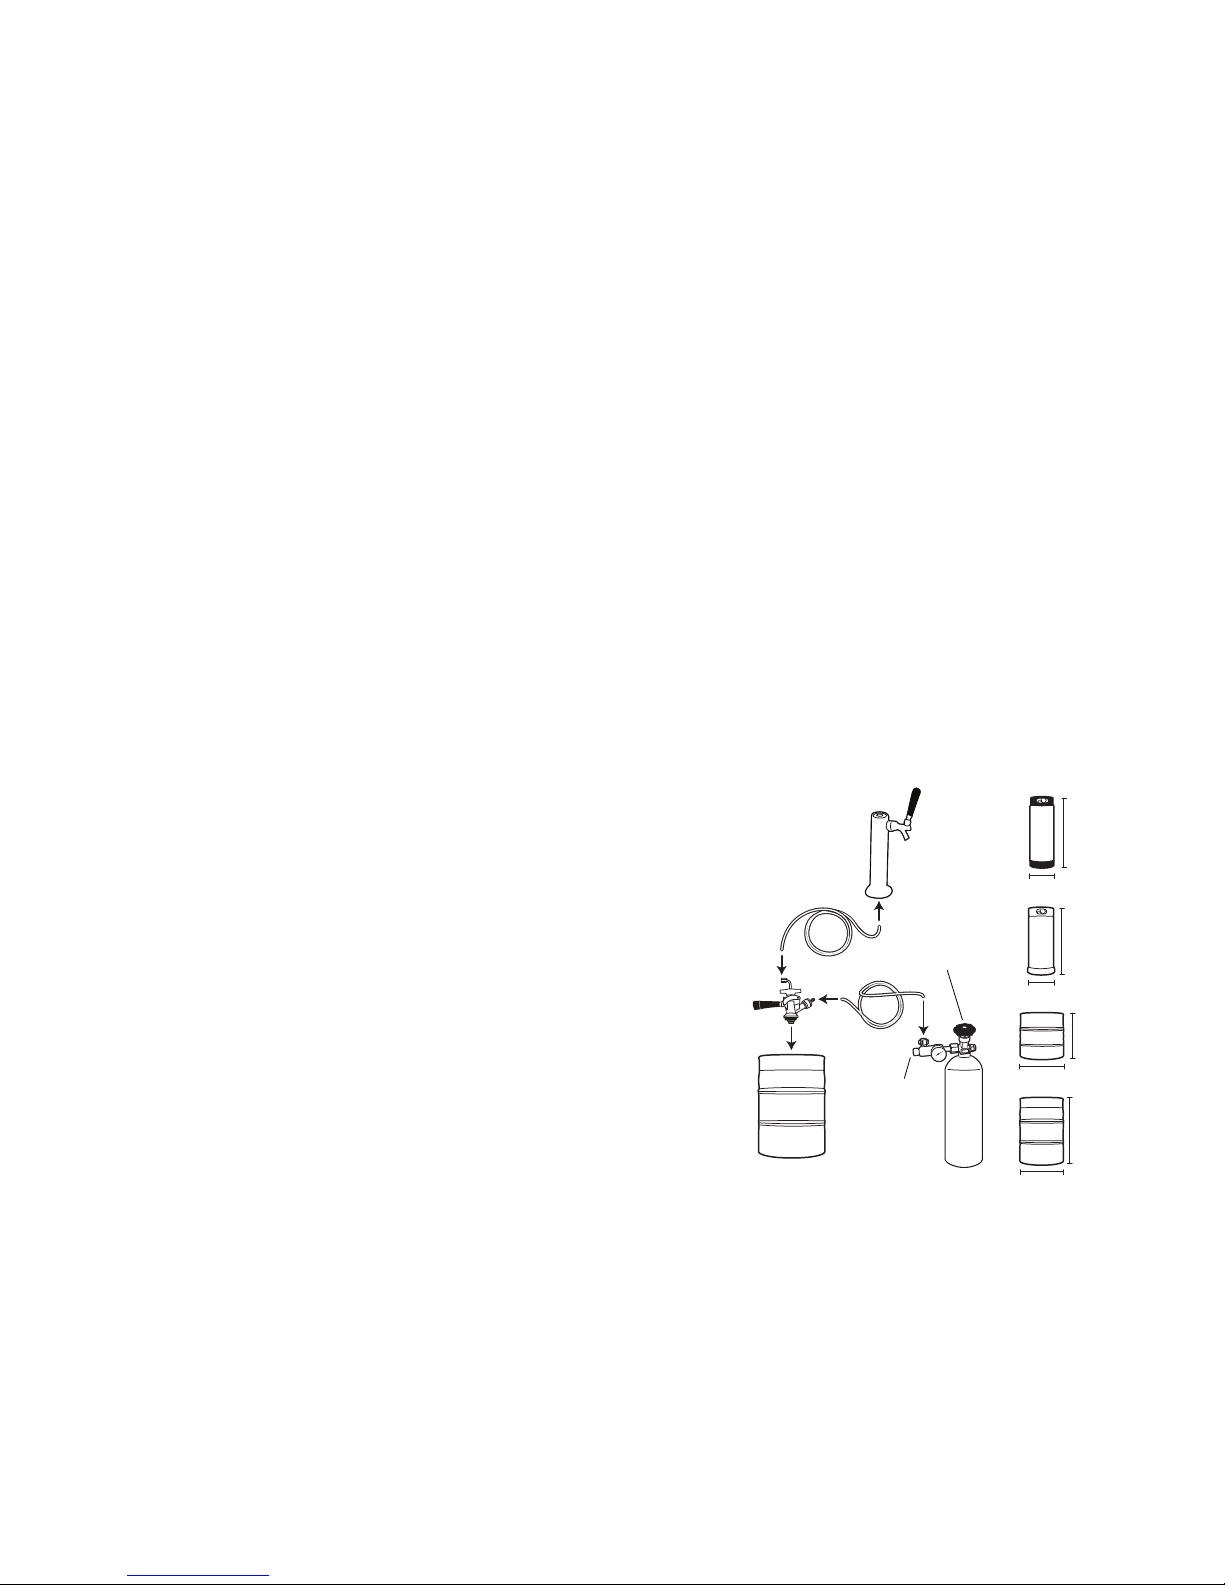
Tapping the Beer Keg – Installing Keg Tap
(Single-Valve Type Barrel)
Follow these steps below to tap the beer keg.
1. Make sure the black pull handle of the tap is in the closed (up) position before
installing it on the keg (Fig. 1 - below). Insert the keg coupler into the locking neck of
the beer keg and turn clockwise ¼ to lock it into position (Fig. 2 - below). This means
that it is secured to the keg.
2. When connecting the beer line to the top of the tap, it is very important that the wing
nut tighten down completely so that the metal tube in the center of the wingnut is
pushed up tightly by the top of the plastic marble choke, which is inserted into the top
ofthetap.Handghtenrmly.
3. Before attaching the CO2line, be sure too insert the rubber directional washer into the
side of the tap. Attach the CO2line(Fig.3-below)andhand-tightenrmly.Securethe
tank with CO2 tank strap.
4. Make sure the beer tower faucet is in the closed (handle pointing straight back)
position before connecting the tap to the keg. To secure the tank connection, pull the
tapping handle out and push down until it locks into position. Listen for the “click” of
thepullhandlewhenitshiftsintothenaldownwardposition(Fig.4-below).Thiswill
open the beer and CO2gas valves. The keg is now tapped.
5. Carefully tilt the keg and rest the edge on the keg base board on the bottom of the
interior cabinet. Slide the beer keg slowly, ensuring that it is properly located
(Fig. 5 - below) and carefully close the door.
6. Your Kegorator comes with a 2.5 lb. CO2bottle, which should be able to dispense four
15 gallon kegs of beer.
DANGER!
CO2can be dangerous! CO2cylinders contain
high-pressured gas, which can be hazardous if handled
improperly. They must be handled with care.
Illustration A
High Pressure Washer Installed into CO2 Regulator
Illustration B
Then Attach to CO2Tank Connector