PolyKeg PRO User manual

www.polykeg.com
POLYKEG PRO WITH BAG
Filling instructions with
PolyKeg®manual kit

POLYKEG PRO WITH BAG
Filling instructions with PolyKeg®manual kit
Before lling, please refer to the warnings in the “Section 1” of the PolyKeg PRO
instruction manual and to the keg technical data sheets.
Fig. 1
Gas tube
Pressure top-up connection
Pressure top-up gauge
Pressure gauge
Gas regulator connection
Counter-pressure regulator
Product tube
Product lling connection
Product lling valve
Keg coupler (Micro Matic is recommended)
1
2
3
4
5
6
7
8
9
10
1
7
8
9
10
2
3
4
5
6
This document is property of PolyKeg® S.r.l. - Unauthorized copying and use is strictly forbidden.
PolyKeg S.r.l - Via L. Da Vinci, 5/9 24064 Grumello del Monte (BG) - Italy - Ph. +39 035 4522245 - E-mail: [email protected] - www.polykeg.com Rev. 01 dated 19/03/2021
POLYKEG PRO WITH BAG
Filling instructions with PolyKeg®manual kit
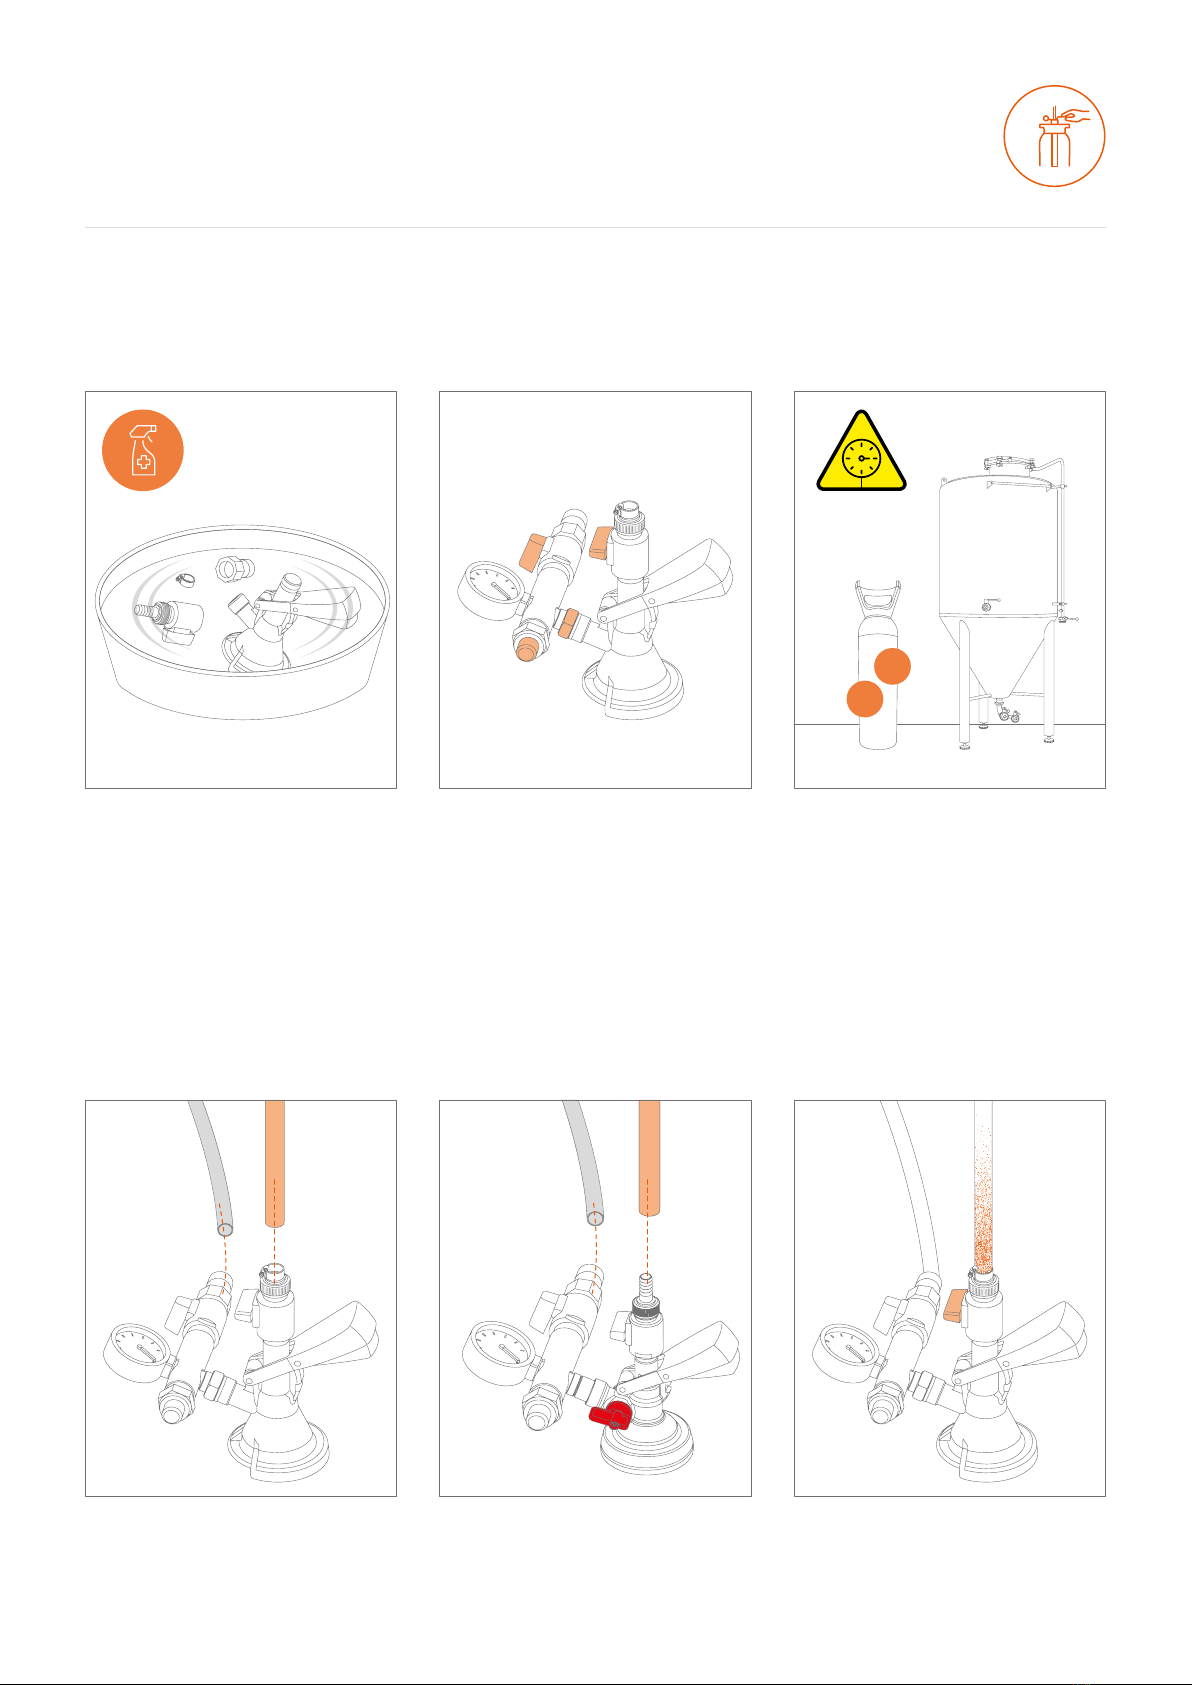
1. Sanitizing
4. Gas and product tube
connection
Disassemble the PolyKeg® lling kit
and sanitize the components as
indicated in the “Sanitizing
Instructions”section.
FġG. 1
FIG. 4
FIG. 2
FIG. 5
FIG. 3
FIG. 6
Connect the product and gas
tubes to the lling kit.
PREPARATION
2. Assembly
5. Gas and product tubes
connection with K-valve
3. Gas and product
pressure check
6. Product tube purging
Reassemble the kit properly and
close all valves.
K-VALVE ONLY
Connect the product and gas tubes
to the lling kit. Open the red valve.
Check that the pressures of the lling
system are correctly set and below
the maximum value indicated.
(3.5 bar).
Work with the product valve to
remove any residual gas from the
product tube. Close the product
valve.
MAX 3.5 BAR
MAX 50 PSI
CO2
N2
This document is property of PolyKeg® S.r.l. - Unauthorized copying and use is strictly forbidden.
PolyKeg S.r.l - Via L. Da Vinci, 5/9 24064 Grumello del Monte (BG) - Italy - Ph. +39 035 4522245 - E-mail: [email protected] - www.polykeg.com Rev. 01 dated 19/03/2021
POLYKEG PRO WITH BAG
Filling instructions with PolyKeg®manual kit
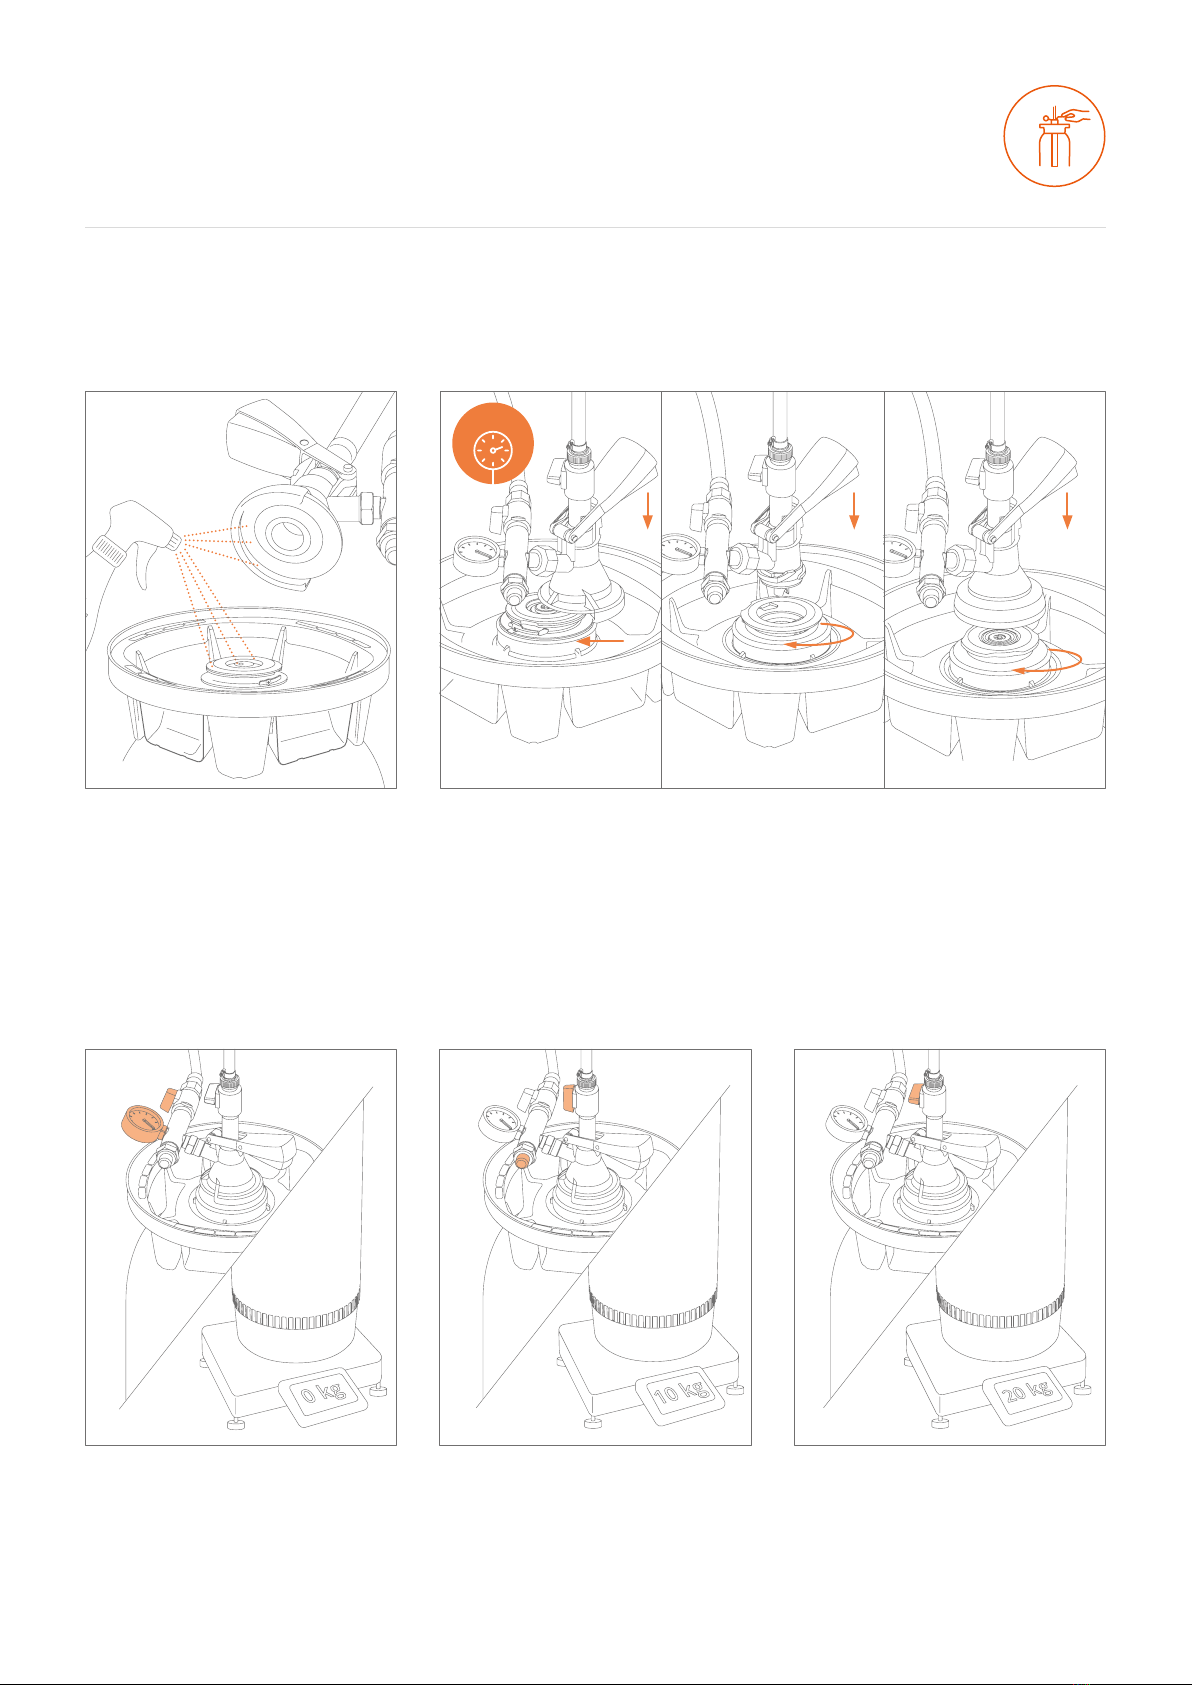
7. Sanitizing
9. Counter-pressure
regulation
10. Filling 11. End of lling
8. Connection and Counter-Pressure Check
Before lling, sanitize the parts in
contact with the product as indicated
in the “Sanitizing instructions”
section.
Work with the gas valve until the
desired counter pressure is reached
(approx. 0.5 bar lower than the
product lling pressure).
Open the product valve to start
lling and work with the
counterpressure regulator to set
and/or change the lling speed.
Once the nominal lling volume is
reached, close the product valve. Do
not exceed the nominal lling volume
to prevent the product from leaking
out of the bag.
Make sure the lling head is properly connected to the valve, lower the lever and
check the internal pressure of the keg.
FIG. 9
FIG. 8.1 - A-M VALVES FIG. 8.2 - S-D VALVES FIG. 8.3 - G-K VALVES
FILLING
FIG. 10
1.5 BAR
FIG. 11
FIG. 7
This document is property of PolyKeg® S.r.l. - Unauthorized copying and use is strictly forbidden.
PolyKeg S.r.l - Via L. Da Vinci, 5/9 24064 Grumello del Monte (BG) - Italy - Ph. +39 035 4522245 - E-mail: [email protected] - www.polykeg.com Rev. 01 dated 19/03/2021

POLYKEG PRO WITH BAG
Filling instructions with PolyKeg®manual kit
12. Pressure balance 13. Uncoupling
14. Valve sanitizing 15. Seal application
Close the regulator and work
on the gas valve to increase the
counter-pressure to a value
slightly higher than the product
lling value.
Quickly lift the lever and disconnect the coupler from the keg.
Remove any residual product with
water and sanitize the external
part of the valve as indicated in the
“Sanitizing instructions” section.
Apply the seal.
FIG. 13.1 - A-M VALVES FIG. 13.2 - S-D VALVES FIG. 13.3 - G-K VALVESFIG. 12
FIG. 14 FIG. 15
This document is property of PolyKeg® S.r.l. - Unauthorized copying and use is strictly forbidden.
PolyKeg S.r.l - Via L. Da Vinci, 5/9 24064 Grumello del Monte (BG) - Italy - Ph. +39 035 4522245 - E-mail: [email protected] - www.polykeg.com Rev. 01 dated 19/03/2021
Other manuals for PRO
3
Other PolyKeg Kegerator manuals


Popular Kegerator manuals by other brands

Nostalgia Electrics
Nostalgia Electrics KEG9000DTSS instruction manual

Nostalgia Electrics
Nostalgia Electrics KRS2100 SERIES instruction manual

NPC
NPC ReverseTap instruction manual

AMD DIrect
AMD DIrect SSRFR-24DK user manual

KegLand
KegLand Fermzilla instruction manual

EdgeStar
EdgeStar KC3000 installation guide

Nostalgia Electrics
Nostalgia Electrics Kegorator KRS-2150 instruction manual

Nostalgia Electrics
Nostalgia Electrics KEGORATOR KRS-2000 SERIES instruction manual

NPC
NPC ReverseTap RD-B1 installation guide

KegLand
KegLand Benchy Carbon KL18210 instruction manual

KegLand
KegLand Benchy - Glycol instruction manual

Kegco
Kegco Hot Draft KC HDT301 user manual


